This easy drawing tutorial shows you how to draw a winky face in a calm, simple way. It is a fun step by step drawing for beginners, and each small part helps the expression come to life. Take your time, and enjoy building this playful face one line at a time.
What You Will Need
- Pencil
- Eraser
- Black pen or marker
- Paper
- Colored pencils or crayons
Here are my RECOMMENDED Art Supplies!
- Crayola Coloring Set (140 Pieces – Mega Value!)
- 24 Colored Crayon Set
- A4 Printer Paper
- Crayola Coloring Pencils
- HP Home Printer with Instant Ink!
Time needed:
22 minutes.
Step-by-Step Drawing Guide
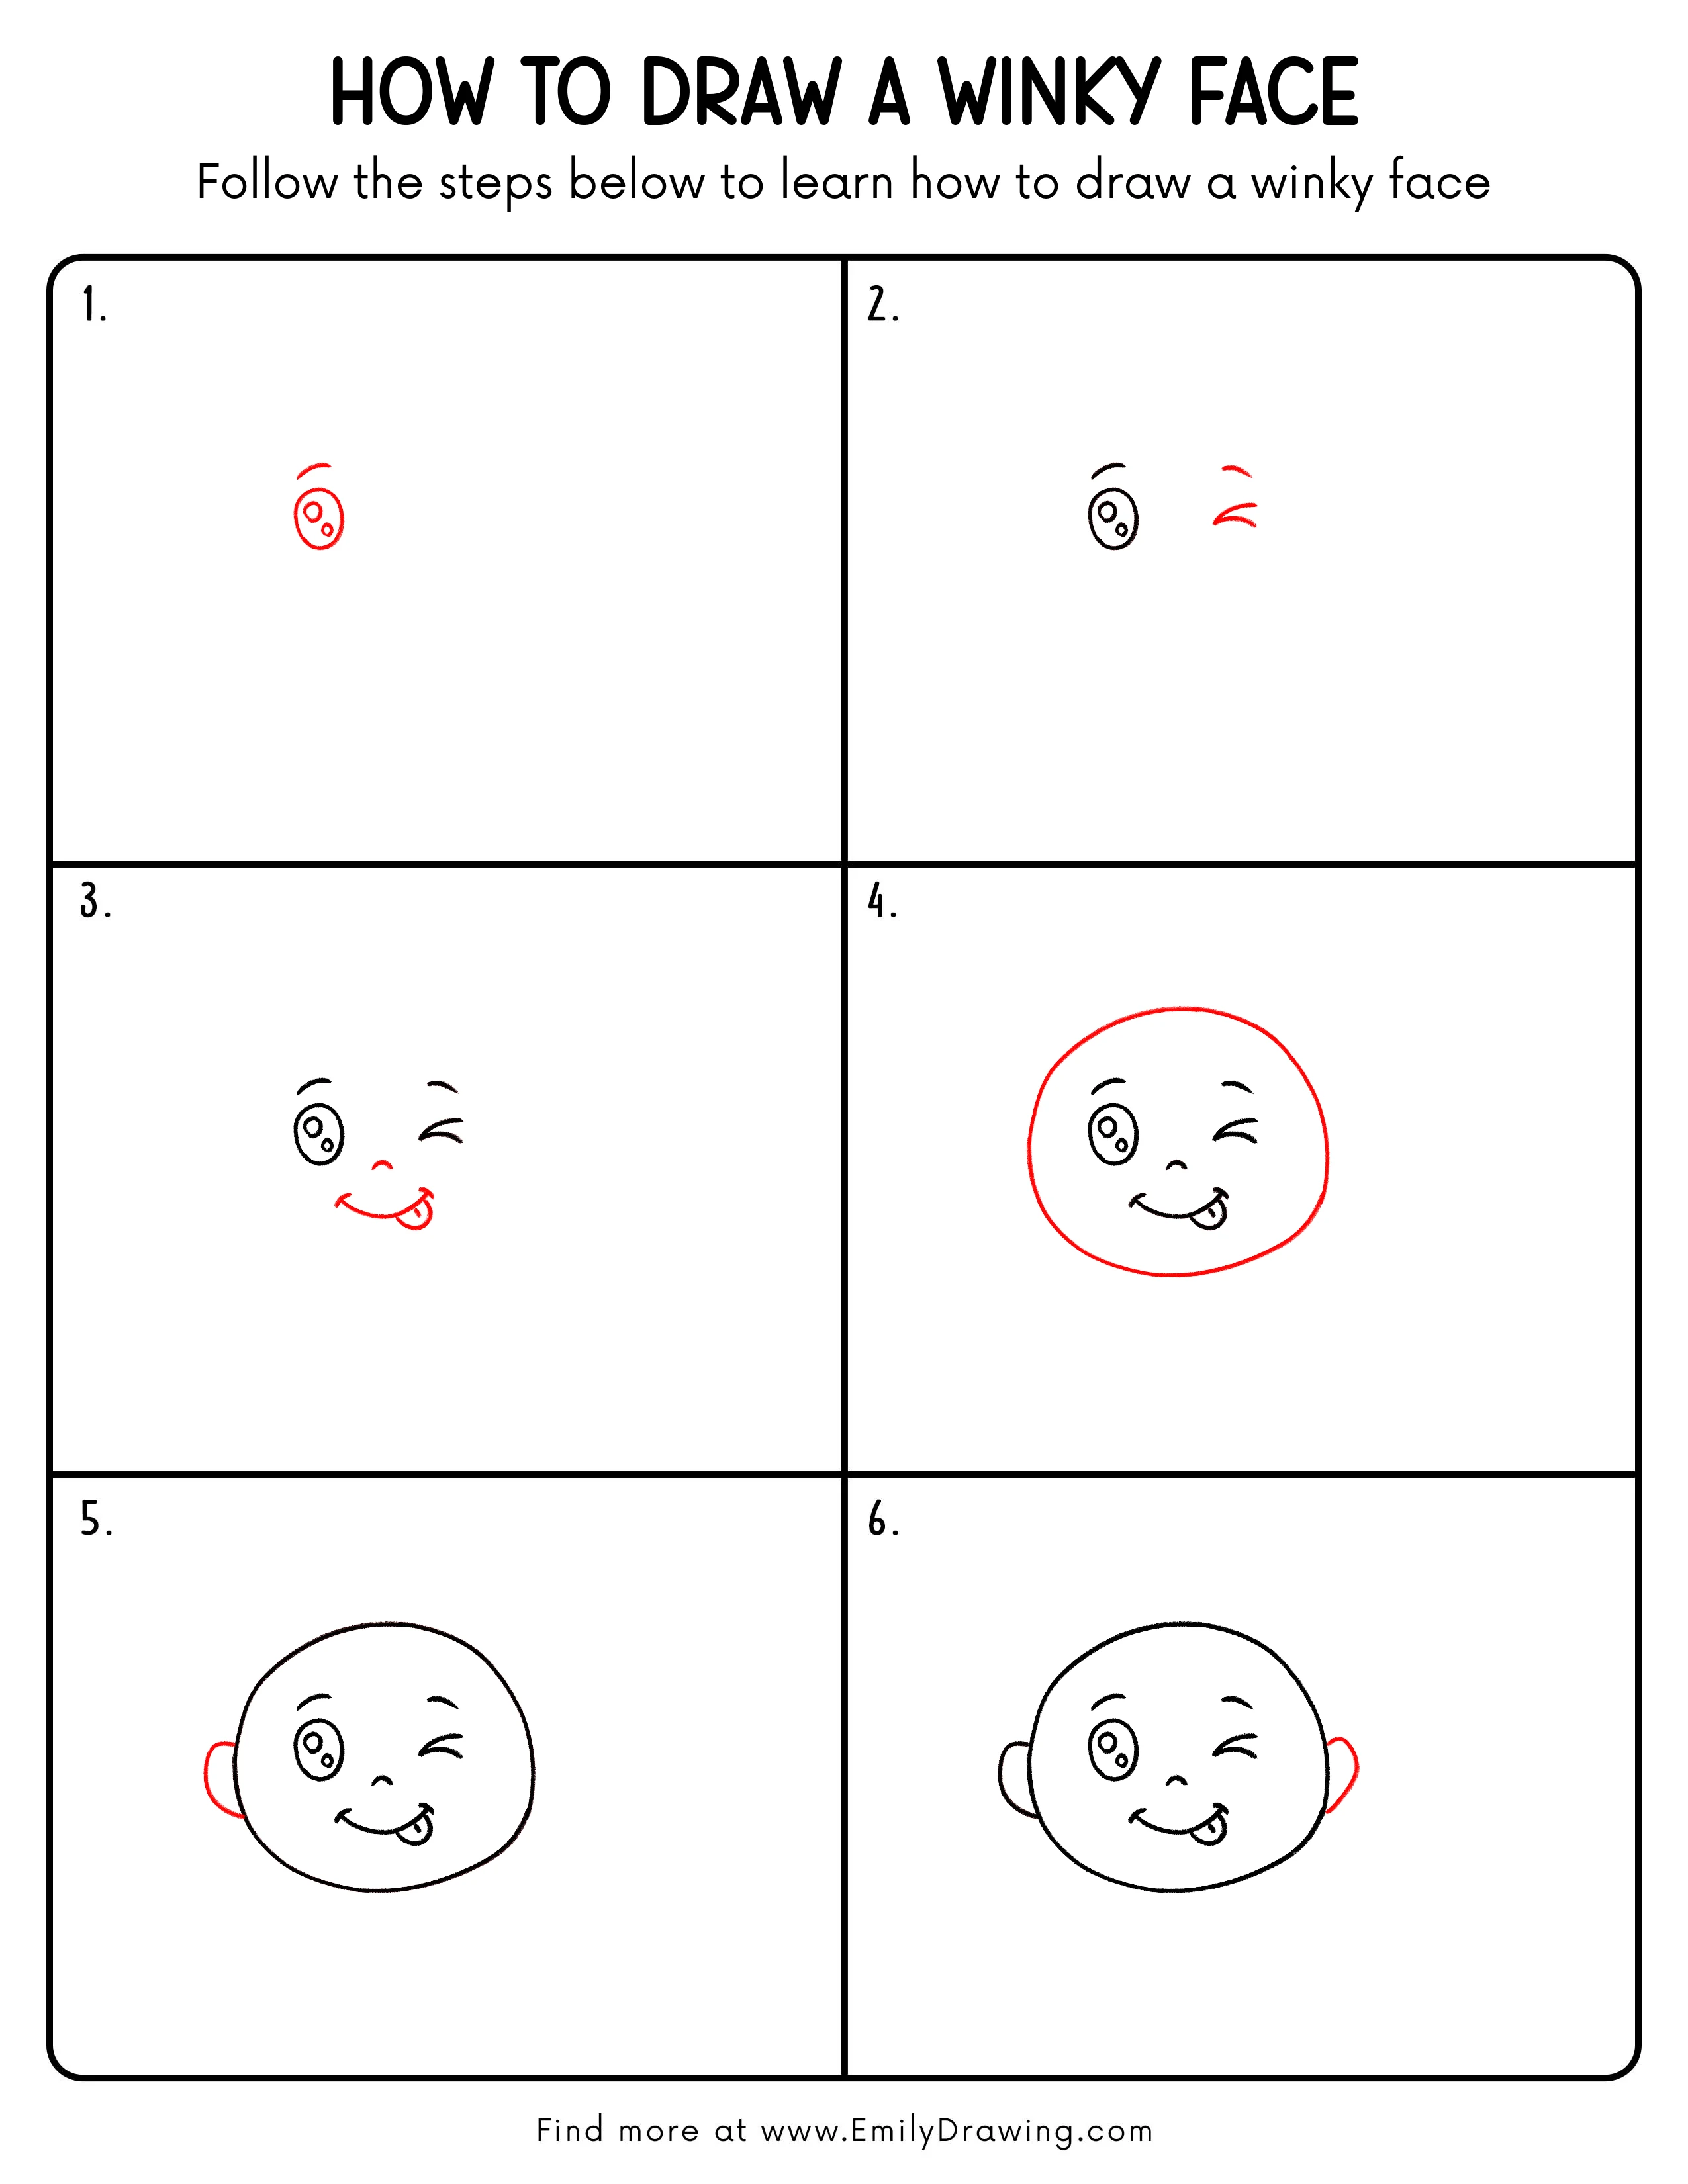
Step 1: Draw the Basic Face Shape

Start with a vertical oval near the left-center of the page for the face outline. Then add two small circles inside it, one larger and one smaller, to mark the facial features. Finish by placing a short curved line above the face, like a raised eyebrow.
Pro Tip: Keep the oval soft and even so the expression feels natural later.
Step 2: Add the Winking Eye
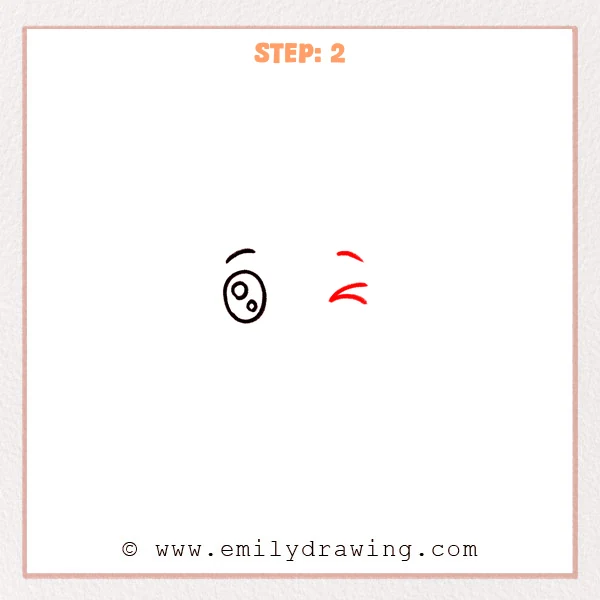
On the right side of the face, add a short curved line for the second raised eyebrow. Then place two close curved strokes below it, so they look like a gently closed eye and create the wink.
Pro Tip: Keep the closed eye short and soft so the wink looks cute and natural.
Step 3: Add the Nose and Playful Mouth
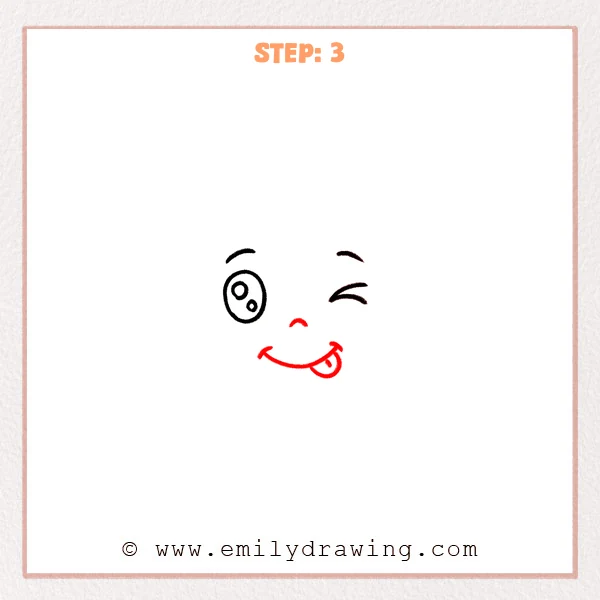
Place a small curved nose just below the eyes near the center of the face. Then add a wide upward smile, and draw a little tongue at the right corner of the mouth to give the face a playful look.
Pro Tip: Sketch the mouth curve lightly first so the smile feels smooth and natural.
Step 4: Add the Round Outer Face Shape
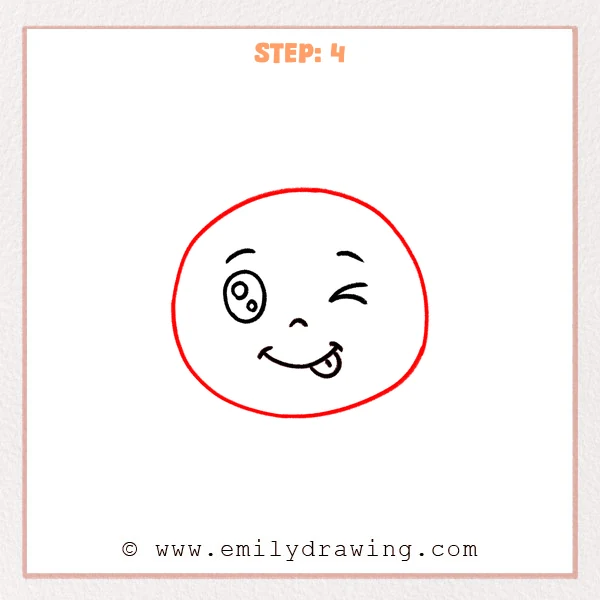
Around the features, start adding a large rounded outline to enclose the whole expression. Let the curve open wider across the top and turn softly under the chin, so the face feels full and cute.
Pro Tip: Sketch the outer shape lightly first, then darken it once the curve looks smooth.
Step 5: Add the Small Left Ear
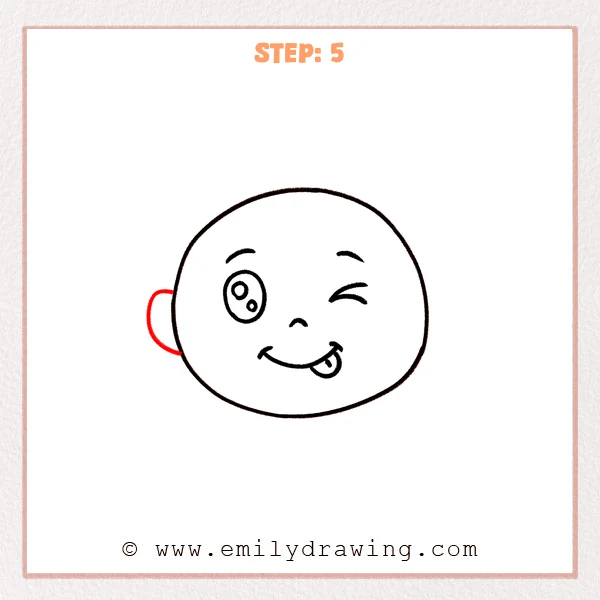
On the left middle side of the face, add a rounded half-circle that sticks out gently from the edge. Keep it small and simple so it sits neatly beside the face.
Pro Tip: Keep the ear smaller than the face width so the character looks balanced and cute.
Step 6: Add the Small Right Ear

On the right side of the face, add another rounded half-circle in a matching position. Keep it close in size and height to the left ear so the face feels even and complete.
Pro Tip: Compare both sides before drawing so the ears feel balanced and aligned.
Step 7: Color in your drawing!
Fun Facts
- A wink can show playfulness, friendliness, or a silly joke.
- Cartoon faces often use simple curved lines to show big emotions.
- A tongue-out expression makes a drawing feel more lively and mischievous.
Pin it now, Draw later!

You have now finished a cheerful winky face with one open eye, one closed eye, and a playful smile. Add soft color to the face, and use a slightly darker shade under the mouth or around the edges for gentle shading. One common beginner mistake is making the two sides uneven too early, so it helps to compare both sides as you go. Keep practicing this easy drawing tutorial, and try more step by step drawing projects to build your confidence.
Get the FREE Printable Drawing Guide
FREE Download Printable Winky Face Drawing Tutorial
Frequently Asked Questions
Is this drawing good for beginners?
Yes, this drawing for beginners uses simple shapes and short curved lines.
How can I make the wink look clearer?
Keep the closed eye short and curved, and place it below the eyebrow with a little space.
Can I color the face after outlining it?
Yes, you can color it after outlining, and light shading can make the face look softer.