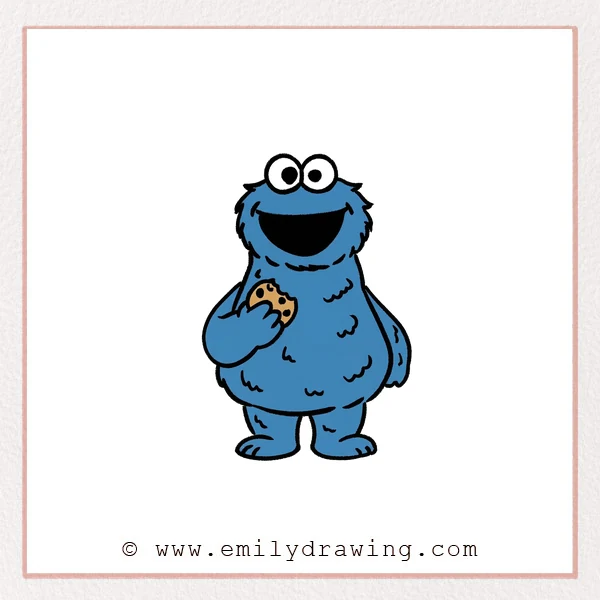
This easy drawing tutorial shows how to draw Cookie Monster step by step. We will build him from simple shapes, then add fluffy fur, a big smile, and a tasty cookie. Take your time, and let each small step feel manageable.
What You Will Need
- Pencil
- Eraser
- Black marker or pen (optional, for clean outlines)
- Coloring supplies (blue, black, white, and a cookie-brown)
Here are my RECOMMENDED Art Supplies!
- Crayola Coloring Set (140 Pieces – Mega Value!)
- 24 Colored Crayon Set
- A4 Printer Paper
- Crayola Coloring Pencils
- HP Home Printer with Instant Ink!
Time needed:
13 minutes.
Step-by-Step Drawing Guide
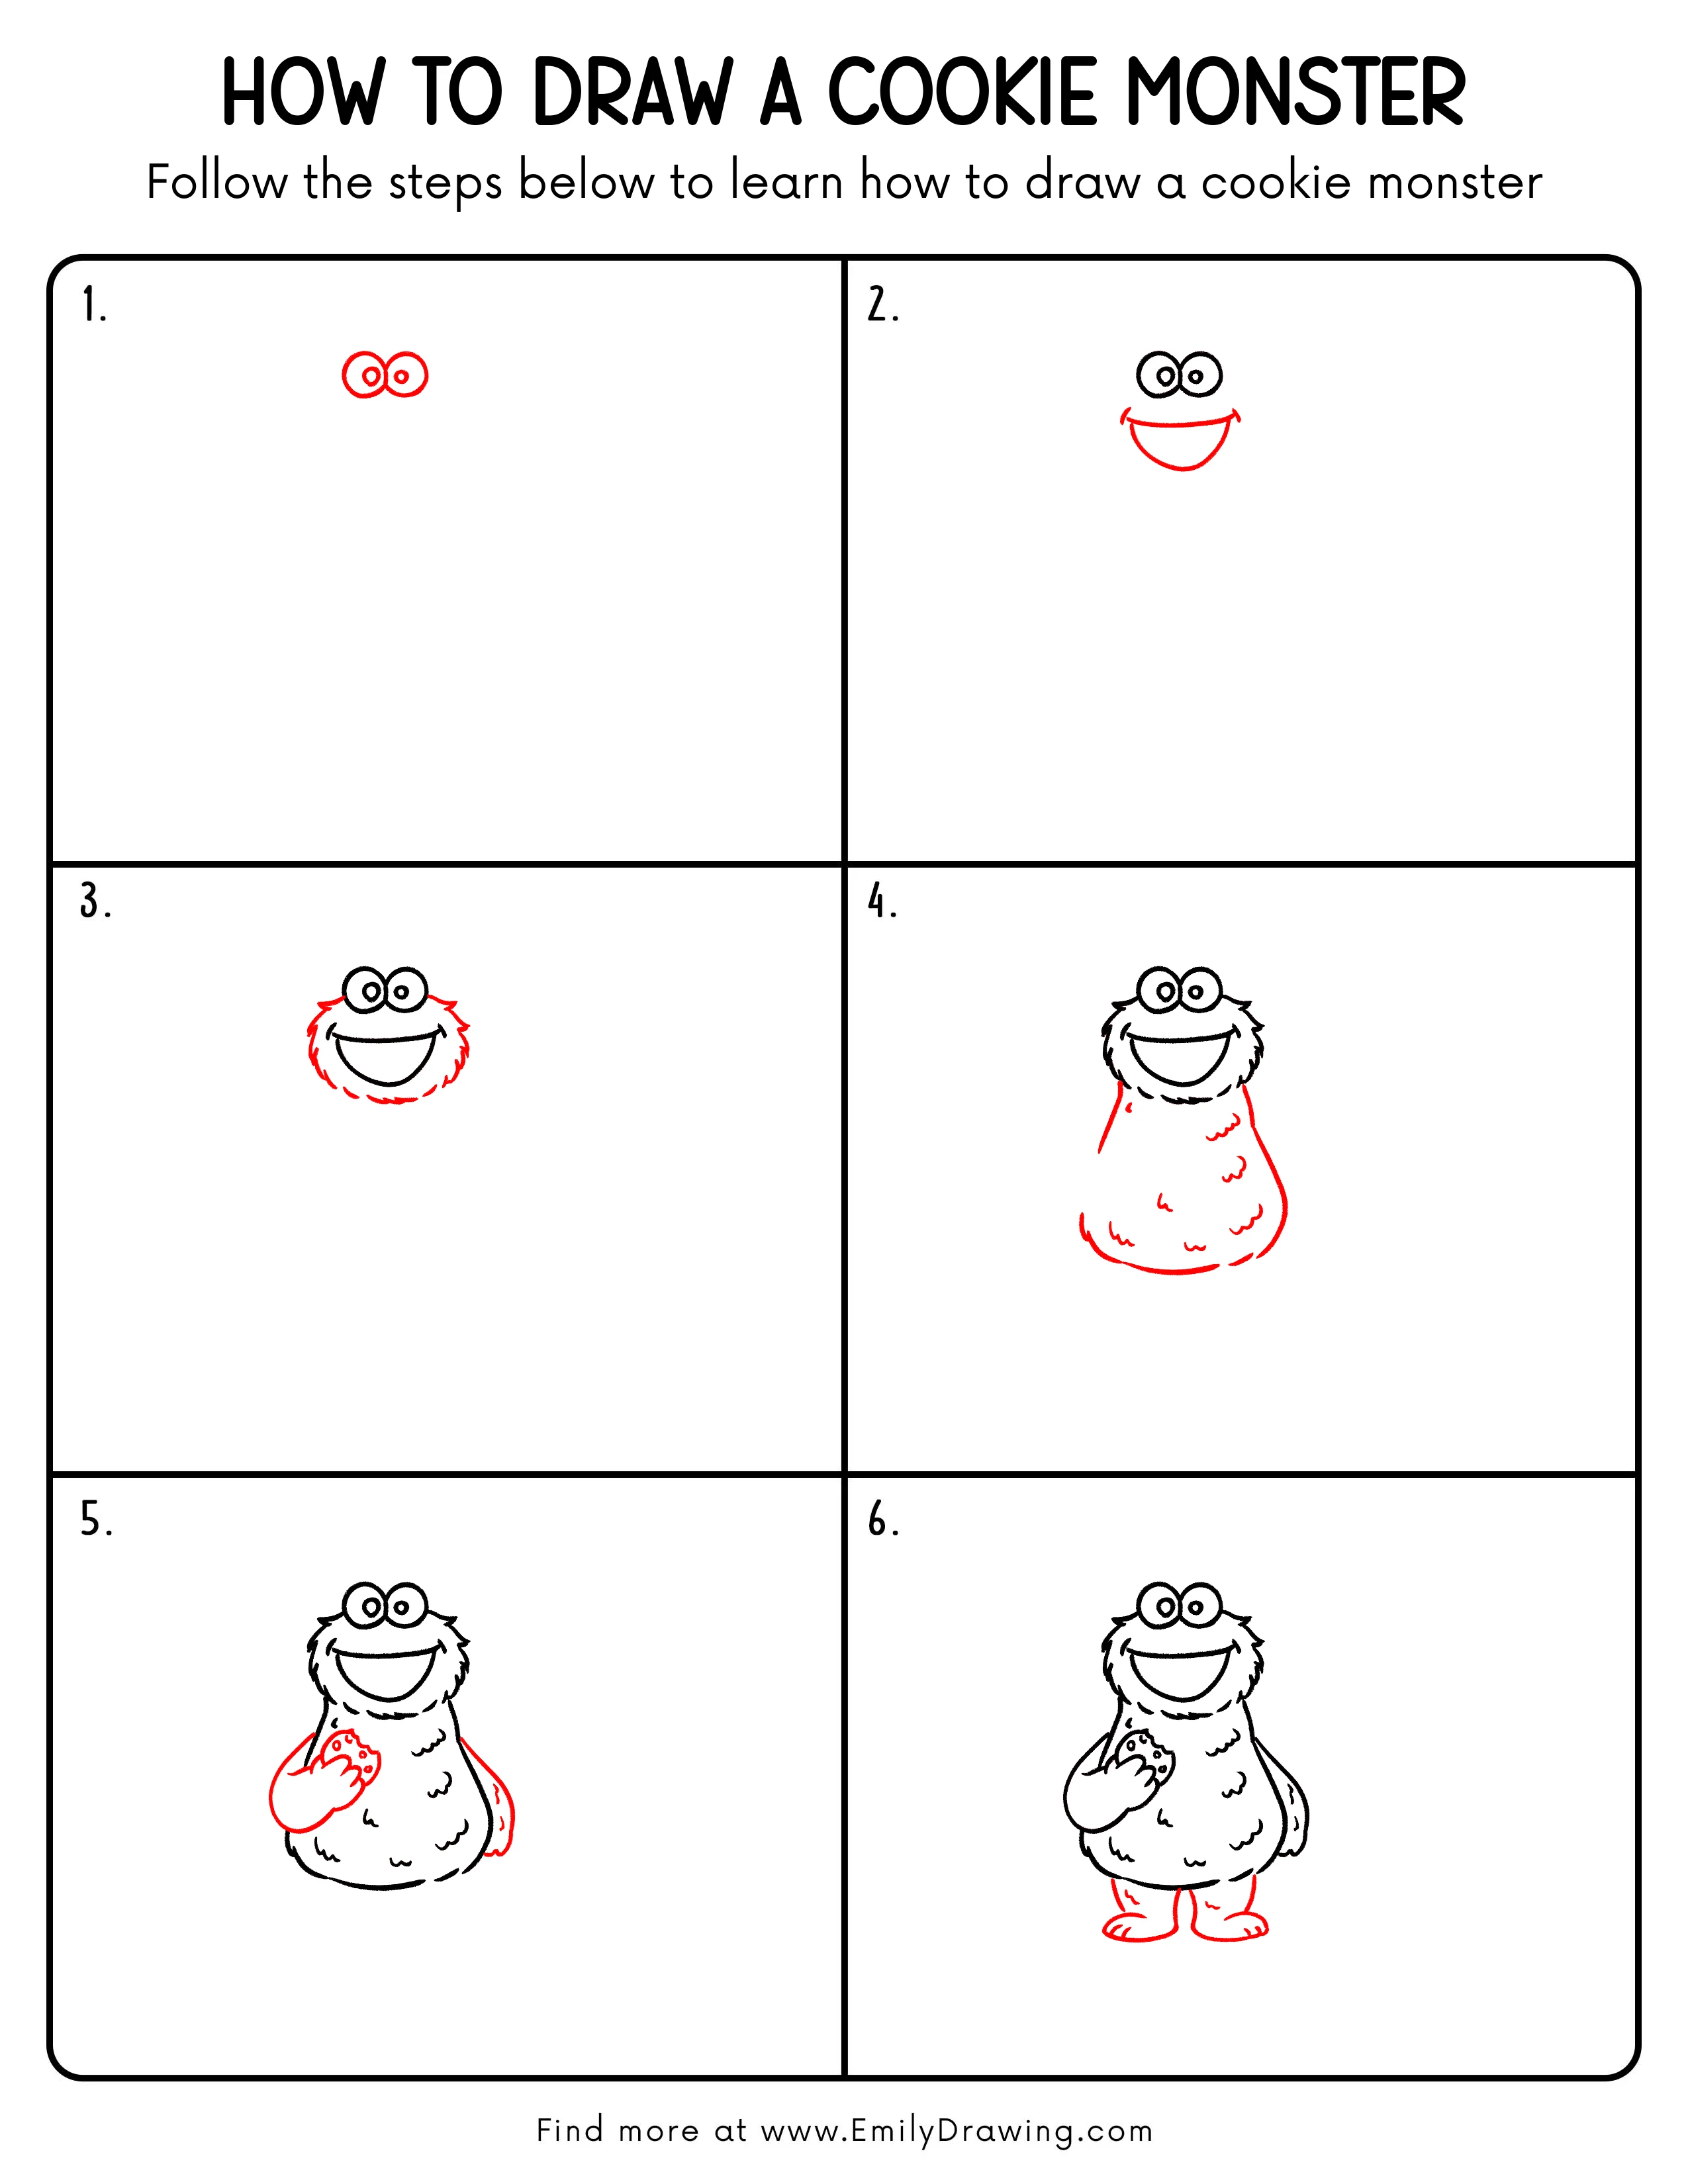
Step 1: Draw Cookie Monster’s Big Eyes

Start with two large circles near the top of your page, touching slightly in the middle. Inside each big circle, add a smaller circle for the eye area. Then place a tiny dot inside each to suggest the pupils and a simple gaze.
Pro Tip: Keep both eye circles similar in size, and let them touch gently.
Step 2: Add the Big Smiling Mouth
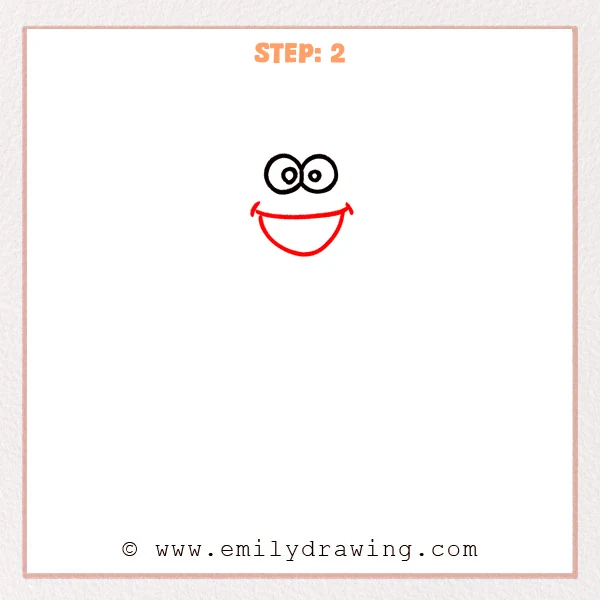
Under the eyes, sketch a long curved line for the top of the smile, lifting both ends slightly. From those ends, draw a larger curve down and around to form an open “U” shape mouth. Add a small point at each corner to make the grin feel lively.
Pro Tip: Make the mouth a little wider than the eyes for that classic big grin.
Step 3: Add the Fluffy Face Outline
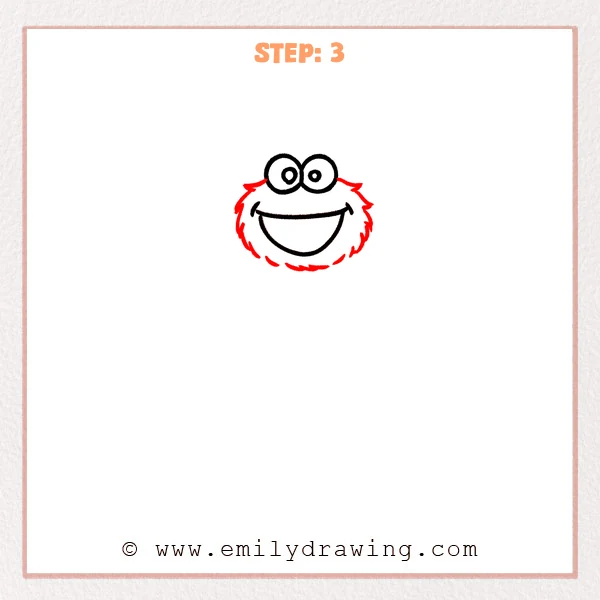
Starting beside the left eye, add short zigzag strokes down toward the mouth to suggest fur. Repeat on the right side so the cheeks feel balanced. Finish with a curved, broken furry line under the mouth to close the face shape.
Pro Tip: Vary the fur spikes slightly so the outline feels soft and natural.
Step 4: Draw the Body Shape and Fluffy Texture
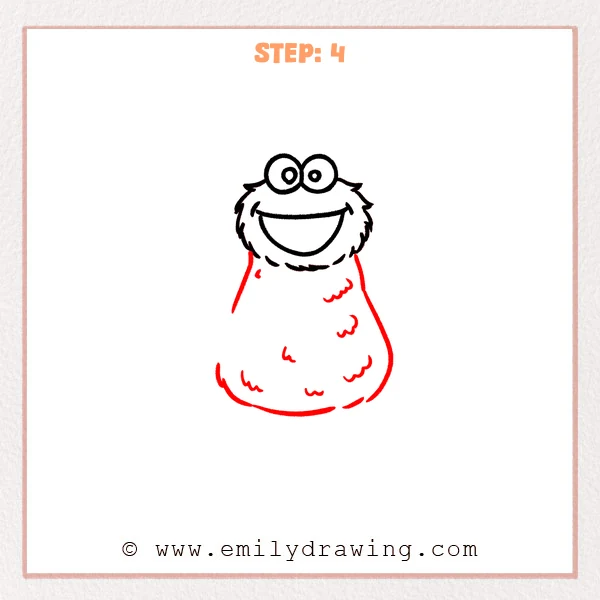
Extend two curved lines down from under the head to form a chubby body, keeping the right side a bit rounder. Add a few small wavy marks inside the body to suggest fluffy fur. Finish with a gentle curved line at the bottom so the body feels grounded.
Pro Tip: A teardrop body shape, narrower at the top, looks extra plush.
Step 5: Add the Arms and Cookie
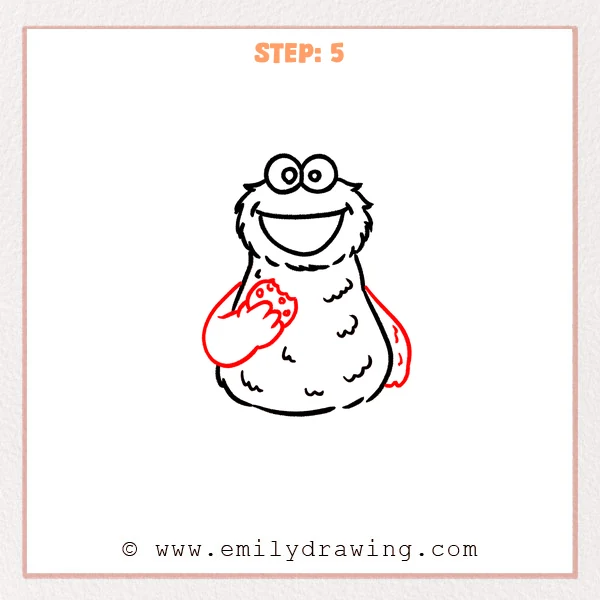
On the left side, sketch a curved arm reaching across the body, then shape a rounded hand with a few thick fingers. Place a small round cookie in front of the fingers and cut out a bite mark along the edge. Add a few small dots for chocolate chips, and finish with a simple hanging arm on the right side.
Pro Tip: Keep the cookie slightly smaller so the fingers overlap it a bit.
Step 6: Add the Legs and Big Feet
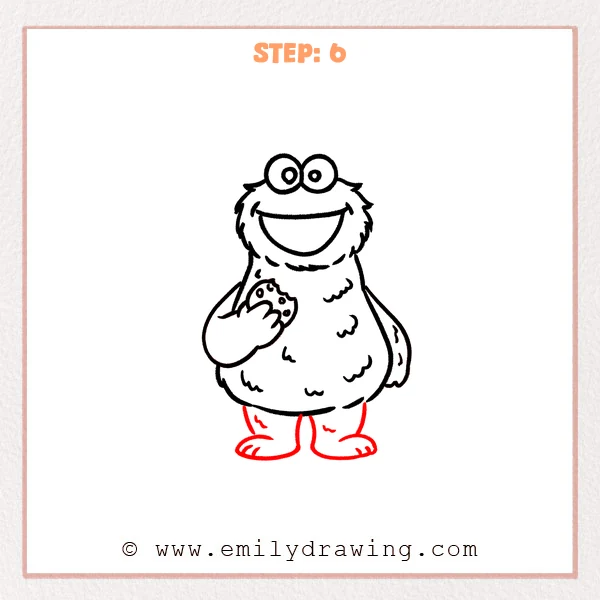
Under the body, sketch two short legs dropping down, leaving a small gap between them. At the end of each leg, draw a wide, flat foot with the toes turning slightly outward. Add a few short curved lines on each foot to suggest toes and give it weight.
Pro Tip: Keep both feet on the same level so the pose feels steady.
Step 7: Color in your drawing!
Fun Facts
- Cookie Monster is known for his big eyes and extra-wide smile, which makes his expressions easy to read.
- Simple zigzag lines can create a “fur” look without drawing every single hair.
- A bitten cookie shape is a quick way to add a story to your picture.
Pin it now, Draw later!
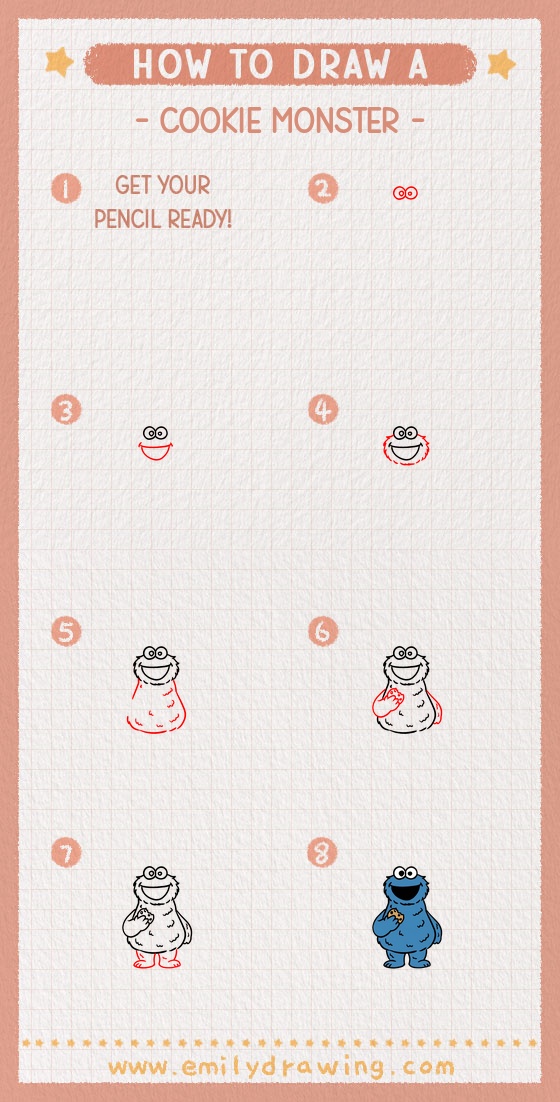
You have built Cookie Monster from eyes, to mouth, to fluffy fur, then added his body, arms, cookie, and feet. If you want to color him, try a bright blue base and add darker blue shading near the sides and under the chin. Keep the eyes white, and add a tiny highlight dot in each pupil for sparkle. A common beginner mistake is making the mouth too small, so let it stay wide and friendly. Practice this step by step drawing again, and try a new pose with the cookie closer to his mouth.
Get the FREE Printable Drawing Guide
FREE Download Printable Cookie Monster Drawing Tutorial
Frequently Asked Questions
How do I make Cookie Monster look fluffier?
Add more small zigzag edges around the face and body, and sprinkle a few short wavy marks inside the shape.
What if my eyes do not match?
Lightly redraw one circle to match the other, or use an eraser to adjust the size until they feel balanced.
How can I color the cookie so it looks tasty?
Use a warm brown base, then add a slightly darker brown along the bite mark and under a few chips for gentle shading.