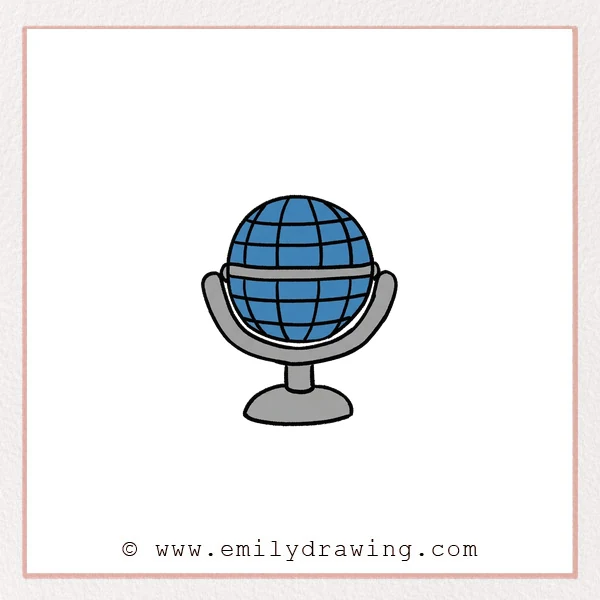
This easy drawing tutorial shows how to draw a cartoon microphone step by step. We will build simple shapes first, then refine the details. It is a calm drawing for beginners that you can finish in one sitting.
What You Will Need
- Pencil
- Eraser
- Black marker or pen
- Coloring tools (optional)
Here are my RECOMMENDED Art Supplies!
- Crayola Coloring Set (140 Pieces – Mega Value!)
- 24 Colored Crayon Set
- A4 Printer Paper
- Crayola Coloring Pencils
- HP Home Printer with Instant Ink!
Time needed:
17 minutes.
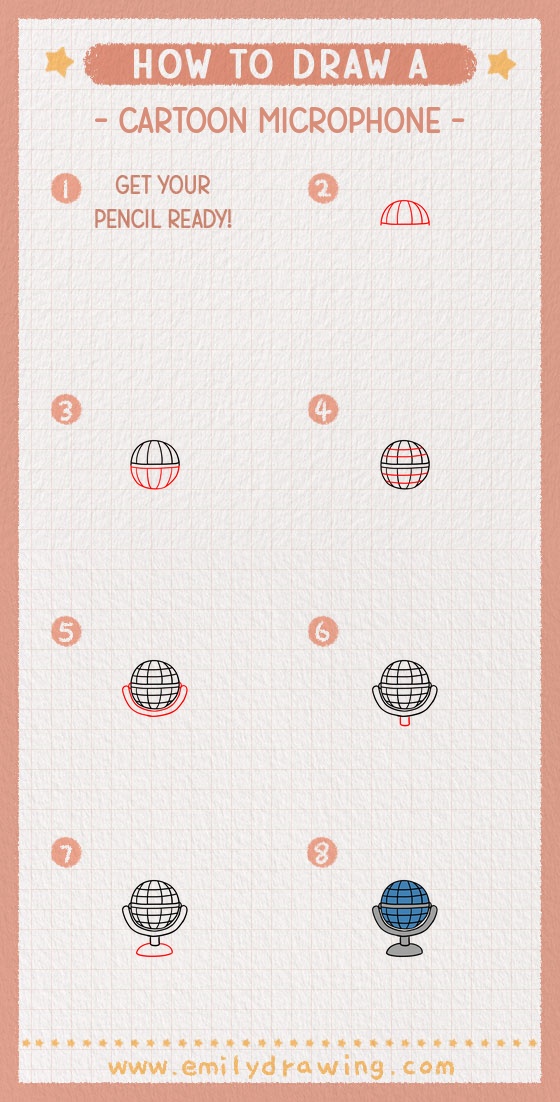
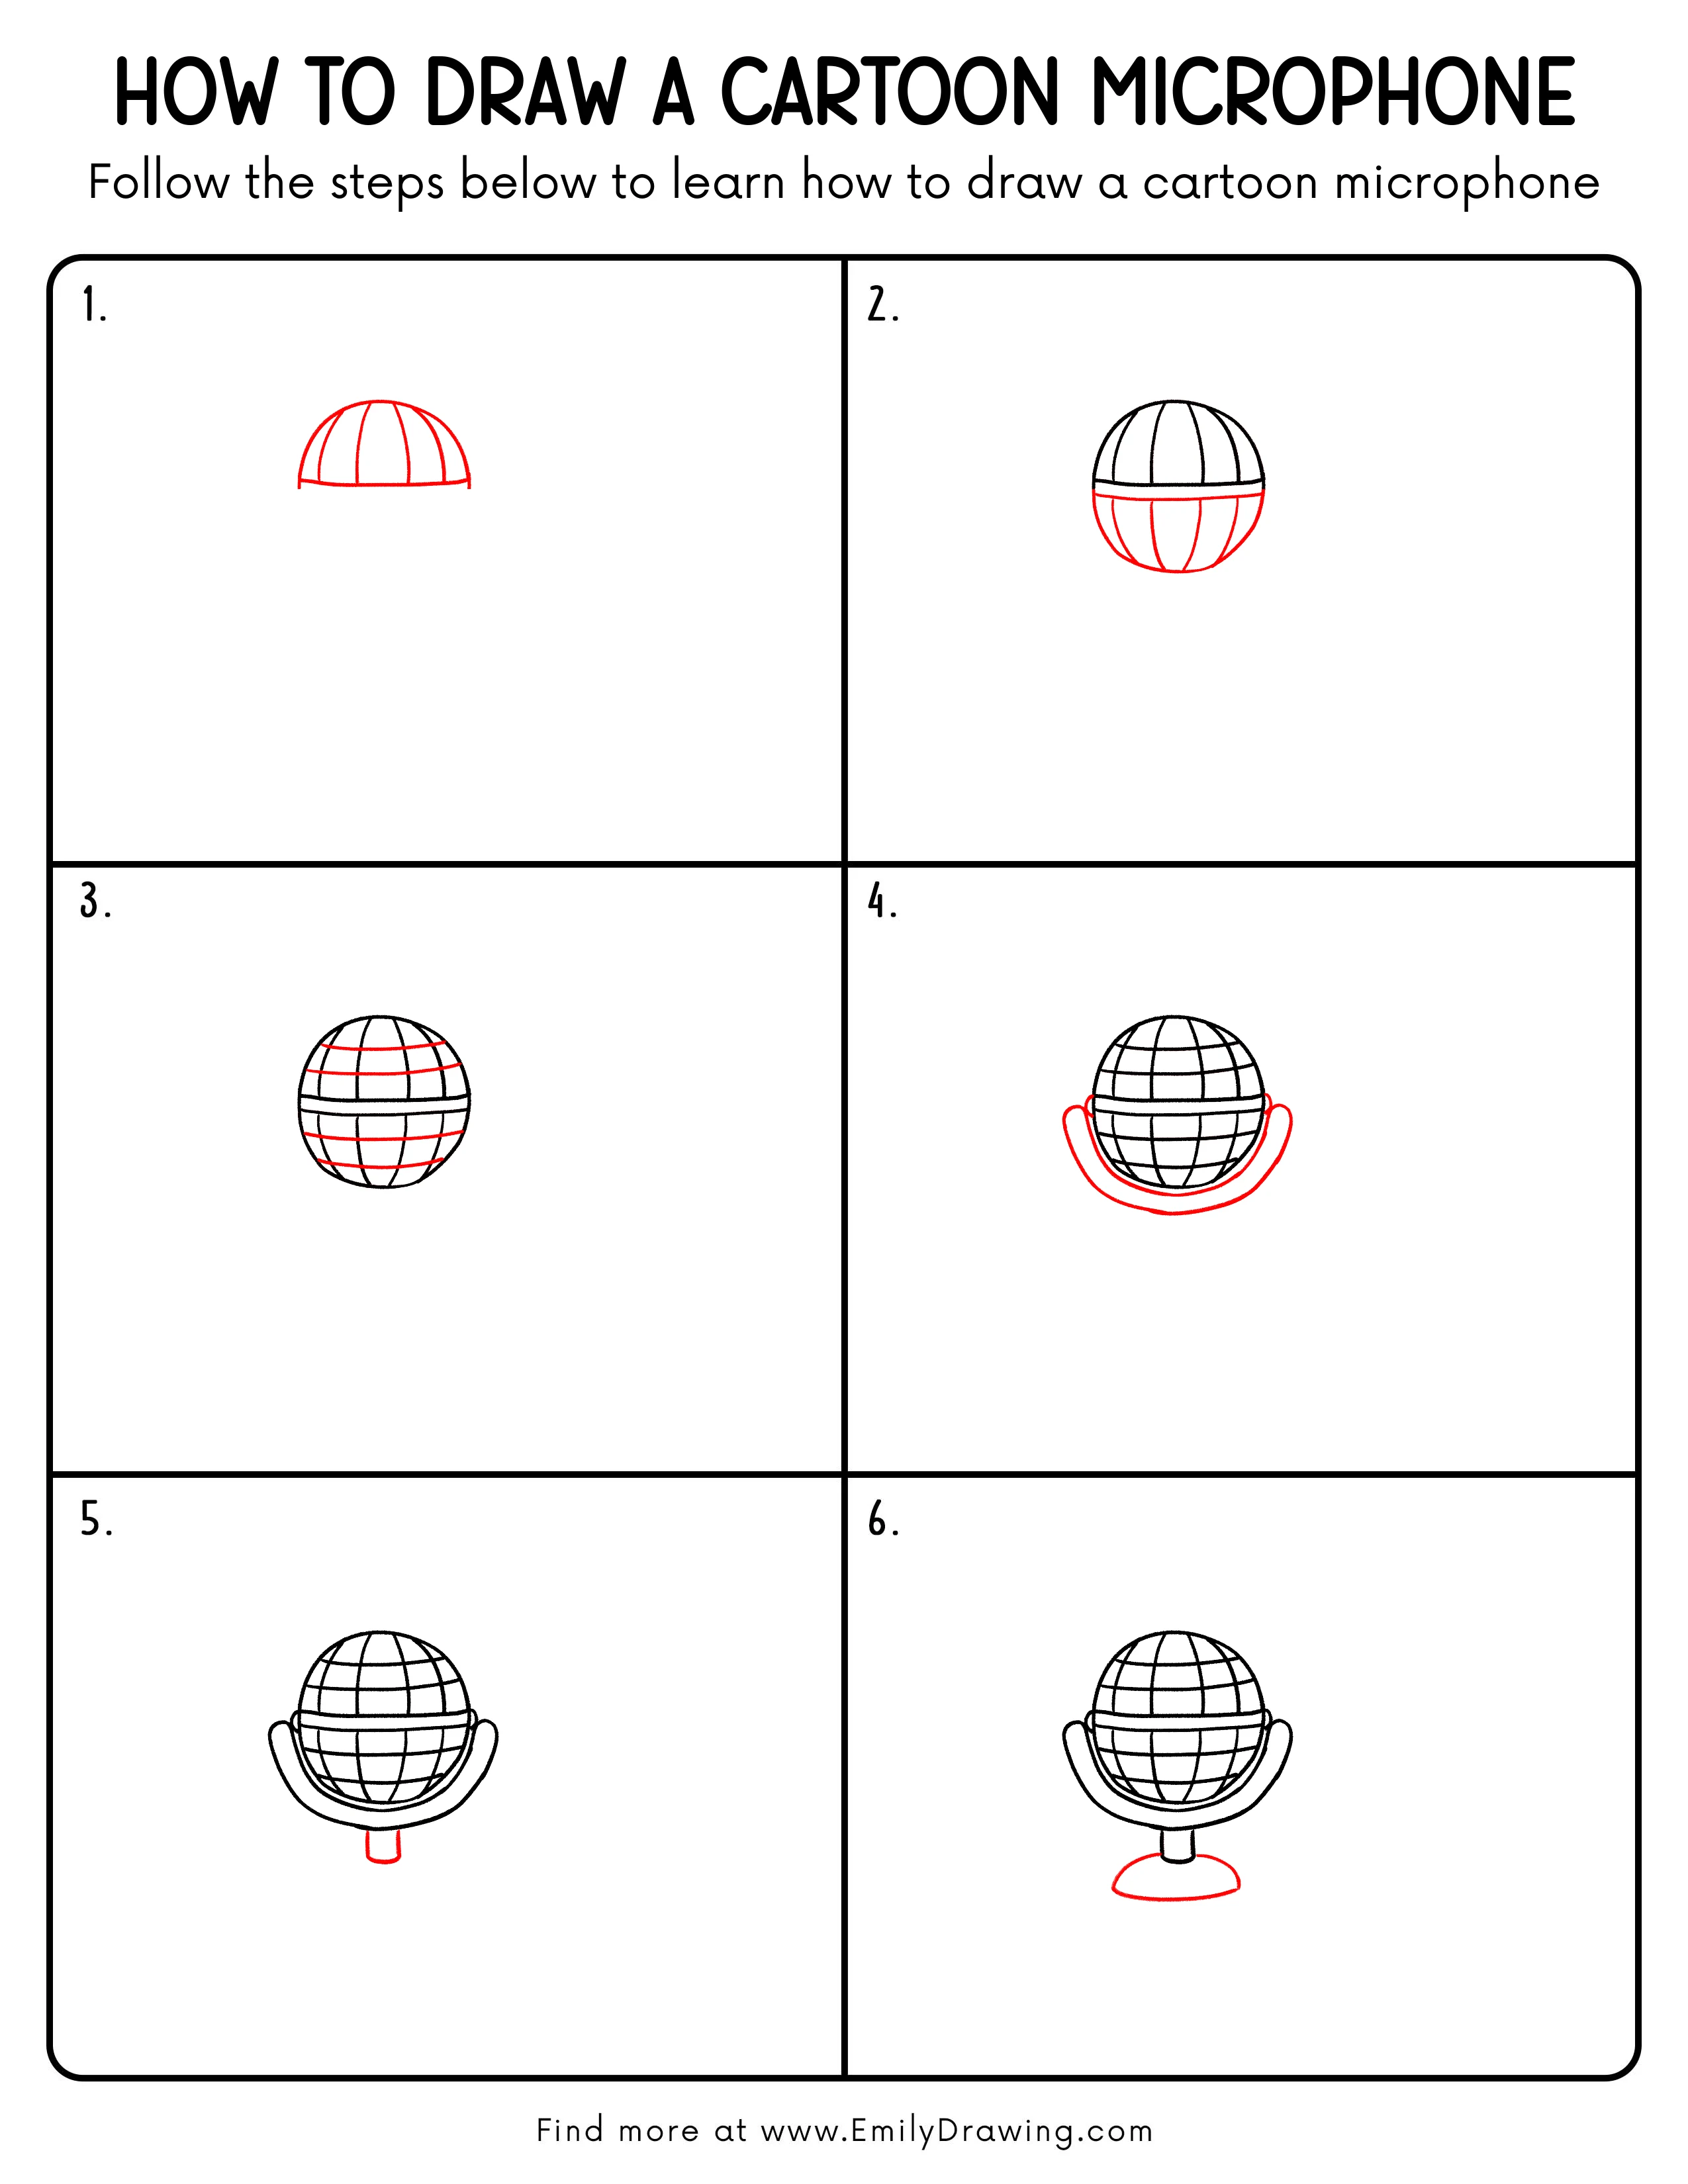
Step-by-Step Drawing Guide
Step 1: Draw the Microphone Grille Top
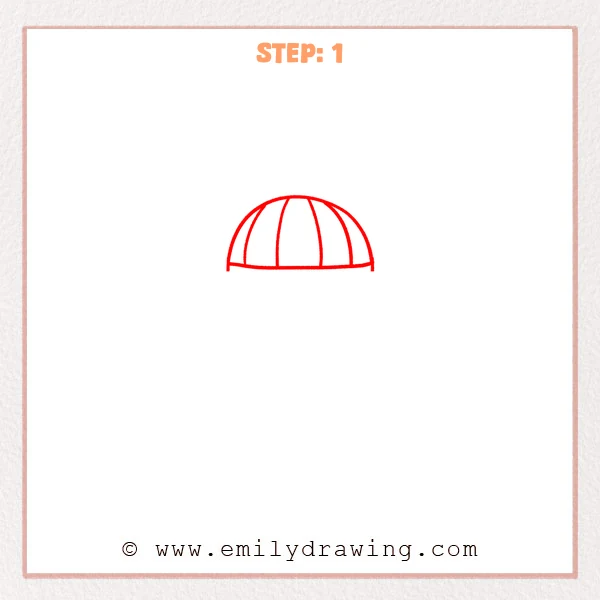
Start with a smooth half-circle, like a small dome. Add a few curved divider lines from the top down to suggest the metal grille panels. Close the bottom with a gently curved line.
Pro Tip: Keep the panel gaps evenly spaced to make the grille look believable.
Step 2: Add the Lower Head and the Separator Band
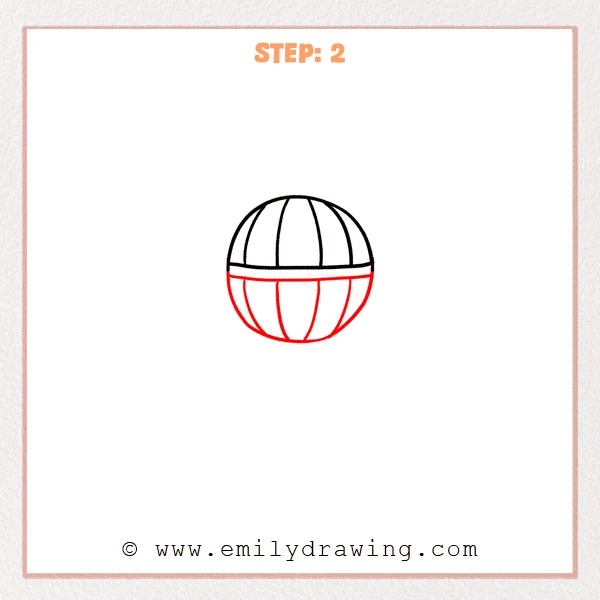
Just under the grille, draw a slightly thicker curved band to separate the parts. From both ends of the band, sketch a rounded half-sphere to form the lower microphone head. Add a few curved panel lines that taper downward to match the top sections.
Pro Tip: Make the lower curve a little wider so the microphone feels sturdy.
Step 3: Add Horizontal Grille Lines for a Metal Look
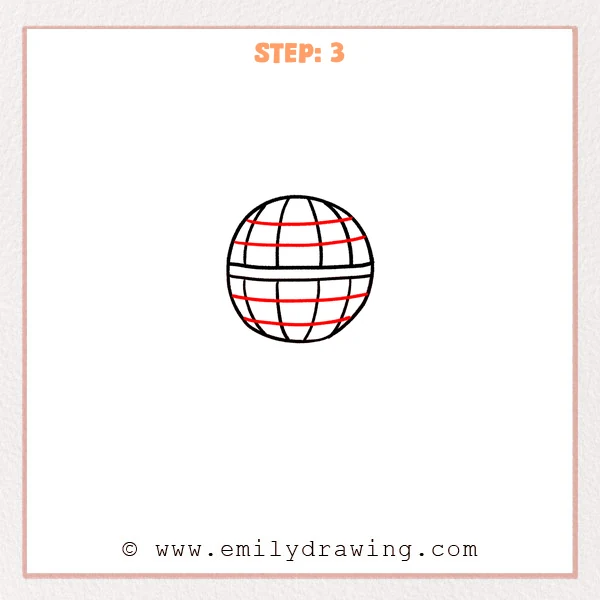
On the top grille, add two gently curved lines that wrap around like bands. Add two more curved bands on the lower half, placed a bit lower to build a round, 3D feel. Let each band stop near the outer edge instead of crossing the outline.
Pro Tip: Curve the bands to follow the sphere so the head looks round.
Step 4: Add the Cradle so the Microphone Sits in a Stand
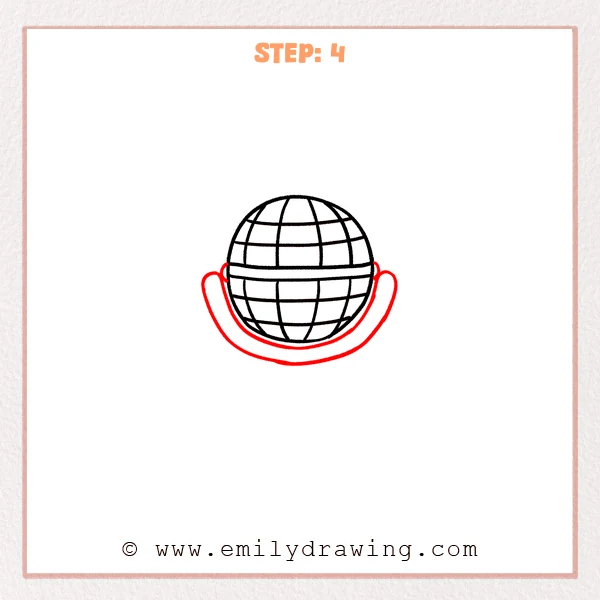
Add a small rounded bump on each side of the microphone head as connection points. From the left point, draw a long curved line down and around to the right point to form a U-shaped cradle. Let the cradle lines feel slightly thicker so it looks supportive.
Pro Tip: Round the bottom curve of the cradle to keep the shape cute and balanced.
Step 5: Add the Stand Connector
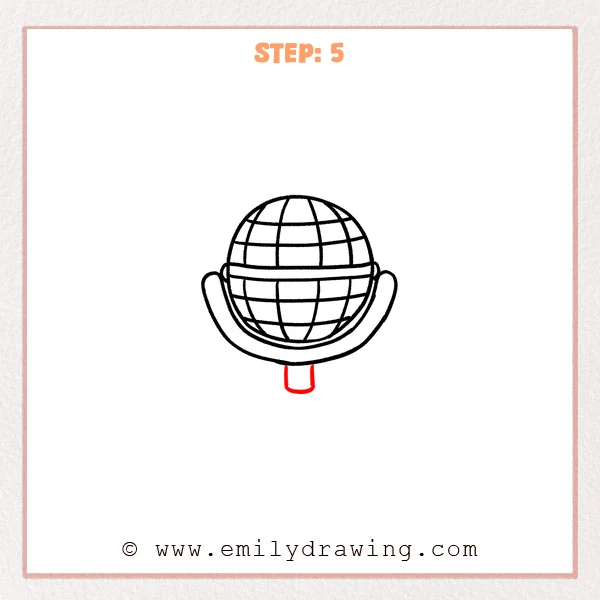
Under the cradle, draw a short rounded rectangle as a small “neck” that connects to the stand. Keep the sides fairly straight, then curve the bottom softly for a cartoon look. Make it short so the microphone still feels compact.
Pro Tip: Center the connector width under the head to keep everything balanced.
Step 6: Draw the Base so the Stand Feels Stable
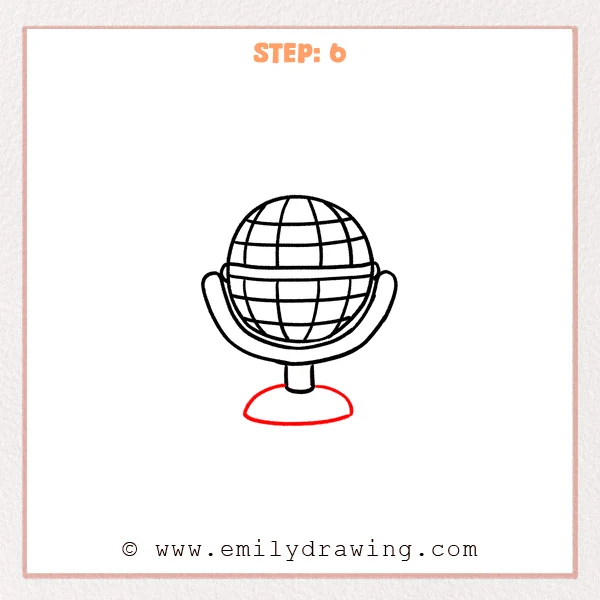
Under the connector, sketch a flat oval like a small plate for the base. Add a gentle curved line on top to make the base feel rounded and thick. Let the base be a bit wider than the microphone head for balance.
Pro Tip: Keep the oval ends rounded, not pointy, for a cartoon stand look.
Step 7: Color in your drawing!
Fun Facts
- Many microphones use a metal grille to protect delicate parts inside.
- Different microphone shapes help capture sound in different ways.
- A stable stand helps reduce shaking noises during recording.
Pin it now, Draw later!
You now have a complete cartoon microphone with a rounded grille and a simple stand. Try adding gentle shading under the grille bands and along one side of the base to show light and shadow. If you color it, keep one side slightly darker for depth. A common beginner mistake is making the stand connector off-center, so take your time lining it up. Practice drawing it again with a taller base or a tilted angle, and try another easy drawing tutorial next.
Get the FREE Printable Drawing Guide
FREE Download Printable Cartoon Microphone Drawing Tutorial
Frequently Asked Questions
How do I make the microphone look more 3D?
Add curved shading that follows the round shape, especially on one side.
What if my grille lines look uneven?
Lightly sketch guide lines first, then trace the best ones with pen.
Can I draw a handheld microphone instead of a stand one?
Yes, replace the base with a long handle and add a small band near the bottom.