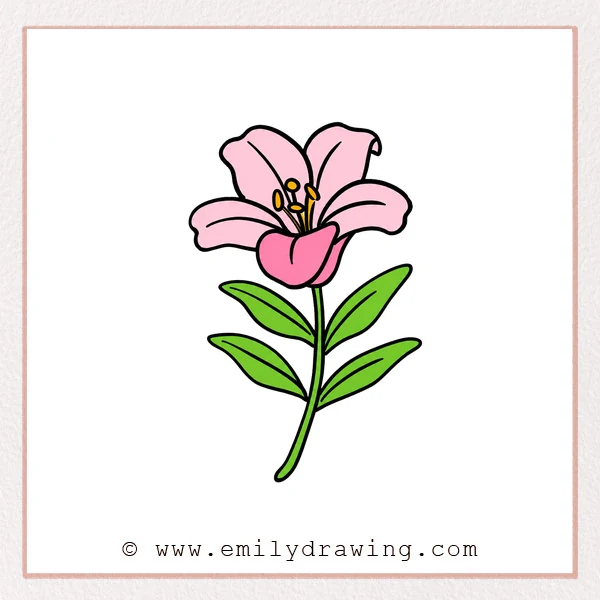
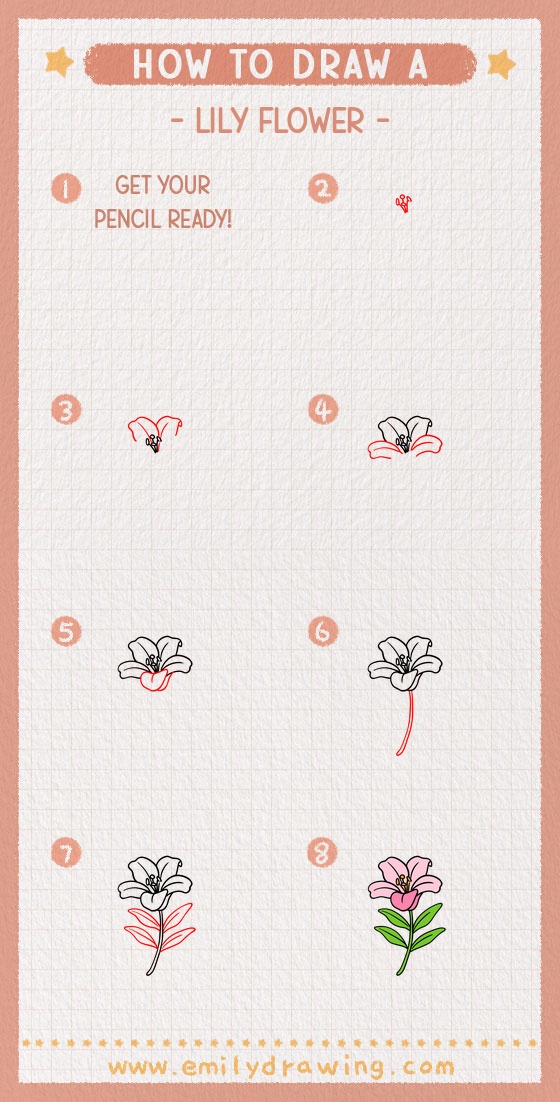
If you want to learn how to draw a lily flower, this easy drawing tutorial will guide you step by step. The lesson is simple, calm, and beginner-friendly, so it works well for kids, students, and anyone practicing drawing for beginners. Follow each step in order, and you will build a graceful lily flower from the center outward.
What You Will Need
- Drawing paper
- Pencil or black pen
- Eraser
- Colored pencils, crayons, or markers (optional)
Here are my RECOMMENDED Art Supplies!
- Crayola Coloring Set (140 Pieces – Mega Value!)
- 24 Colored Crayon Set
- A4 Printer Paper
- Crayola Coloring Pencils
- HP Home Printer with Instant Ink!
Time needed:
13 minutes.
Step-by-Step Drawing Guide
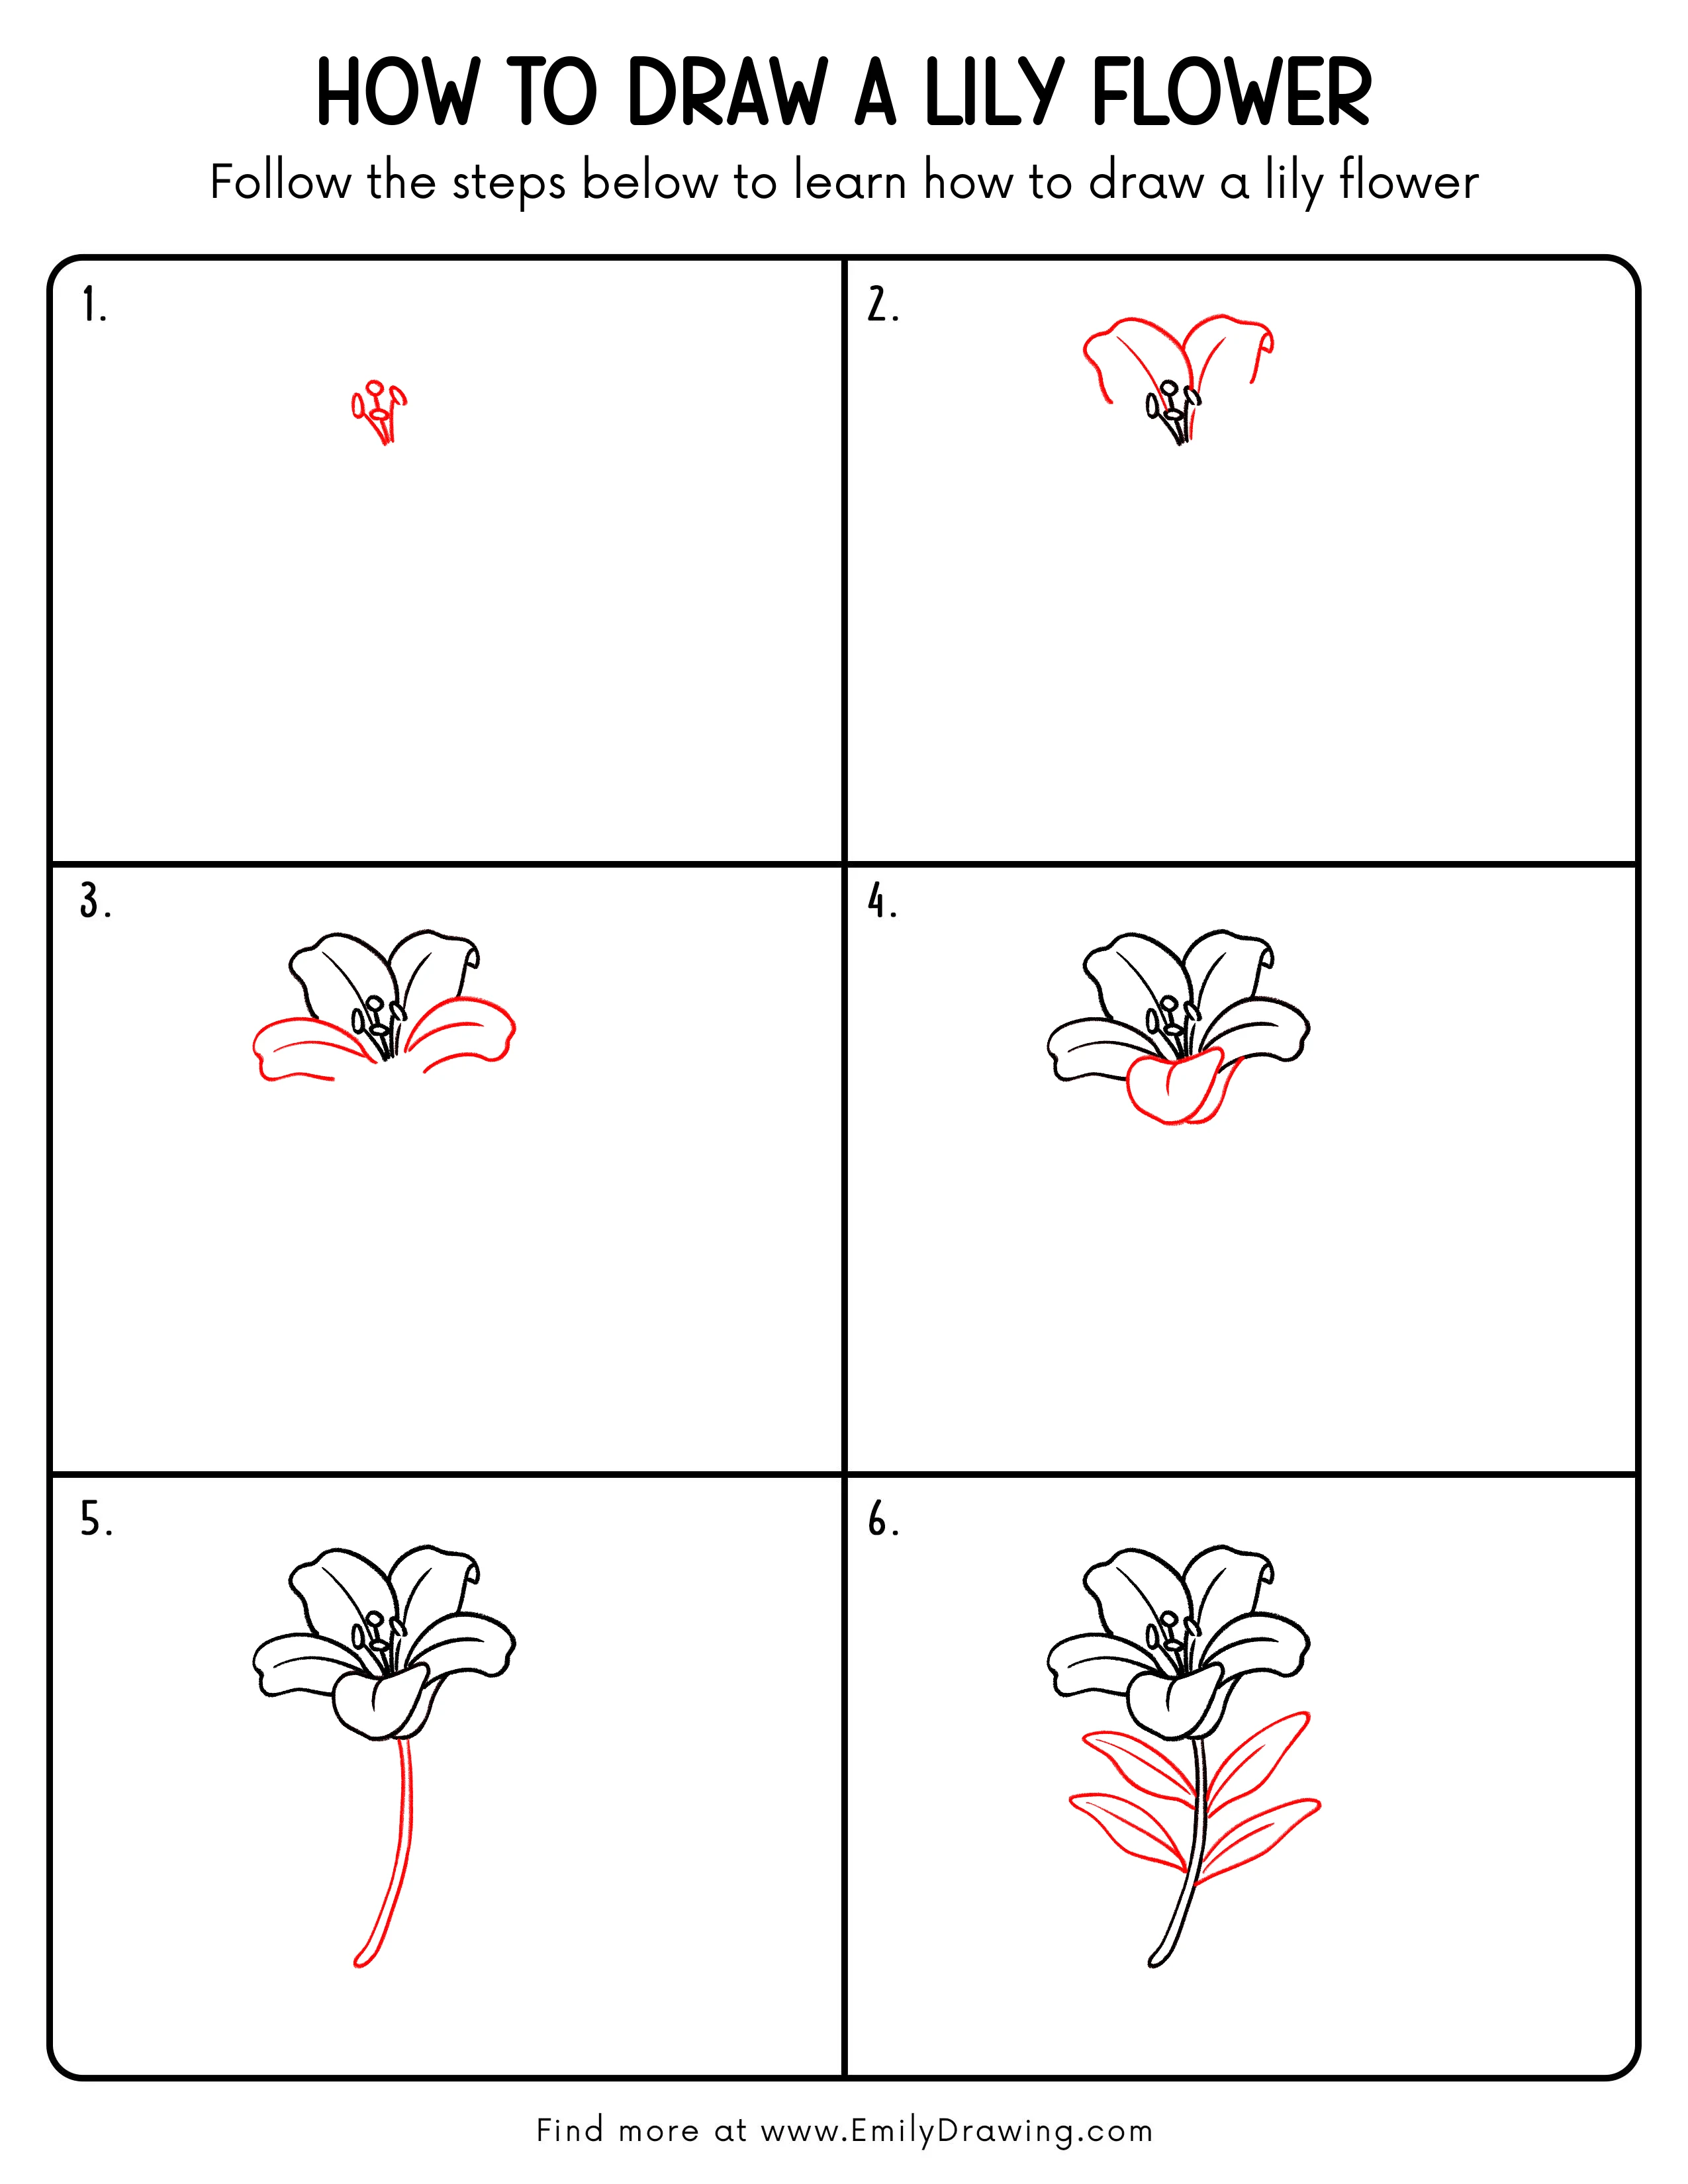
Step 1: Sketch the Lily Flower Center Guides
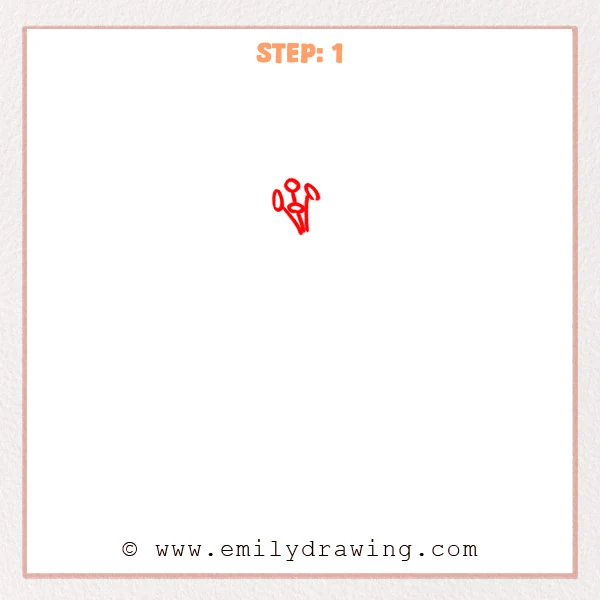
Start with a few small ovals near the center to mark the flower openings and center points. Then draw several narrow lines downward, letting them come closer at the bottom to build the lily flower’s inner structure. Keep the shapes light and simple for this first sketch.
Pro Tip: Make the small top ovals slightly different sizes so the lily flower looks more natural.
[Alt Text: A beginner sketch of a lily flower starting with small oval flower centers and narrow guide lines for the petals.]
Step 2: Add Two Open Lily Petals
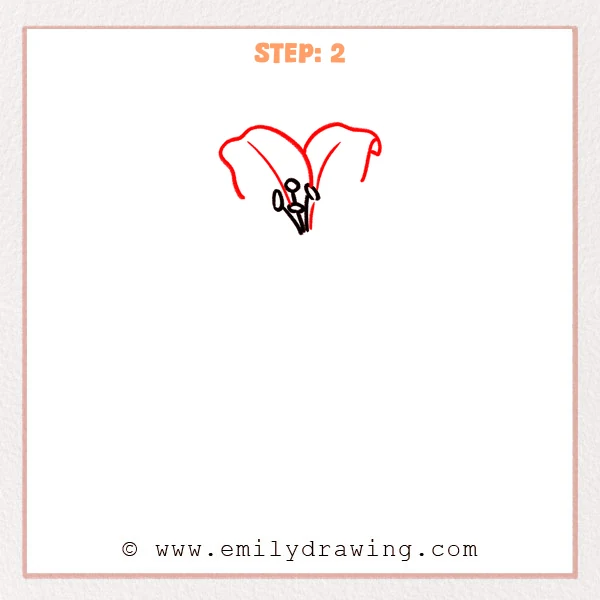
Draw two large curved petals above the center, letting the edges spread out like soft waves. Add one inward-curving center line on each petal to show their shape and flow. Let one petal curl slightly at the edge for a more natural look.
Pro Tip: Avoid making the petal tops too straight, because gentle waves make the lily flower look more realistic.
[Alt Text: A lily flower sketch refined with two large open petals, curved center lines, and a small curled edge on one petal.]
Step 3: Add the Two Lower Side Petals
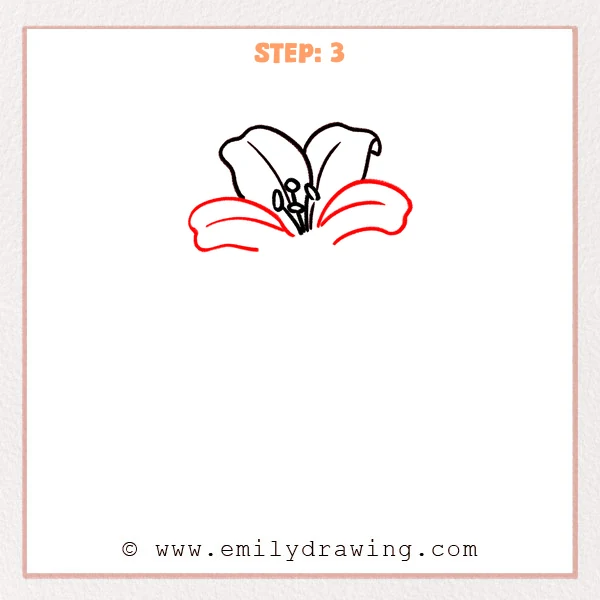
Draw one wide petal on each side of the flower center, letting them spread outward like open wings. Then add one curved inner line inside each petal to show the fold and direction. These petals make the lily flower look fuller and more open.
Pro Tip: Keep the two side petals close in size so the lily flower looks more balanced.
[Alt Text: A lily flower drawing for beginners with the center, top petals, and two newly added lower side petals spreading outward.]
Step 4: Draw the Overlapping Front Lower Petals
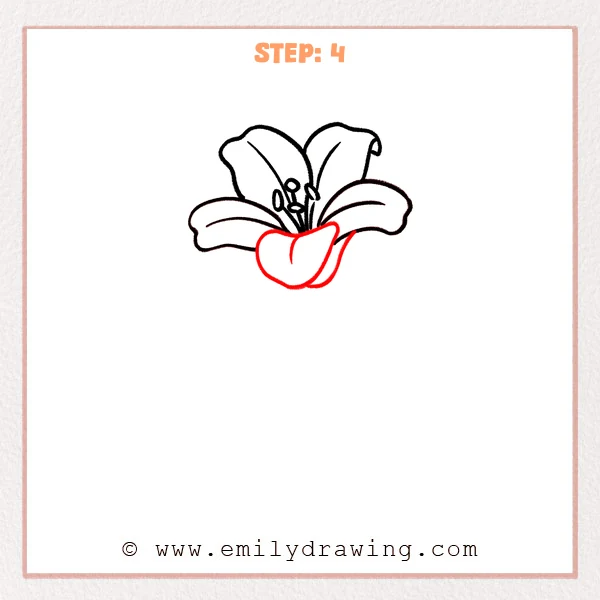
Add one petal in the lower center that folds forward, so it looks closer to the viewer. Then extend another connected petal edge on the lower right to show overlap and create a layered flower shape. This step gives the bloom more depth and structure.
Pro Tip: Make the front petal slightly larger so the front-to-back layering is easier to show.
[Alt Text: A beginner lily flower drawing with a newly added front lower petal and an overlapping lower-right petal, creating a fuller layered bloom.]
Step 5: Add the Long Flower Stem
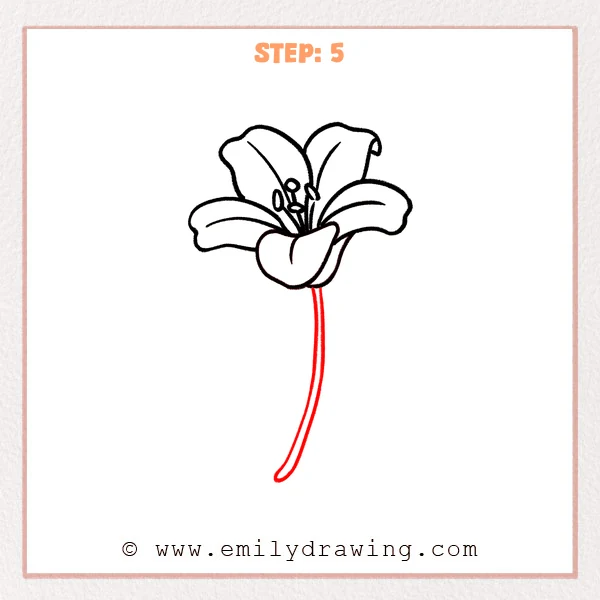
Draw two long curved lines downward from the base of the flower to form a gently bending stem. Let the bottom of the stem narrow and close smoothly so the flower feels complete. Keep the curve soft and flowing.
Pro Tip: Avoid making the stem perfectly straight, because a slight curve gives the flower more life.
[Alt Text: A beginner lily flower drawing with a completed bloom and a newly added long curved stem below it.]
Step 6: Add the Leaves on Both Sides of the Stem
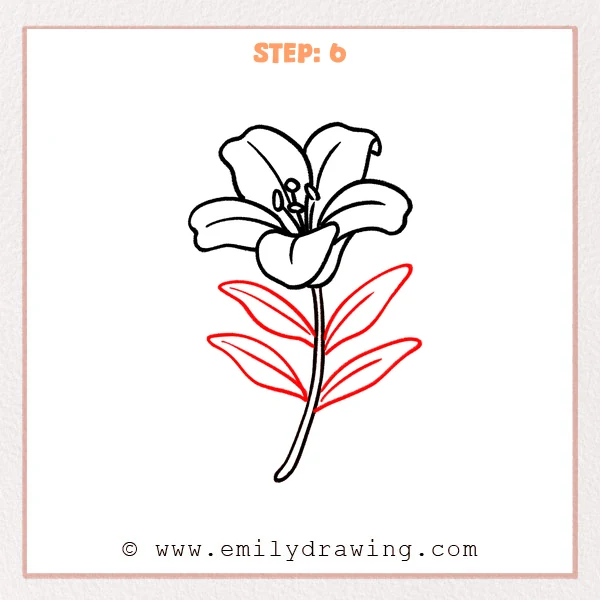
Add several long, narrow leaves on both sides of the stem, letting them stretch outward from the center. Draw one curved vein inside each leaf to show its direction and length. This final step completes the lily flower drawing and gives it a graceful finish.
Pro Tip: Let the leaf tips point in slightly different directions so the drawing feels more natural.
[Alt Text: A beginner lily flower drawing with a full bloom, curved stem, and newly added long leaves with inner veins.]
Step 7: Color in your drawing!
Fun Facts
- Lily flowers are known for their large petals and elegant shape.
- Many lilies have a sweet fragrance and come in many colors.
- Lilies are often used as symbols of beauty, purity, and renewal.
Pin it now, Draw later!
You have now completed an easy step-by-step drawing of a lily flower. You can trace over your final lines, erase extra sketch marks, and color the petals and leaves if you like. Keep practicing this step by step drawing method, and try drawing more flowers to grow your confidence as an artist.
Get the FREE Printable Drawing Guide
FREE Download Printable Lily Flower Drawing Tutorial
Frequently Asked Questions
Is this lily flower tutorial good for beginners?
Yes, this easy drawing tutorial is designed for beginners and uses simple shapes in each step.
Can I color my lily flower drawing?
Yes, you can color it with pencils, crayons, or markers after finishing the outline.
How can I make my flower drawing look more realistic?
Use gentle curves, vary the petal edges slightly, and keep the leaves and stem flowing naturally.