
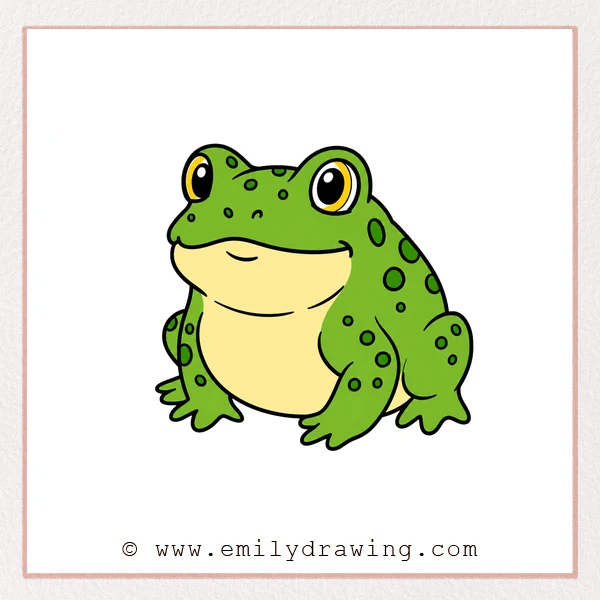
Learning how to draw toad can be calm and fun for beginners. This easy drawing tutorial uses simple curves, round shapes, and small details. Take your time with each step, and let the toad slowly come together.
What You Will Need
- Pencil
- Eraser
- Black marker or pen
- Drawing paper
- Colored pencils or crayons
Here are my RECOMMENDED Art Supplies!
- Crayola Coloring Set (140 Pieces – Mega Value!)
- 24 Colored Crayon Set
- A4 Printer Paper
- Crayola Coloring Pencils
- HP Home Printer with Instant Ink!
Time needed:
19 minutes.
Step-by-Step Drawing Guide
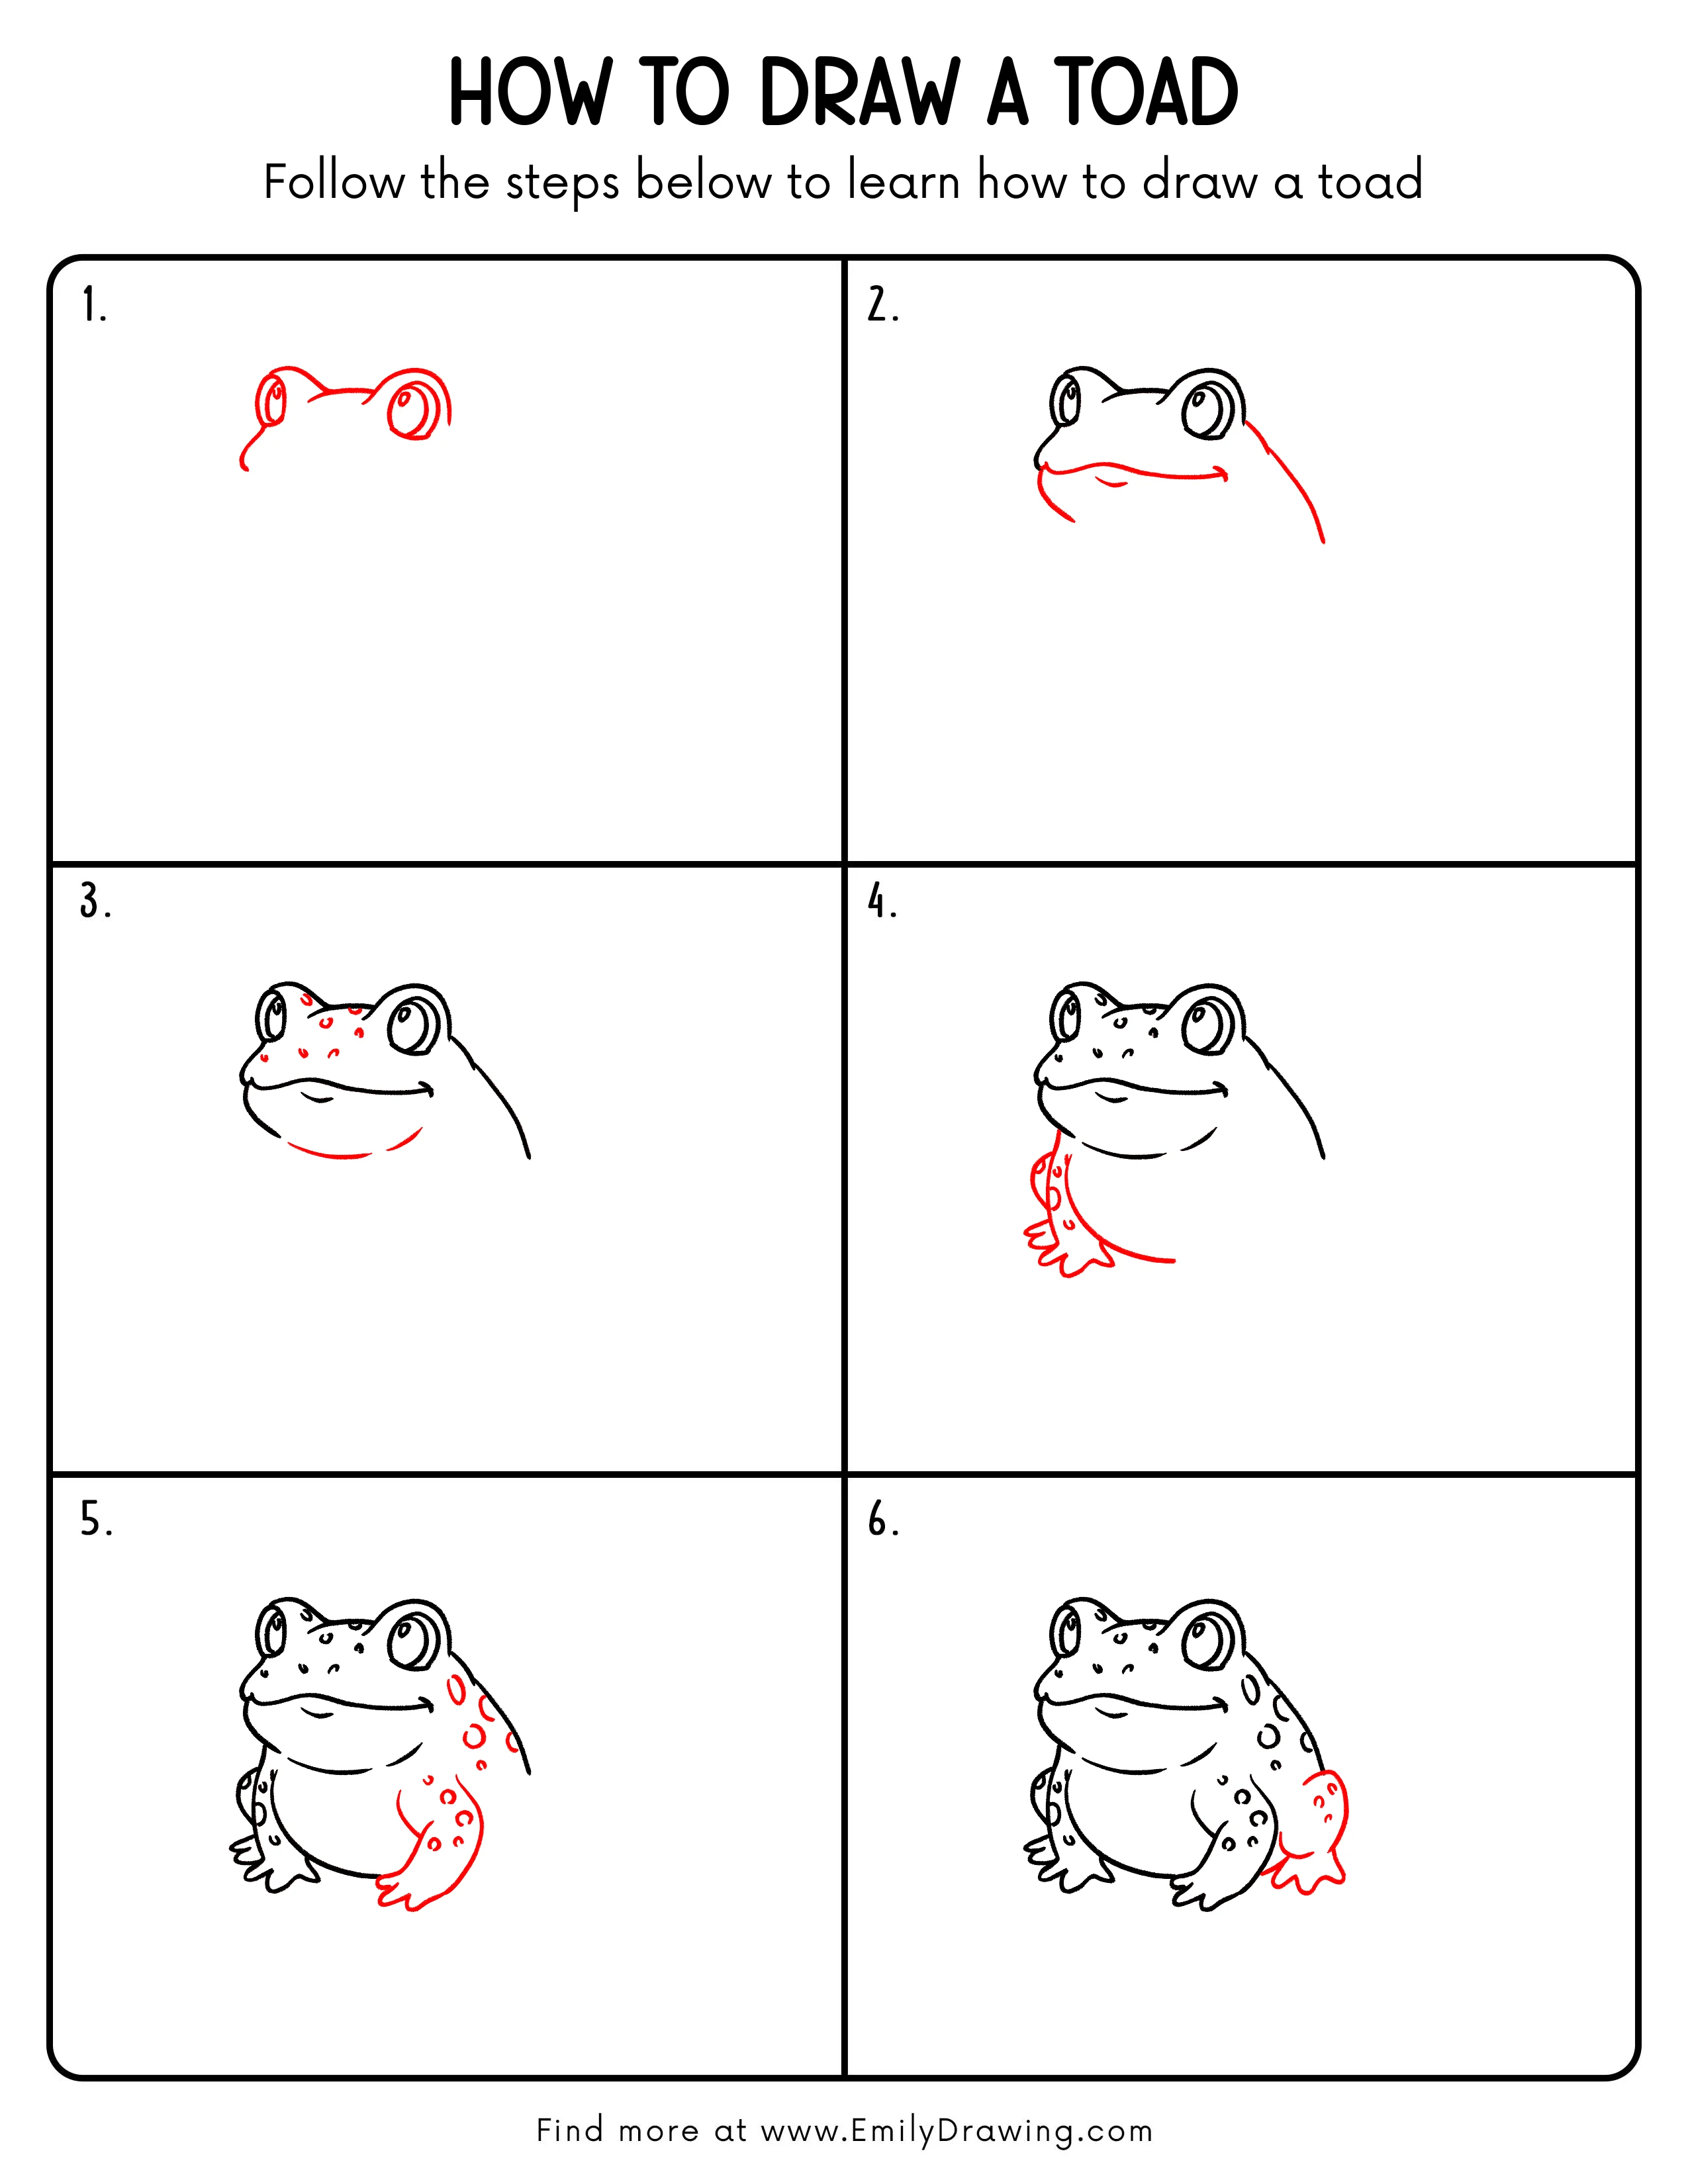
Step 1: Draw the Toad’s Eyes and Head Top
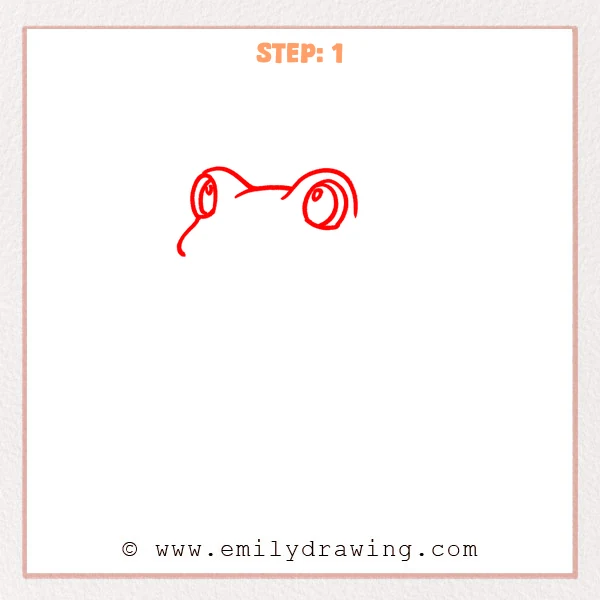
Start with two large round eyes, leaving small white highlights inside each eye. Connect the tops of the eyes with a curved line to form the toad’s head. Add a short curve below the left eye to begin the side of the face.
Pro Tip: Keep both eyes similar in size so the toad looks balanced.
Step 2: Add the Mouth and Body Outline
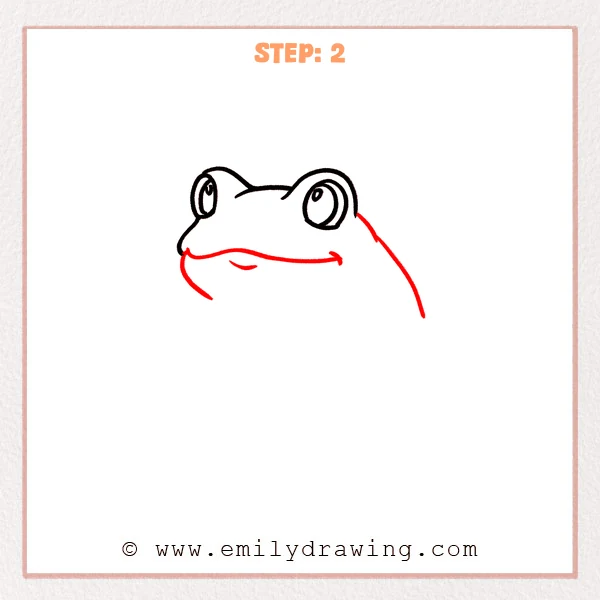
Draw a long curved line from the left face toward the right to form the toad’s wide mouth. Add a short curve below the mouth to show the chin and cheek. Pull a large curve downward from beside the right eye to begin the back of the body.
Pro Tip: Let the mouth line curve slightly upward to make the toad’s expression feel natural.
Step 3: Add Spots and Belly Lines
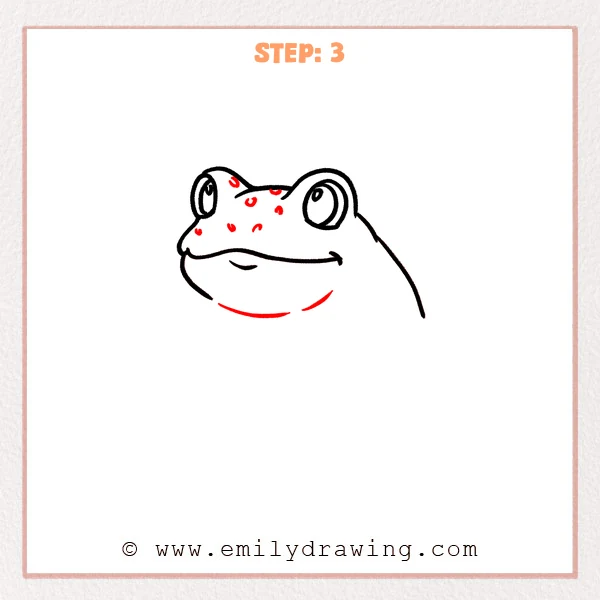
Add several small curved spots across the top of the toad’s head and cheek. Place the spots apart, and avoid making every spot the same size. Draw two gentle curves below the mouth to begin the round belly.
Pro Tip: The more irregular the spots are, the more natural the toad’s skin will look.
Step 4: Draw the Front Leg and Toes
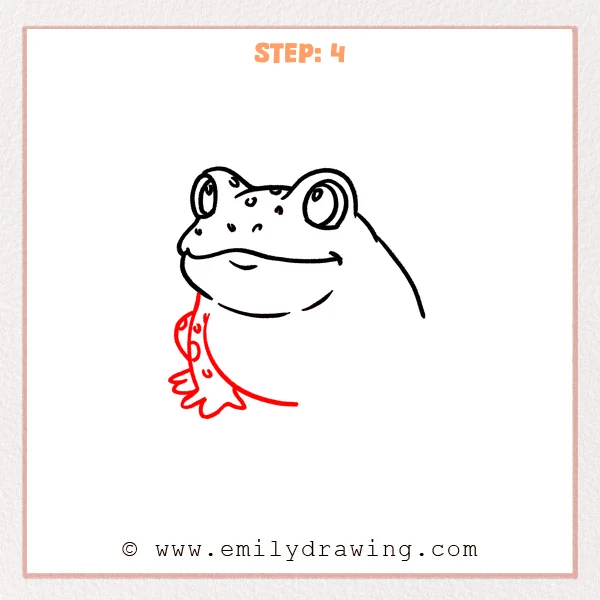
Draw a long downward curve under the left side of the toad’s body to form the front leg. Add a curved foot and several rounded toes so the foot sits firmly on the ground. Add small spots on the leg, then begin the lower body with a long sweeping curve.
Pro Tip: Keep the toes rounded so the toad looks cute and well balanced.
Step 5: Add the Back Leg and Back Spots
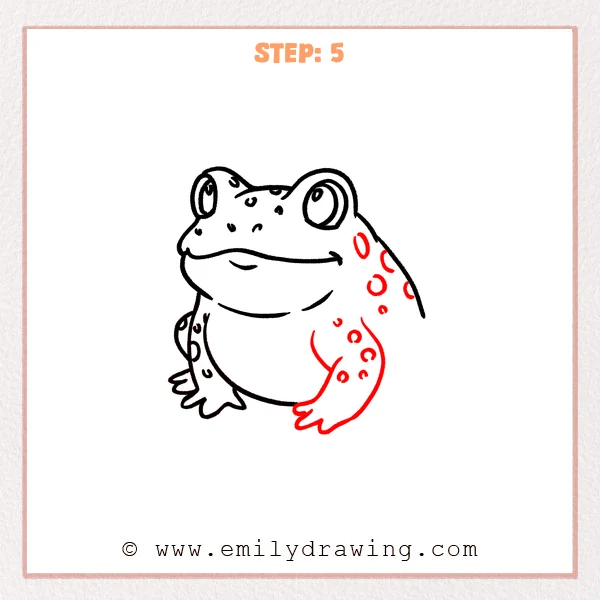
Draw a curved back leg on the lower right side of the body, stretching it forward. Add rounded toes, then connect the leg to the belly with smooth curves. Place different-sized round spots across the back and back leg.
Pro Tip: Make the back leg wider than the front leg so the toad feels more firmly seated.
Step 6: Draw the Other Back Foot
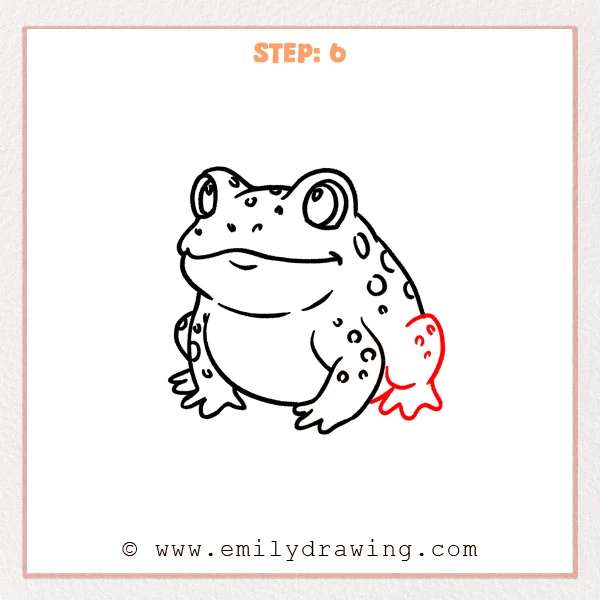
Add another back foot stretching outward on the right side of the body. Draw a rounded foot pad and several wide toes to support the crouching pose. Add small curved spots on the foot so the details match the body texture.
Pro Tip: Make the right foot slightly broad to strengthen the feeling that the toad is crouching on the ground.
Step 7: Color in your drawing!
Fun Facts
Toads have dry, bumpy skin that helps them blend into their surroundings. Their wide bodies and strong legs make them excellent at short hops. Many toads are most active in the evening or after rain.
Pin it now, Draw later!
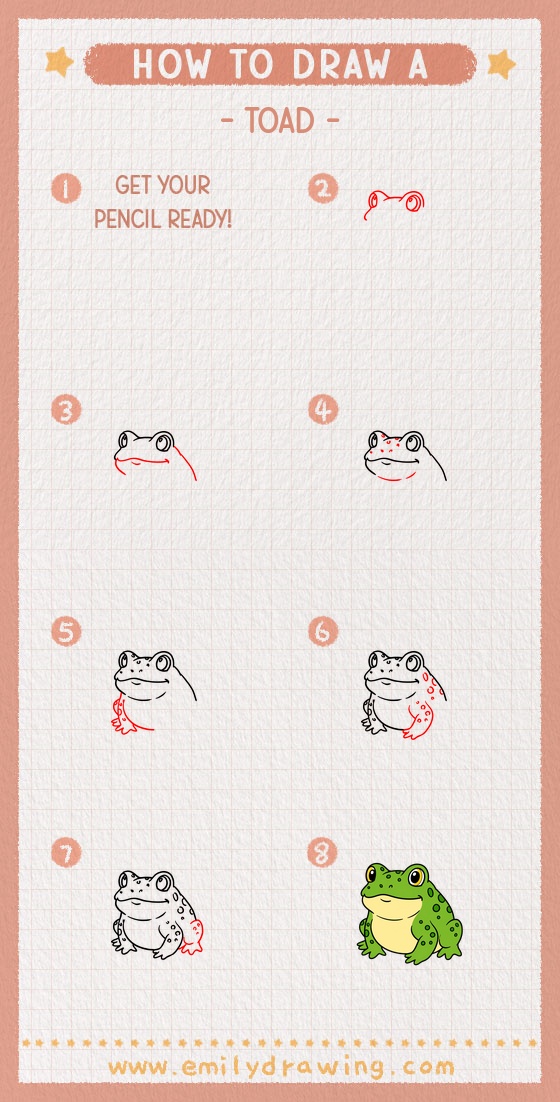
Trace your finished toad drawing with a black marker when you like the shape. Add soft green, brown, or yellow colors to make the skin feel natural. You can also draw grass, stones, or a pond behind it for a complete scene.
Now you have finished a step by step drawing of a toad. Try the tutorial again and change the spots to create a new toad character.
Get the FREE Printable Drawing Guide
FREE Download Printable Toad Drawing Tutorial
Frequently Asked Questions
Is this toad drawing for beginners?
Yes, this drawing for beginners uses simple curves, rounded shapes, and easy details.
How can I make my toad look more realistic?
Add uneven spots, a wider body, and gentle shading under the belly and legs.
Can I color the toad after drawing it?
Yes, you can use green, brown, tan, or yellow shades to color your toad.



