
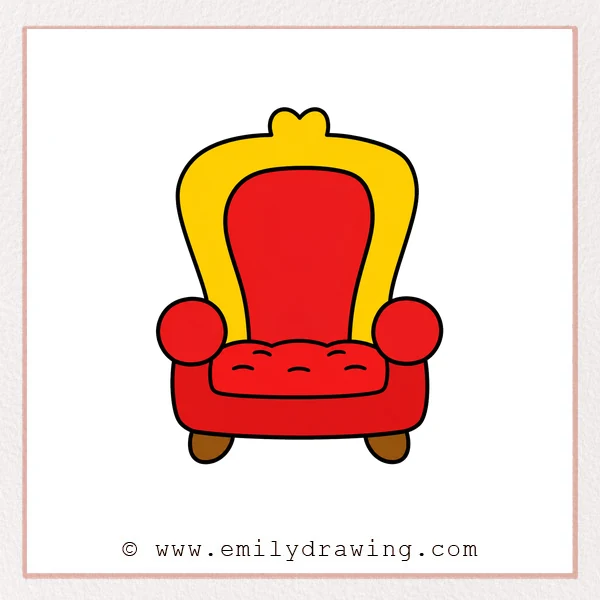
Learning how to draw throne can be simple and enjoyable. This easy drawing tutorial uses rounded shapes, soft curves, and clear steps. Take your time with each part, and your throne will look balanced and royal.
What You Will Need
- Pencil
- Eraser
- Black marker or pen
- Drawing paper
- Colored pencils or crayons
Here are my RECOMMENDED Art Supplies!
- Crayola Coloring Set (140 Pieces – Mega Value!)
- 24 Colored Crayon Set
- A4 Printer Paper
- Crayola Coloring Pencils
- HP Home Printer with Instant Ink!
Time needed:
25 minutes.
Step-by-Step Drawing Guide
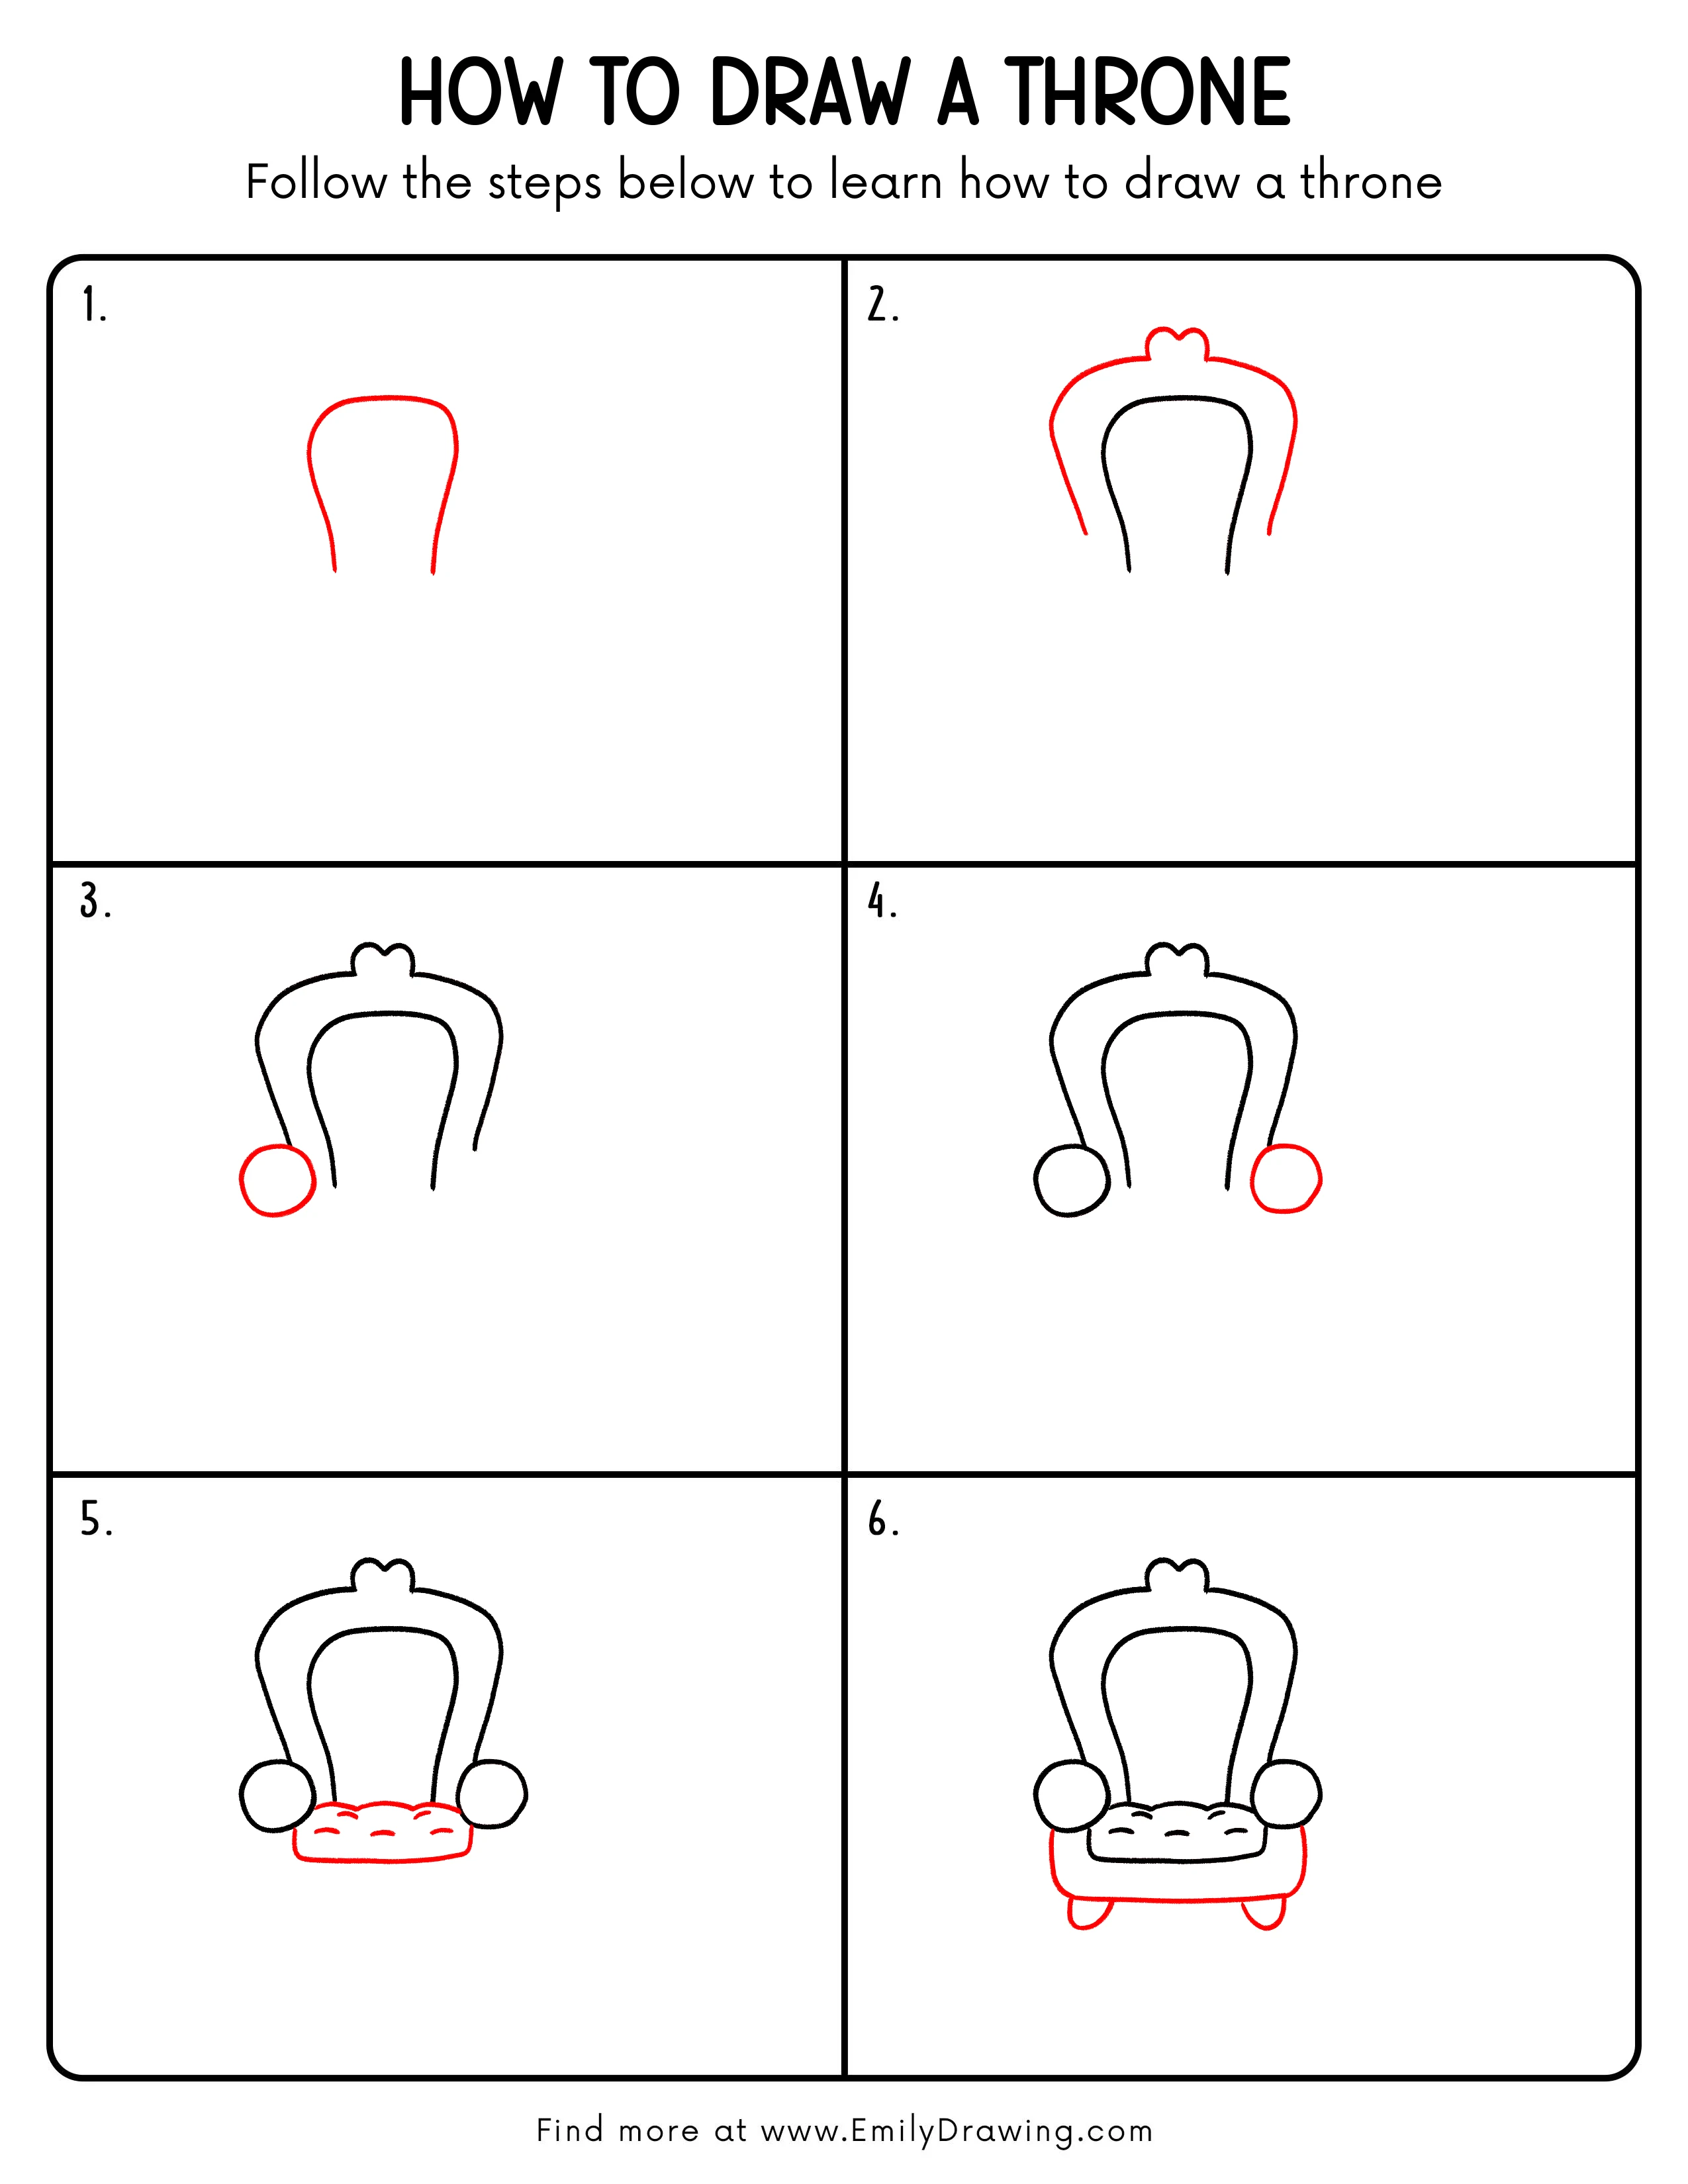
Step 1: Draw the Throne Back Shape
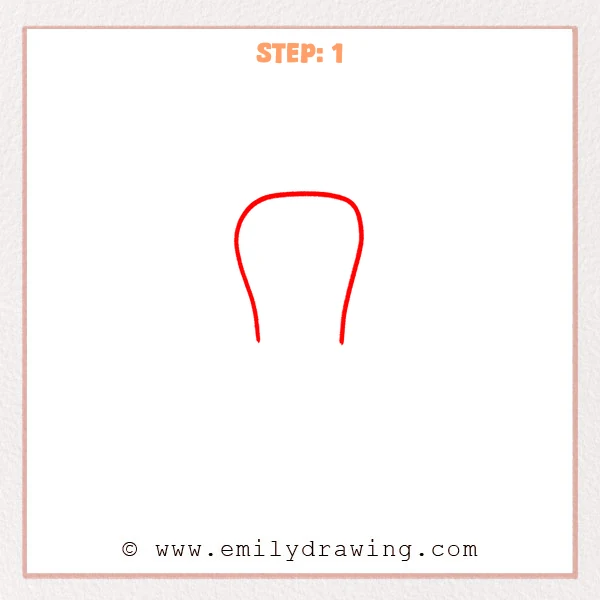
Start at the top with a wide rounded arch. Extend both sides downward, letting them curve slightly inward to form the basic throne back.
Pro Tip: Keep both sides nearly the same height so the throne looks balanced.
Step 2: Add the Outer Crown Back
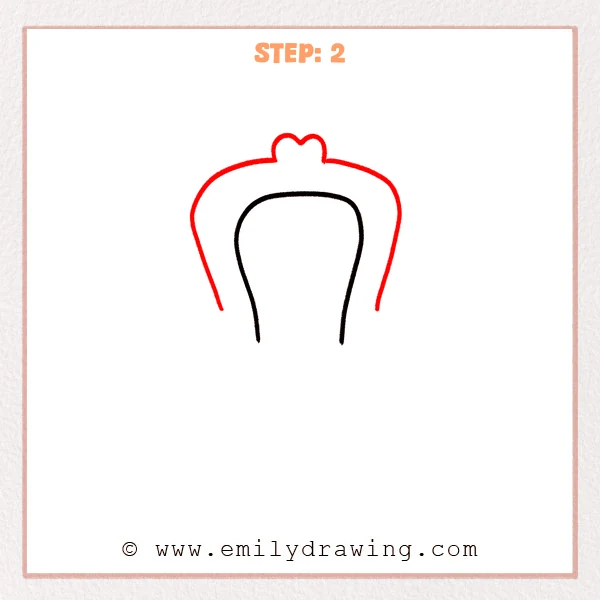
Draw a wider outline around the first throne back. Add three rounded bumps at the top to make the throne look more royal.
Pro Tip: Make the outer outline slightly taller and wider than the inner one to create a clear border.
Step 3: Draw the Left Armrest Circle
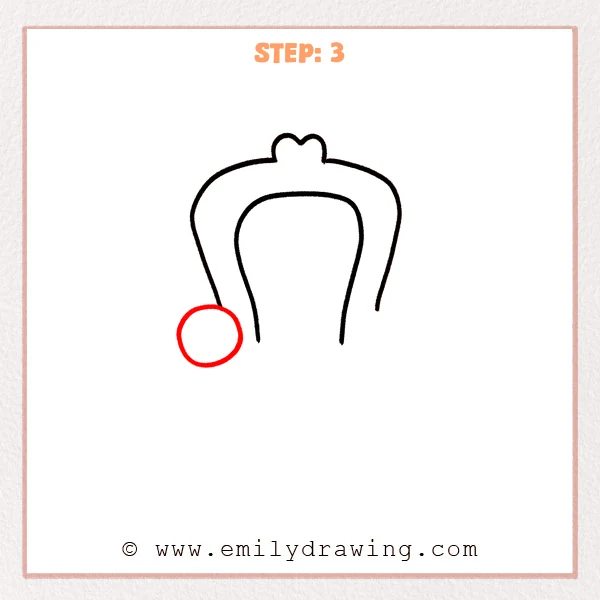
Add a sideways oval on the lower left side of the throne. Place it near the bottom of the outer back to form the front of the left armrest.
Pro Tip: Do not make the oval too small, because it will support the armrest shape later.
Step 4: Draw the Right Armrest Circle
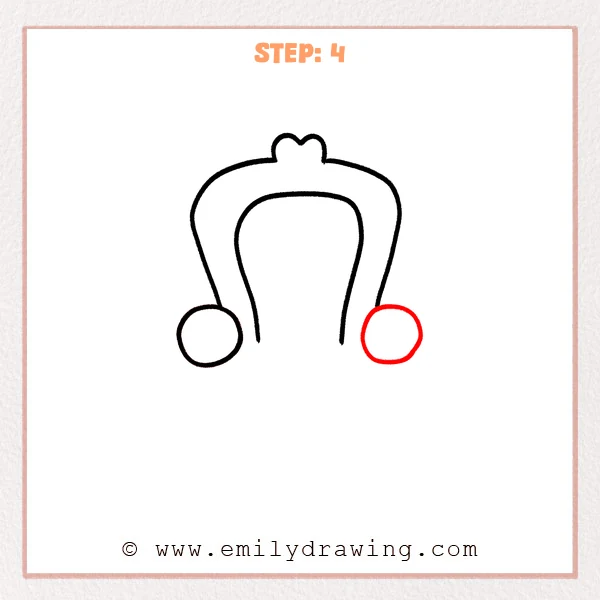
Add a sideways oval on the lower right side of the throne. Make it close in size to the left armrest and place it at a similar height.
Pro Tip: Compare the positions of both ovals to keep the throne feeling symmetrical.
Step 5: Add the Seat Cushion and Decorative Lines
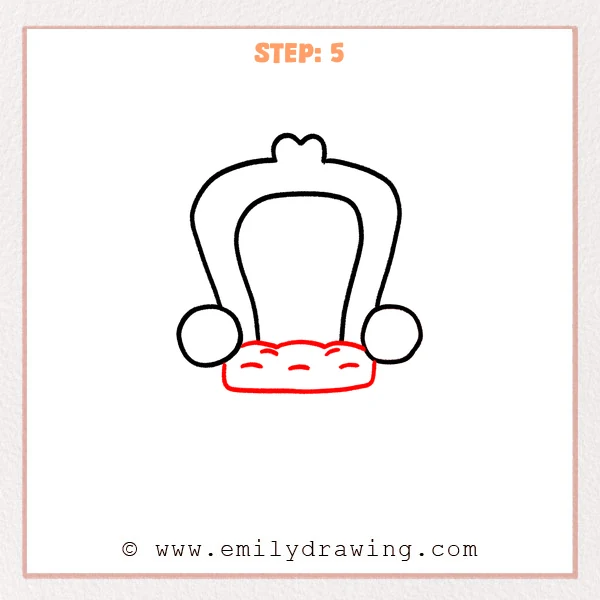
Draw a low rectangular cushion between the two armrests, keeping the bottom edge steady. Add a few short curved lines on top to show the soft cushion surface.
Pro Tip: Make the cushion a little wider than the inner back so the throne base feels supportive.
Step 6: Draw the Base and Short Legs
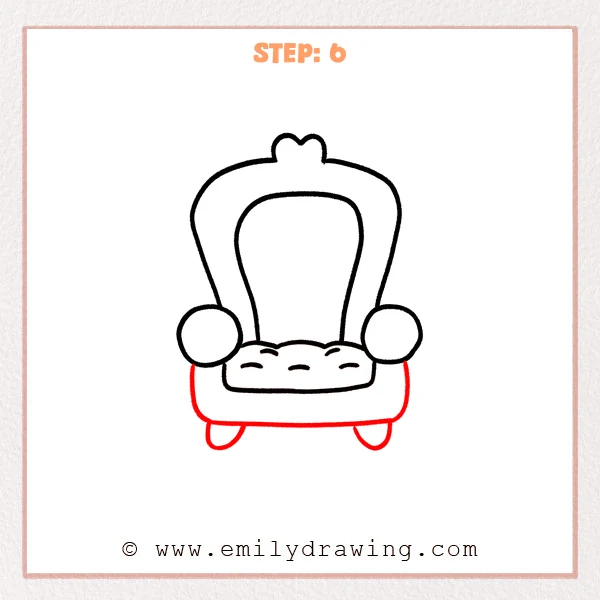
Draw a wide rounded base below the cushion, connecting beneath both armrests. Add two short curved feet under the base so the throne stands firmly.
Pro Tip: Keep the base line long and steady, with both feet placed in similar positions.
Step 7: Color in your drawing!
Fun Facts
Thrones are special chairs often used to show importance and ceremony. Many throne designs include tall backs, wide seats, and decorative tops. In a step by step drawing, these fancy details become easier when you build them from simple shapes.
Pin it now, Draw later!
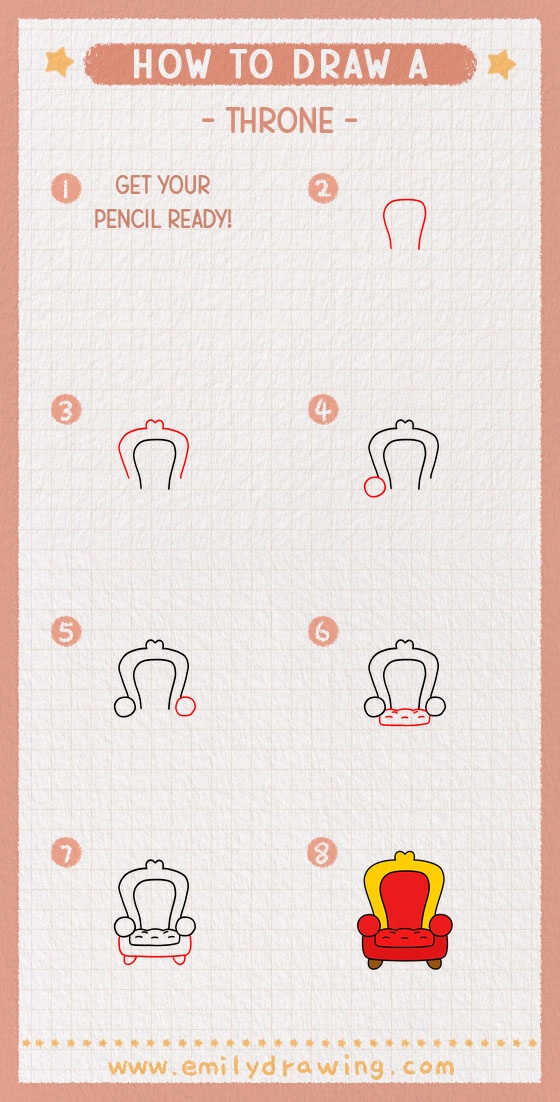
Trace your final throne drawing with a marker when you like the shapes. Erase extra pencil lines, then color the cushion, frame, and base. Try gold, red, purple, or any royal colors you enjoy.
Now you know how to draw throne using a calm drawing for beginners method. Keep practicing with soft curves, even sides, and simple decoration.
Get the FREE Printable Drawing Guide
FREE Download Printable Throne Drawing Tutorial
Frequently Asked Questions
Is this throne drawing good for beginners?
Yes, this throne drawing is good for beginners because it uses basic curves, ovals, and rounded rectangles.
What colors should I use for a throne?
Gold, red, and purple are classic throne colors, but you can choose any colors you like.
How can I make the throne look more royal?
Add small gems, extra cushion lines, or a brighter crown-shaped top to make the throne look more royal.



