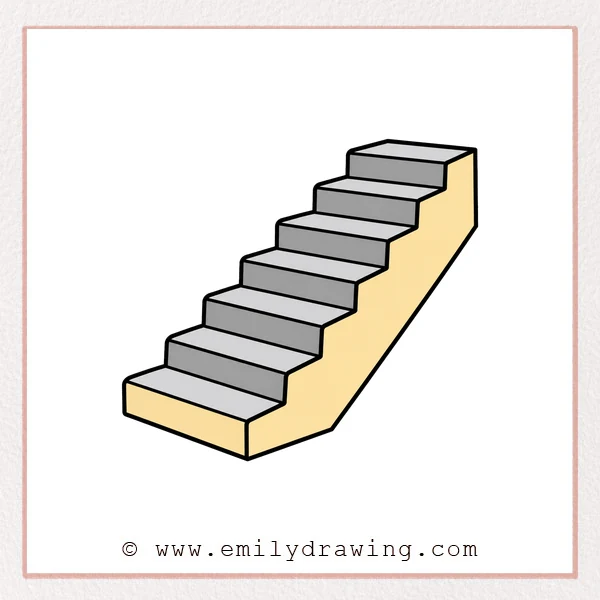
Learning how to draw stairs is a great way to practice simple perspective. This easy drawing tutorial uses clear lines and steady shapes, making it friendly for beginners. Take your time with each step and focus on keeping the stair edges even.
What You Will Need
- A pencil
- An eraser
- Drawing paper
- A black marker or pen
- Colored pencils or crayons, if you want to add color
Here are my RECOMMENDED Art Supplies!
- Crayola Coloring Set (140 Pieces – Mega Value!)
- 24 Colored Crayon Set
- A4 Printer Paper
- Crayola Coloring Pencils
- HP Home Printer with Instant Ink!
Time needed:
26 minutes.
Step-by-Step Drawing Guide
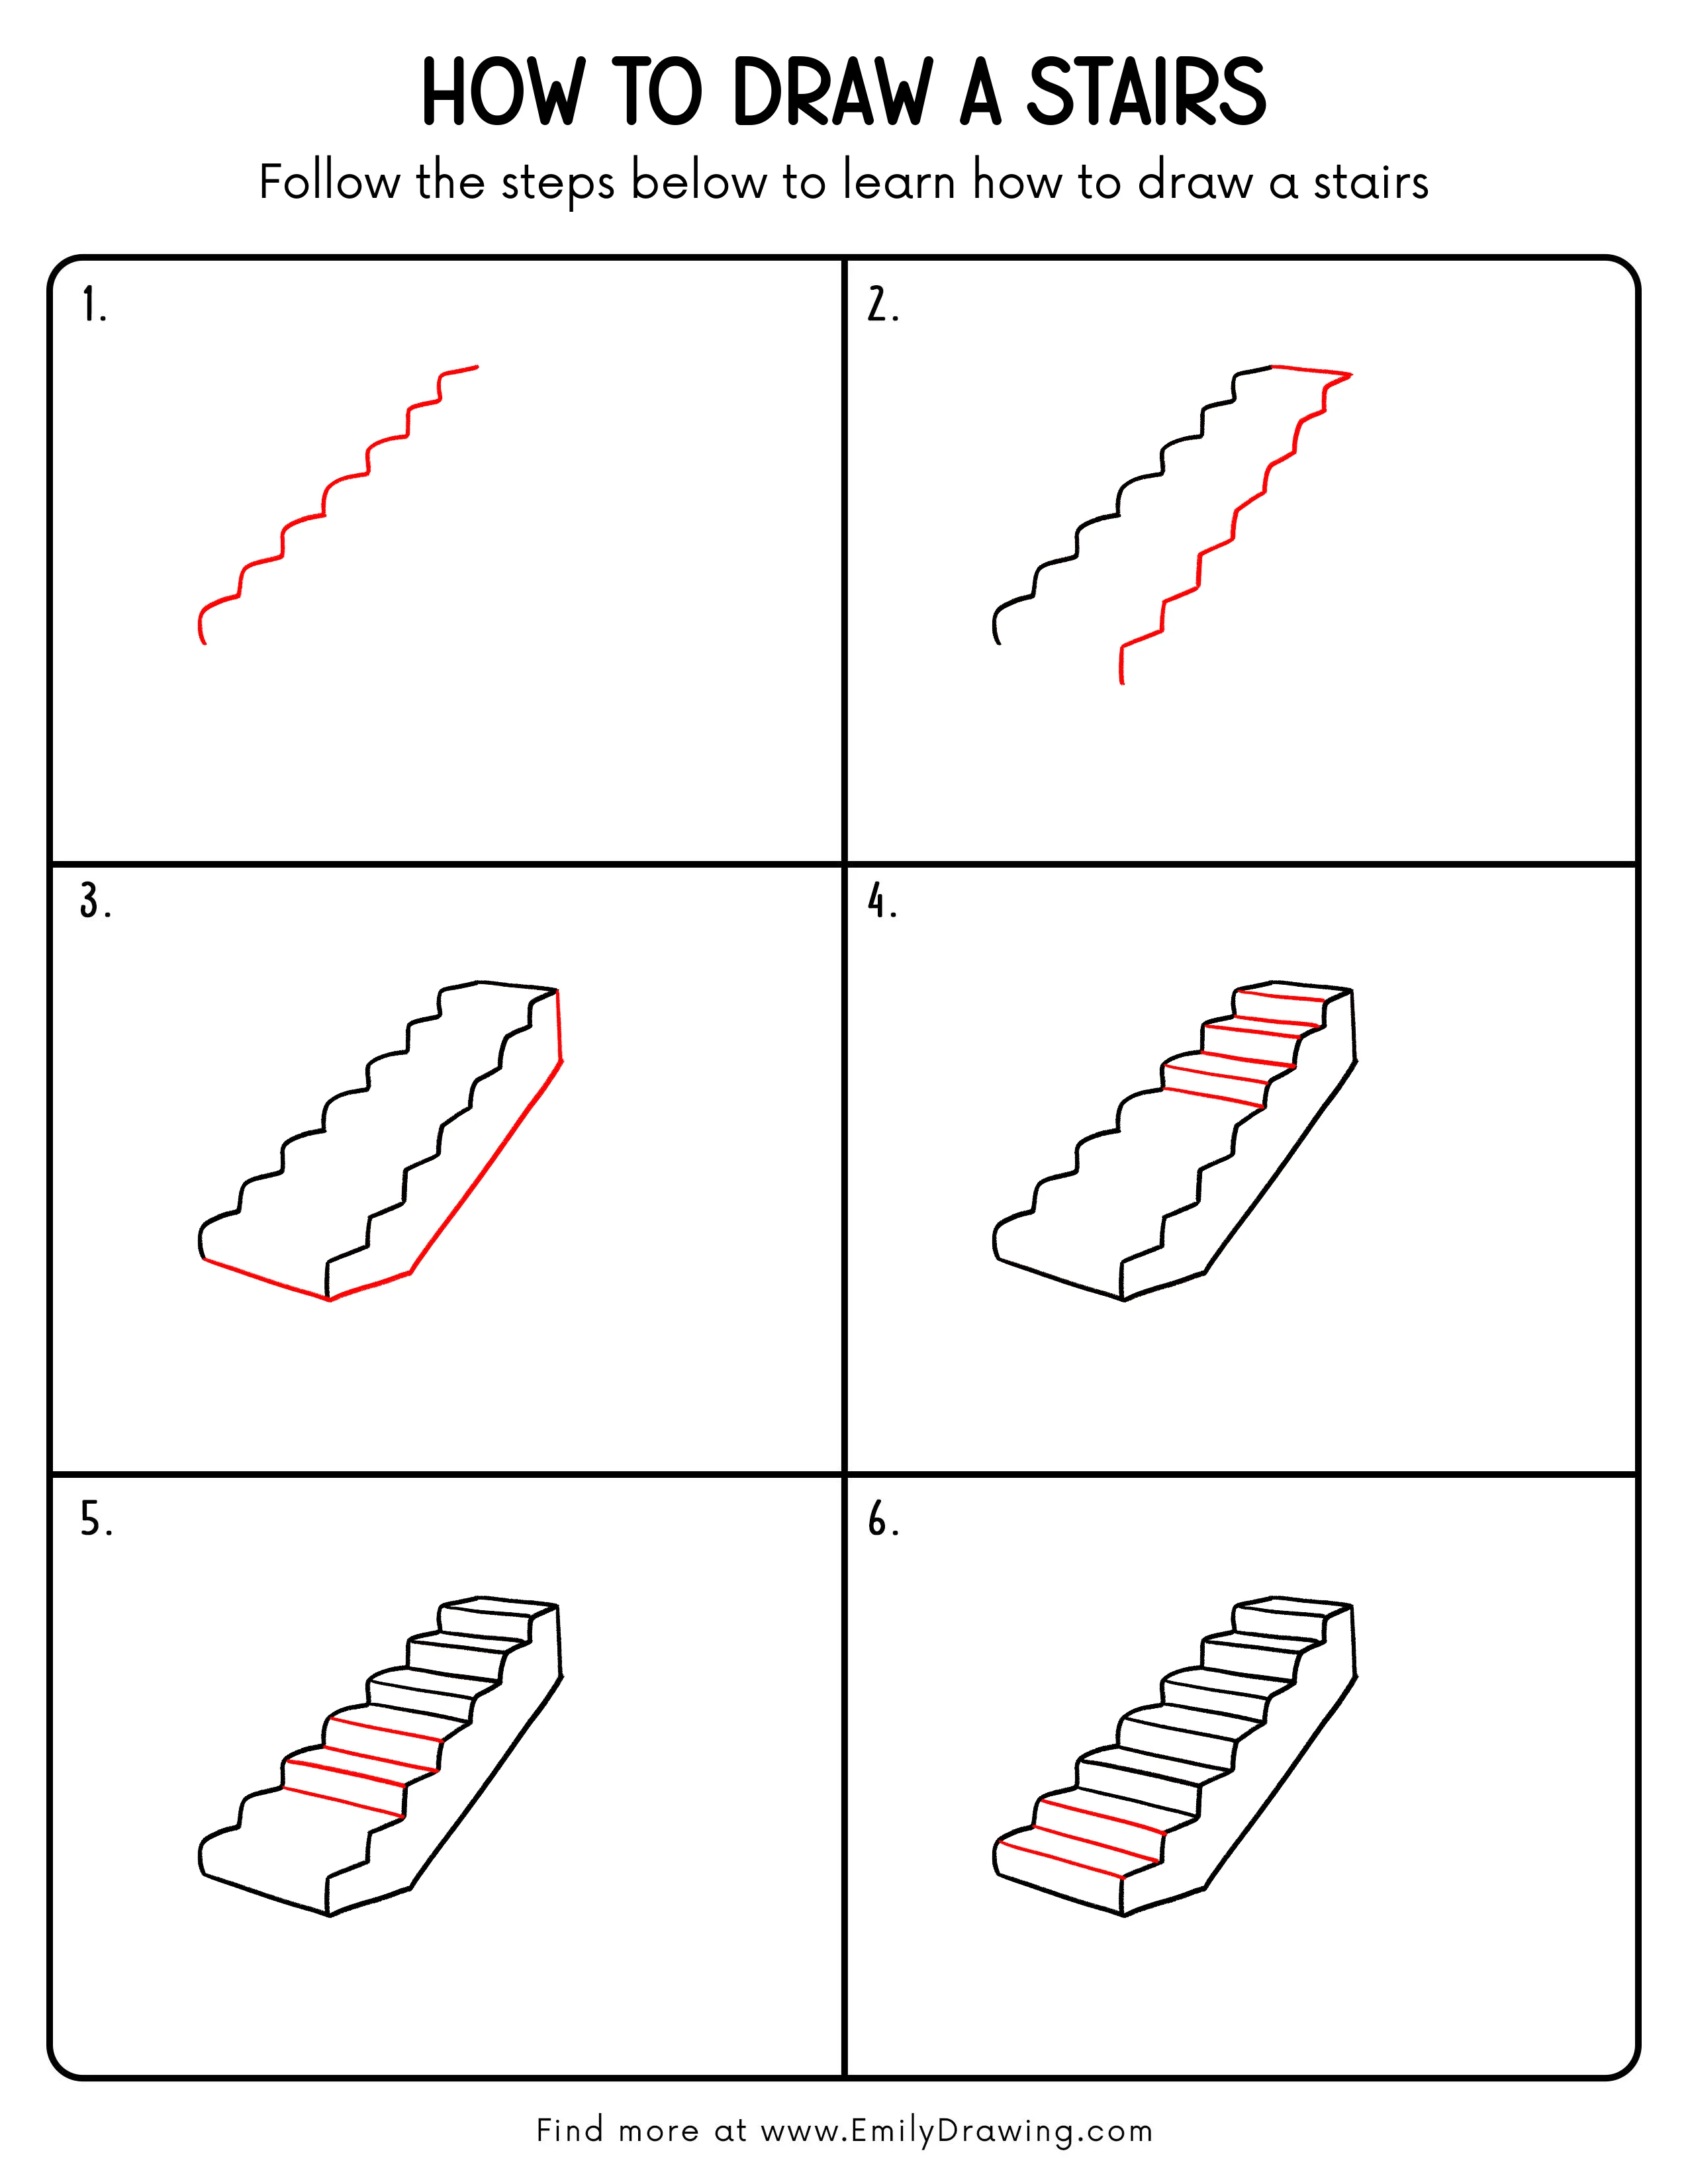
Step 1: Draw the Outer Stair Line
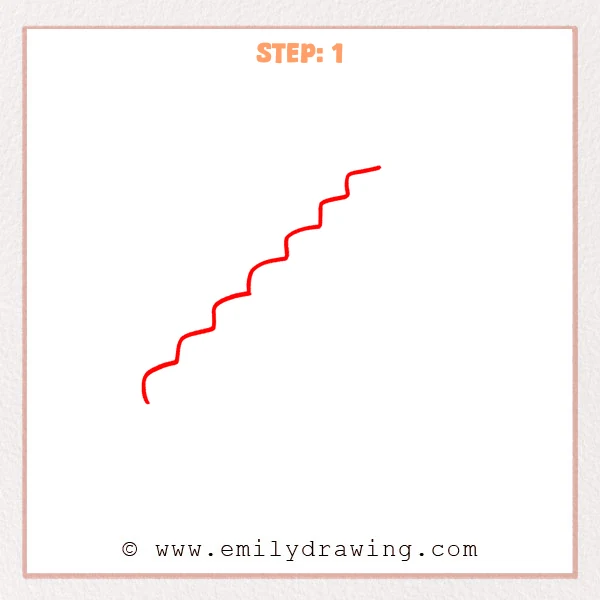
Start at the lower left and draw a stepped zigzag line moving upward to the right. Make each rise short, then add a small flat platform. Keep the rhythm even as the stairs climb.
Pro Tip: Keep each step close in height and width so the stairs look neat.
Step 2: Add the Other Side of the Stairs
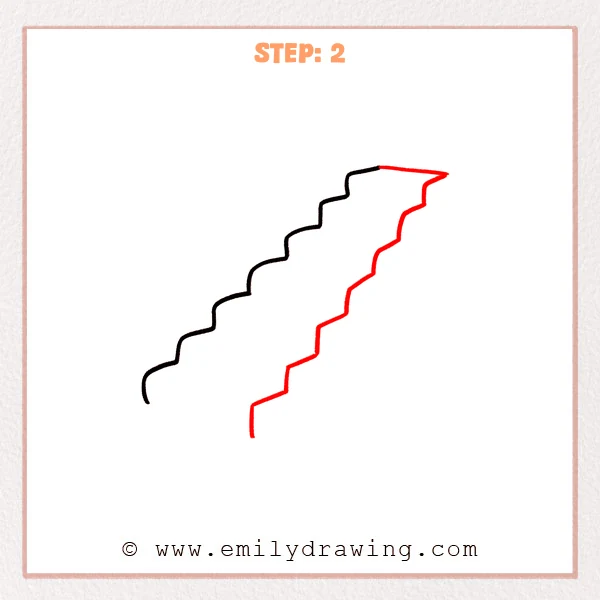
Draw a second stepped zigzag line on the right, following the same upward direction. Keep it spaced evenly from the first line. Connect both sides at the top with a short flat line to show the stair width.
Pro Tip: Keep the space between the two zigzag lines steady so the stairs look more dimensional.
Step 3: Draw the Bottom and Side Outline
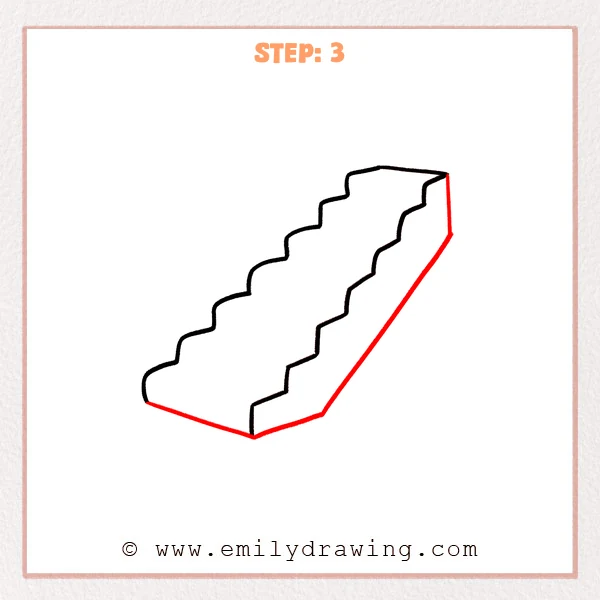
From the lower left corner, draw a slanted line toward the front bottom edge. Then add a long slanted side line and a short vertical line on the right. These lines complete the outer frame of the stairs.
Pro Tip: Let the bottom slanted lines connect smoothly at the corners so the stairs look sturdy.
Step 4: Add the Step Tread Lines
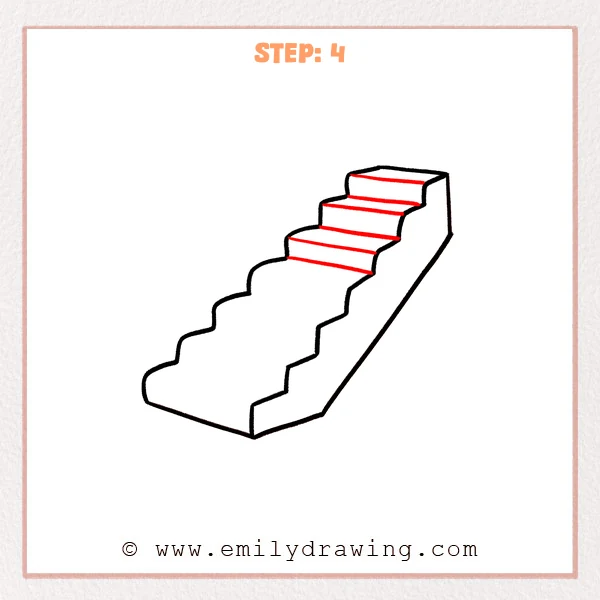
Draw several slanted horizontal lines across the upper part of the stairs. Connect the left and right step edges with each line. These lines show the flat tread of each step and make the layers clearer.
Pro Tip: Keep each tread line parallel to the top edge so the perspective feels natural.
Step 5: Complete the Front Tread Lines
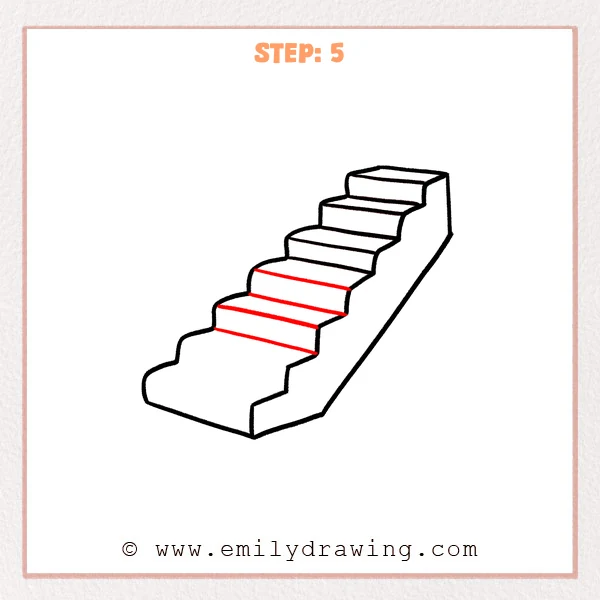
Continue drawing slanted horizontal lines across the front half of the stairs. Connect the left and right step edges carefully. Now each step has a clear tread, making the whole structure feel complete.
Pro Tip: Keep the new tread lines parallel to the upper ones so the stairs do not look tilted.
Step 6: Finish the Front Step Treads
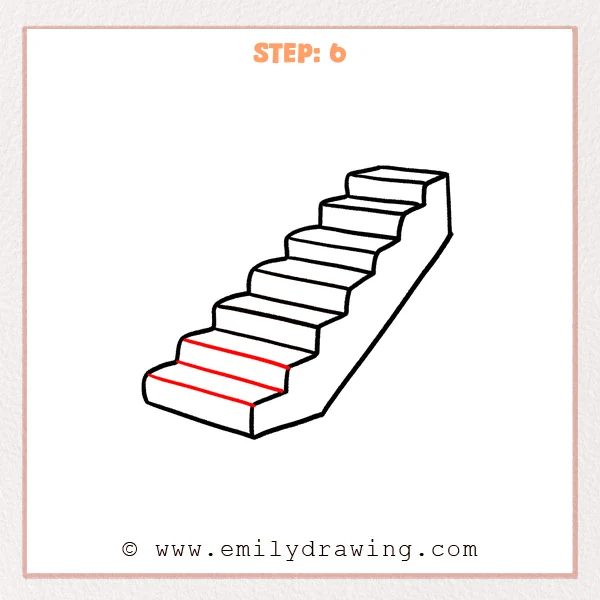
Add slanted horizontal lines across the two front steps. Let these lines reach the right edges. This makes every stair tread clearly visible from front to back.
Pro Tip: Make the front lines slightly longer to help the stairs feel closer to the viewer.
Step 7: Color in your drawing!
Fun Facts
- Stairs are made from two main parts: the flat tread and the upright riser.
- Artists often use stairs to practice perspective and depth.
- Long staircases can make a drawing feel like it leads somewhere exciting.
Pin it now, Draw later!
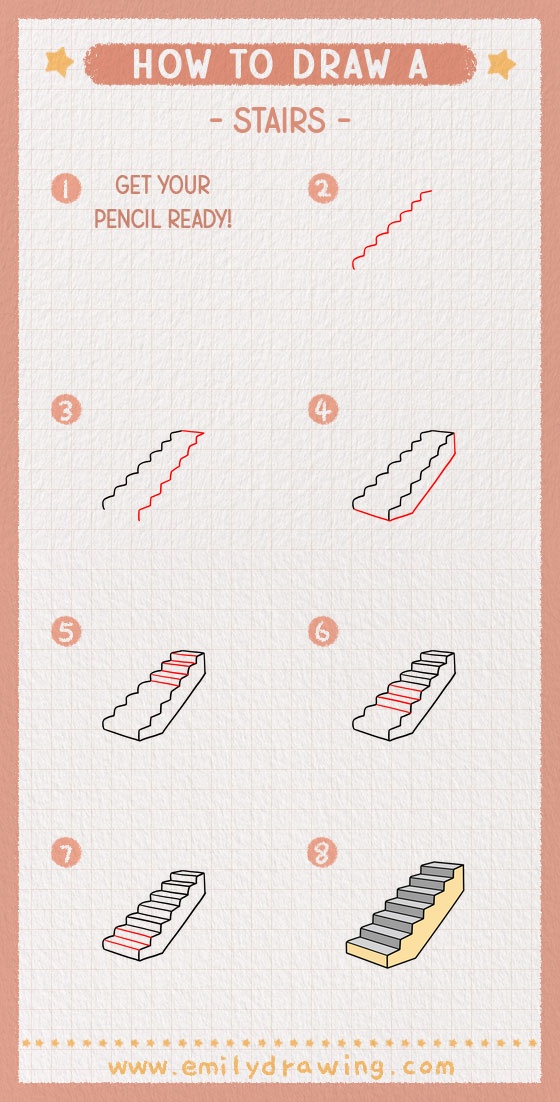
Trace your best lines with a black marker once you are happy with the shape. Erase extra pencil marks gently, then add light shading under each tread for depth. Keep practicing this step by step drawing, and try changing the stair height or angle next time.
Get the FREE Printable Drawing Guide
FREE Download Printable Stairs Drawing Tutorial
Frequently Asked Questions
Is this stairs drawing good for beginners?
Yes, this stairs drawing for beginners uses repeated lines and simple angles. It is a helpful way to learn basic perspective.
How can I make my stairs look more realistic?
Keep the tread lines parallel and make the side edges meet cleanly. A little shading on the risers can also add depth.
Can I color the stairs after drawing them?
Yes, you can use gray, brown, or any color you like. Soft shading will help the stairs look more solid.