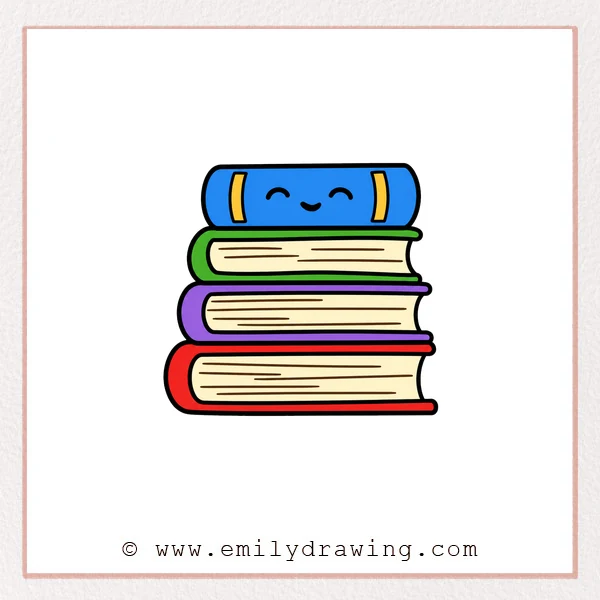
In this easy drawing tutorial, you will learn how to draw stack of books step by step.
We will build the drawing slowly, using rounded rectangles, curved edges, and simple page lines.
This drawing for beginners is friendly, neat, and fun to finish.
What You Will Need
- Pencil
- Eraser
- Black marker or pen
- Coloring tools
- Drawing paper
Here are my RECOMMENDED Art Supplies!
- Crayola Coloring Set (140 Pieces – Mega Value!)
- 24 Colored Crayon Set
- A4 Printer Paper
- Crayola Coloring Pencils
- HP Home Printer with Instant Ink!
Time needed:
20 minutes.
Step-by-Step Drawing Guide
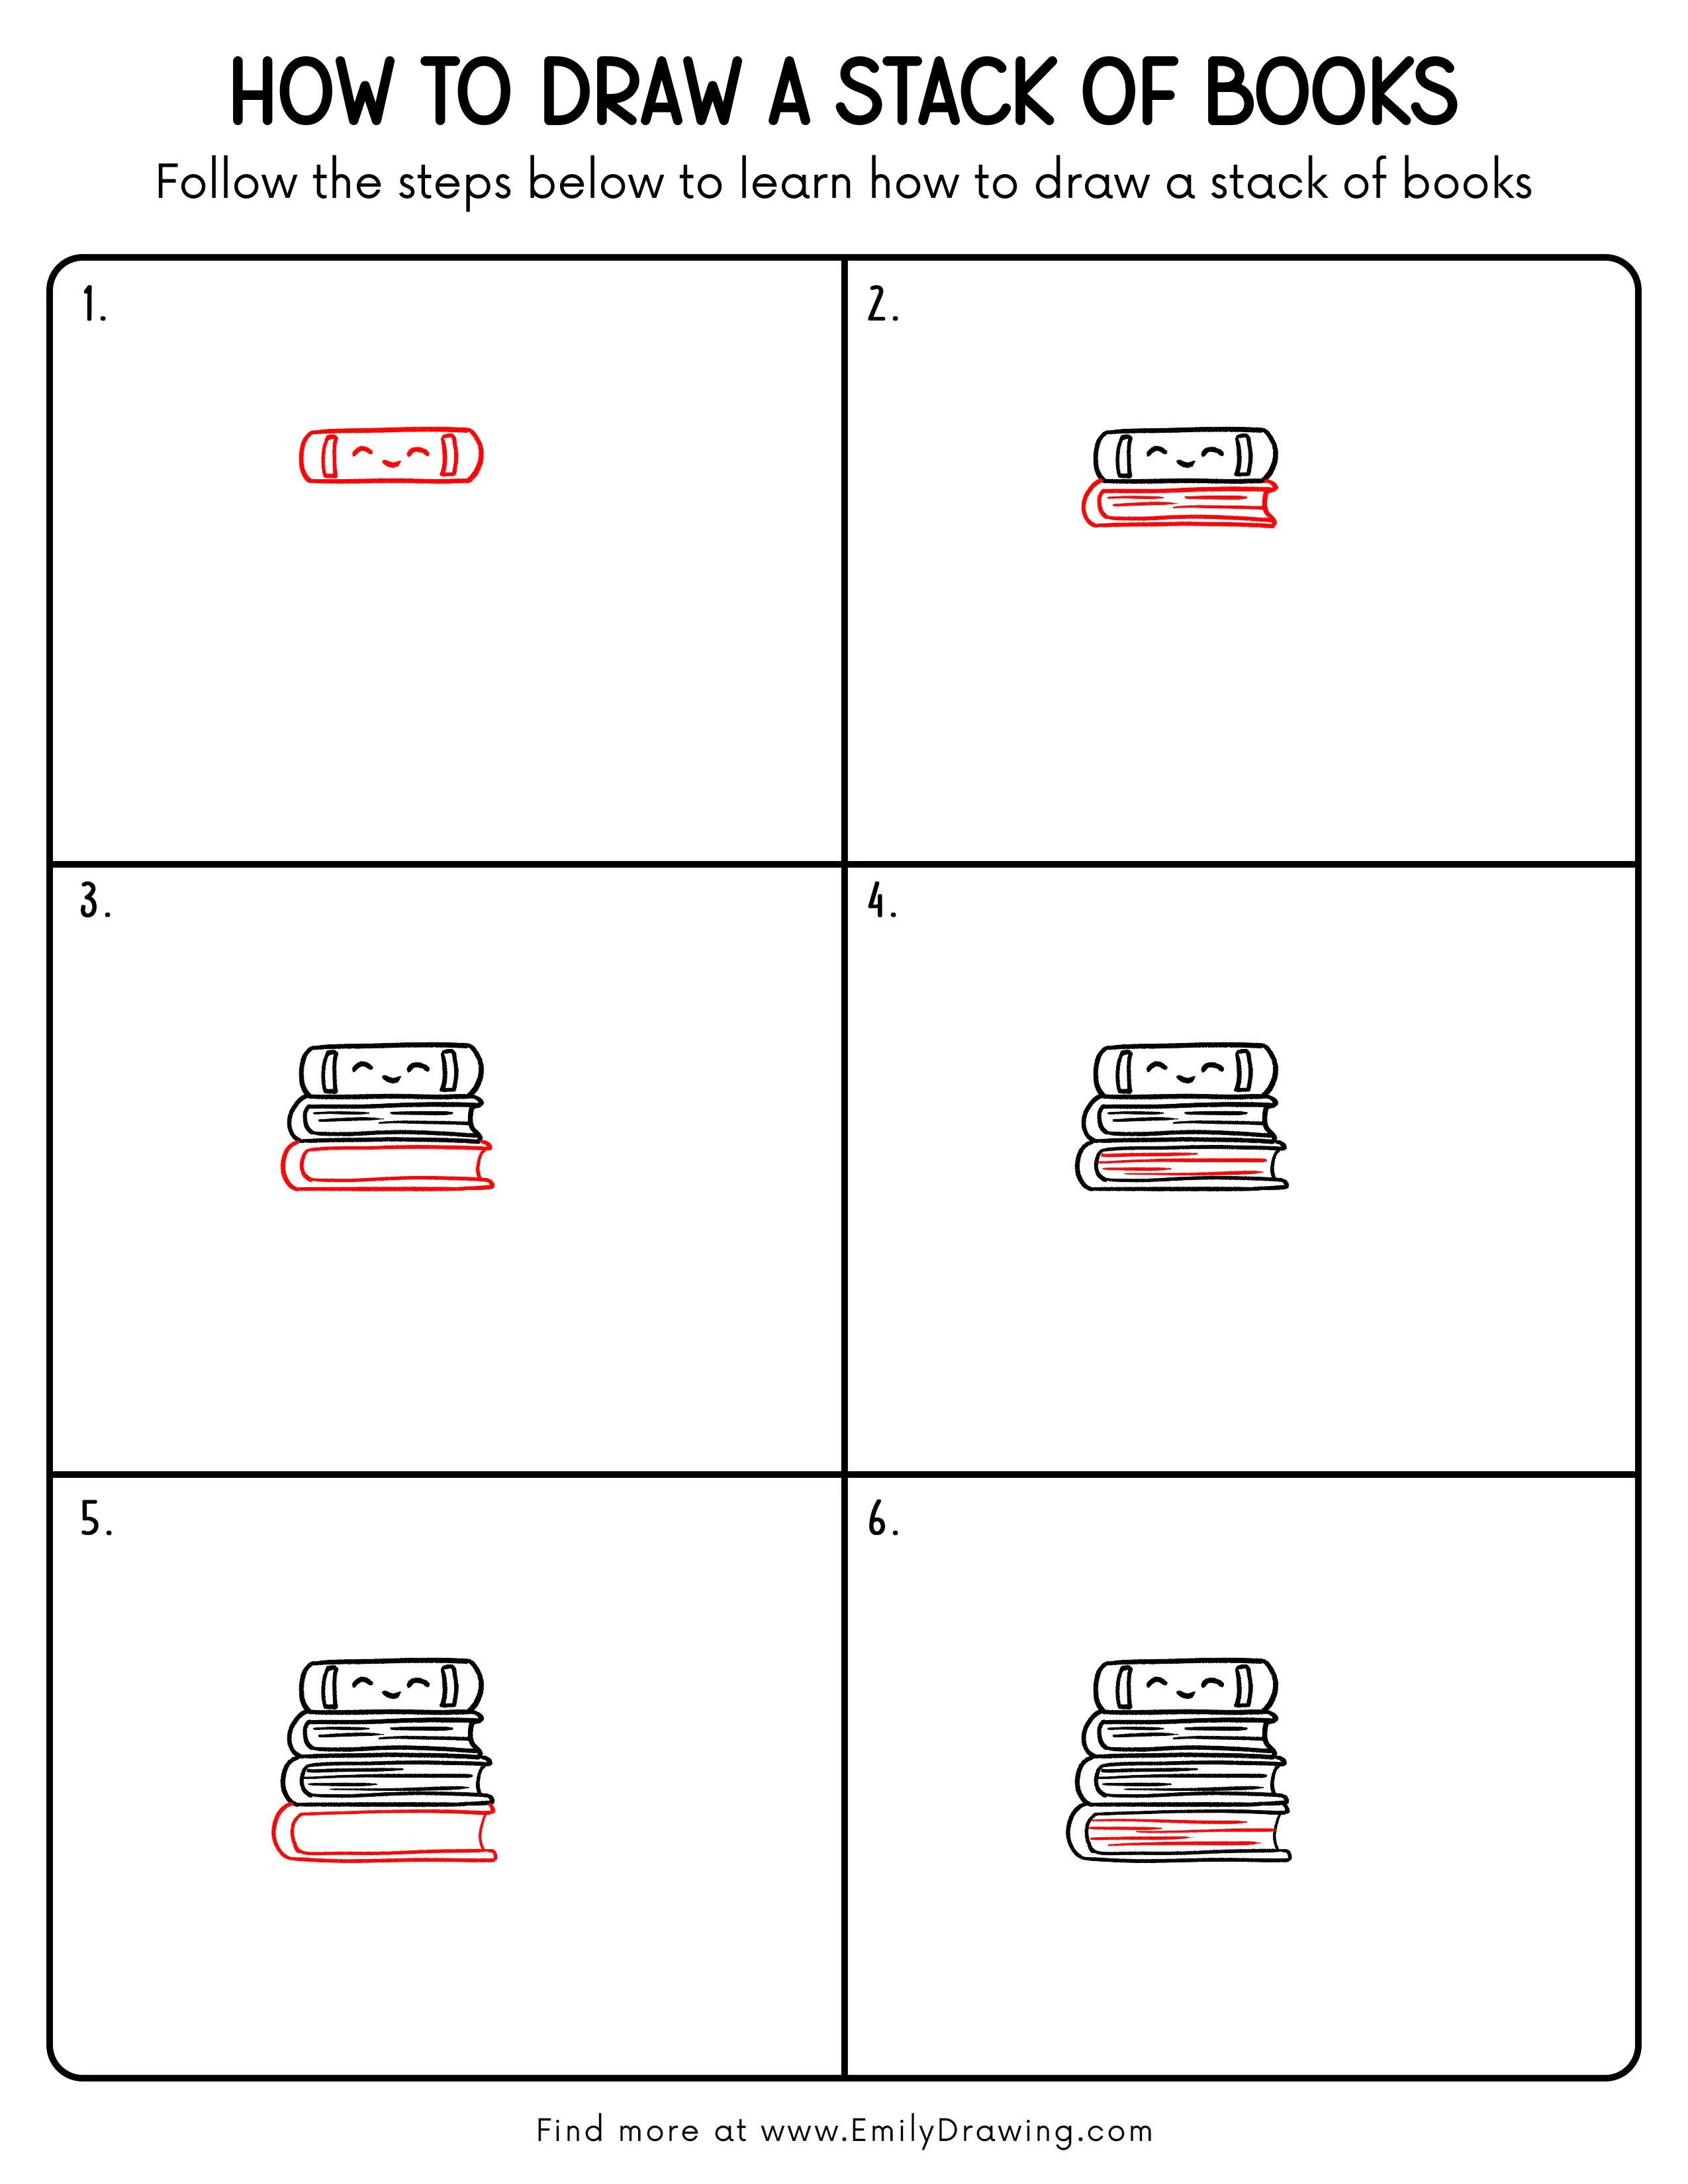
Step 1: Draw the First Book Cover
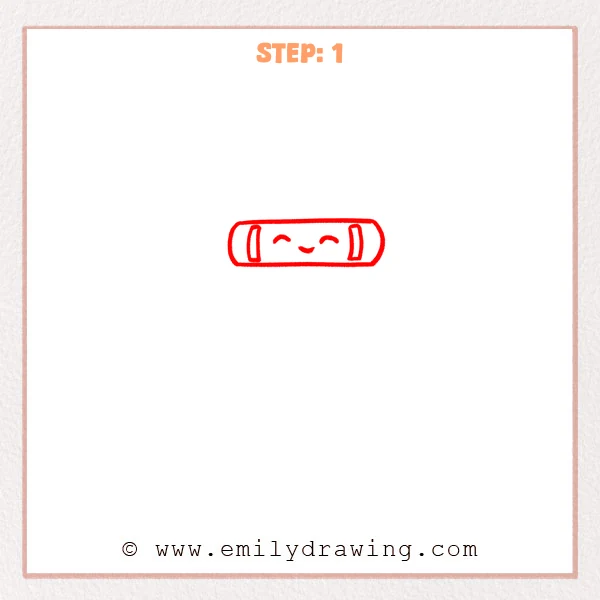
Start with a long rounded rectangle for the top book shape.
Add a short curved line on each side for the page edges, then draw a simple happy face.
Pro Tip: Keep the rectangle level so the stack of books looks neat later.
Step 2: Add the Second Book
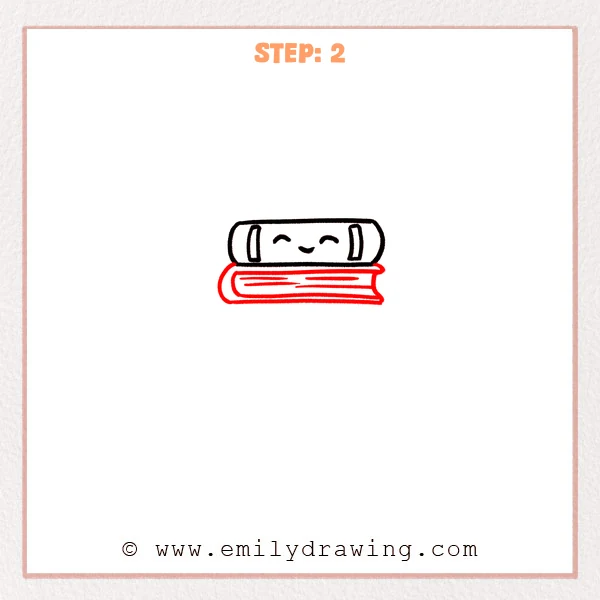
Draw a wider rounded book shape underneath the first book, letting it support the top one.
Add a few short horizontal lines across the middle for page and cover details.
Pro Tip: Make the second book slightly wider so the stack of books looks more stable.
Step 3: Add the Third Book
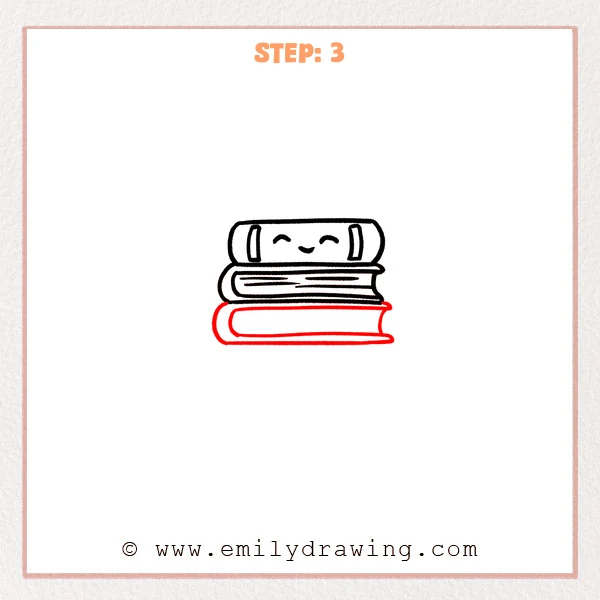
Draw a thicker book underneath the second one, letting the bottom line stretch slightly to the right.
Keep both ends rounded, and leave a curved edge line inside the book spine.
Pro Tip: Make the third book the largest so the stack of books has a steady base.
Step 4: Add Page Lines to the Third Book
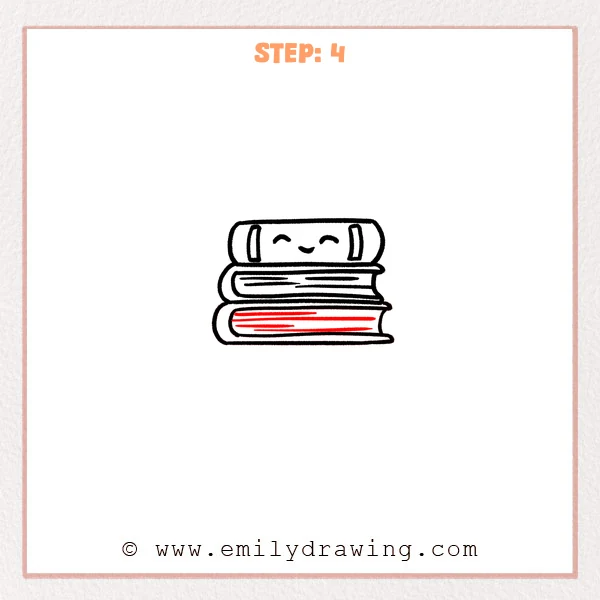
Draw several straight horizontal lines across the middle of the third book to show page layers.
Start the lines on the left and extend them rightward, but avoid touching the curved edge.
Pro Tip: Keep the page lines parallel so this book looks thicker and more solid.
Step 5: Add the Fourth Book
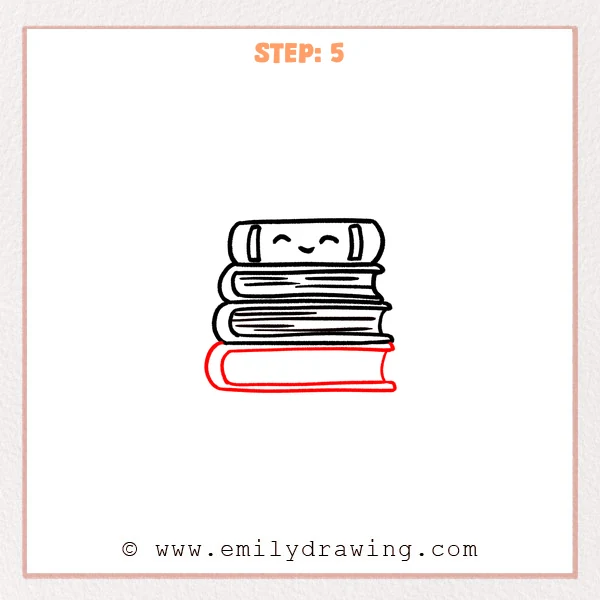
Draw a wider new book at the bottom of the stack as a steady base layer.
Keep the left end rounded, and add an inward curved edge on the right to show the page opening.
Pro Tip: Make the bottom book slightly wider than the books above for a balanced overall shape.
Step 6: Add Page Lines to the Fourth Book
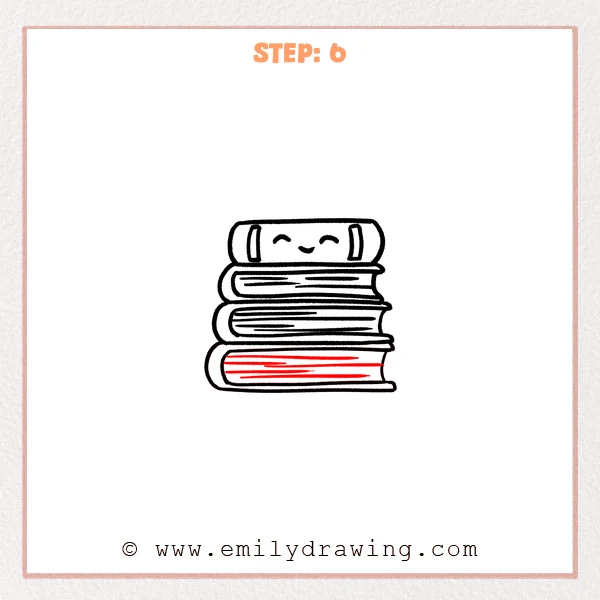
Draw several horizontal lines inside the bottom book to make the page layers clearer.
The lines can be different lengths, but keep them neatly aligned with the book shape.
Pro Tip: Do not crowd the page lines, because some open space keeps the drawing clean.
Step 7: Color in your drawing!
Fun Facts
- Books can be stacked in many ways, which makes each drawing feel unique.
- Rounded book corners can make a stack of books look soft and friendly.
- Page lines help viewers understand which parts are covers and which parts are pages.
Pin it now, Draw later!
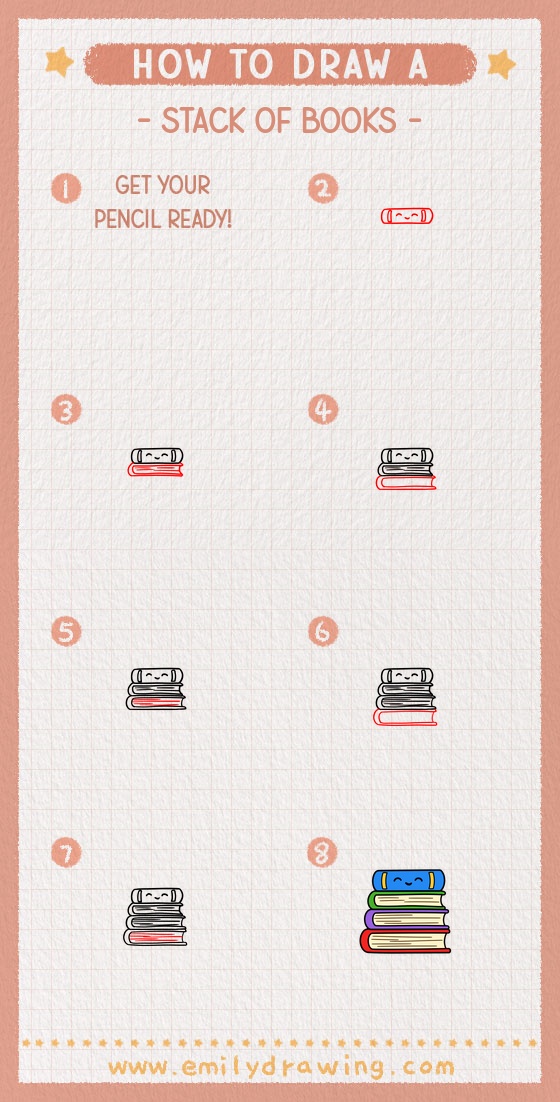
Now you know how to draw stack of books using simple shapes and gentle details.
Trace your final lines with a marker, then erase any extra pencil marks.
Add colors to each book cover, and take your time making the stack cheerful.
Keep practicing this step by step drawing, and try adding bookmarks or tiny labels next time.
Get the FREE Printable Drawing Guide
FREE Download Printable Stack Of Books Drawing Tutorial
Frequently Asked Questions
Is this stack of books drawing good for beginners?
Yes, this is a drawing for beginners because it uses simple rounded shapes and short lines.
How can I make my stack of books look more balanced?
Keep the bottom books slightly wider than the top book, and align the centers carefully.
Can I color each book differently?
Yes, using different colors makes the stack of books more playful and clear.