
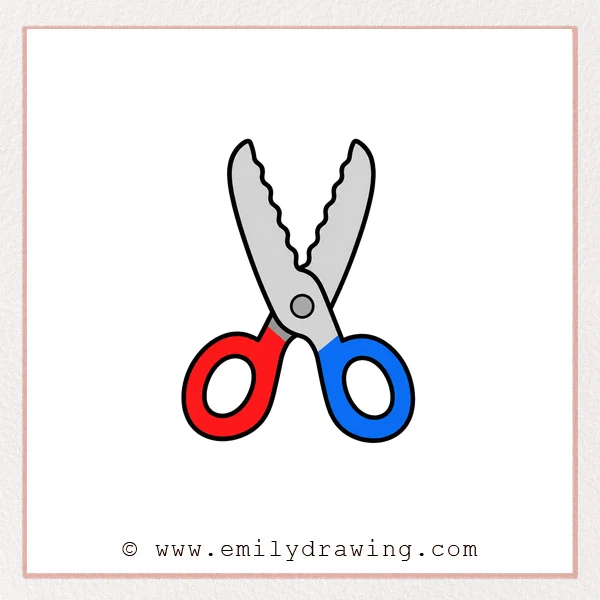
Learning how to draw scissors is easier when you build the shape slowly.
This step by step drawing guide uses simple curves, loops, and connecting lines.
Take your time, and focus on one new part at each step.
What You Will Need
- Pencil
- Eraser
- Black marker or pen
- Drawing paper
- Colored pencils or crayons
Here are my RECOMMENDED Art Supplies!
- Crayola Coloring Set (140 Pieces – Mega Value!)
- 24 Colored Crayon Set
- A4 Printer Paper
- Crayola Coloring Pencils
- HP Home Printer with Instant Ink!
Time needed:
18 minutes.
Step-by-Step Drawing Guide
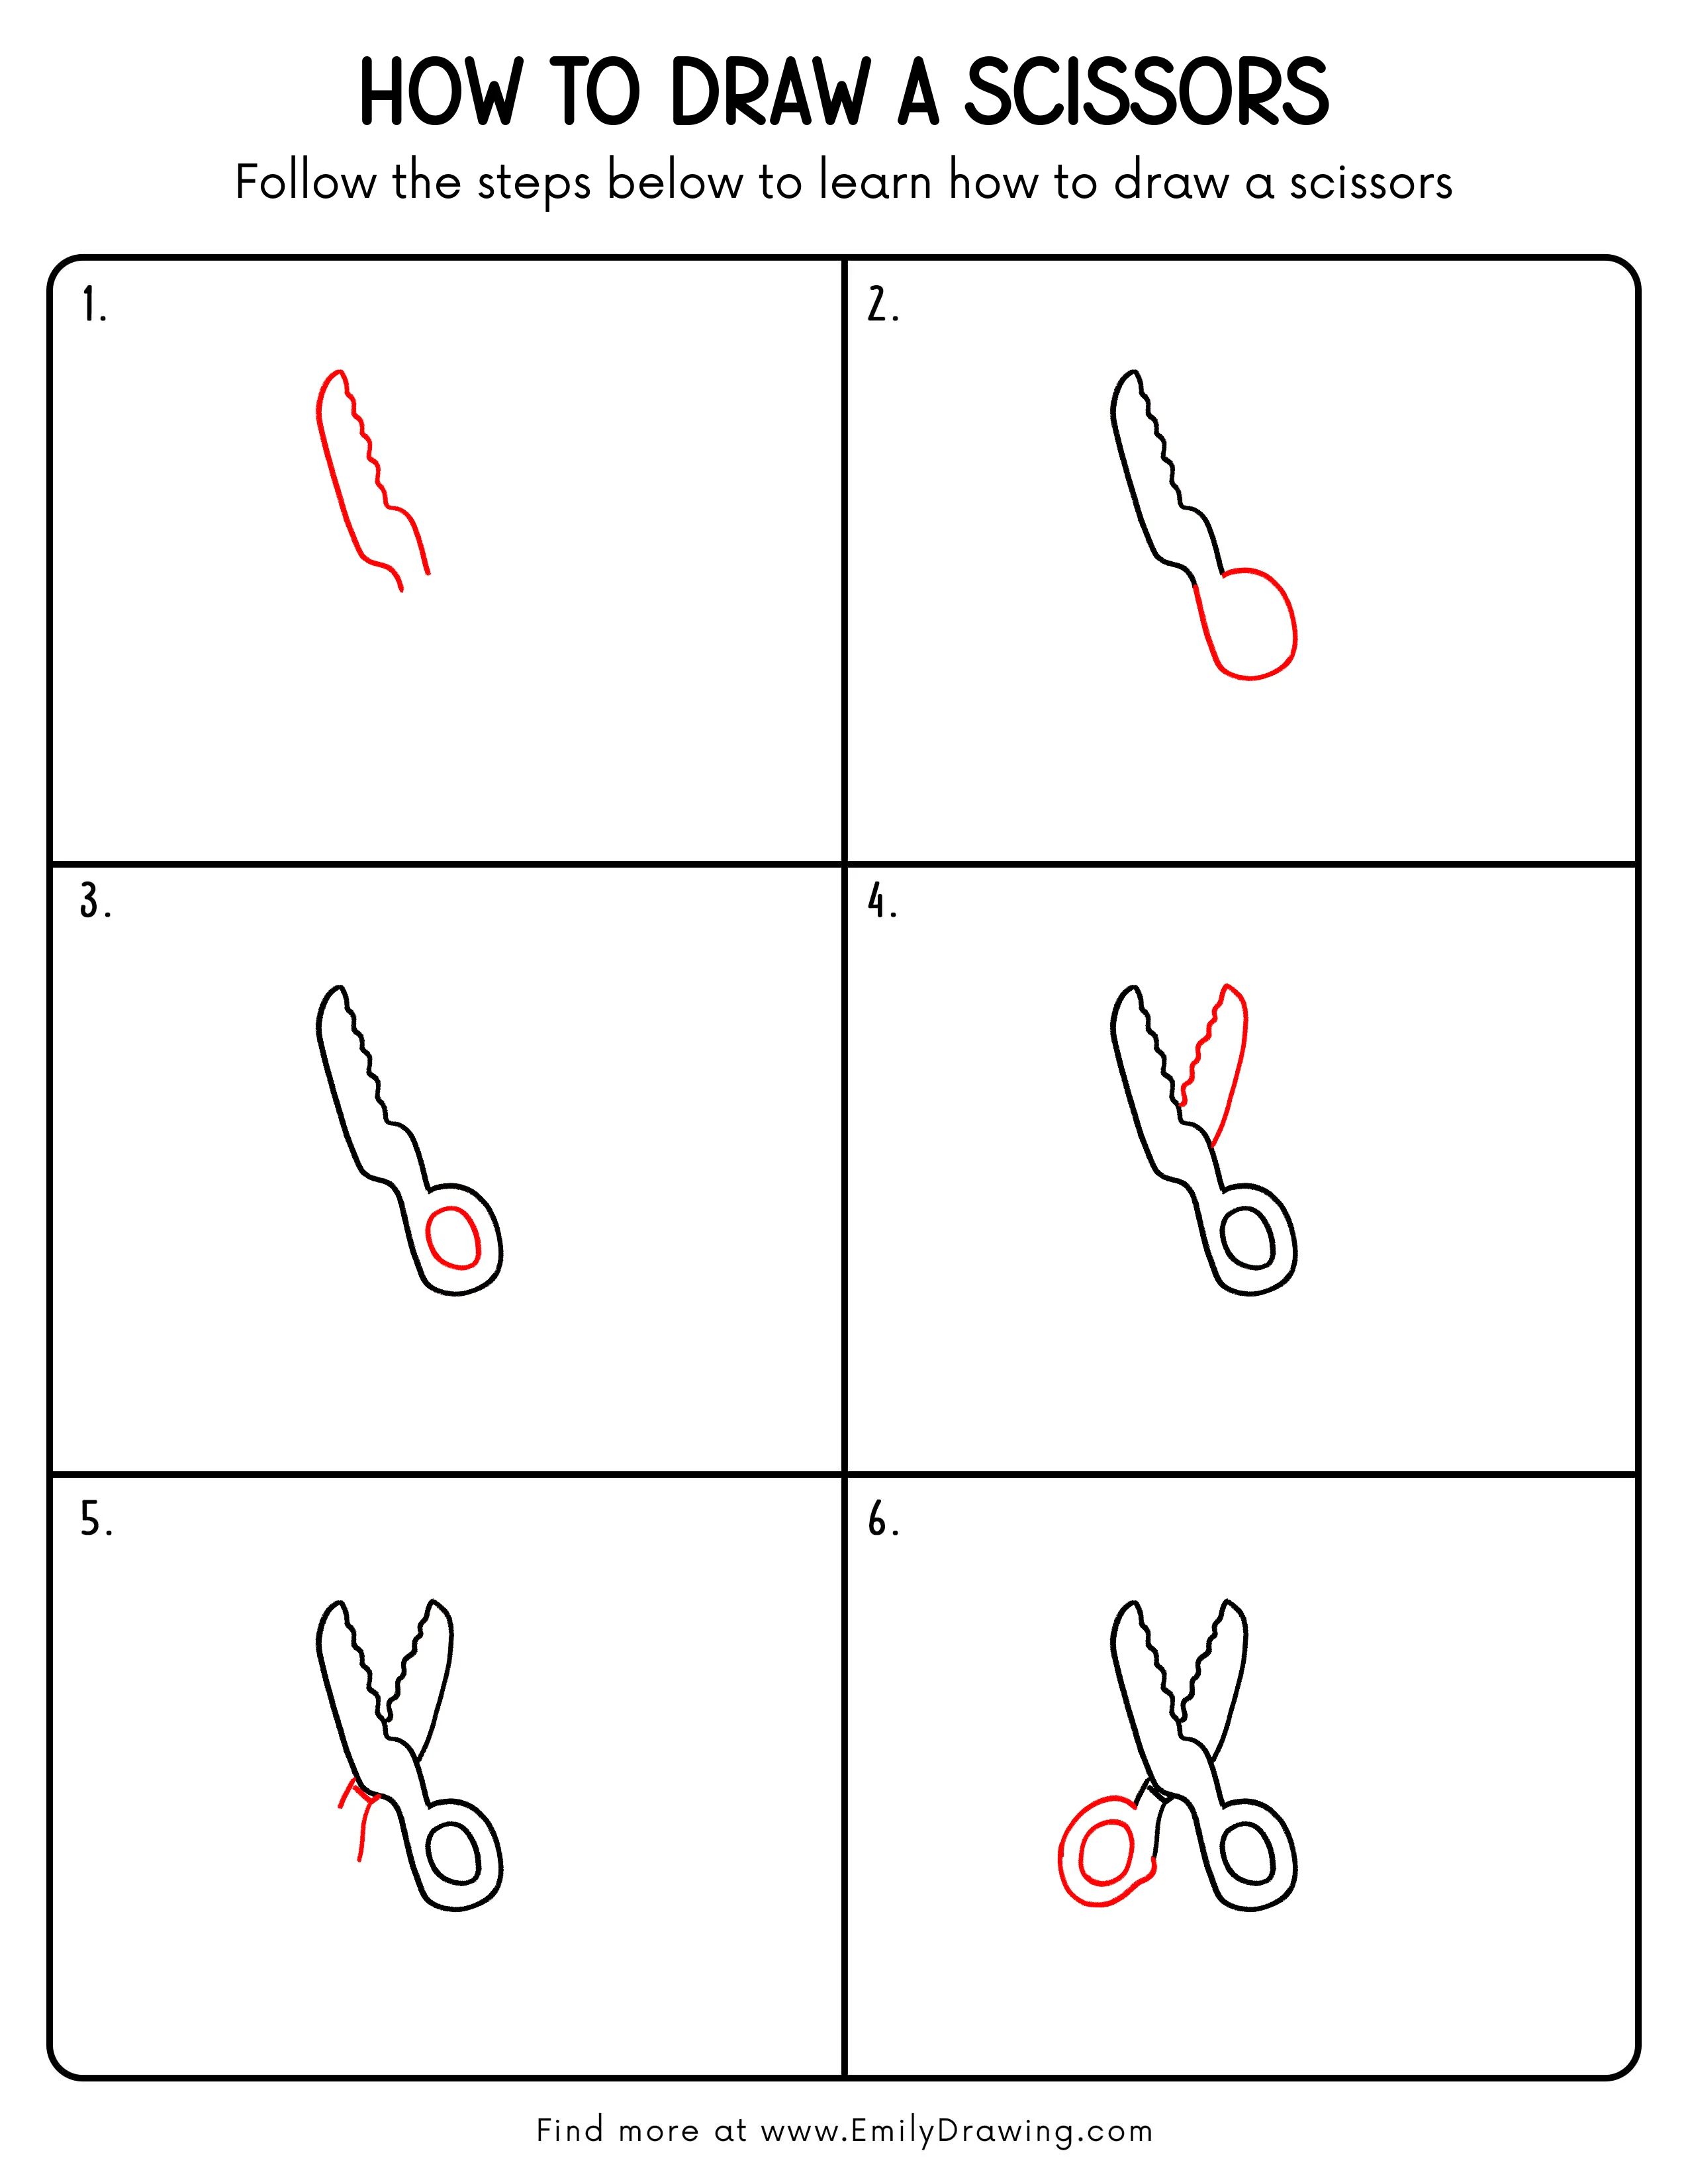
Step 1: Draw the Outer Scissors Outline
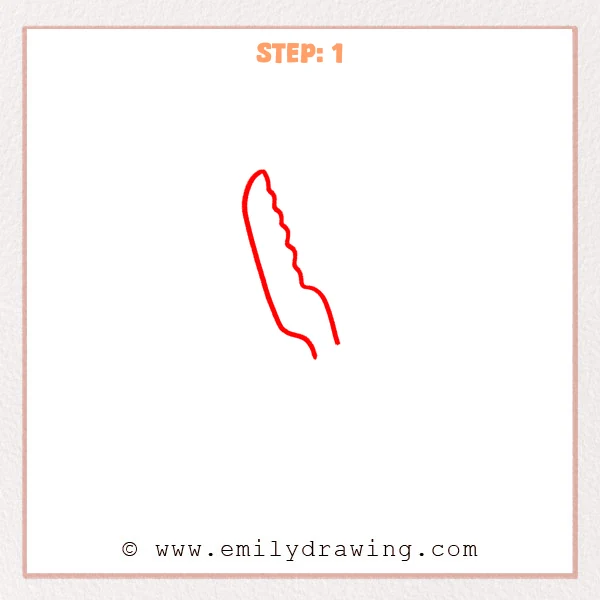
Start near the top with one long curved line to shape one outside edge of the scissors.
Add a few small bends along the right side to suggest the handle and blade connection.
Keep this first shape open so the next parts can attach easily.
Pro Tip: Keep the line gentle and flowing, focusing first on the height and curve direction.
Step 2: Add the Lower Handle Loop
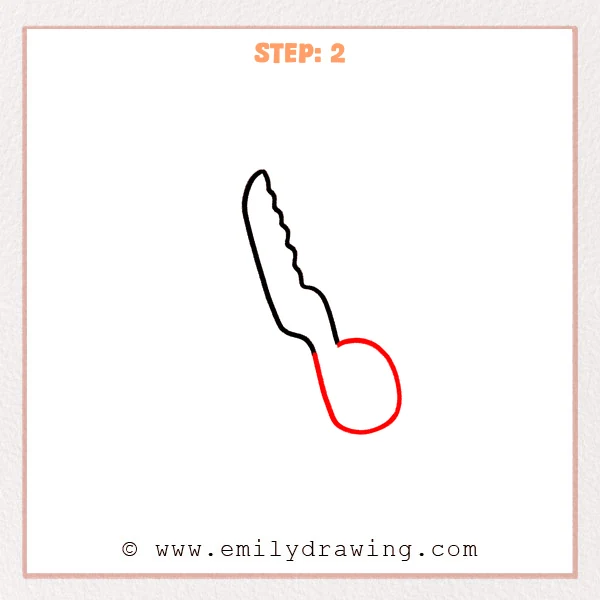
Draw a large rounded handle loop from the lower connection point, curving outward to the right.
Let the upper-left end meet the earlier line so the scissors handle begins to take shape.
This rounded loop will become one finger hole area.
Pro Tip: Make the handle loop fairly wide so it is easier to add the inner opening later.
Step 3: Draw the Inner Handle Opening
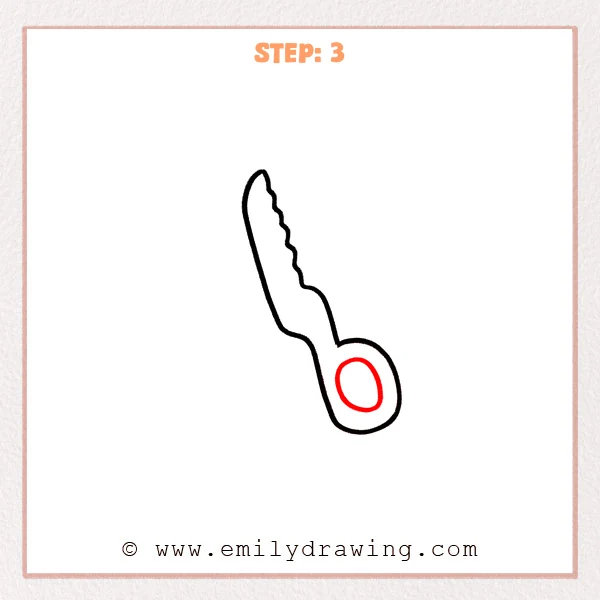
Draw a smaller rounded opening inside the lower handle loop.
Let the inner opening follow the outer loop’s direction and sit near the center of the handle.
This creates the first clear finger hole.
Pro Tip: Leave an even border around the inner opening so the handle looks neat.
Step 4: Add the Other Blade
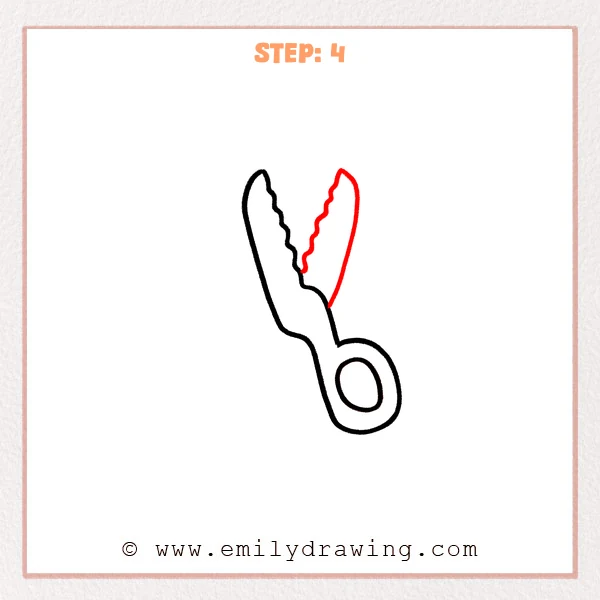
From the middle connection area, draw the second blade opening upward to the right.
Keep the outer edge long and curved, and add small bends along the inner edge.
This helps show the crossed shape of the scissors.
Pro Tip: Leave a clear space between the two blades so the scissors are easier to recognize.
Step 5: Draw the Pivot Support Lines
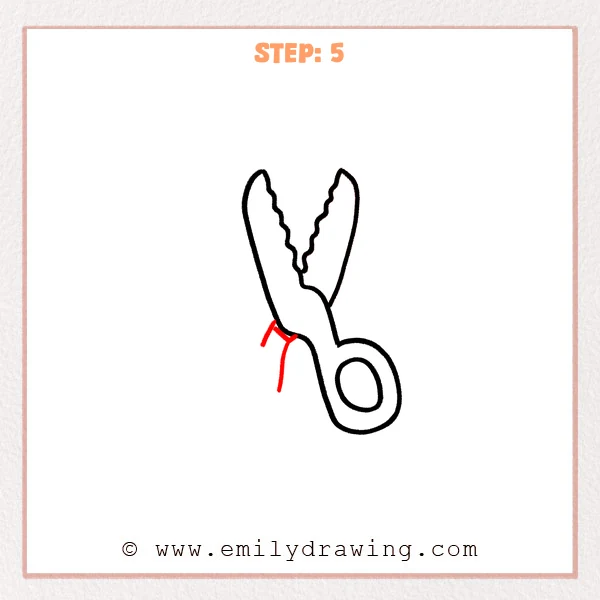
Below the crossing blades, draw a few short lines spreading outward.
These lines connect the blades to the handle area and make the middle structure clearer.
Keep them simple, like small guide supports around the pivot.
Pro Tip: Keep the short lines close to the same crossing point so the scissors feel balanced.
Step 6: Complete the Left Handle Loop
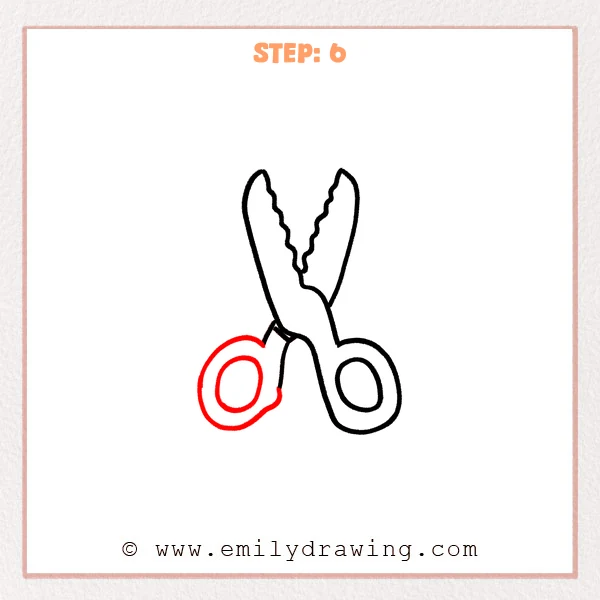
Draw the second large rounded handle loop on the lower left, curving outward.
Add a smaller rounded opening inside it so both scissors handles look complete.
Now the scissors have two blades, two handles, and a clear center connection.
Pro Tip: The two handles can be similar in size, but each should turn naturally from its connection point.
Step 7: Color in your drawing!
Fun Facts
Scissors usually work with two blades that cross at a central pivot.
The handles help your fingers open and close the blades smoothly.
Many scissors have slightly different handle shapes for comfort and control.
Pin it now, Draw later!
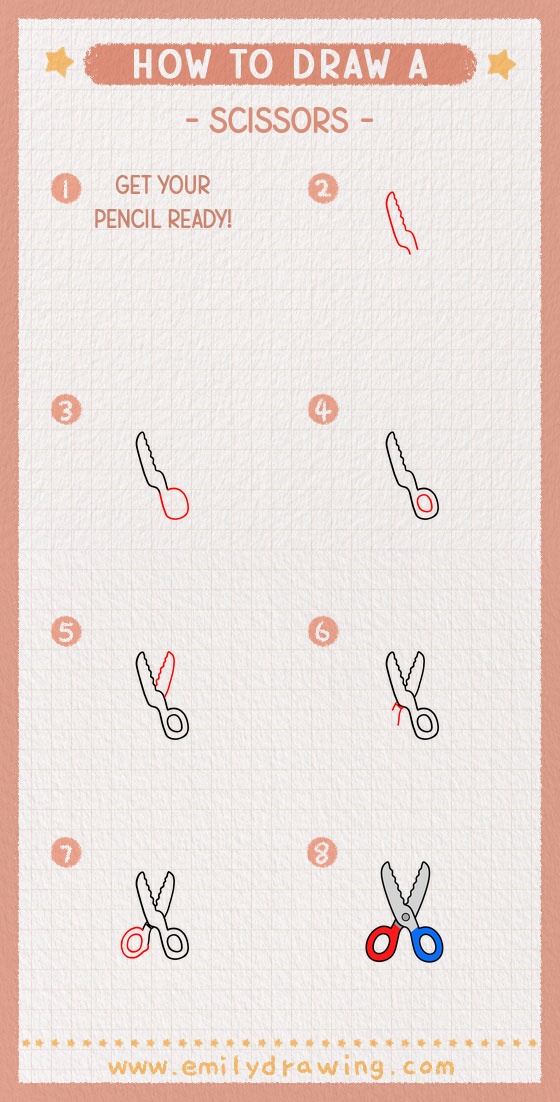
Trace your best lines with a black marker, then erase any extra pencil marks.
You can color the handles bright red, blue, or yellow for a cheerful look.
Practice this easy drawing tutorial again to make your scissors cleaner each time.
Try drawing a pencil or paper beside your scissors to create a small art-supplies scene.
Get the FREE Printable Drawing Guide
FREE Download Printable Scissors Drawing Tutorial
Frequently Asked Questions
Is this scissors drawing for beginners?
Yes, this drawing for beginners uses simple curved lines and rounded handle shapes.
How can I make the scissors look more realistic?
Make the blades thinner, sharpen the tips, and keep the center pivot neat.
What should I do if the handles look uneven?
Lightly redraw the outer loops and compare the space around each inner opening.



