Learn how to draw a haunted house with a pointed roof and a friendly ghost. This drawing for beginners combines uneven building shapes, cobwebs, and a little fence.
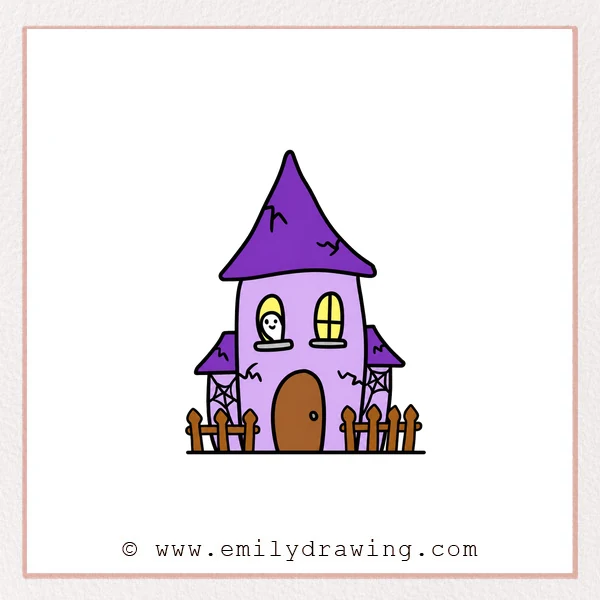
This easy drawing tutorial breaks the shapes into six manageable stages. Follow the step by step drawing at your own pace.
What You Will Need
- Drawing paper
- A pencil and eraser
- Colored pencils or crayons, if desired
Here are my RECOMMENDED Art Supplies!
- Crayola Coloring Set (140 Pieces – Mega Value!)
- 24 Colored Crayon Set
- A4 Printer Paper
- Crayola Coloring Pencils
- HP Home Printer with Instant Ink!
Time needed:
27 minutes.
Step-by-Step Drawing Guide
Step 1: Draw the Tall Roof
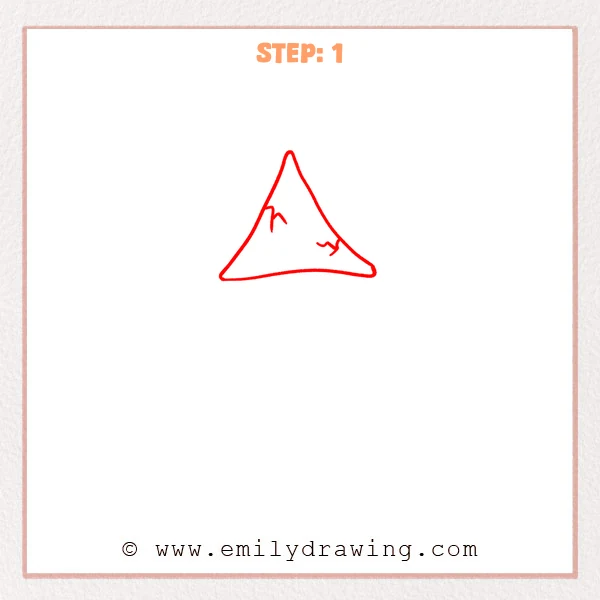
Draw a tall triangular roof with gently inward-curving sides and a wavy base. Add two short branching cracks near its sloping edges.
Pro Tip: Place the roof high enough to leave room for tall walls.
Step 2: Add Walls and Upper Windows
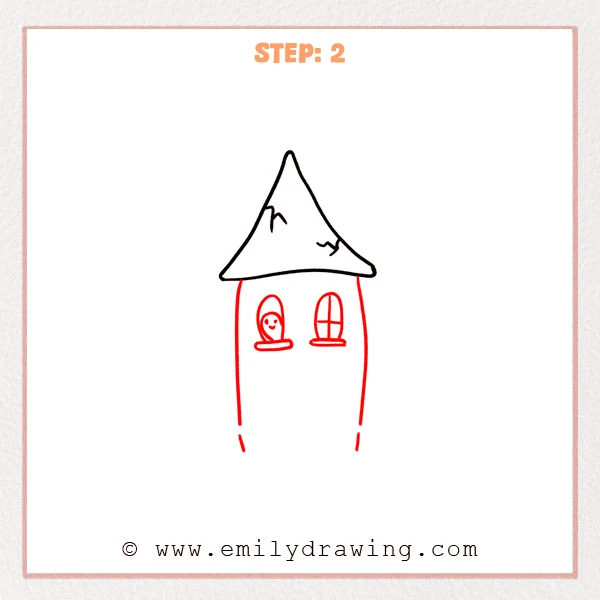
Extend two slightly bowed walls beneath the roof, leaving small lower gaps. Add two oval windows with sills, a ghost face left, and crossbars right.
Pro Tip: Keep the window sills at roughly the same height.
Step 3: Draw the Door and Wall Cracks
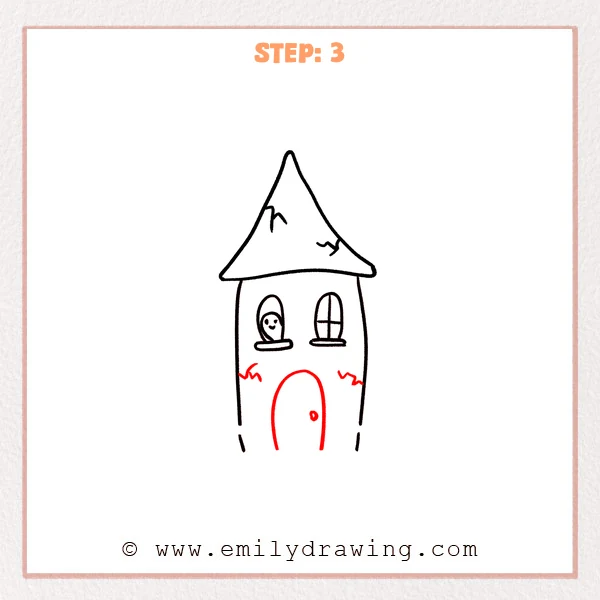
Draw a tall arched door with a small round knob. Add short zigzag cracks coming inward from both wall edges.
Pro Tip: Center the door below the gap between the windows.
Step 4: Build the Left Wing
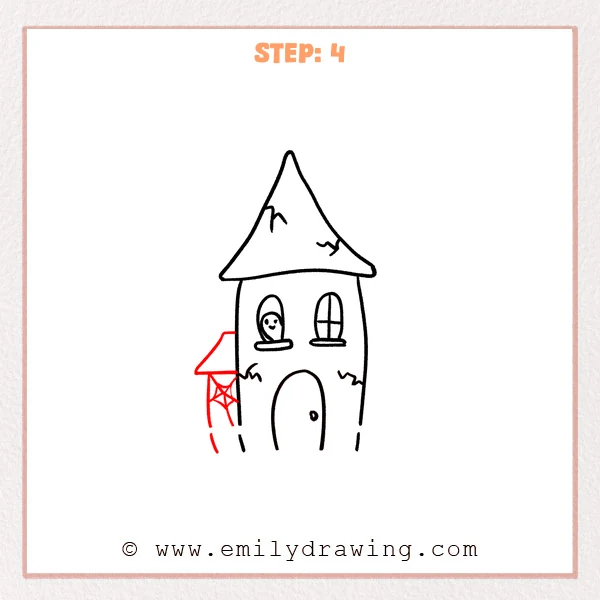
Draw a sloping side roof and a narrow wall on the left. Add crossing web strands beneath the roof, joining them with inward-curved lines.
Pro Tip: Keep the side wing shorter than the main building.
Step 5: Build the Right Wing
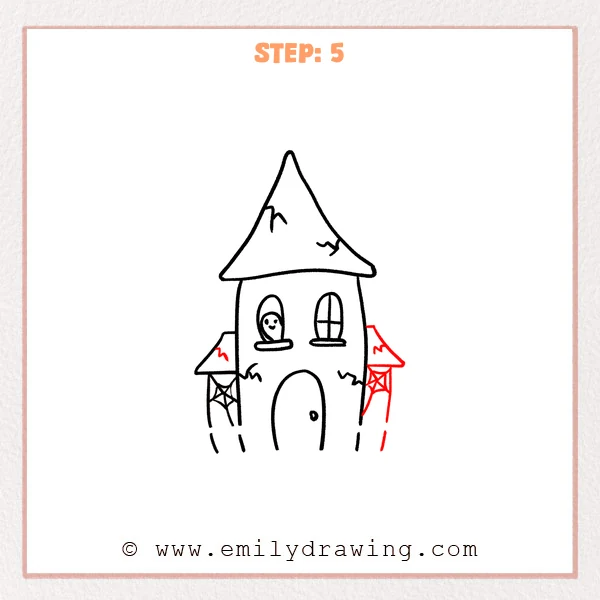
Add a matching sloping roof and narrow wall on the right. Draw its cobweb, then add one short crack to each side roof.
Pro Tip: Use curved connecting lines to make the webs look delicate.
Step 6: Finish the Front Fence
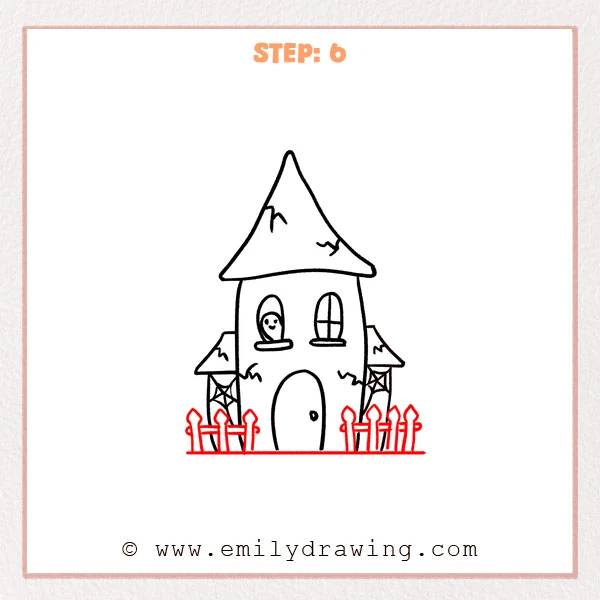
Draw a horizontal ground line beneath the house and doorway. Add pointed fence posts and paired rails on both sides, leaving the entrance open.
Pro Tip: Stop the fence on either side of the door.
Step 7: Color in your drawing!
Fun Facts
- The haunted house’s curved walls and uneven roofs create a playful crooked silhouette.
- The small ghost makes the haunted house feel friendly despite its cracks and cobwebs.
Pin it now, Draw later!
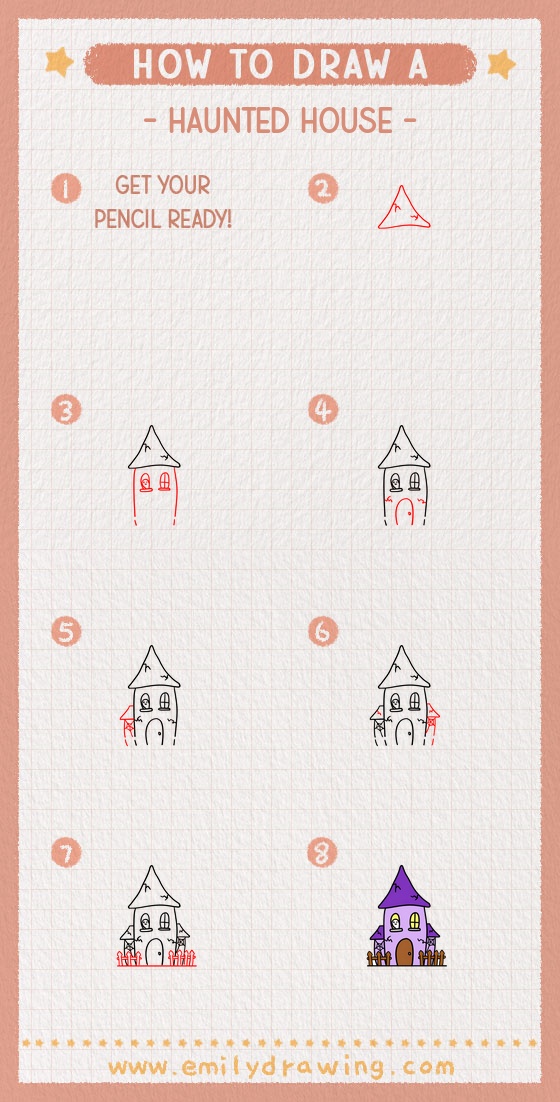
Your haunted house now has a ghost, cracked roofs, cobwebs, and a pointed fence. Try dark walls with bright windows for a nighttime look. Draw another haunted house and invent a different friendly window visitor.
Get the FREE Printable Drawing Guide
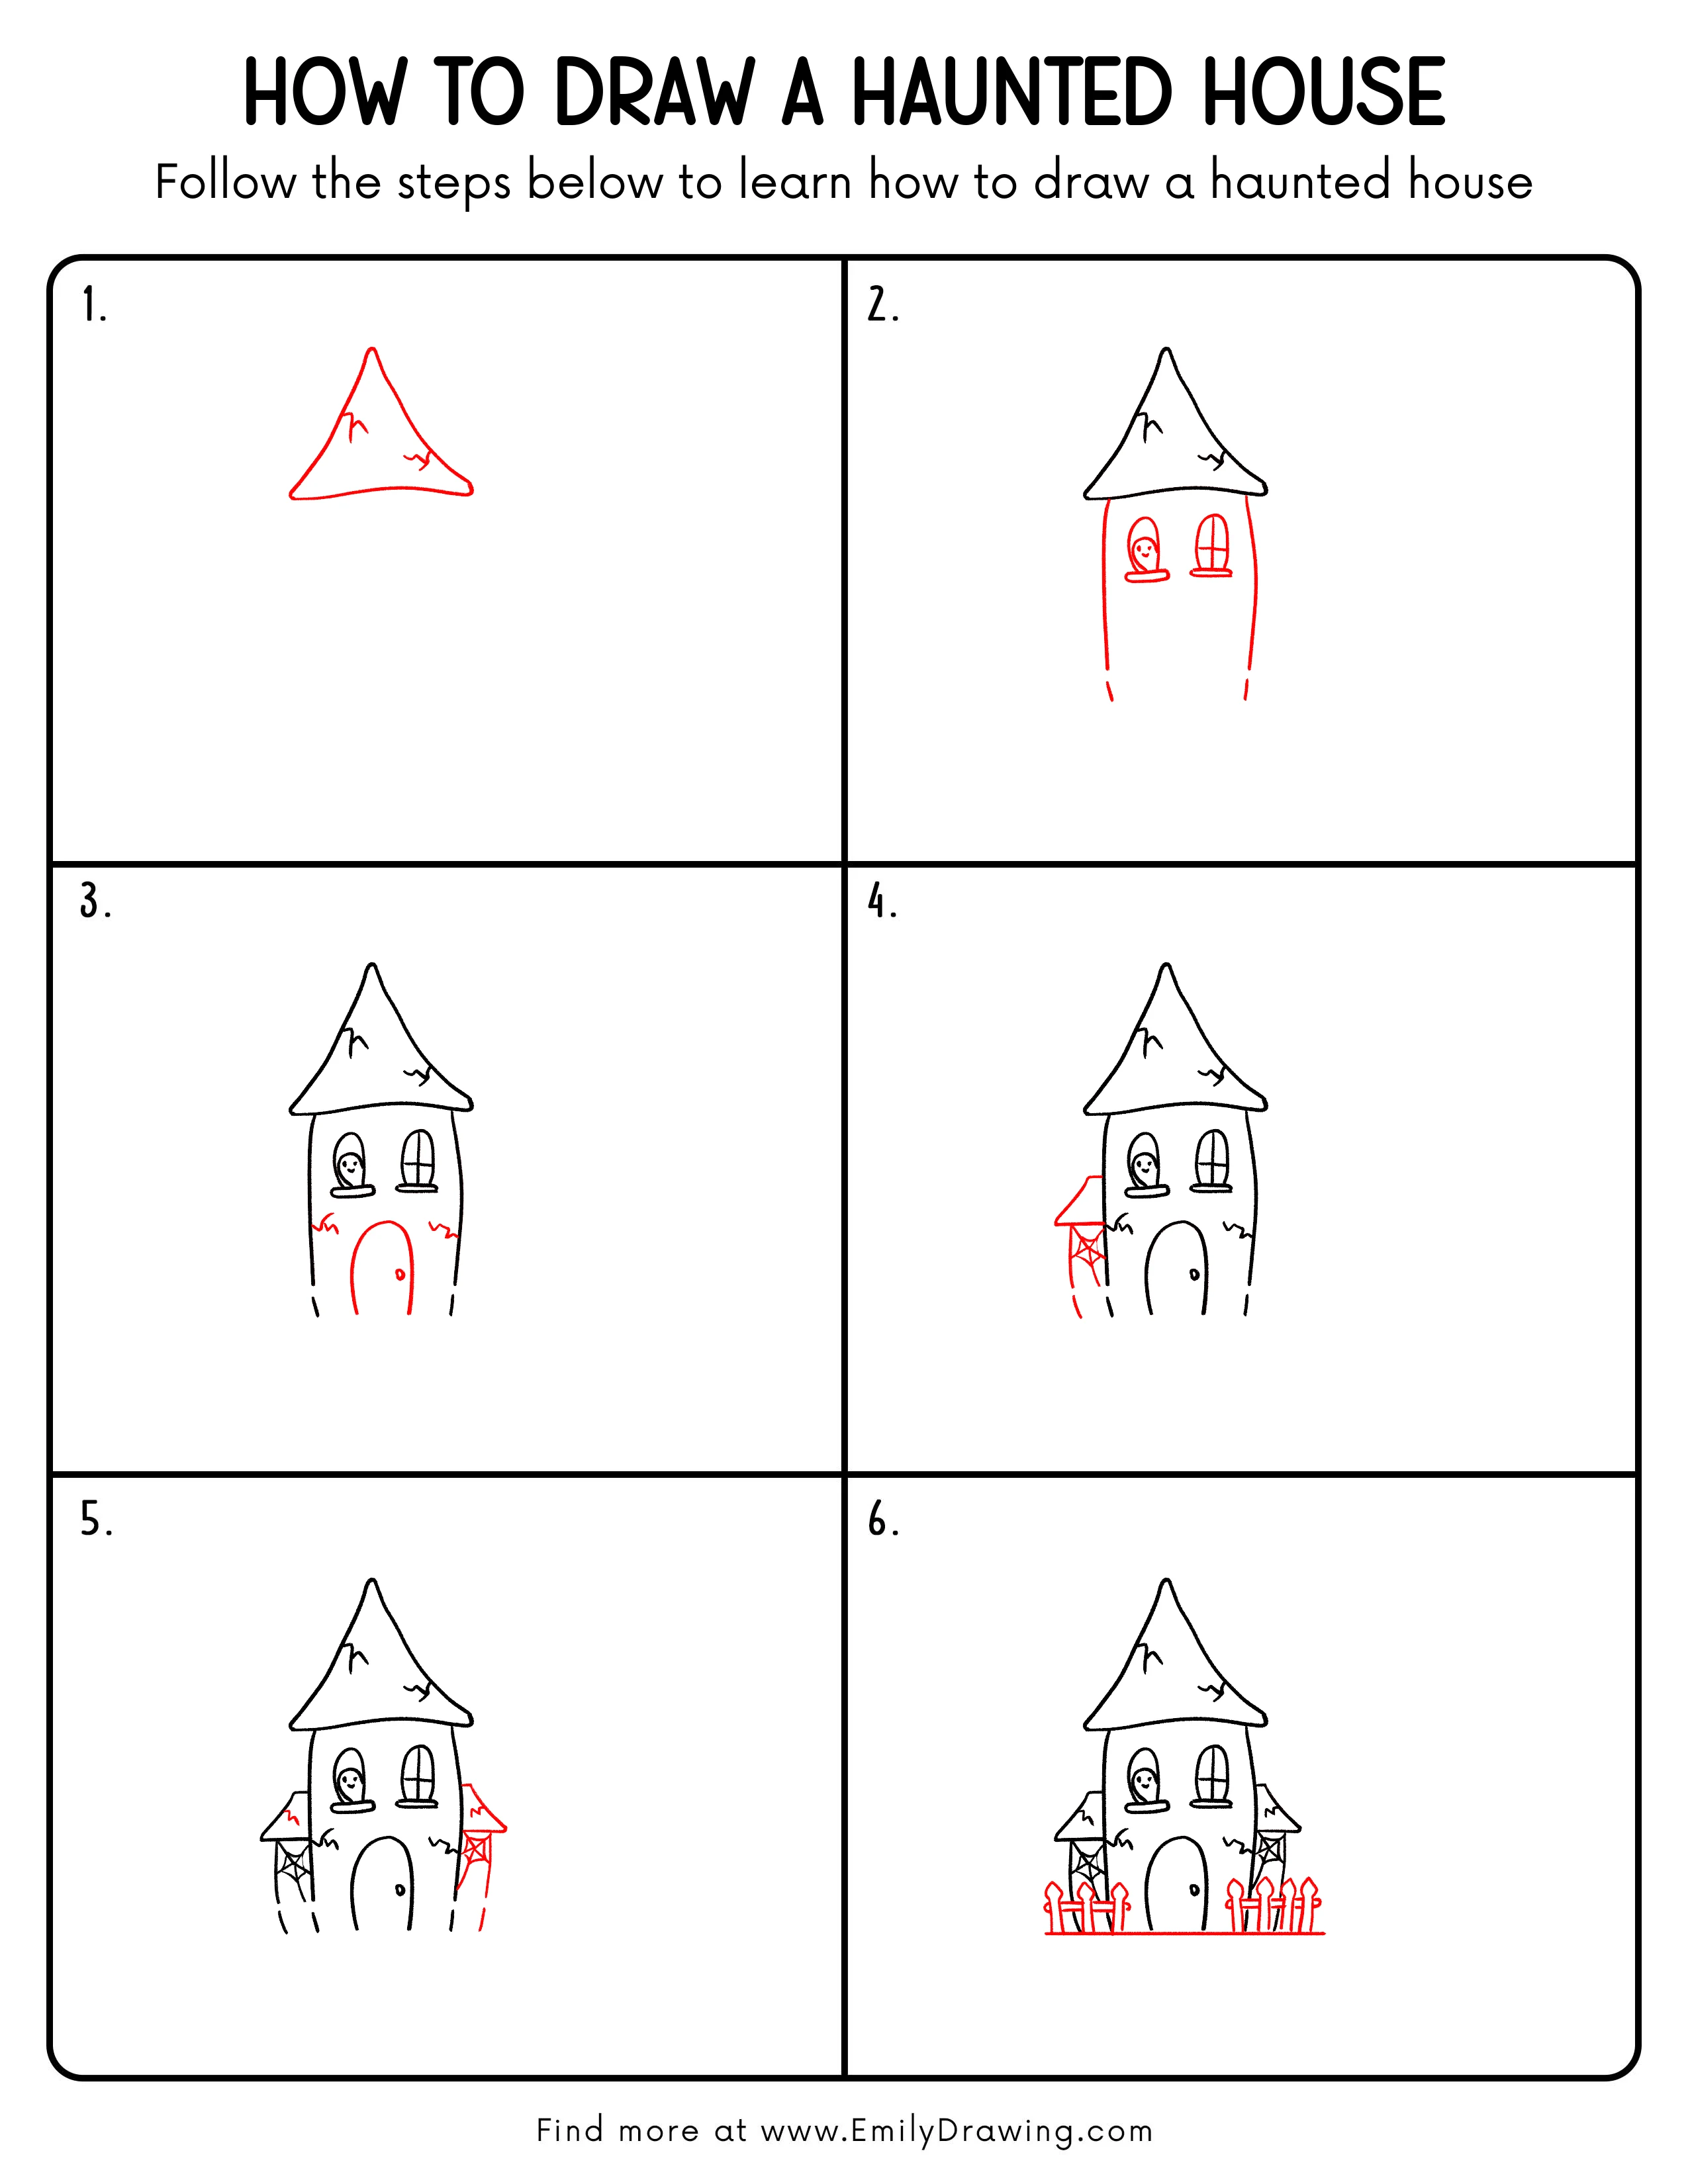
FREE Download Printable Haunted House Drawing Tutorial
Frequently Asked Questions
Do the haunted house walls need to be straight?
Slightly bowed walls suit this design and add to its crooked appearance.
How do I keep the haunted house cobwebs simple?
Draw a few crossing strands first, then connect their neighboring arms with short inward curves.