
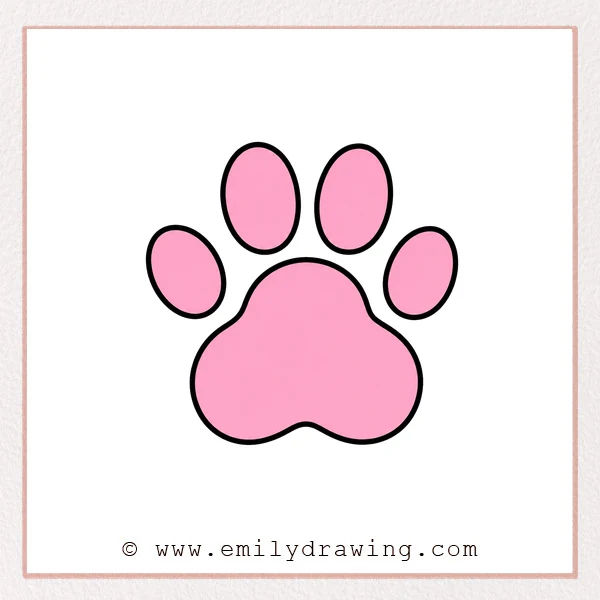
Learning how to draw paw print can be simple and fun for beginners. This easy drawing tutorial uses soft ovals and rounded curves to build the shape slowly. Take your time, and focus on one new part at each step.
What You Will Need
- A pencil or drawing pen
- A sheet of paper
- An eraser
- Colored pencils or markers, if you want to add color
Here are my RECOMMENDED Art Supplies!
- Crayola Coloring Set (140 Pieces – Mega Value!)
- 24 Colored Crayon Set
- A4 Printer Paper
- Crayola Coloring Pencils
- HP Home Printer with Instant Ink!
Time needed:
28 minutes.
Step-by-Step Drawing Guide
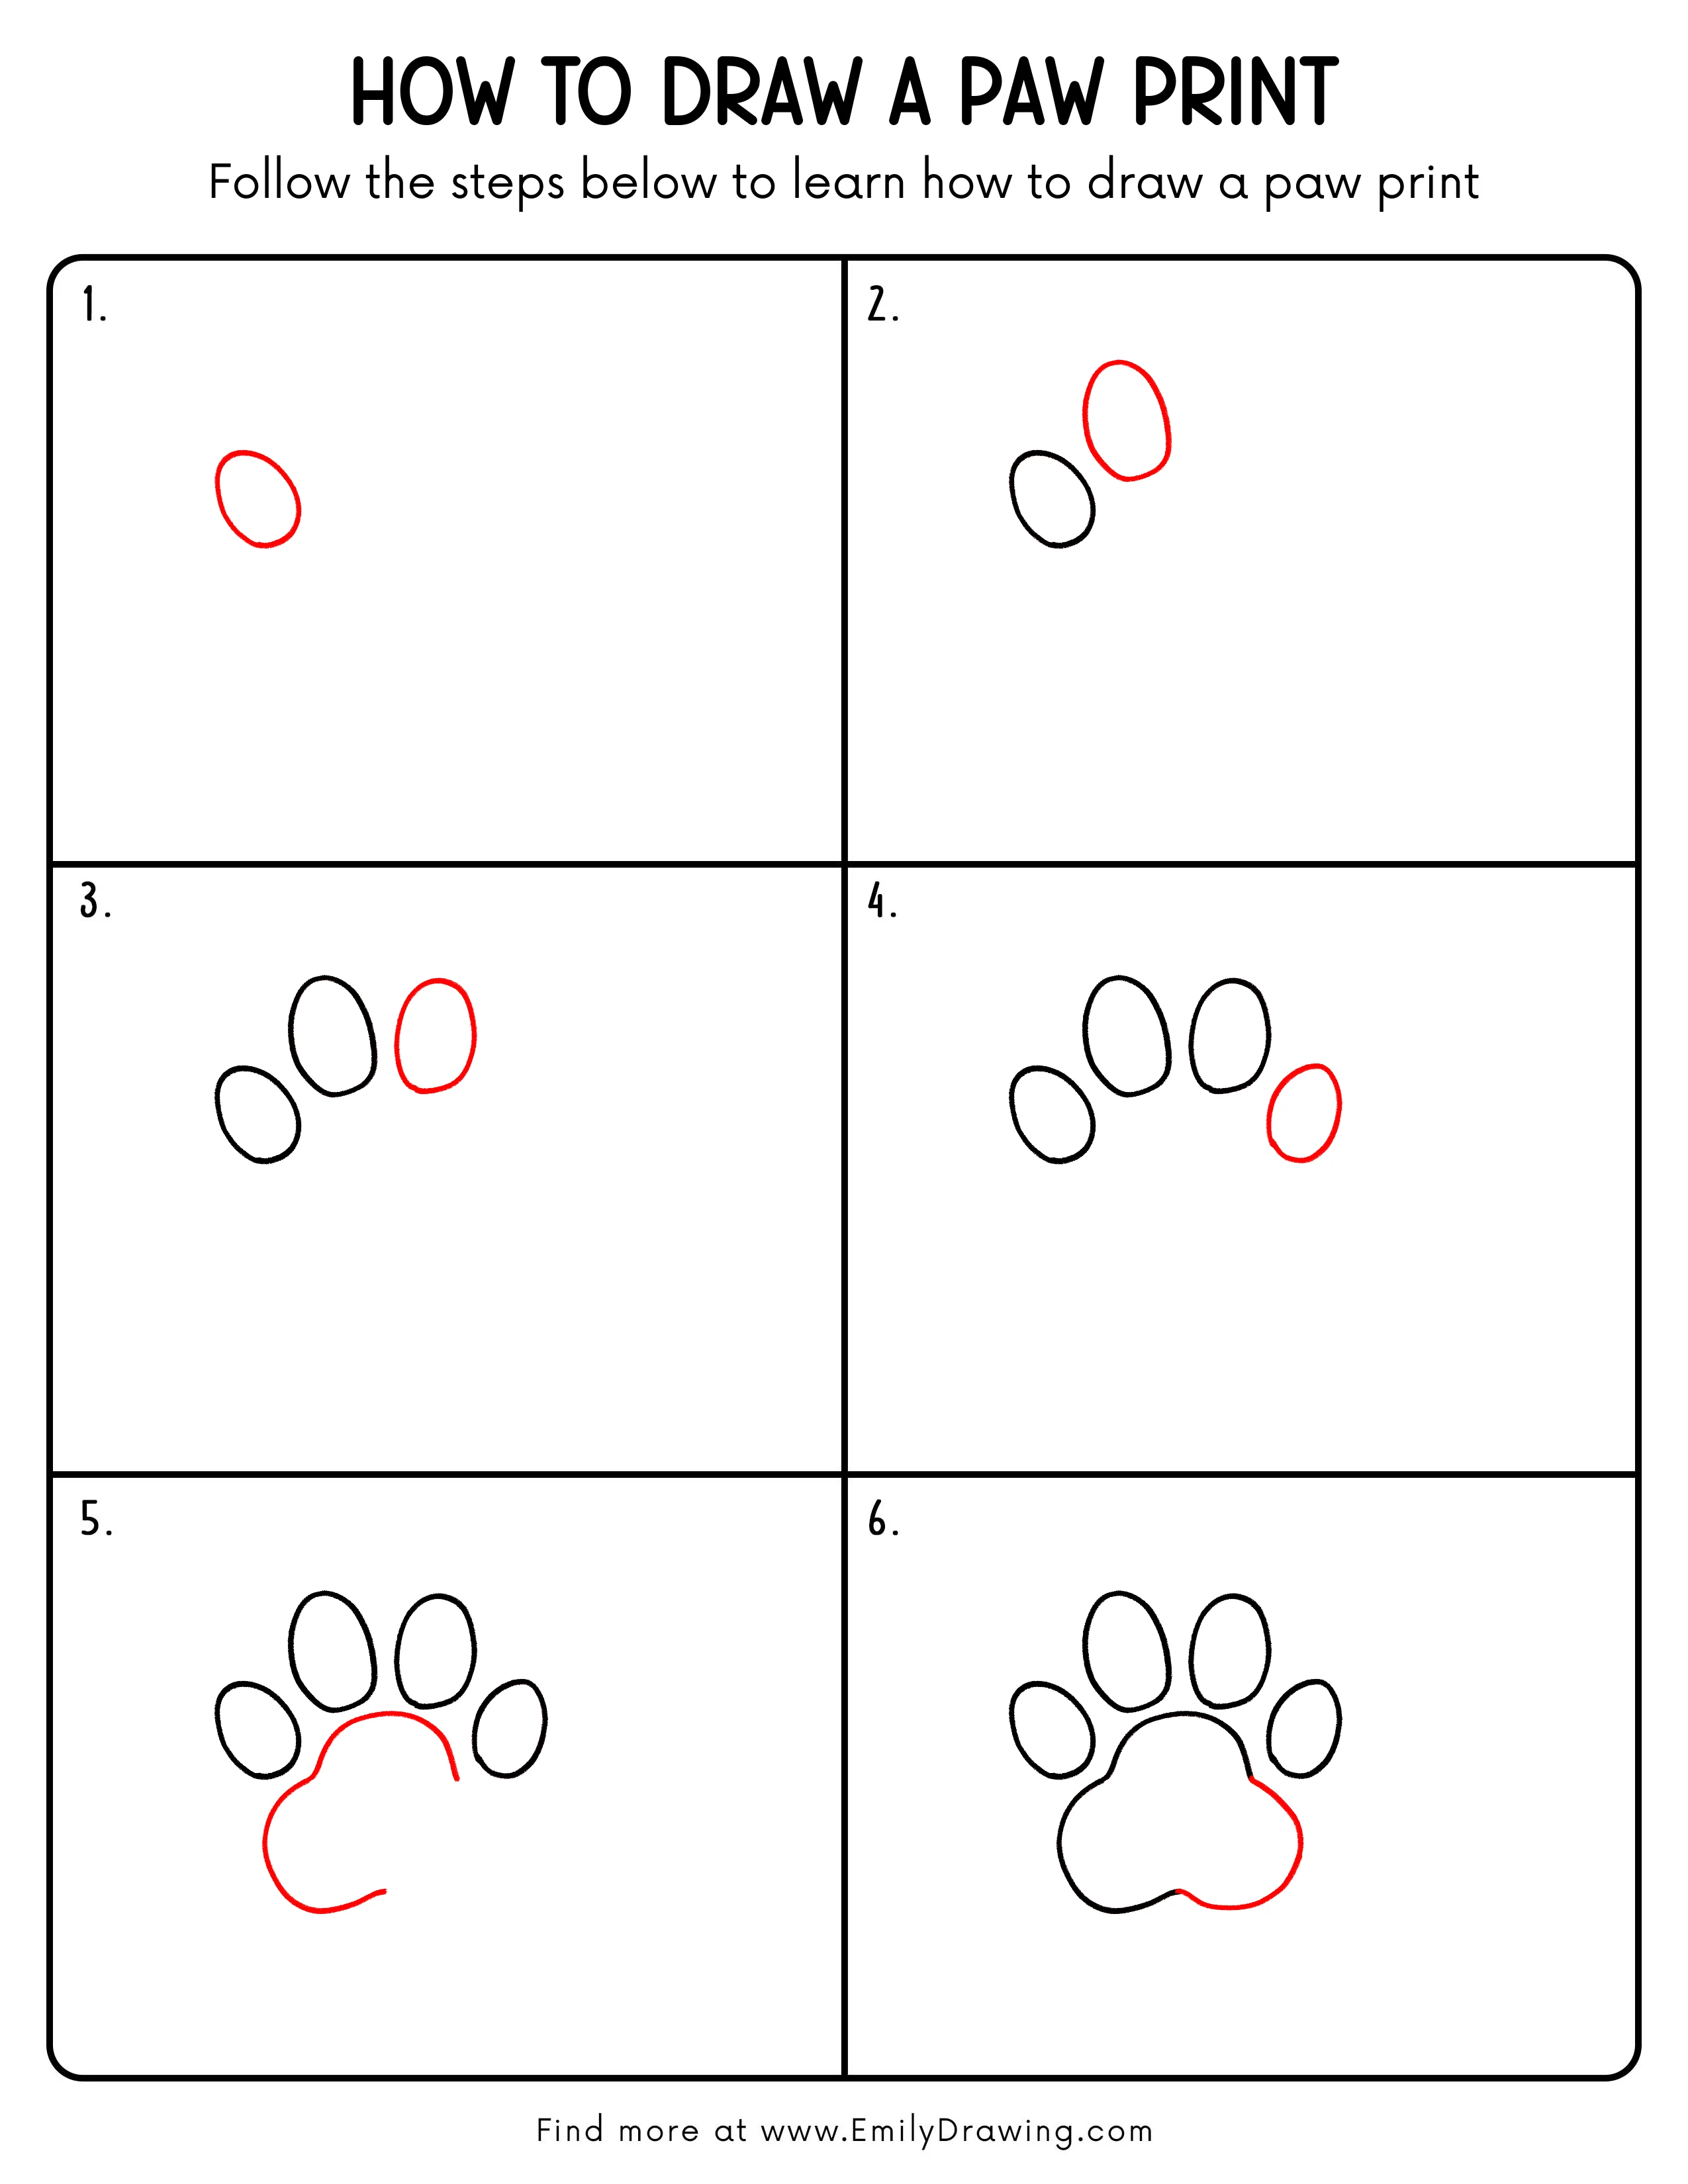
Step 1: Draw the First Toe Pad
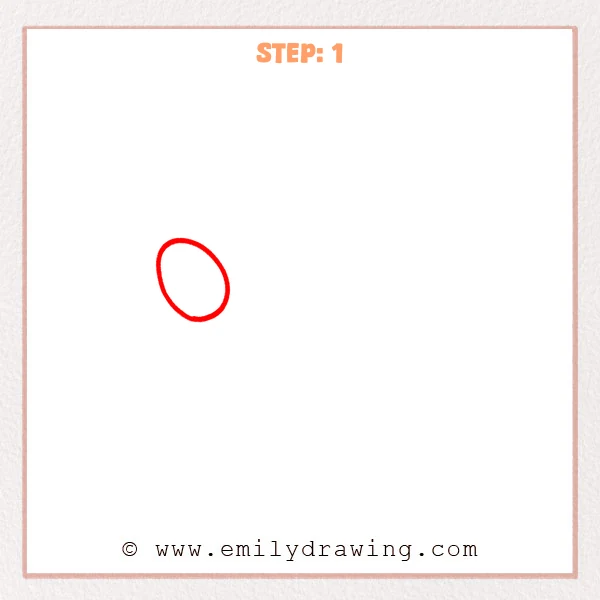
Start with a tilted oval near the upper left area of the page. Keep the line smooth and rounded, like a soft bean shape. This will become one toe pad of the paw print.
Pro Tip: Tilt the oval slightly so the paw print looks more natural.
Step 2: Add the Second Toe Pad
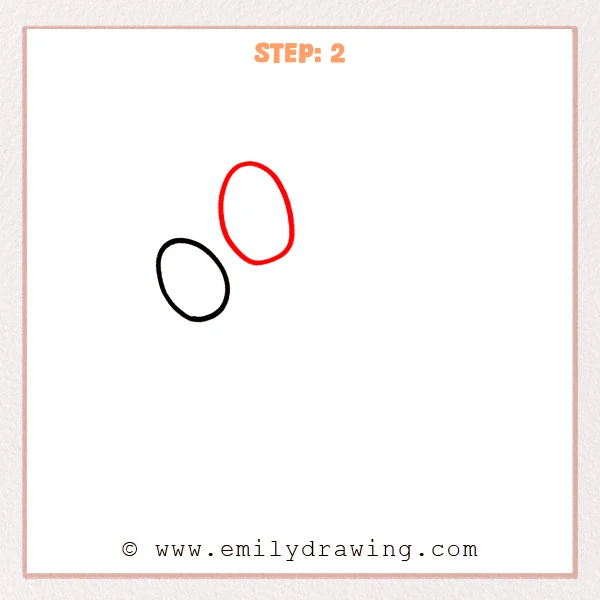
Draw a taller oval above and to the right of the first oval. Place it slightly higher to begin the top row of toe pads. Keep a small space between the two ovals so they do not touch.
Pro Tip: Make the second oval a little more upright to show the paw print’s direction clearly.
Step 3: Add the Third Toe Pad
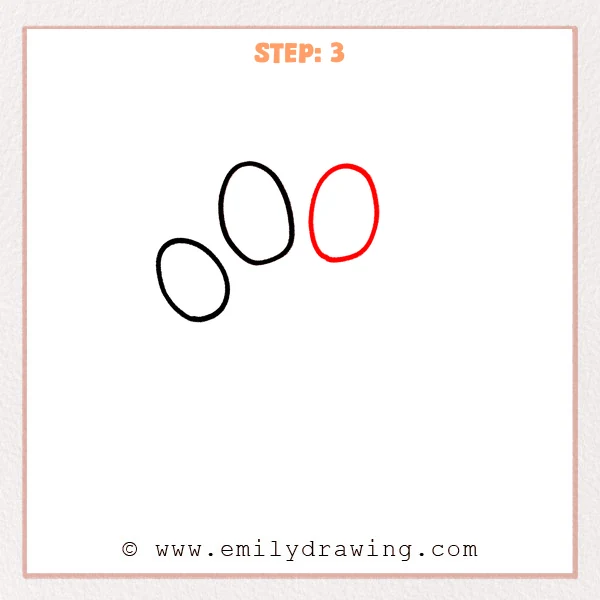
Draw another upright oval to the right of the middle oval. Keep this oval close in height to the middle toe pad, forming a neat top row. Leave a clear small gap between each toe pad.
Pro Tip: Angle the right oval slightly inward to make the paw print look softer.
Step 4: Add the Fourth Toe Pad
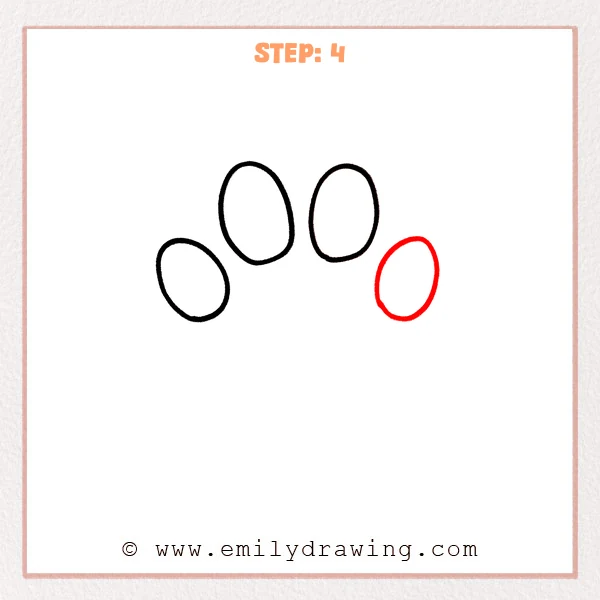
Draw a slightly tilted oval on the far right side. Place it a little lower than the two middle toe pads to create a natural curve. Keep the toe pads separated so the paw print stays clear.
Pro Tip: Tilt the fourth oval slightly outward to help balance both sides of the paw print.
Step 5: Draw the Large Paw Pad Shape
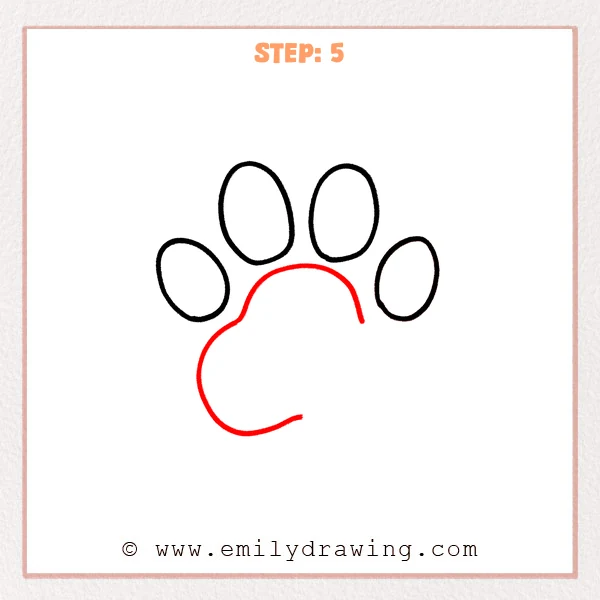
Below the four toe pads, draw a large curved outline. Shape the top edge like a wide arch that reaches toward both sides. Keep the bottom rounded, and leave a small opening for now.
Pro Tip: Make the large paw pad much wider than the toe pads so the paw print feels balanced.
Step 6: Close the Large Paw Pad
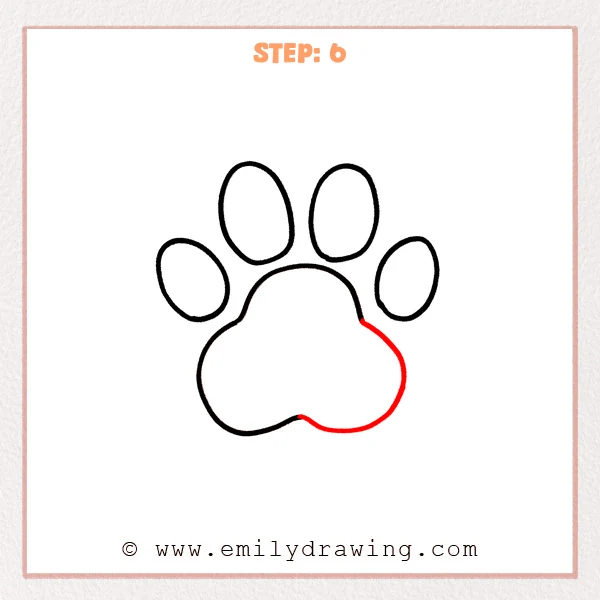
Continue the rounded outer line along the right side. Curve the line downward, then gently bring it back to the small center dip. This completes the large paw pad shape.
Pro Tip: When closing the shape, keep the right curve close in size to the left for a balanced paw print.
Step 7: Color in your drawing!
Fun Facts
Paw prints can look different depending on the animal. Dogs, cats, bears, and many wild animals all leave unique tracks. Artists often use paw prints as cute symbols for pets, nature, and animal stories.
Pin it now, Draw later!
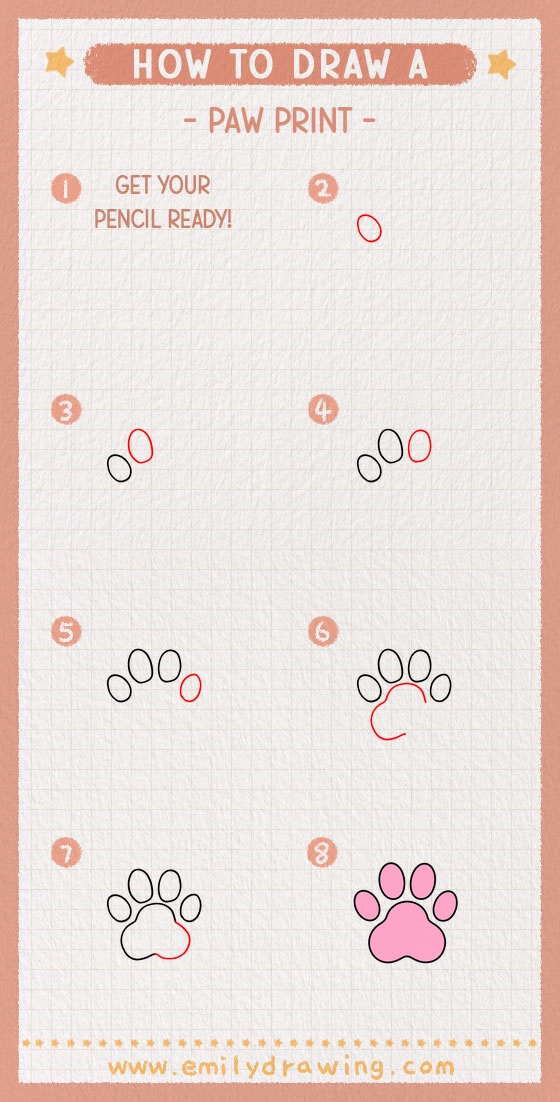
Now you have completed a simple paw print drawing for beginners. You can color the pads black, brown, pink, or any playful color you like. Try drawing several paw prints in a trail for a fun page design.
Get the FREE Printable Drawing Guide
FREE Download Printable Paw Print Drawing Tutorial
Frequently Asked Questions
Is this paw print drawing good for beginners?
Yes, this step by step drawing uses simple ovals and rounded curves, so it is friendly for beginners.
How can I make the paw print look cuter?
Use softer, rounder shapes and keep the toe pads evenly spaced. You can also add gentle colors inside each pad.
Can I use this easy drawing tutorial for a dog or cat paw?
Yes, this paw print can work for a simple dog or cat style. Adjust the size and spacing to match the animal you want.



