
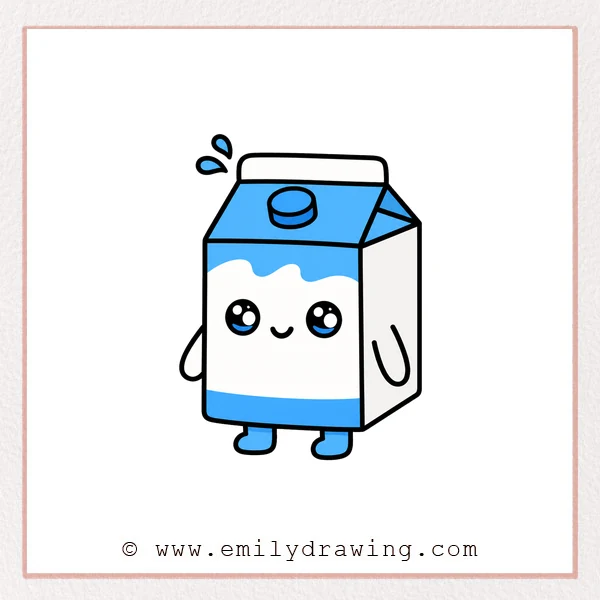
Learning how to draw a milk carton is a fun and simple art activity. This easy drawing tutorial is great for beginners and helps you turn a basic carton shape into a cute character. Follow each step slowly, and enjoy your step by step drawing practice.
What You Will Need
- Drawing paper
- Pencil or black marker
- Red pencil or colored marker for guide lines
- Eraser
- Crayons, colored pencils, or markers for coloring
Here are my RECOMMENDED Art Supplies!
- Crayola Coloring Set (140 Pieces – Mega Value!)
- 24 Colored Crayon Set
- A4 Printer Paper
- Crayola Coloring Pencils
- HP Home Printer with Instant Ink!
Time needed:
16 minutes.
Step-by-Step Drawing Guide
Step 1: Draw the Basic Milk Carton Shape
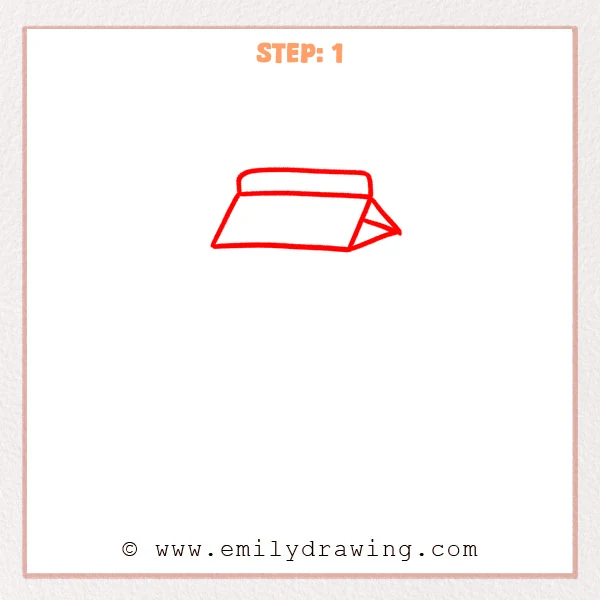
Start with a slanted front shape for the top section of the milk carton. Add a rounded strip across the top, then draw a folded triangle on the right side to begin the carton lid. Keep the lines simple and open for now.
Pro Tip: Let the bottom edge slant slightly so the milk carton already feels three-dimensional.
Step 2: Complete the Carton Body
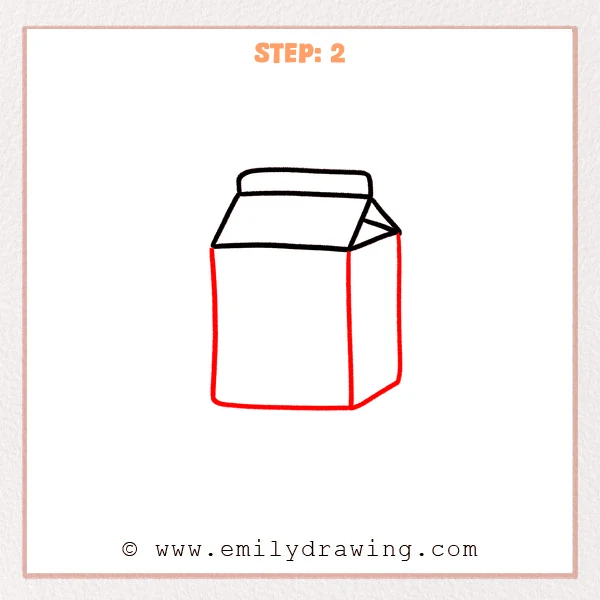
Draw the large front body of the milk carton downward from the top section. Then add the right side panel with a vertical edge and a slanted bottom corner. This turns the top sketch into a full carton shape.
Pro Tip: Keep the side edges nearly parallel so the milk carton looks stable and neat.
Step 3: Add the Cute Face
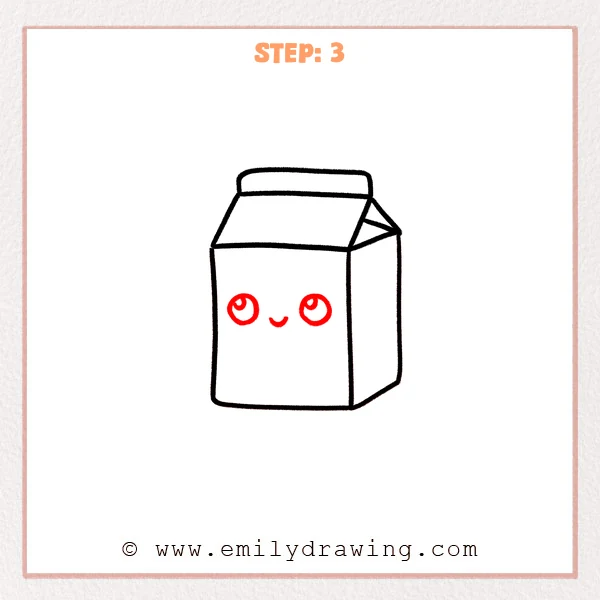
Draw two round eyes on the front of the milk carton. Add small highlights inside the eyes, then place a tiny curved smile between them. These simple features make the carton look friendly and cute.
Pro Tip: Place the eyes at the same height to keep the face balanced.
Step 4: Draw the Little Arms
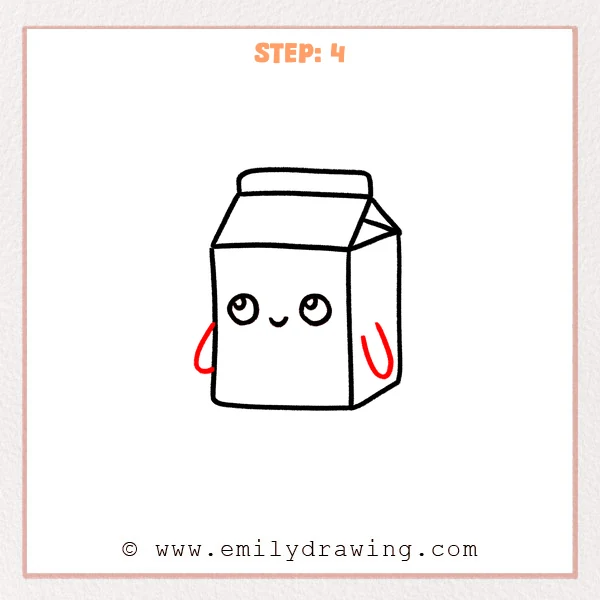
Add one curved arm on the left side of the milk carton. Then draw another curved arm on the right side panel. These soft curved lines make the character feel more playful.
Pro Tip: Let the arms sit at slightly different heights for a more natural pose.
Step 5: Add the Little Feet
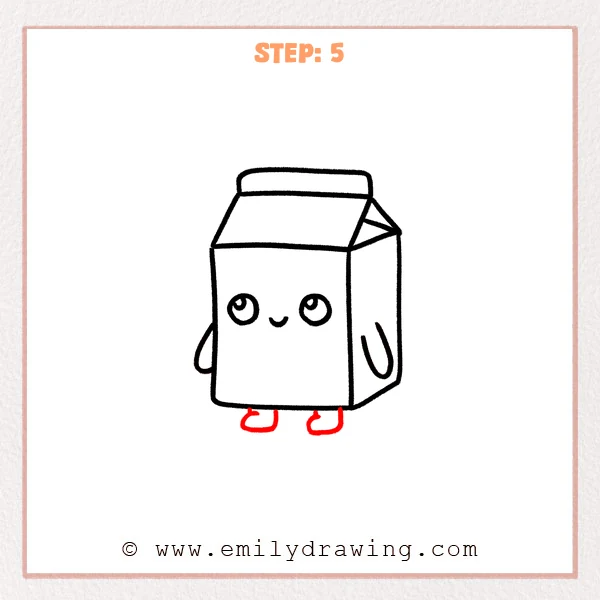
Draw two short feet under the bottom edge of the milk carton. Use small curved shapes that bend outward and back again. Now the milk carton looks like it is standing up.
Pro Tip: Leave a small space between the feet so the body looks centered.
Step 6: Add the Cap and Splash Details
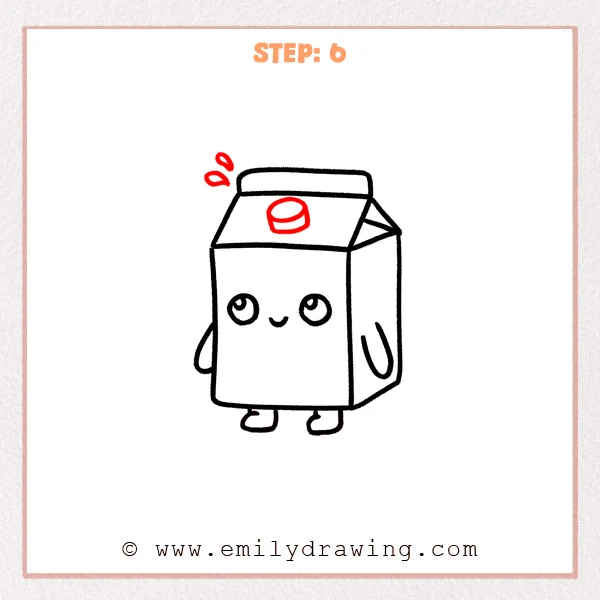
Draw a small oval cap on the slanted top panel of the milk carton. Add a curved band under it to show thickness, then place two small splash shapes near the upper left. These final details make the drawing more lively and complete.
Pro Tip: Keep the cap near the middle of the top panel so the design stays clear and balanced.
Step 7: Color in your drawing!
Fun Facts
- Milk cartons are often designed with folded tops to make pouring easier.
- Cartons can hold milk, juice, cream, and many other drinks.
- Cute food characters are popular in easy drawing tutorials because they are simple and fun to personalize.
Pin it now, Draw later!
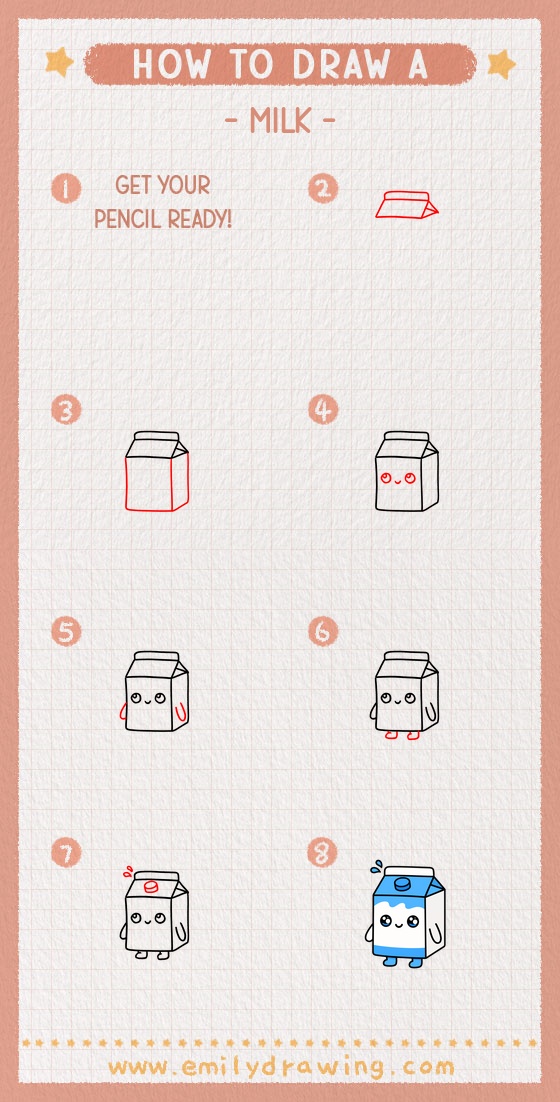
You now know how to draw a milk carton with a cute face, little arms, little feet, and a small cap. This step by step drawing lesson is a great example of drawing for beginners because it uses simple shapes and gentle details. Try coloring your milk carton next, and keep practicing this easy drawing tutorial to make your own fun variations.
Get the FREE Printable Drawing Guide
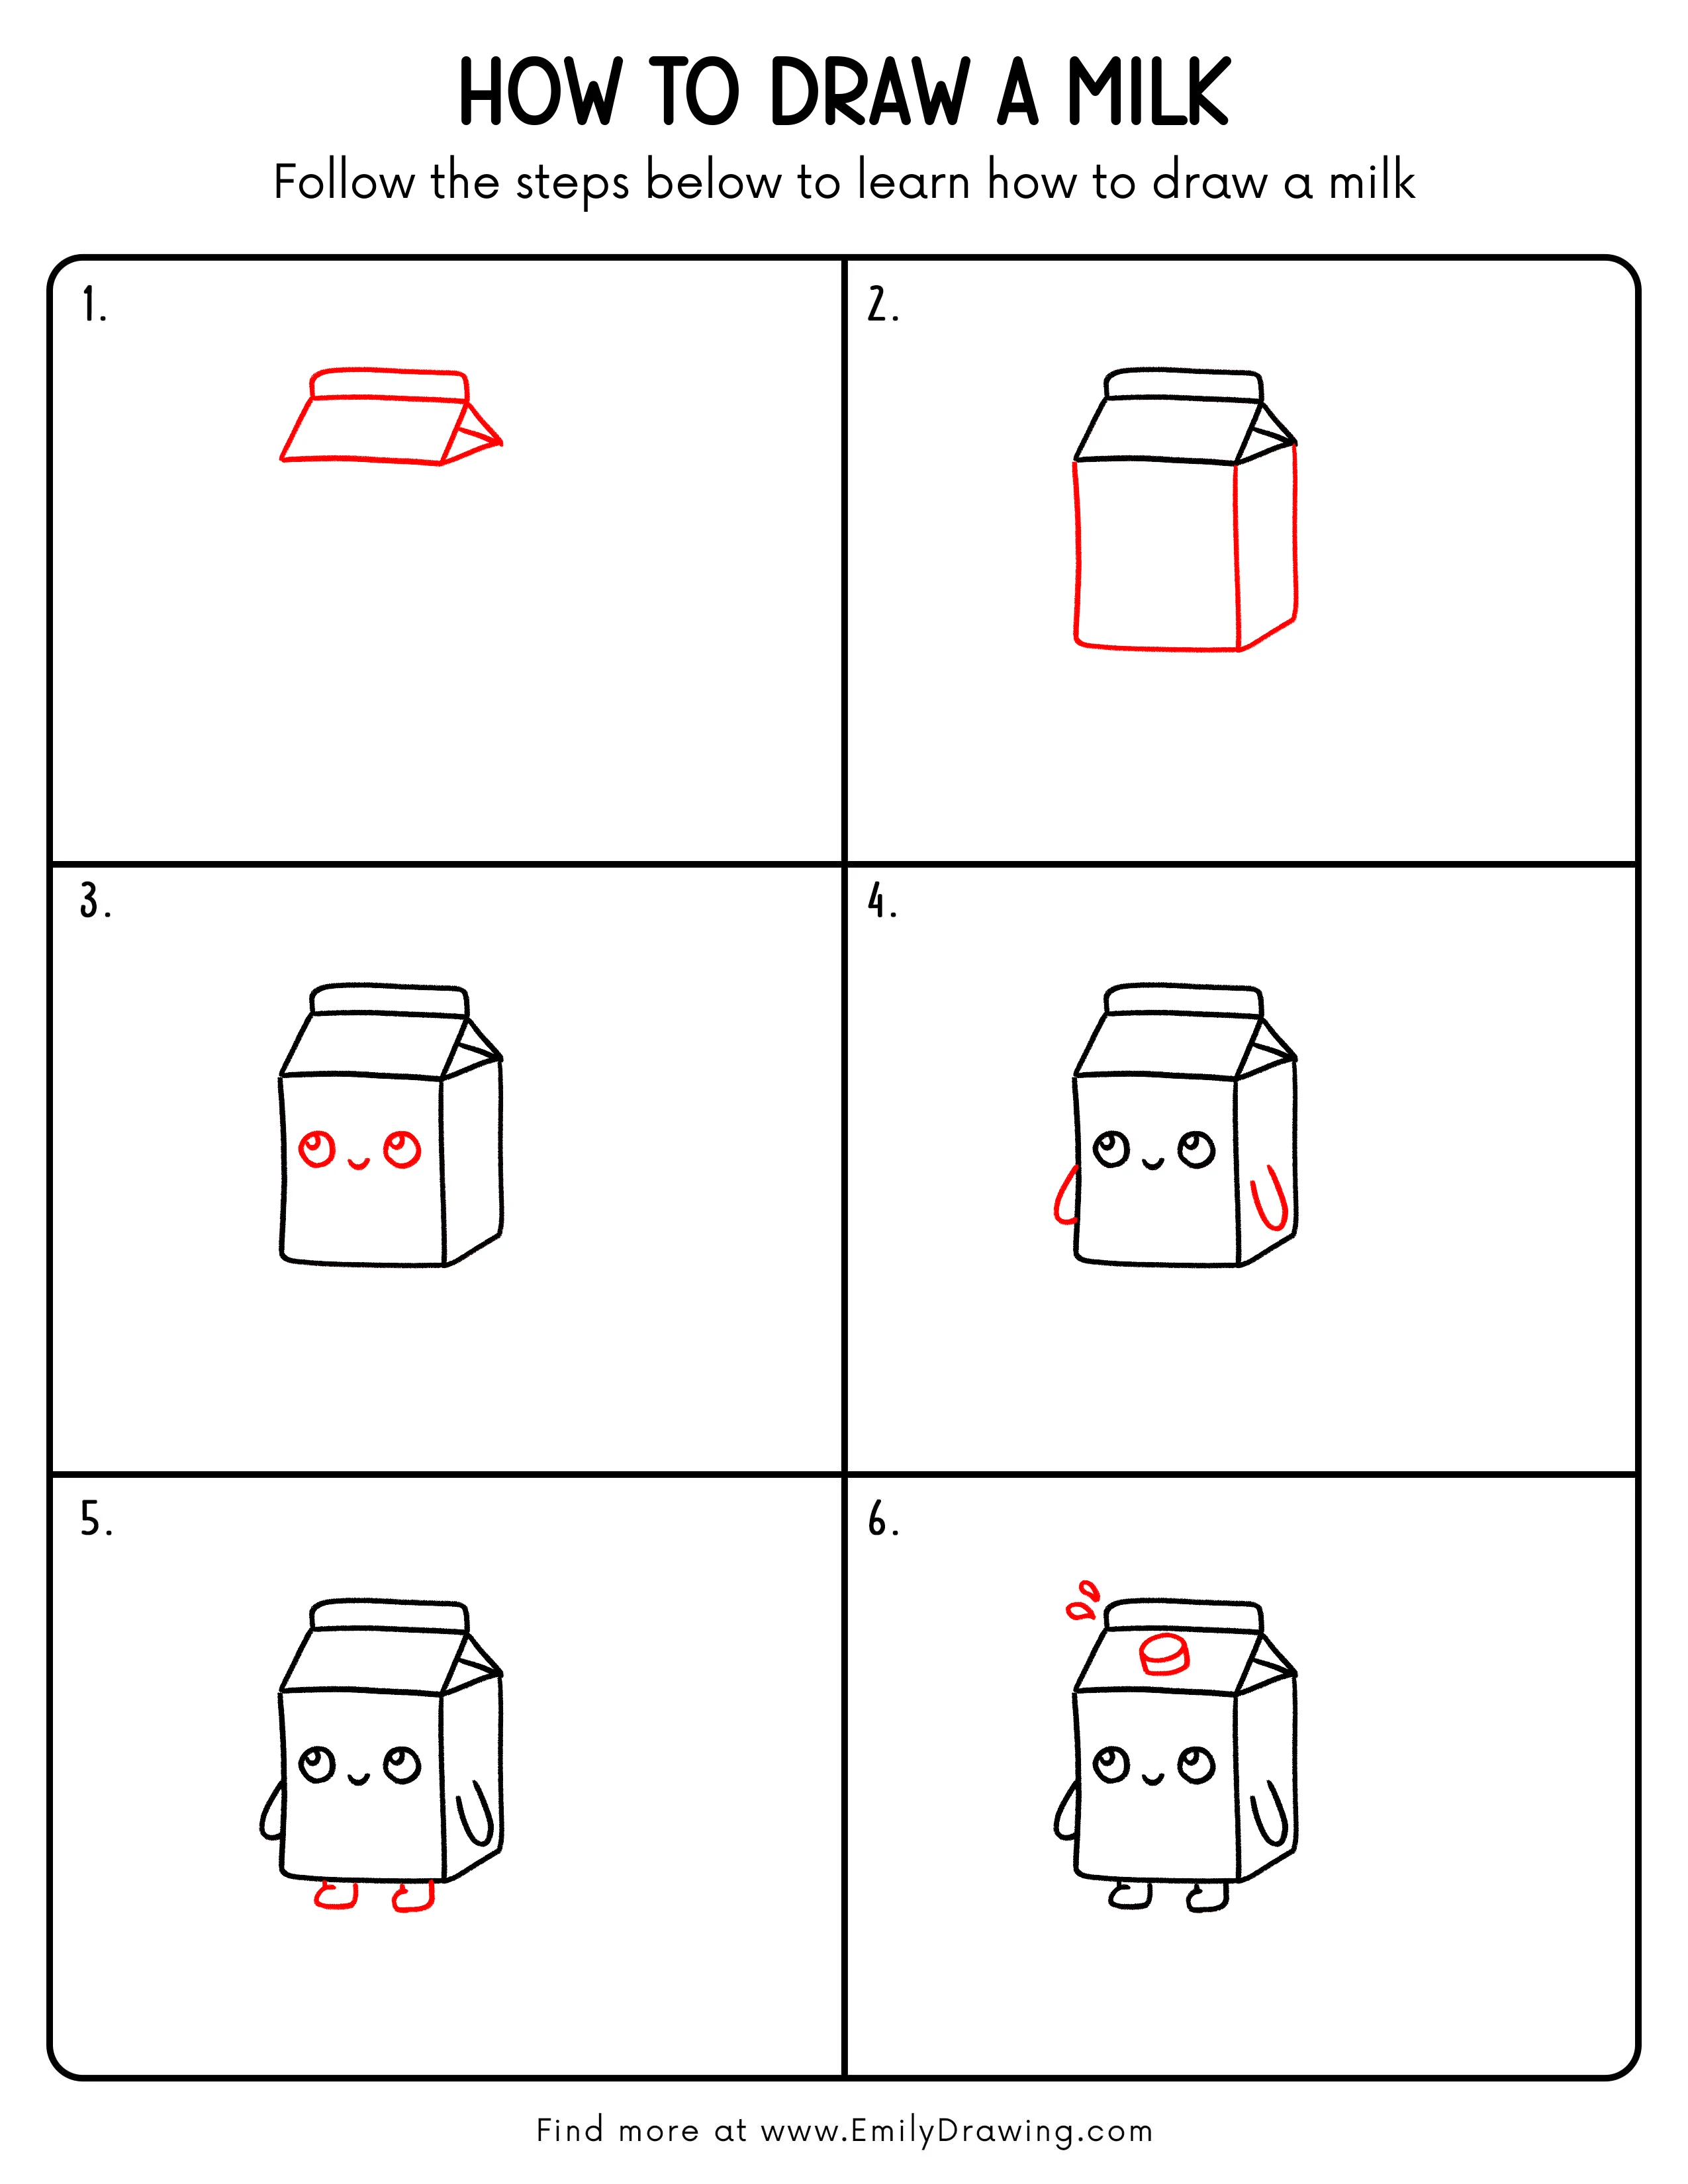
FREE Download Printable Milk Drawing Tutorial
Frequently Asked Questions
Can beginners draw this milk carton?
Yes, this milk carton is made with simple lines and basic shapes. It is a great drawing for beginners.
Can I color the milk carton any way I like?
Yes, you can keep it white like a classic milk carton or add bright colors and patterns. A pink, blue, or chocolate milk version can be very fun.
What should I do if my carton looks uneven?
Take your time and lightly sketch the shapes first. Small changes to the side edges and face placement can help the drawing look more balanced.



