
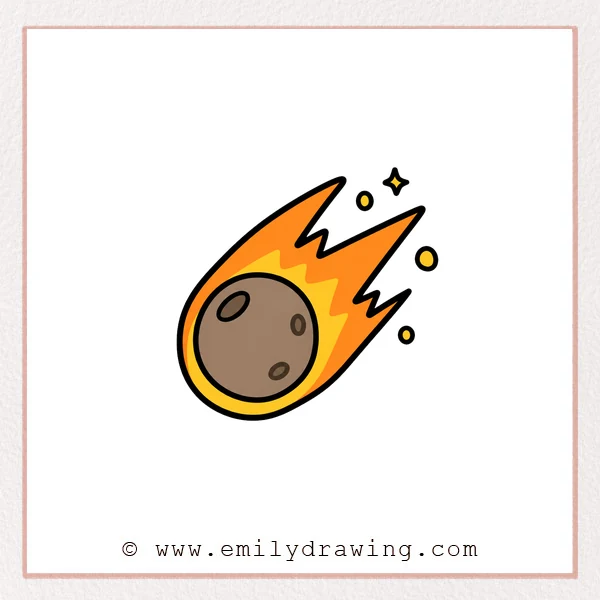
If you want to learn how to draw a meteor, this easy drawing tutorial is a great place to start. You will build the shape step by step, using simple curves, points, and a few small details. This step by step drawing guide is designed for beginners and is calm, clear, and fun to follow.
What You Will Need
- Drawing paper
- Pencil
- Eraser
- Black pen or marker
- Red pencil or crayon for guide lines
- Colored pencils, crayons, or markers for finishing
Here are my RECOMMENDED Art Supplies!
- Crayola Coloring Set (140 Pieces – Mega Value!)
- 24 Colored Crayon Set
- A4 Printer Paper
- Crayola Coloring Pencils
- HP Home Printer with Instant Ink!
Time needed:
24 minutes.
Step-by-Step Drawing Guide
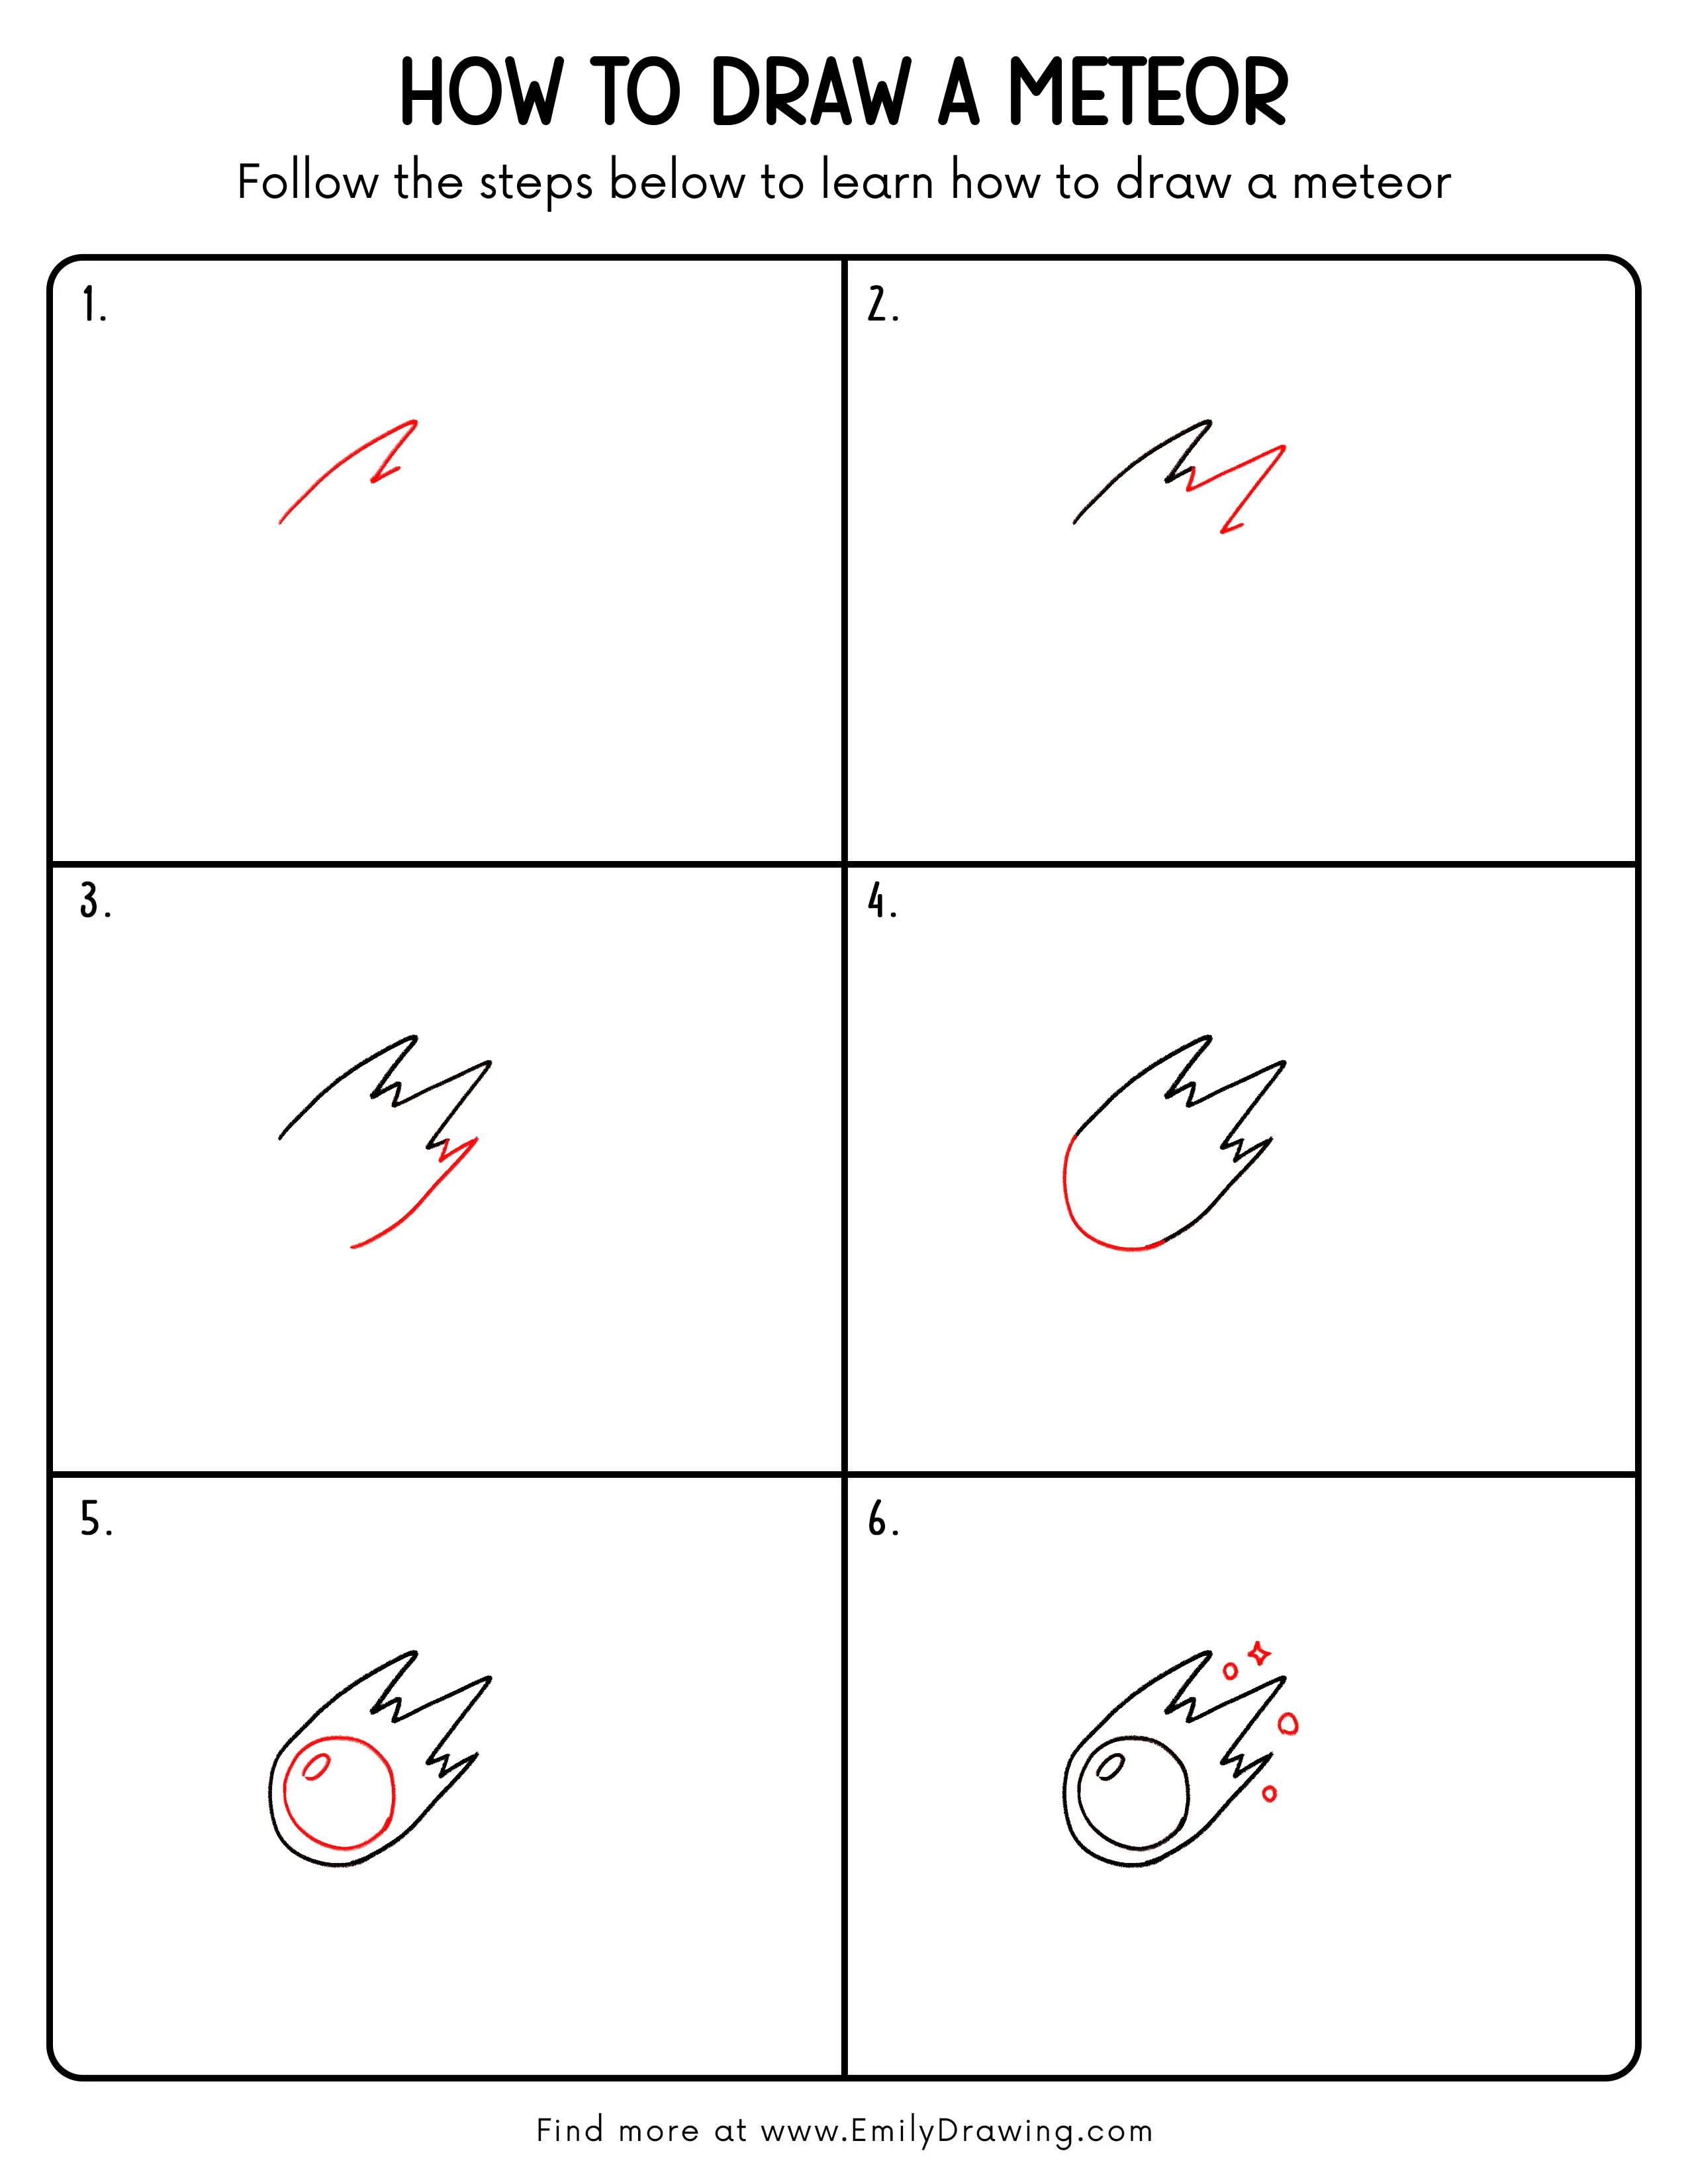
Step 1: Draw the Curved Meteor Trail
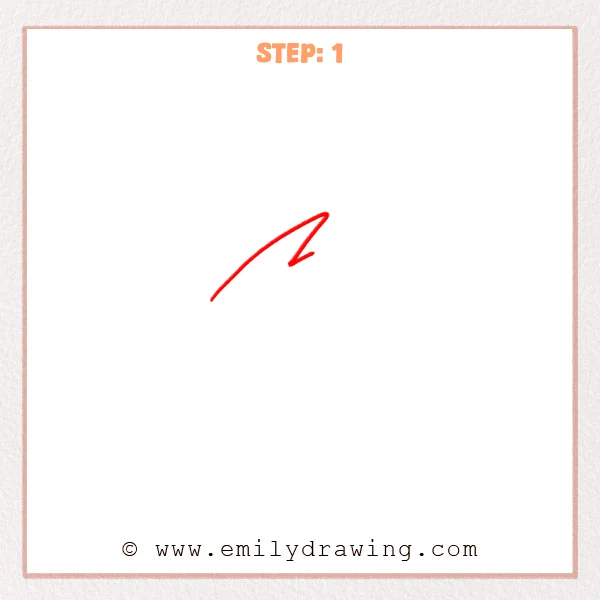
Start with a long curved line that rises from the lower left toward the upper right. This line begins the meteor’s fast flying motion. Add a sharp angled turn at the end to suggest speed and direction.
Pro Tip: Sketch the curve lightly first so you can adjust the flow before darkening it.
Step 2: Add the Second Flame Point
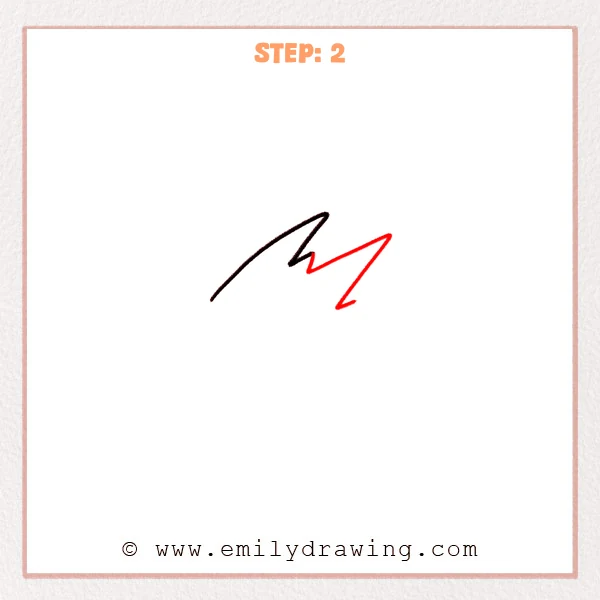
Continue the shape on the right with another angled line that stretches outward. Then bend the line down to create a second pointed flame shape behind the meteor. This helps the tail look layered and energetic.
Pro Tip: Let this second point extend a little farther to create a lively flame effect.
Step 3: Draw the Lower Curved Tail Line
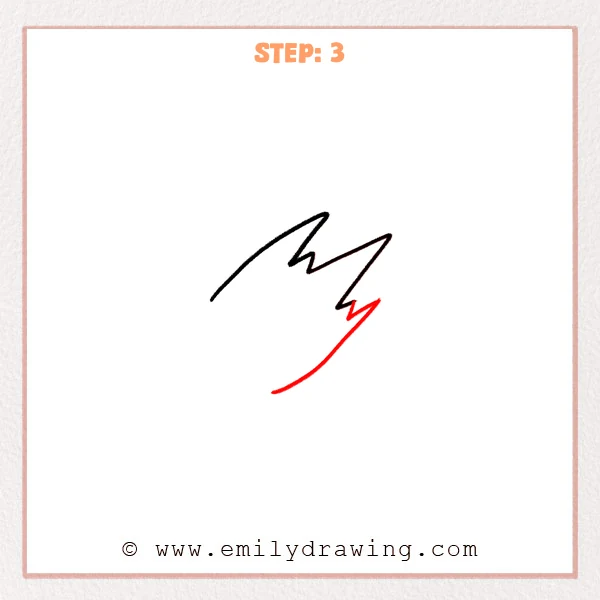
From the small point on the right, draw a long smooth curve that sweeps down and left. This line forms the lower edge of the meteor’s tail. Keep the curve gentle so it balances the sharper points above.
Pro Tip: A soft lower curve makes the meteor look smoother and more natural.
Step 4: Close the Rounded Bottom
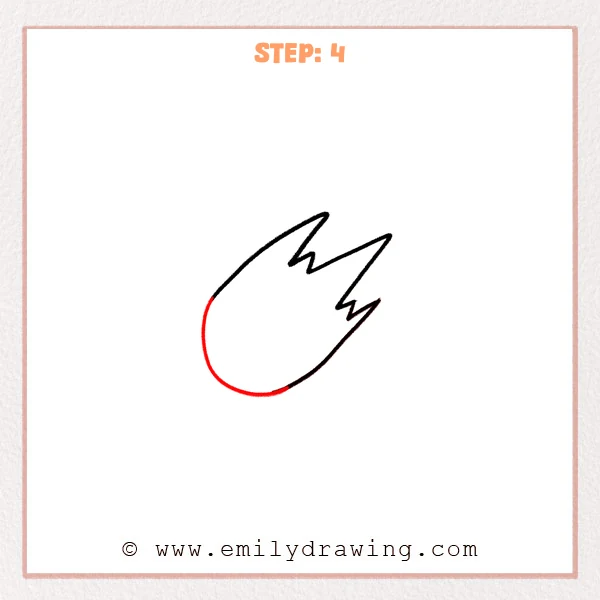
Add a rounded curve on the lower left to connect the tail back into the front of the meteor. This closes the body and gives it a full, rounded front. The meteor now looks like a complete flying shape.
Pro Tip: Make the rounded front broad enough so the meteor body feels solid and full.
Step 5: Add the Meteor Core and Small Highlight
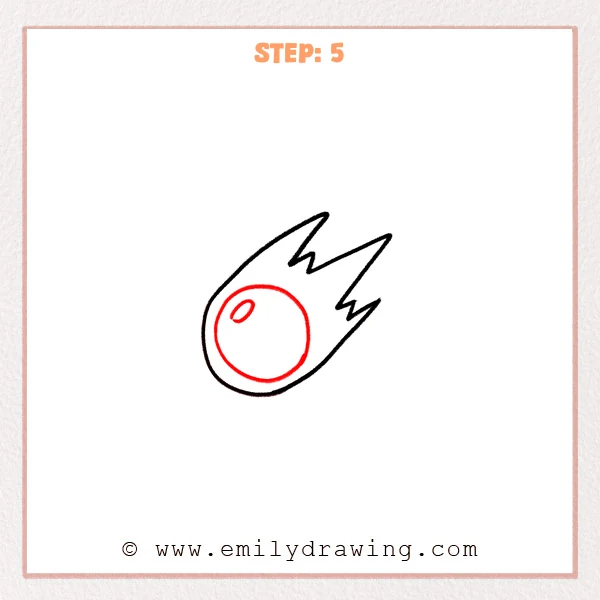
Inside the meteor body, draw a large circle to show the main rock core. Then add a small oval near the upper left area inside that circle. These simple shapes give the meteor a clear inner detail.
Pro Tip: Keep the large inner circle away from the outer outline for a cleaner drawing.
Step 6: Add Stars and Small Debris
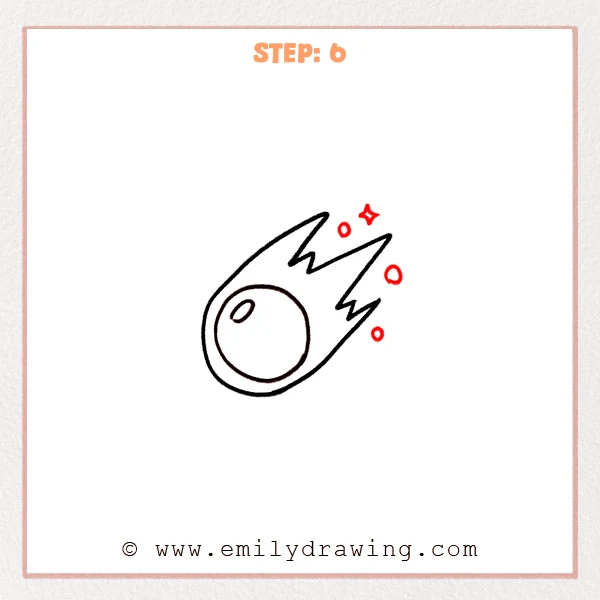
Draw a few small circles around the tail area to show flying debris. Then add a tiny four-point star near the meteor to create a space-like feeling. These finishing details make the easy drawing tutorial feel more lively and complete.
Pro Tip: Scatter the small shapes loosely so the sky details look natural.
Step 7: Color in your drawing!
Fun Facts
- Meteors are often called “shooting stars,” even though they are not stars.
- A meteor is the bright streak of light we see when space rock burns in Earth’s atmosphere.
- If part of the rock reaches the ground, it is called a meteorite.
Pin it now, Draw later!
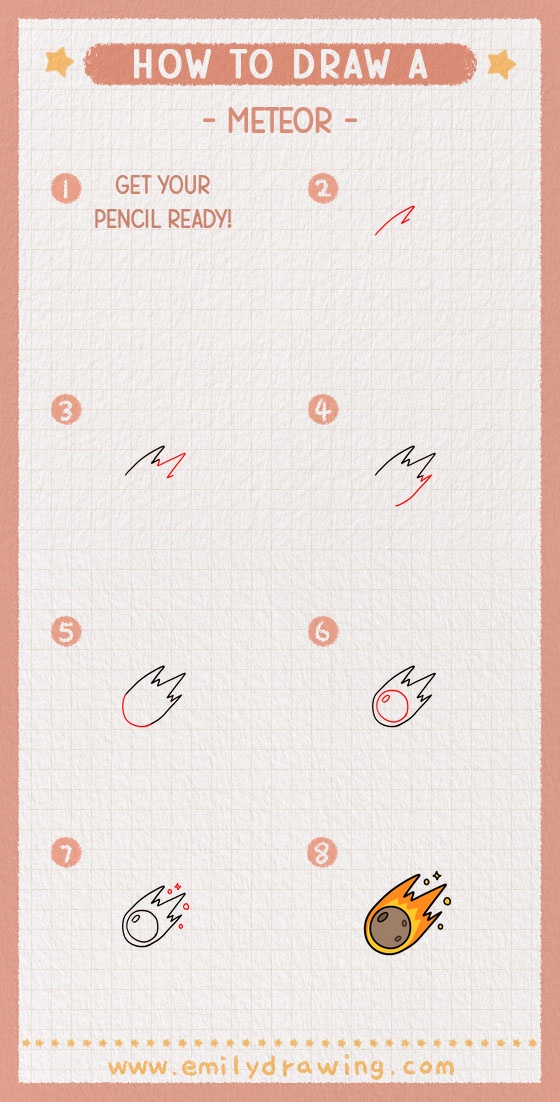
You can now trace your final lines and erase any extra sketch marks. Try coloring the meteor with warm shades like orange, yellow, and red, and add a blue or dark sky background if you like. This step by step drawing is a fun way to practice curves, pointed shapes, and simple details. Keep drawing and come back anytime for another easy drawing tutorial for beginners.
Get the FREE Printable Drawing Guide
FREE Download Printable Meteor Drawing Tutorial
Frequently Asked Questions
Can beginners draw a meteor easily?
Yes, this is a great drawing for beginners because it uses simple curves, circles, and pointed flame shapes.
What colors should I use for a meteor?
Warm colors like red, orange, and yellow work well, but you can also add gray for the rock and dark blue for the sky.
How can I make my meteor look faster?
Use longer curves, sharper tail points, and a few extra debris shapes to show motion.



