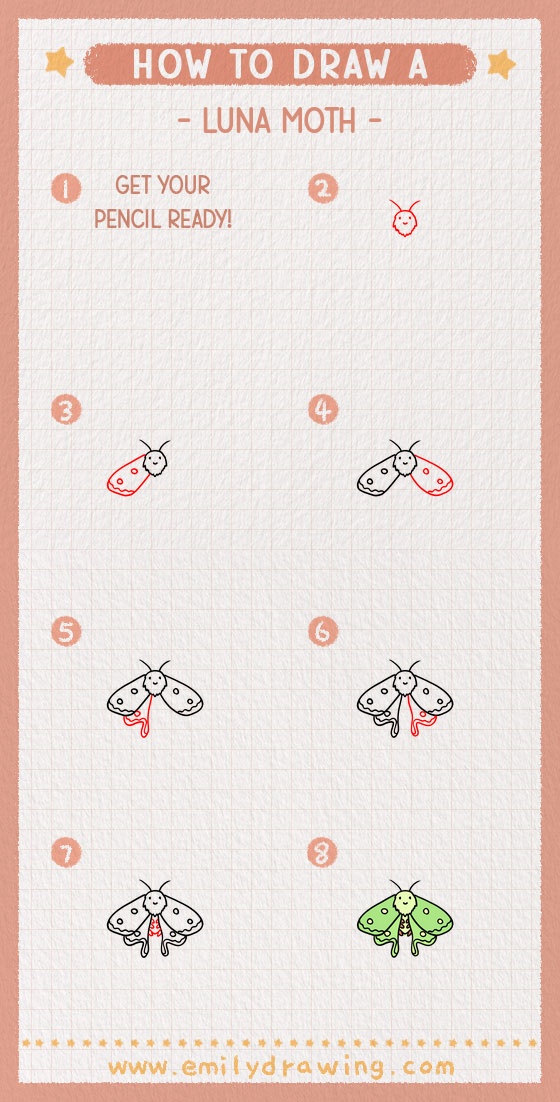
If you want to learn how to draw a luna moth, this easy drawing tutorial will guide you through each stage in a calm and simple way. This step by step drawing lesson is great for beginners and helps you build the moth one shape at a time.
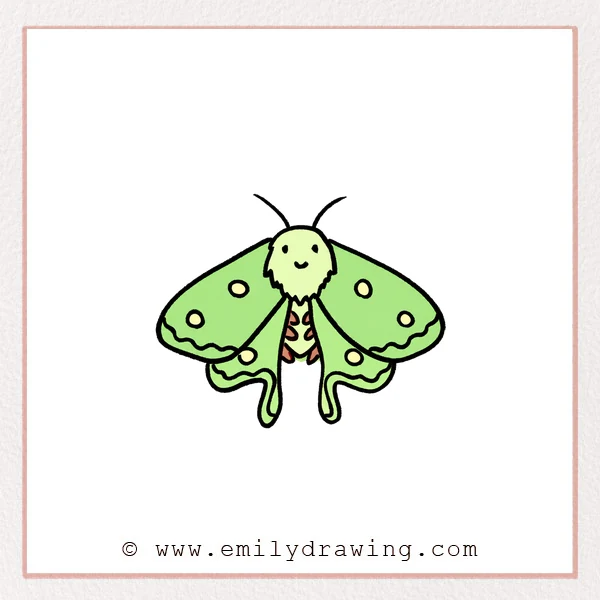
Luna moths are known for their soft fuzzy bodies, wide wings, and long tail wings. In this easy drawing tutorial, you will start with the head and slowly add the wings, tails, and body details until your luna moth looks complete.
What You Will Need
- Drawing paper
- Pencil
- Eraser
- Black pen or marker
- Colored pencils, crayons, or markers
Here are my RECOMMENDED Art Supplies!
- Crayola Coloring Set (140 Pieces – Mega Value!)
- 24 Colored Crayon Set
- A4 Printer Paper
- Crayola Coloring Pencils
- HP Home Printer with Instant Ink!
Time needed:
12 minutes.
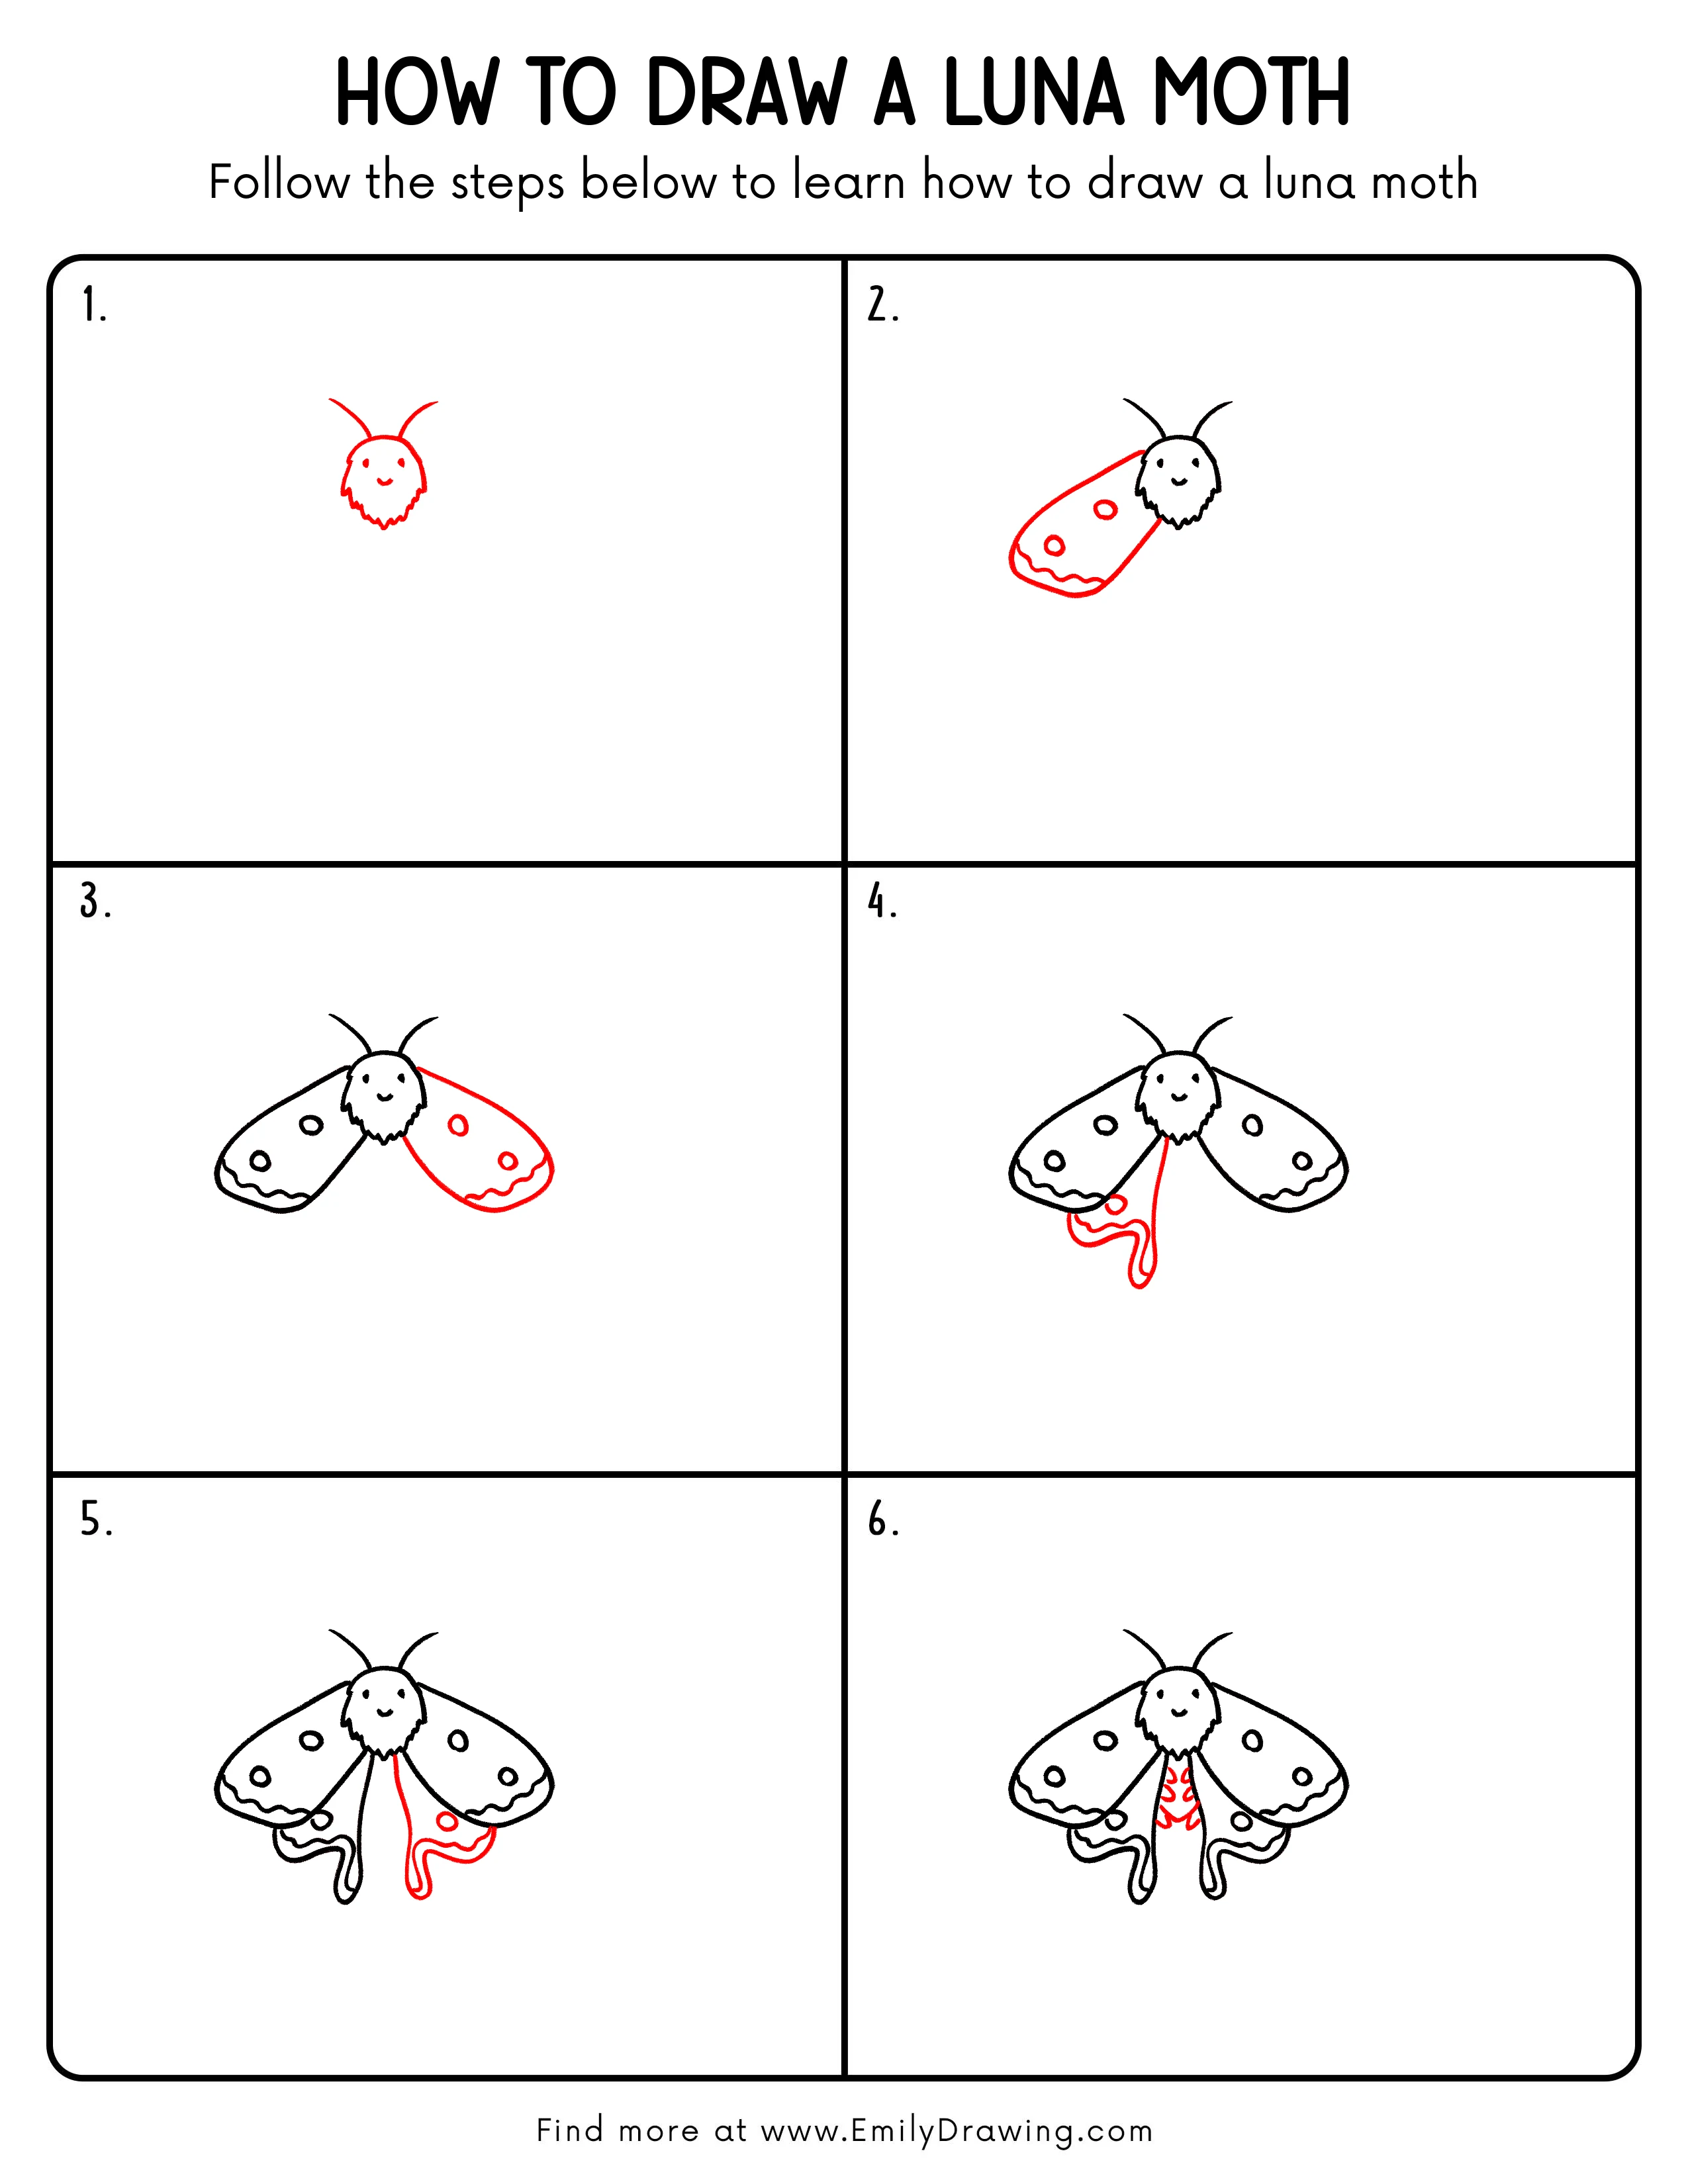
Step-by-Step Drawing Guide
Step 1: Draw the Head and Antennae
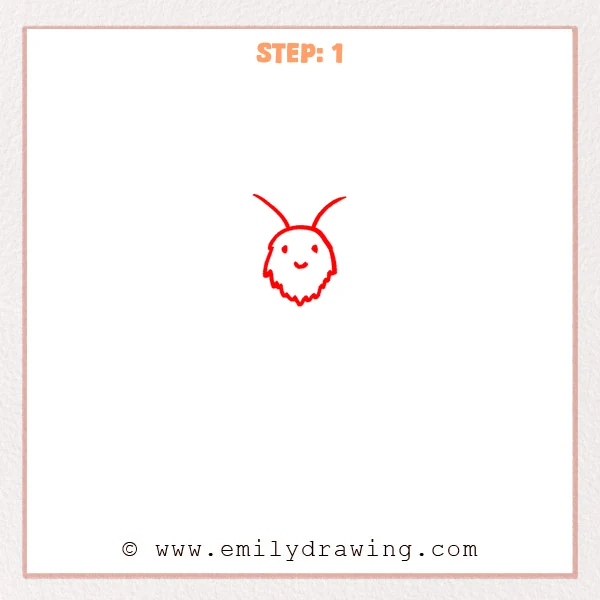
Start with a small rounded head shape. Add short zigzag lines along the bottom to make the head look soft and fuzzy.
Next, draw two long curved antennae rising from the top of the head. Finish the face with two simple eyes and a small smile.
Pro Tip: Keep both antennae close in length so the luna moth looks balanced.
[Alt Text: A beginner luna moth drawing showing a fuzzy rounded head, two curved antennae, simple eyes, and a small smile.]
Step 2: Add the Left Wing
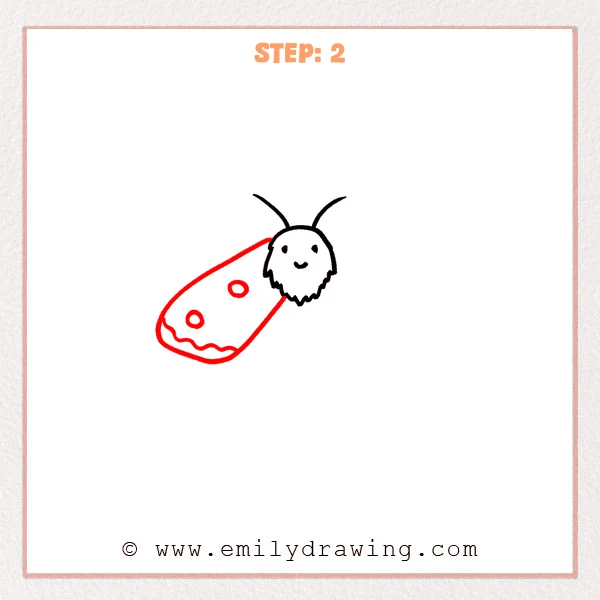
Draw a long rounded wing coming out from the left side of the head. Let the outer edge curve down gently, like a leaf shape.
Add a wavy line near the lower part of the wing. Then draw two circle spots to begin the luna moth’s wing pattern.
Pro Tip: Make the top edge of the wing a little longer than the bottom edge for a natural moth shape.
[Alt Text: A luna moth drawing in progress with a fuzzy head and antennae, plus a large left wing with two spots and a wavy lower pattern.]
Step 3: Add the Right Wing
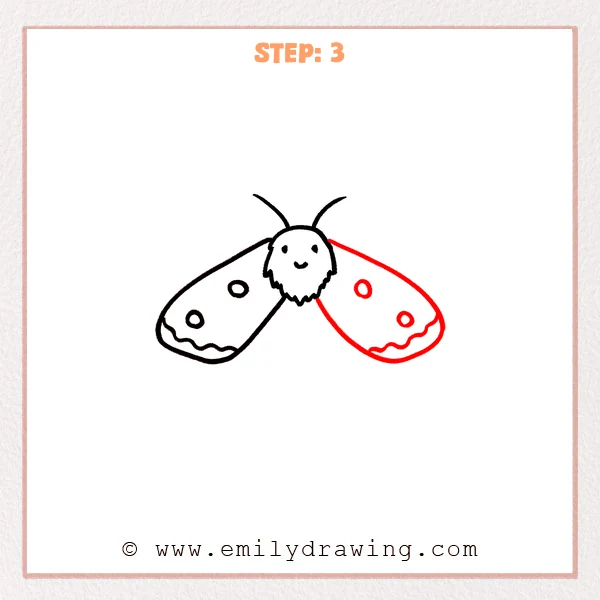
Draw a matching wing on the right side of the head. Try to keep its height and width similar to the left wing so both sides feel even.
Add two circle spots and a wavy line near the bottom of this wing as well. This helps the pair of upper wings look balanced and complete.
Pro Tip: Compare the right wing to the left wing as you draw so the two sides feel symmetrical.
[Alt Text: A luna moth drawing in progress with a fuzzy head, two antennae, and matching left and right upper wings with spots and wavy lower patterns.]
Step 4: Draw the Left Tail Wing
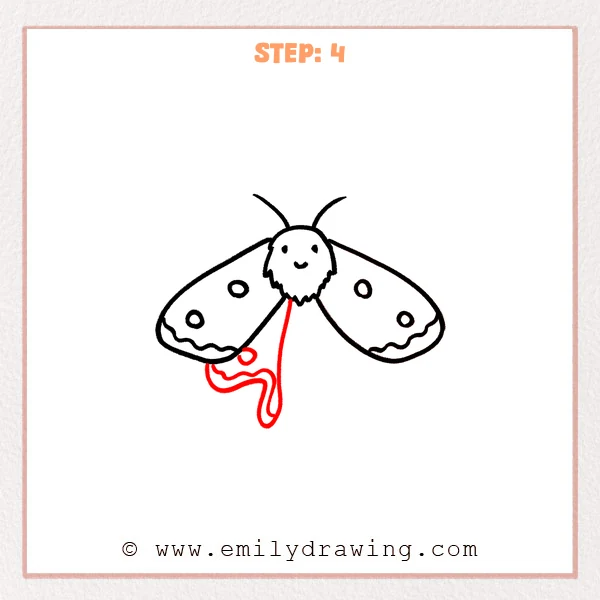
Below the left upper wing, add a long curved tail wing that drops down from near the body. Let the shape bend softly and end in a rounded tip.
Draw a thinner inner curve inside the tail wing. Add a small circle spot and a wavy edge detail to connect it with the style of the upper wing.
Pro Tip: Keep the tail wing soft and flowing instead of stiff so it matches the gentle look of a luna moth.
[Alt Text: A luna moth drawing in progress with two upper wings, now adding a long curved left tail wing with an inner line, a spot, and a wavy edge.]
Step 5: Draw the Right Tail Wing

Now draw the right tail wing below the right upper wing. Let it curve down and outward in a way that pairs nicely with the left tail wing.
Add an inner curved line, a small circle spot, and a wavy edge. These details help both tail wings look like a matching set.
Pro Tip: The tail wings do not need to be identical, but they should feel similar in size and curve.
[Alt Text: A luna moth drawing in progress with two upper wings and two long tail wings, now completing the right tail wing with a spot, inner curve, and wavy edge.]
Step 6: Add Body Patterns
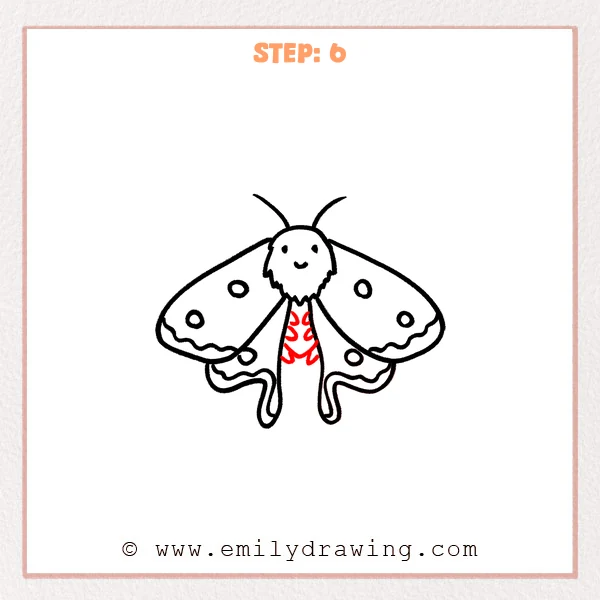
In the center body area, draw several short curved markings. Arrange them from top to bottom so they look like small decorative bands or leaf-like shapes.
These markings give the luna moth more texture and make the middle section feel finished. Keep the shapes simple and evenly spaced.
Pro Tip: Place the body markings along the center so the design stays neat and easy to read.
[Alt Text: A completed luna moth drawing with fuzzy head, large upper wings, long tail wings, and curved body markings down the center.]
Step 7: Color in your drawing!
Fun Facts
- Luna moths are famous for their pale green wings and long elegant tails.
- Adult luna moths do not eat, because they live only a short time after leaving the cocoon.
- Their tail wings may help confuse bats and protect them from predators.
Pin it now, Draw later!
You have now completed an easy luna moth drawing by building it one step at a time. First you drew the head, then the upper wings, then the tail wings, and finally the body patterns.
You can leave your drawing as clean line art or color it with soft greens, yellows, and pinks. Keep practicing this step by step drawing method, and try drawing your luna moth again in your own style.
Get the FREE Printable Drawing Guide
FREE Download Printable Luna Moth Drawing Tutorial
Frequently Asked Questions
Can beginners learn how to draw a luna moth?
Yes, this drawing for beginners uses simple curved shapes and easy patterns. If you go slowly, each step is very manageable.
Do both wings need to match exactly?
No, they do not need to be perfect copies. They should simply look balanced and similar in size.
What colors should I use for a luna moth?
Many people use light green for the wings, with yellow or pink accents near the edges. You can also make your luna moth colorful in your own creative way.