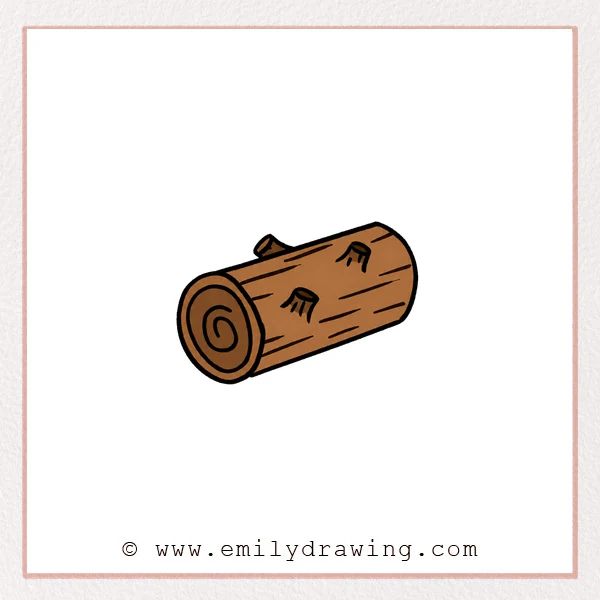
Learning how to draw a log is a fun and simple art activity for beginners. This easy drawing tutorial breaks the picture into small, clear steps so you can build the shape with confidence. If you enjoy step by step drawing, this guide will help you create a neat log using basic lines, curves, and texture marks.
What You Will Need
- Drawing paper
- Pencil
- Eraser
- Black pen or marker
- Red pencil or colored pen for step highlights
Here are my RECOMMENDED Art Supplies!
- Crayola Coloring Set (140 Pieces – Mega Value!)
- 24 Colored Crayon Set
- A4 Printer Paper
- Crayola Coloring Pencils
- HP Home Printer with Instant Ink!
Time needed:
26 minutes.
Step-by-Step Drawing Guide
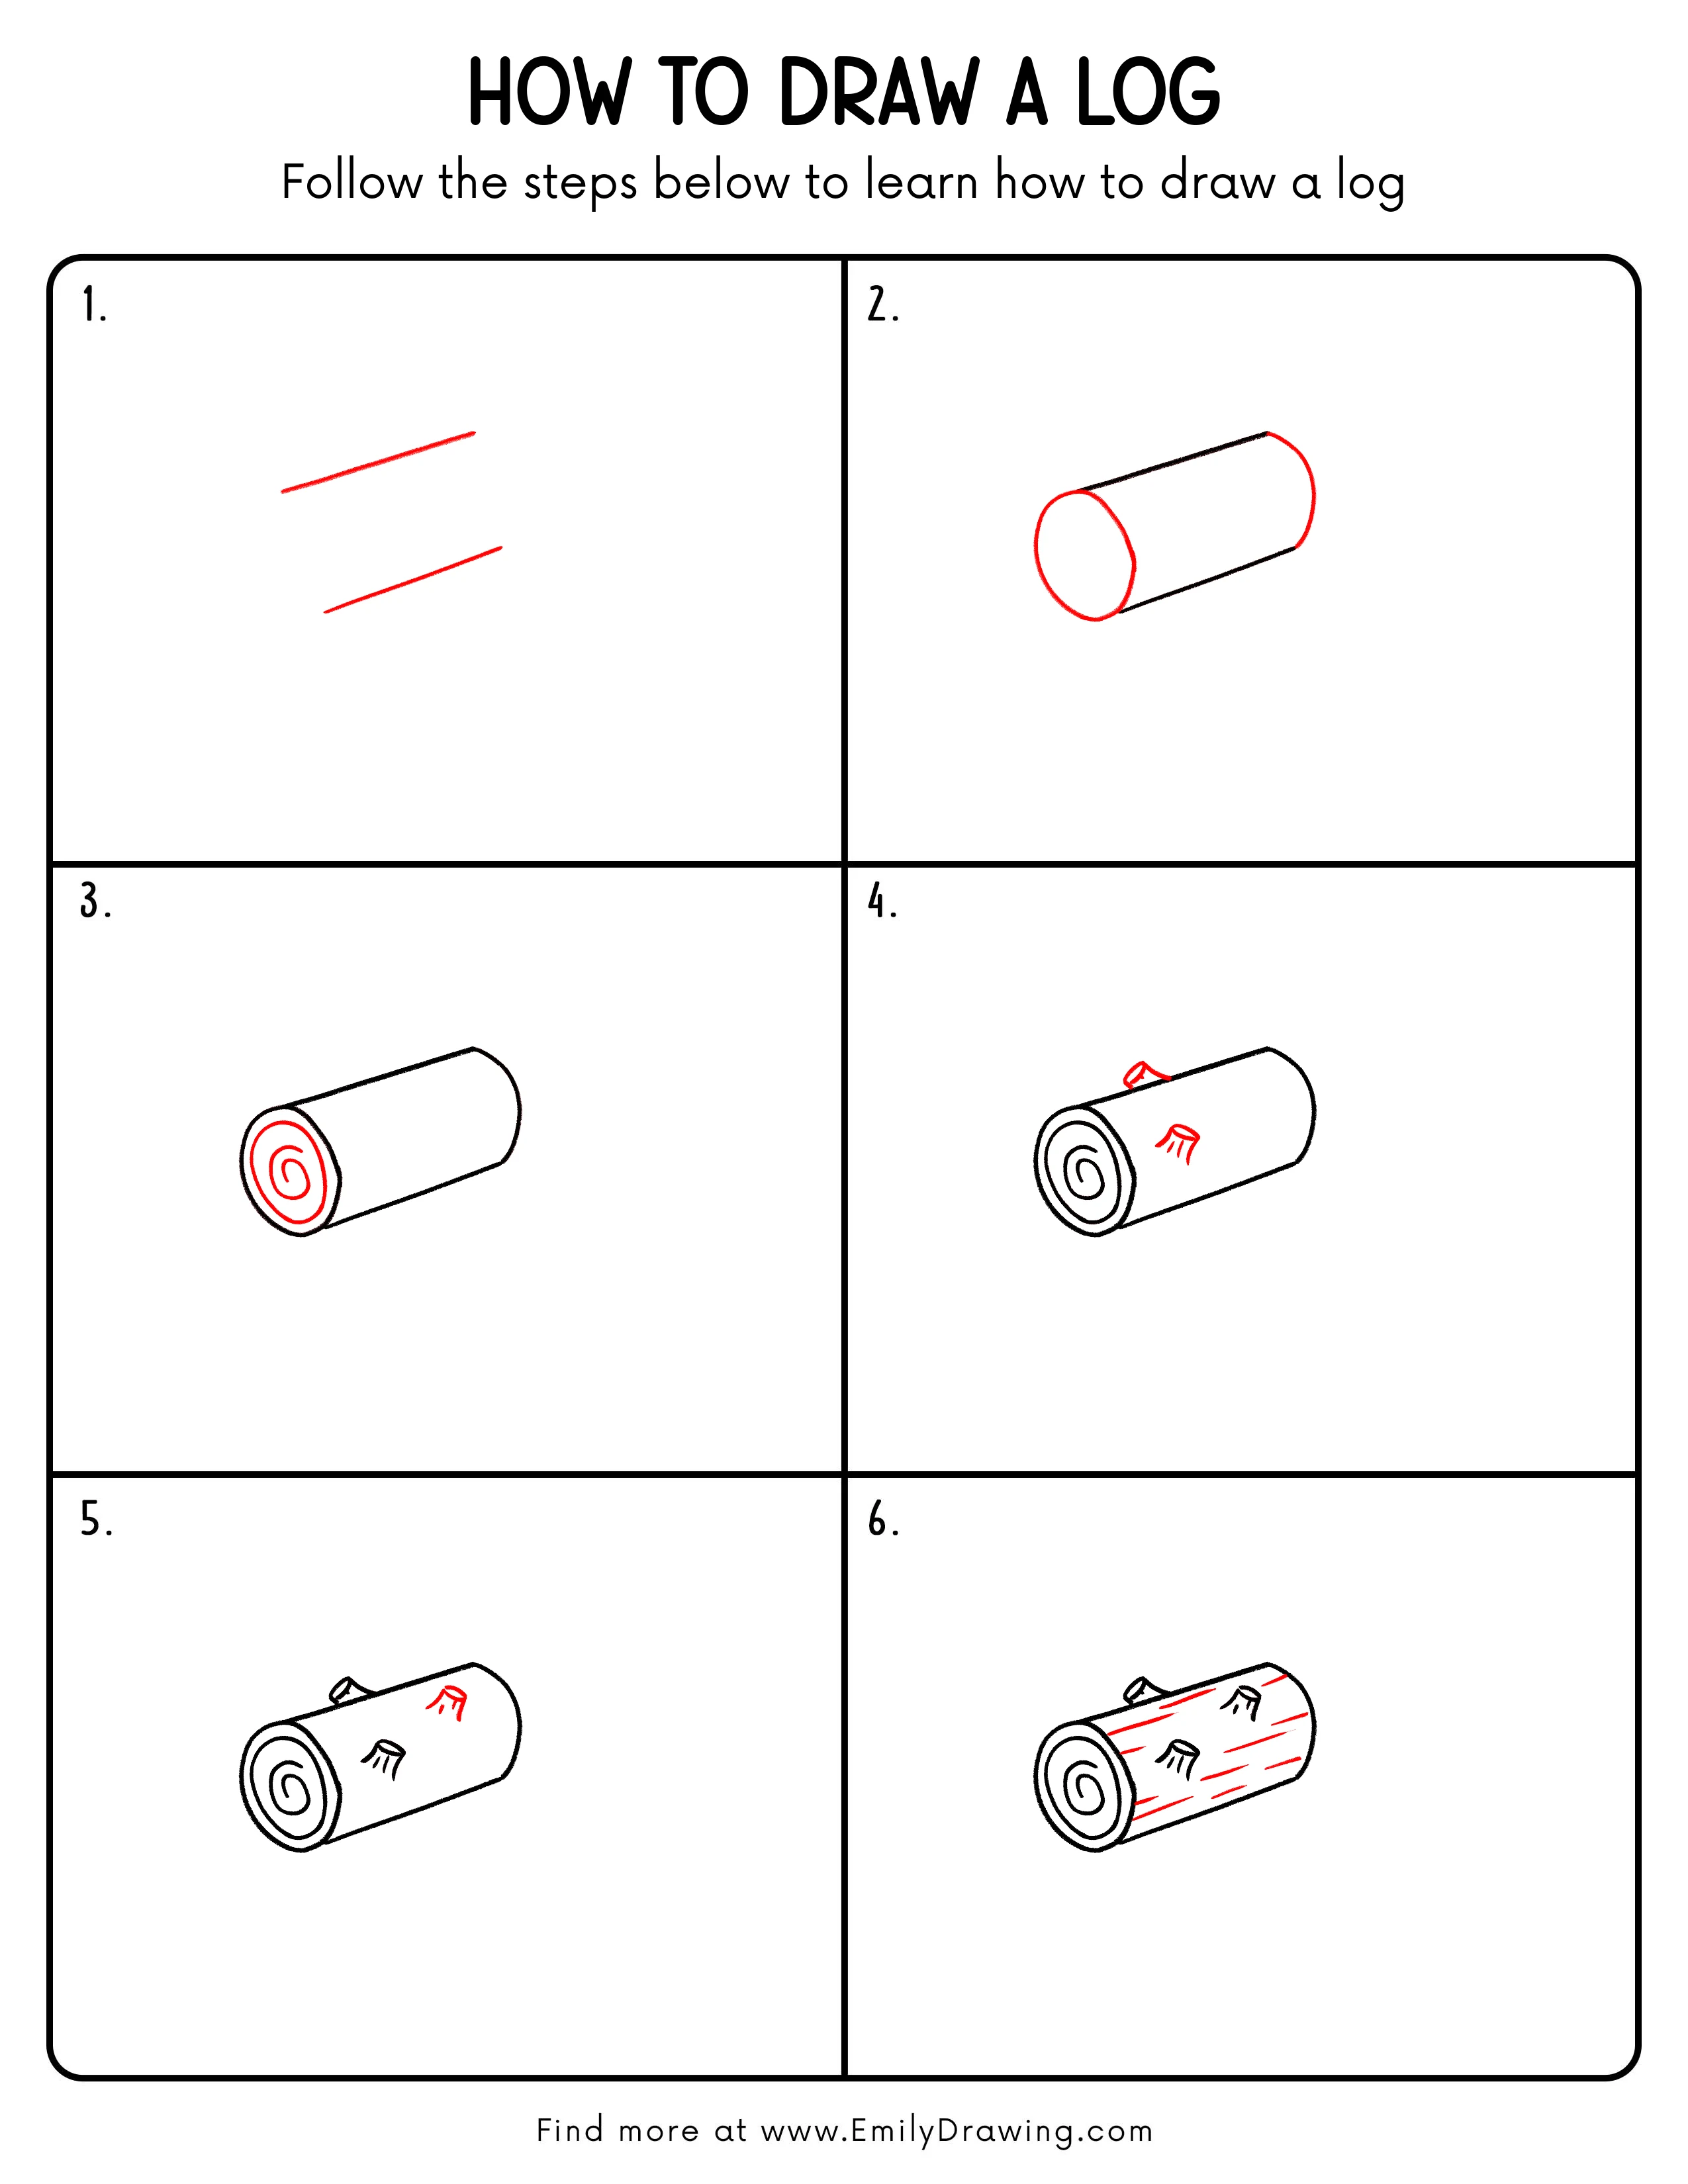
Step 1: Draw Two Slanted Lines
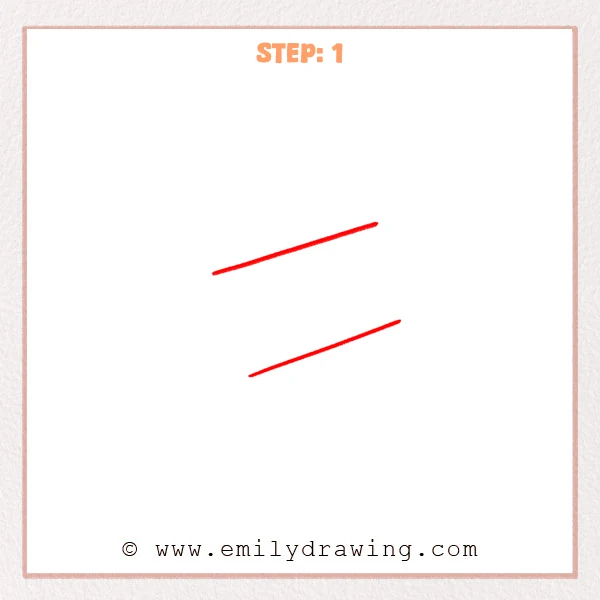
Start with two straight lines that slant upward to the right. Make the top line a little longer than the bottom one, and keep them mostly parallel. These lines will guide the main length of the log.
Pro Tip: Keep both lines tilted at a similar angle so the log looks balanced.
[Alt Text: First sketch step showing two parallel slanted lines as the beginning of a log drawing.]
Step 2: Connect the Log Shape
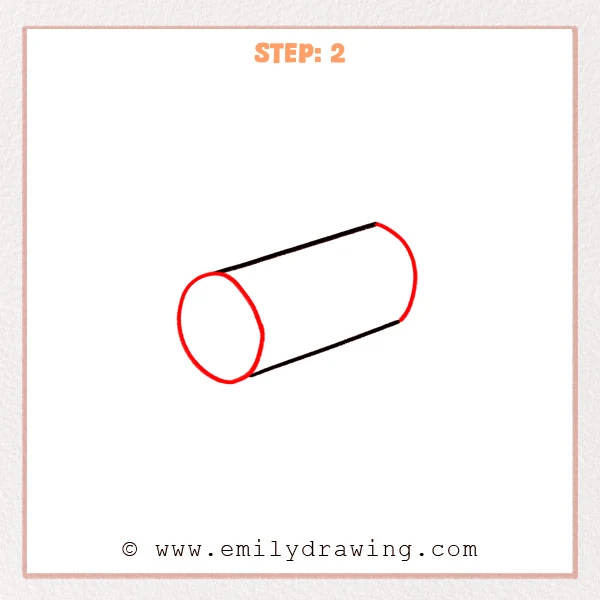
Add rounded ends to connect the two slanted lines and form the body of the log. Draw a full oval on the left side for the front cut end, then use a curved edge on the right side to close the far end. The drawing should now look like a simple cylinder.
Pro Tip: Let the oval touch the ends of both guide lines so the shape feels solid and three-dimensional.
[Alt Text: Second sketch step showing a log shape formed from two slanted lines with a front oval and a curved back edge.]
Step 3: Add the Tree Rings
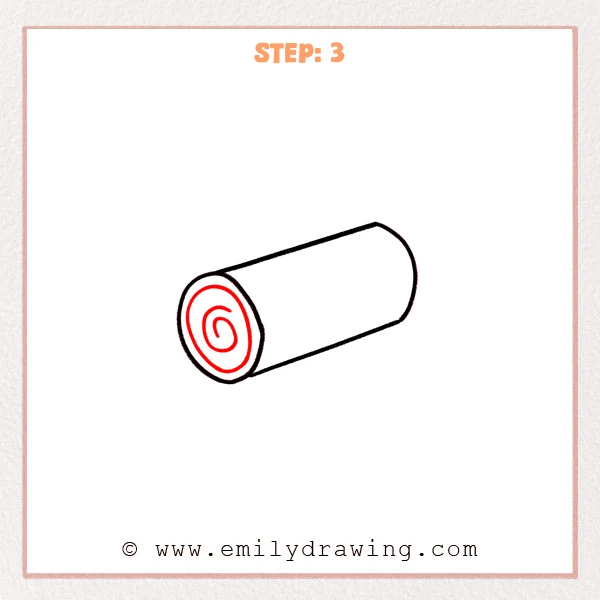
Inside the front oval, draw a spiral shape to show the rings of the wood. Then darken the main outline so the log body stands out more clearly. This step gives the drawing a more finished structure.
Pro Tip: Leave a little space between the spiral turns so the wood rings are easy to see.
[Alt Text: Third sketch step showing a log with a dark outline and spiral tree rings inside the front cut end.]
Step 4: Add Small Branch Stubs
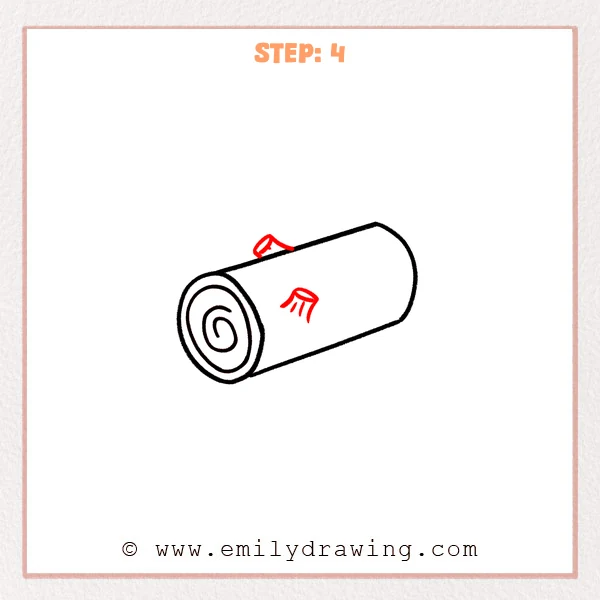
Draw two small branch stubs on the surface of the log, one near the top and one around the middle area. Use a short oval opening and a few curved lines to show each broken branch. These added details make the log look more natural.
Pro Tip: Angle the branch stubs to match the curve of the log so they sit naturally on the surface.
[Alt Text: Fourth sketch step showing a log with tree rings and two small branch stubs added to the surface.]
Step 5: Add One More Branch Stub
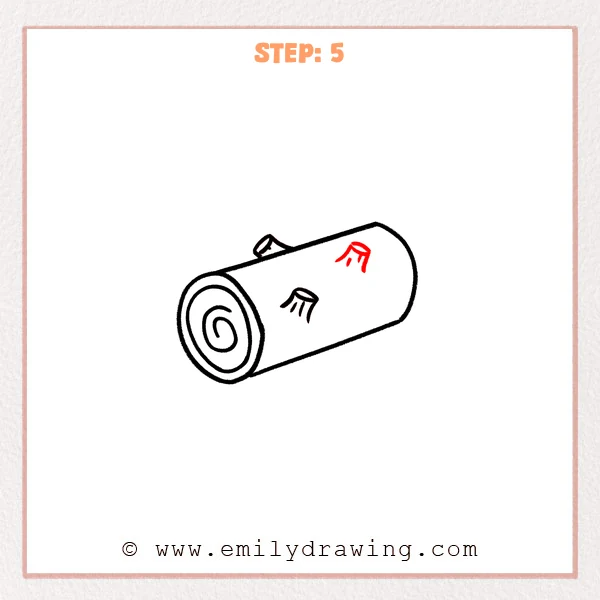
Draw another small branch stub near the upper right part of the log. Keep it small so it does not overpower the main shape. This extra detail helps the surface look more interesting and varied.
Pro Tip: Make the new branch stub much smaller than the log body to keep the proportions clear.
[Alt Text: Fifth sketch step showing a log with spiral rings and three branch stubs, including a newly added upper-right stub.]
Step 6: Draw the Bark Texture
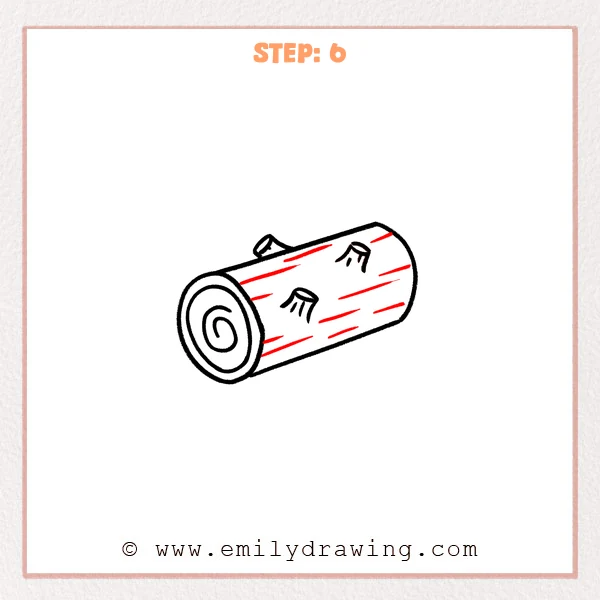
Add several short slanted lines across the surface of the log to show bark texture. Spread them out along the length of the log, using different lengths for a more natural look. These texture marks complete the easy drawing tutorial and give the bark a wood-like feel.
Pro Tip: Stagger the texture lines instead of spacing them too evenly for a more realistic bark effect.
[Alt Text: Sixth sketch step showing a completed log drawing with tree rings, branch stubs, and short bark texture lines across the surface.]
Step 7: Color in your drawing!
Fun Facts
- A log is a section of a tree trunk or a thick branch that has been cut.
- The rings inside a log can help show how old the tree was.
- Bark protects the tree, much like skin protects a body.
- Artists often draw logs in forest scenes, campsites, and nature studies.
Pin it now, Draw later!
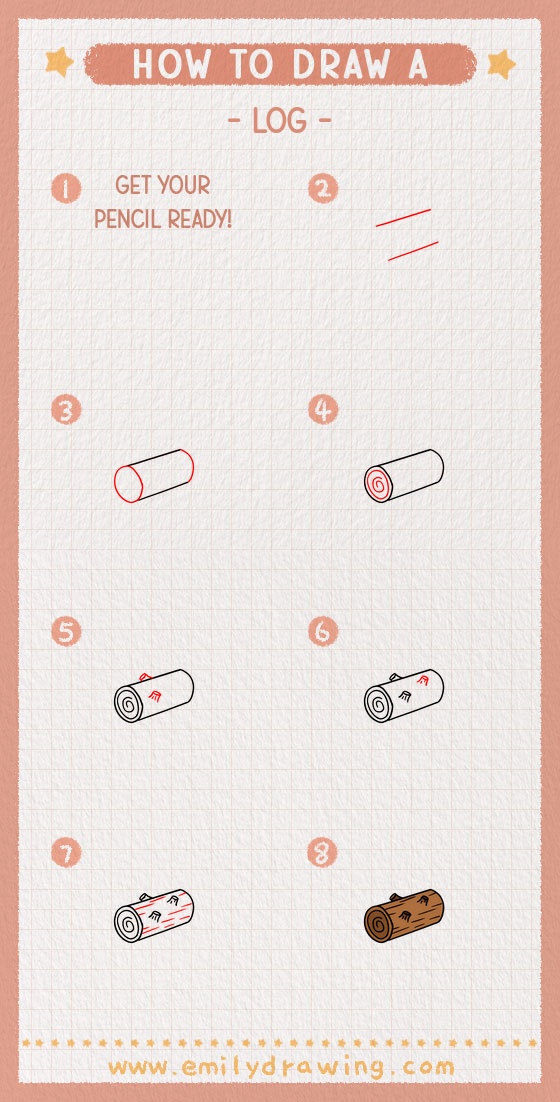
You have now completed a simple log drawing by following an easy step by step drawing process. You started with basic guide lines, shaped the log, added wood rings, included branch stubs, and finished with bark texture. If you want to keep practicing drawing for beginners, try drawing two logs together or place your log in a forest scene for extra fun.
Get the FREE Printable Drawing Guide
FREE Download Printable Log Drawing Tutorial
Frequently Asked Questions
1. Is this how to draw a log tutorial good for beginners?
Yes, this drawing for beginners uses simple shapes and small steps. It is designed to be easy to follow even if you are just starting out.
2. Can I color the log after I finish?
Yes, you can color the bark brown and use darker shades for the branch stubs and tree rings. A little shading can also make the log look more rounded.
3. What should I draw next after this step by step drawing?
You could try drawing leaves, a tree stump, a campfire, or a forest background. These subjects pair well with a log and help you build a full nature scene.