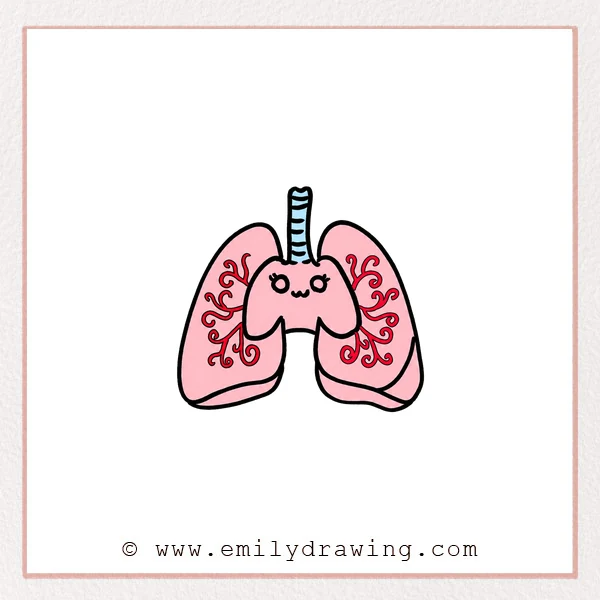
If you want to learn how to draw lungs, this easy drawing tutorial will guide you one step at a time. This step by step drawing lesson is designed for beginners and turns a simple anatomy subject into a cute, friendly character.
What You Will Need
- Drawing paper
- Pencil or black marker
- Eraser
- Red marker or colored pencil
- Black pen for outlining
Here are my RECOMMENDED Art Supplies!
- Crayola Coloring Set (140 Pieces – Mega Value!)
- 24 Colored Crayon Set
- A4 Printer Paper
- Crayola Coloring Pencils
- HP Home Printer with Instant Ink!
Time needed:
10 minutes.
Step-by-Step Drawing Guide
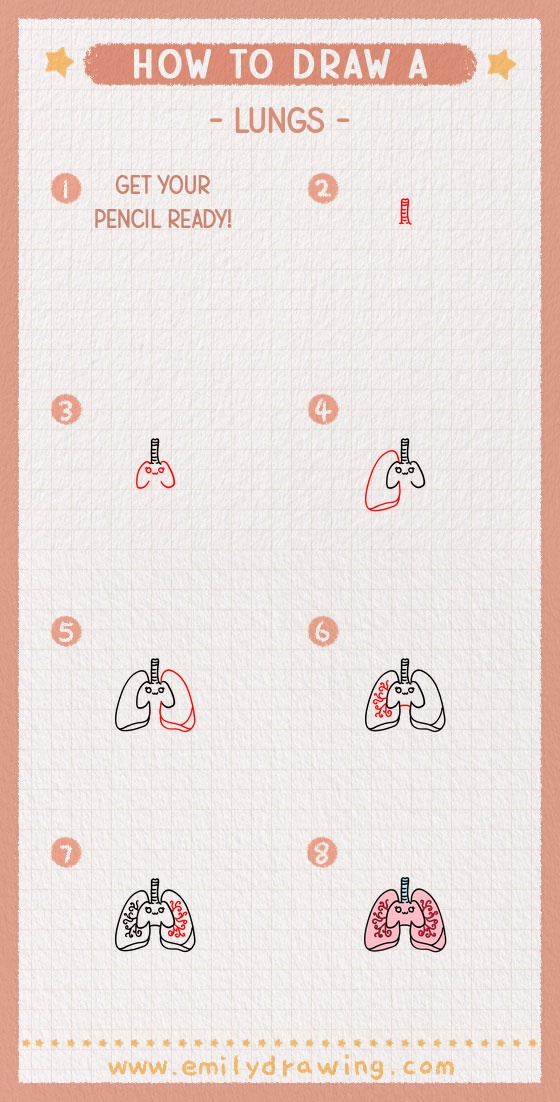
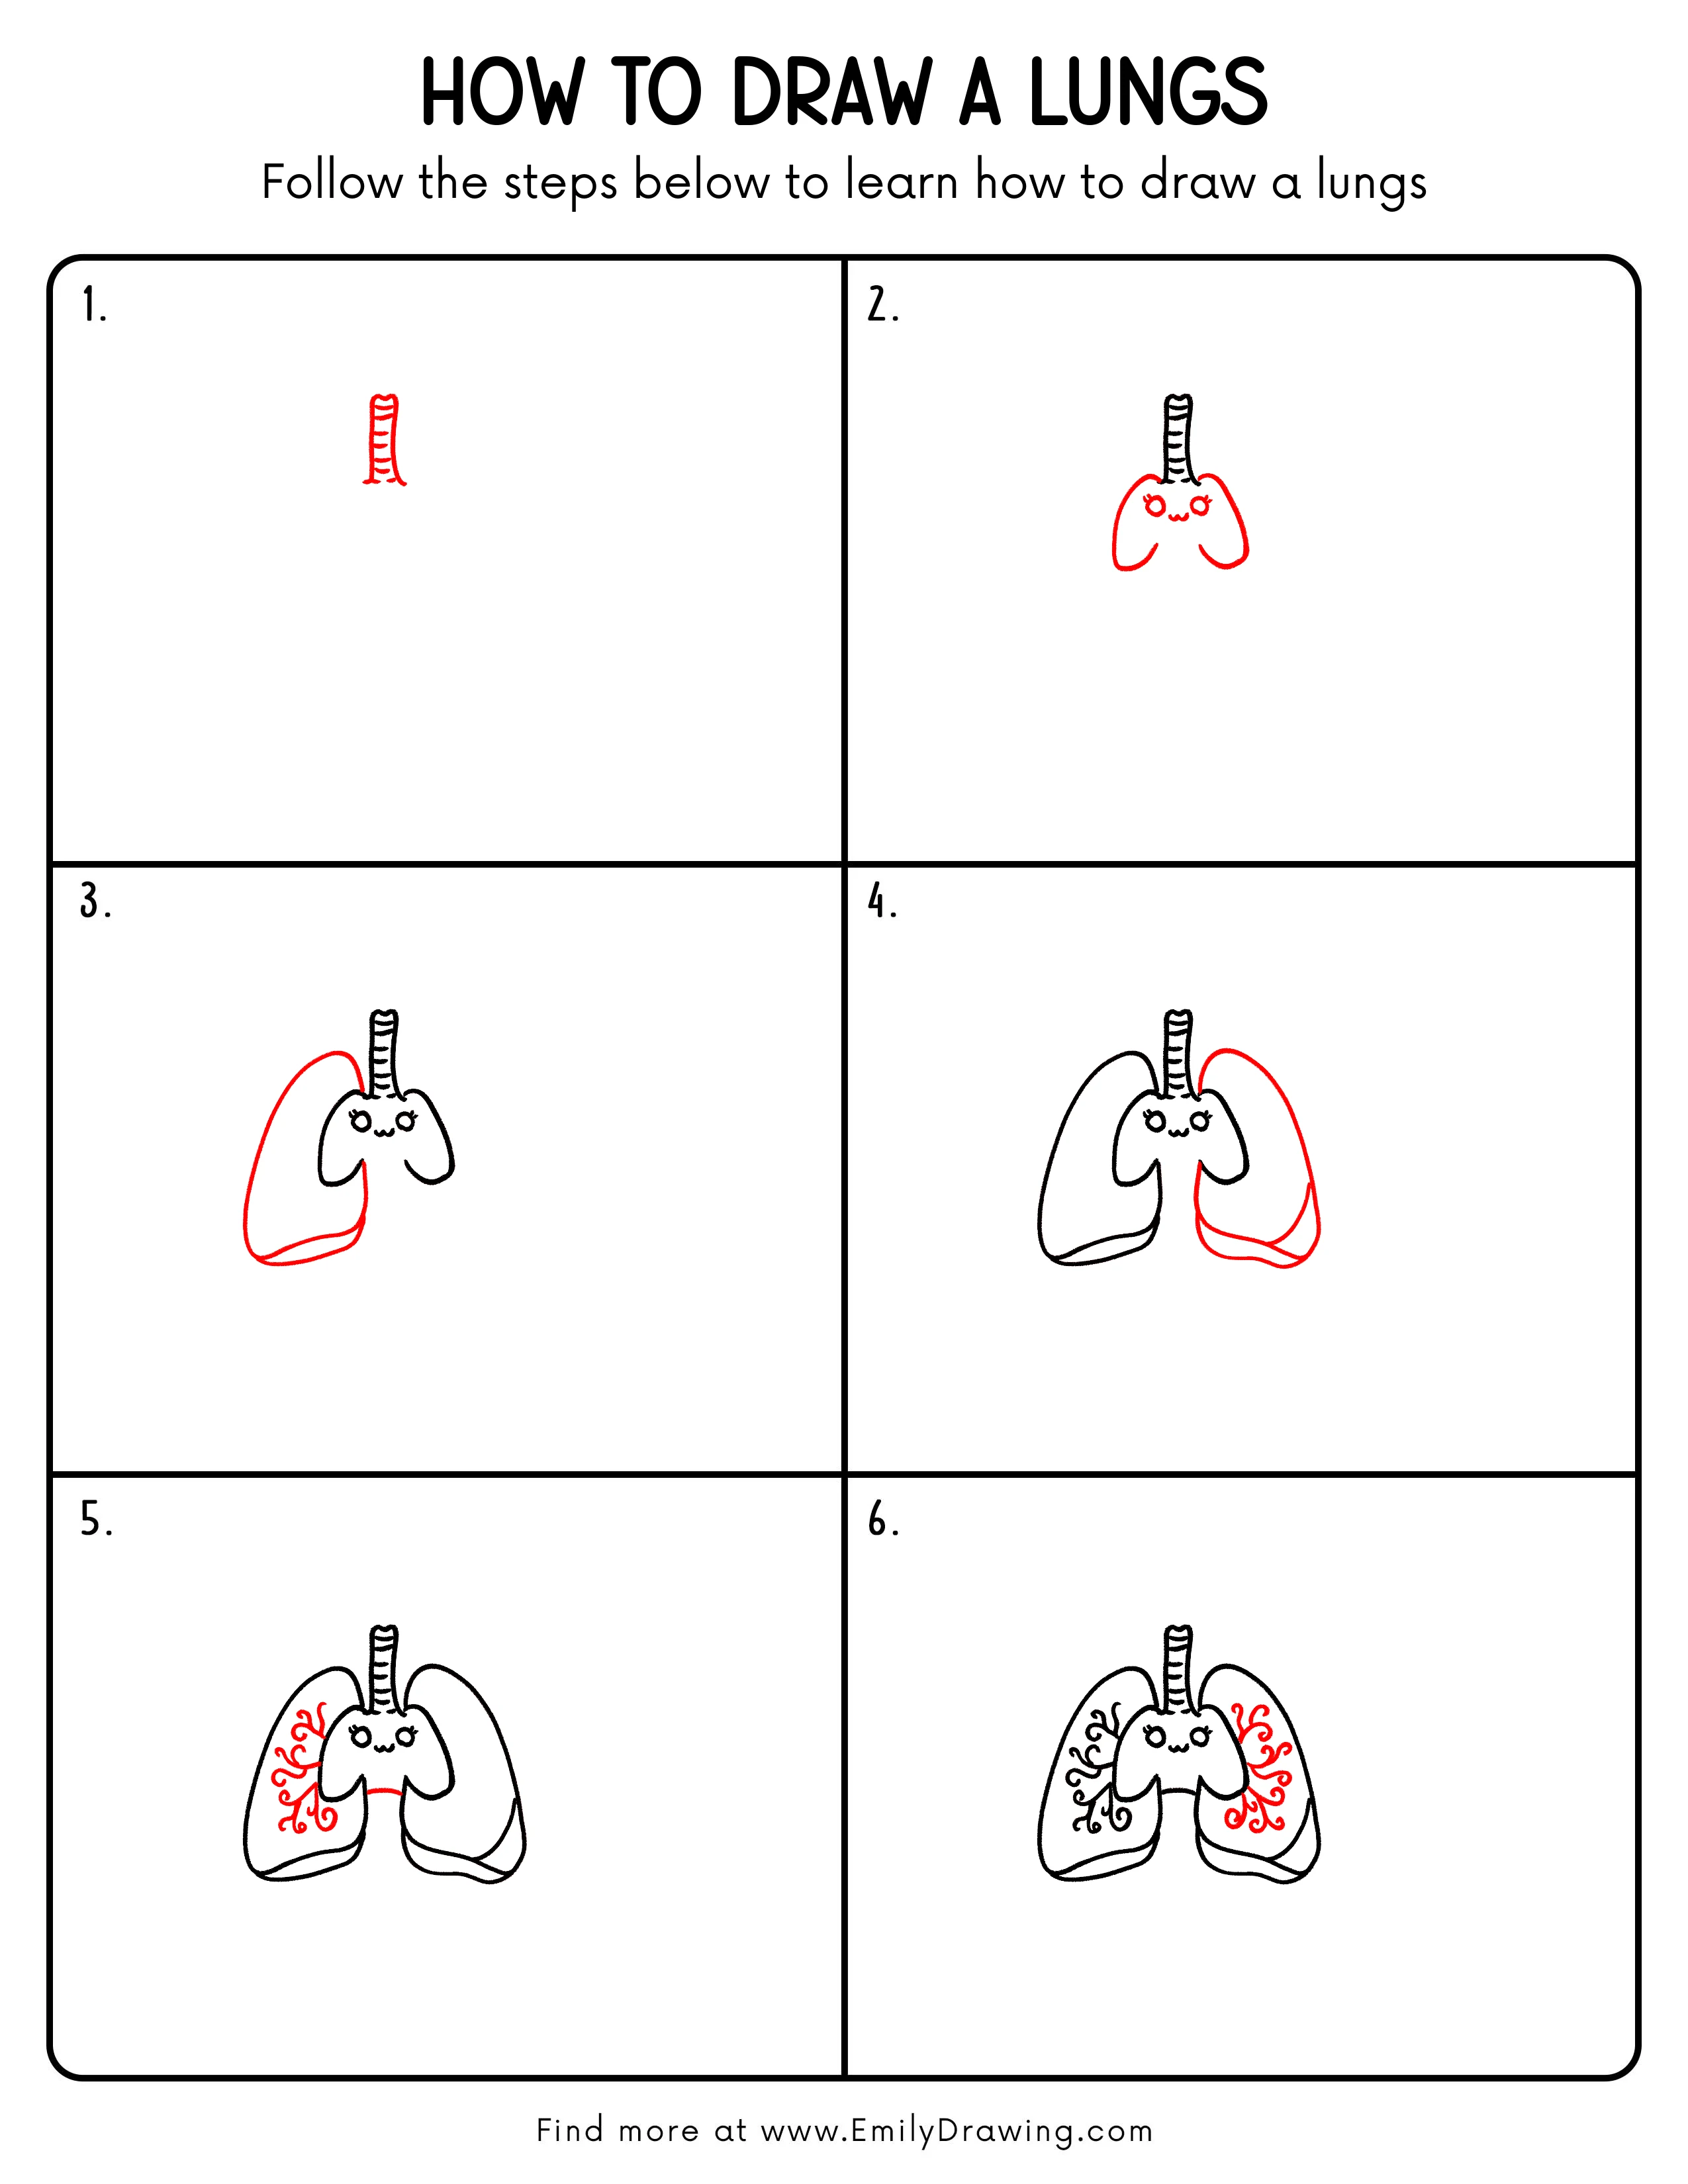
Step 1: Draw the Central Windpipe
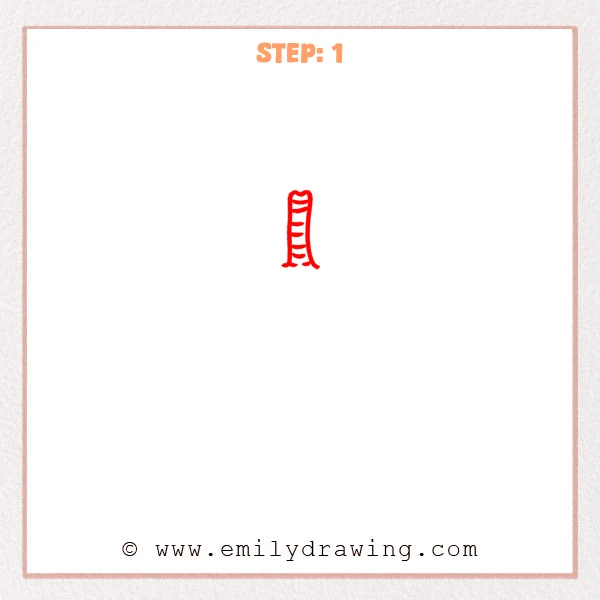
Start with a tall, narrow shape in the center of your page for the windpipe. Leave a small dip at the top, then add several curved horizontal bands inside to show the soft cartilage rings.
Pro Tip: Keep the side edges slightly curved so the windpipe looks soft and natural.
Step 2: Add the Cute Inner Lung Shape and Face

Draw a rounded inner lung shape under the windpipe, with two soft lower curves suggesting the small inner lobes. Add two round eyes, tiny lashes, and a small smiling mouth in the middle to give the lungs a cute expression.
Pro Tip: Try to keep the face centered so both sides of the drawing feel balanced.
Step 3: Enlarge the Left Lung Lobe Outline
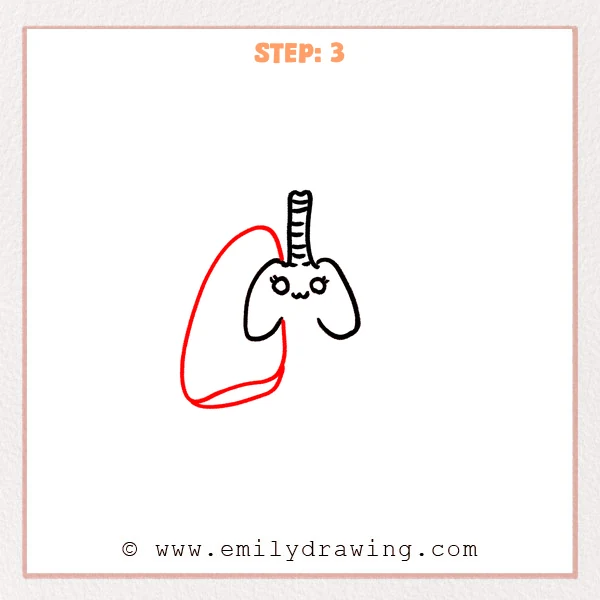
Draw a larger outer lobe on the left side, curving it outward and downward from beside the windpipe. Add a gently curved line near the bottom of this lobe to suggest a soft layered edge.
Pro Tip: Draw the large outer curve slowly to help the lobe look smooth and even.
Step 4: Complete the Large Right Lung Lobe
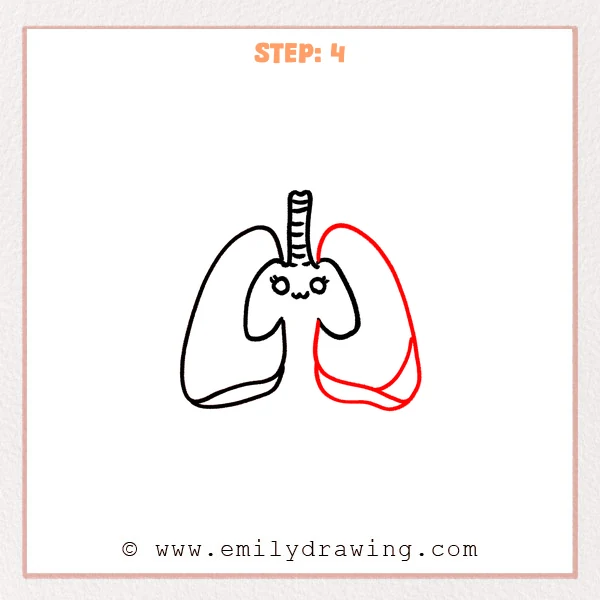
Repeat the same idea on the right side by drawing another large rounded lobe. Add a curved lower line and a small lower section so the right side matches the finished look of the left.
Pro Tip: Use the left lobe as a guide, but do not worry if the two sides are not perfectly identical.
Step 5: Add Decorative Branches Inside the Left Lung
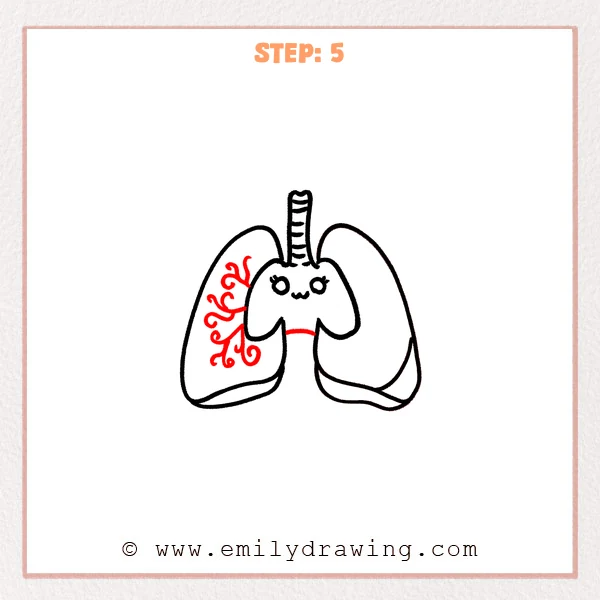
Inside the left lung, draw curling branch-like lines that spread outward like decorative airflow paths. Then add a short curved line below the face to connect the middle inner area.
Pro Tip: Leave a little open space between the curls so the pattern stays clear and easy to see.
Step 6: Add Decorative Branches Inside the Right Lung
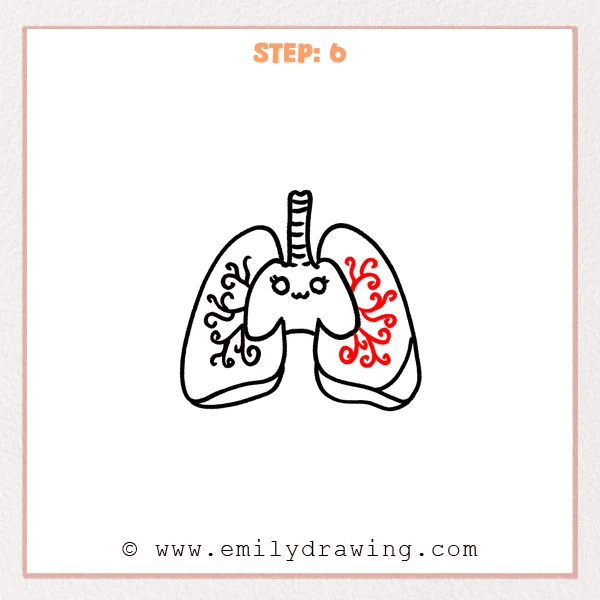
Draw similar curling branch lines inside the right lung to balance the design. Let the lines spread outward from the center so both lungs feel lively and complete.
Pro Tip: Match the overall spacing and size of the left pattern instead of copying every curl exactly.
Step 7: Color in your drawing!
Fun Facts
- Your lungs help bring oxygen into your body every time you breathe.
- The right lung is usually a little larger than the left lung.
- The lungs work closely with the windpipe, also called the trachea.
- Anatomy drawings can be both educational and fun when you turn them into character art.
Pin it now, Draw later!
Trace your final lines neatly and erase any extra sketch marks if needed. You can color the lungs pink or red, keep the windpipe shaded lightly, and leave the face simple and cheerful. This easy drawing tutorial shows that learning how to draw lungs can be clear, fun, and beginner-friendly. If you enjoyed this step by step drawing guide, try drawing more cute body parts or science-themed characters next.
Get the FREE Printable Drawing Guide
FREE Download Printable Lungs Drawing Tutorial
Frequently Asked Questions
Can beginners learn how to draw lungs easily?
Yes, this drawing for beginners uses simple curved shapes and small details. If you follow each step slowly, the drawing becomes much easier.
Do I need to make both lungs exactly the same?
No, they only need to look balanced overall. Small differences can still make your drawing look natural and charming.
Can I color the lungs in different ways?
Yes, you can use red, pink, or even pastel tones for a cute style. You can also keep the decorative branches in a contrasting color for a playful finish.