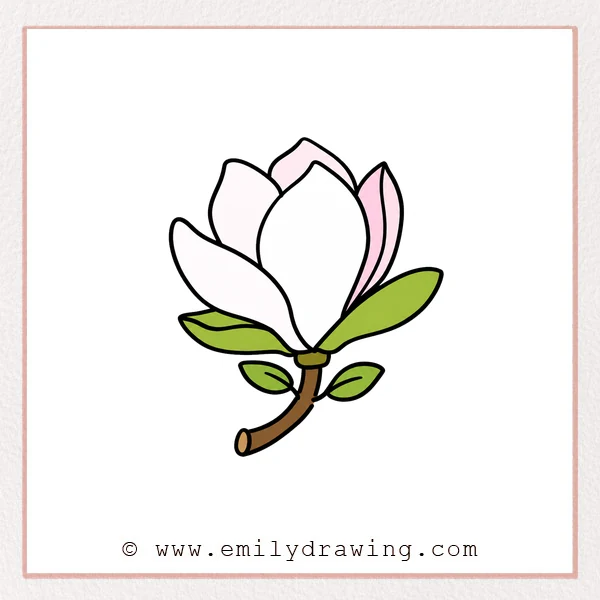
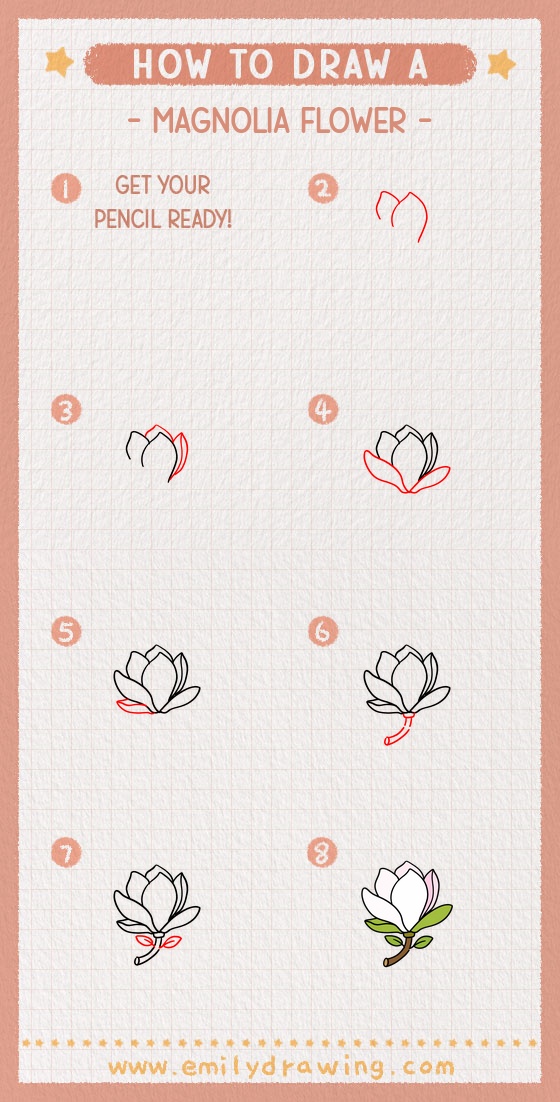
If you want to learn how to draw a magnolia flower, this easy drawing tutorial is a great place to start. This step by step drawing guide is designed for beginners and uses simple shapes to build the flower one part at a time. Take your time with each stage, and enjoy watching your magnolia flower come together.
What You Will Need
- Drawing paper
- Pencil or black pen
- Eraser
- Colored pencils or markers (optional)
Here are my RECOMMENDED Art Supplies!
- Crayola Coloring Set (140 Pieces – Mega Value!)
- 24 Colored Crayon Set
- A4 Printer Paper
- Crayola Coloring Pencils
- HP Home Printer with Instant Ink!
Time needed:
13 minutes.
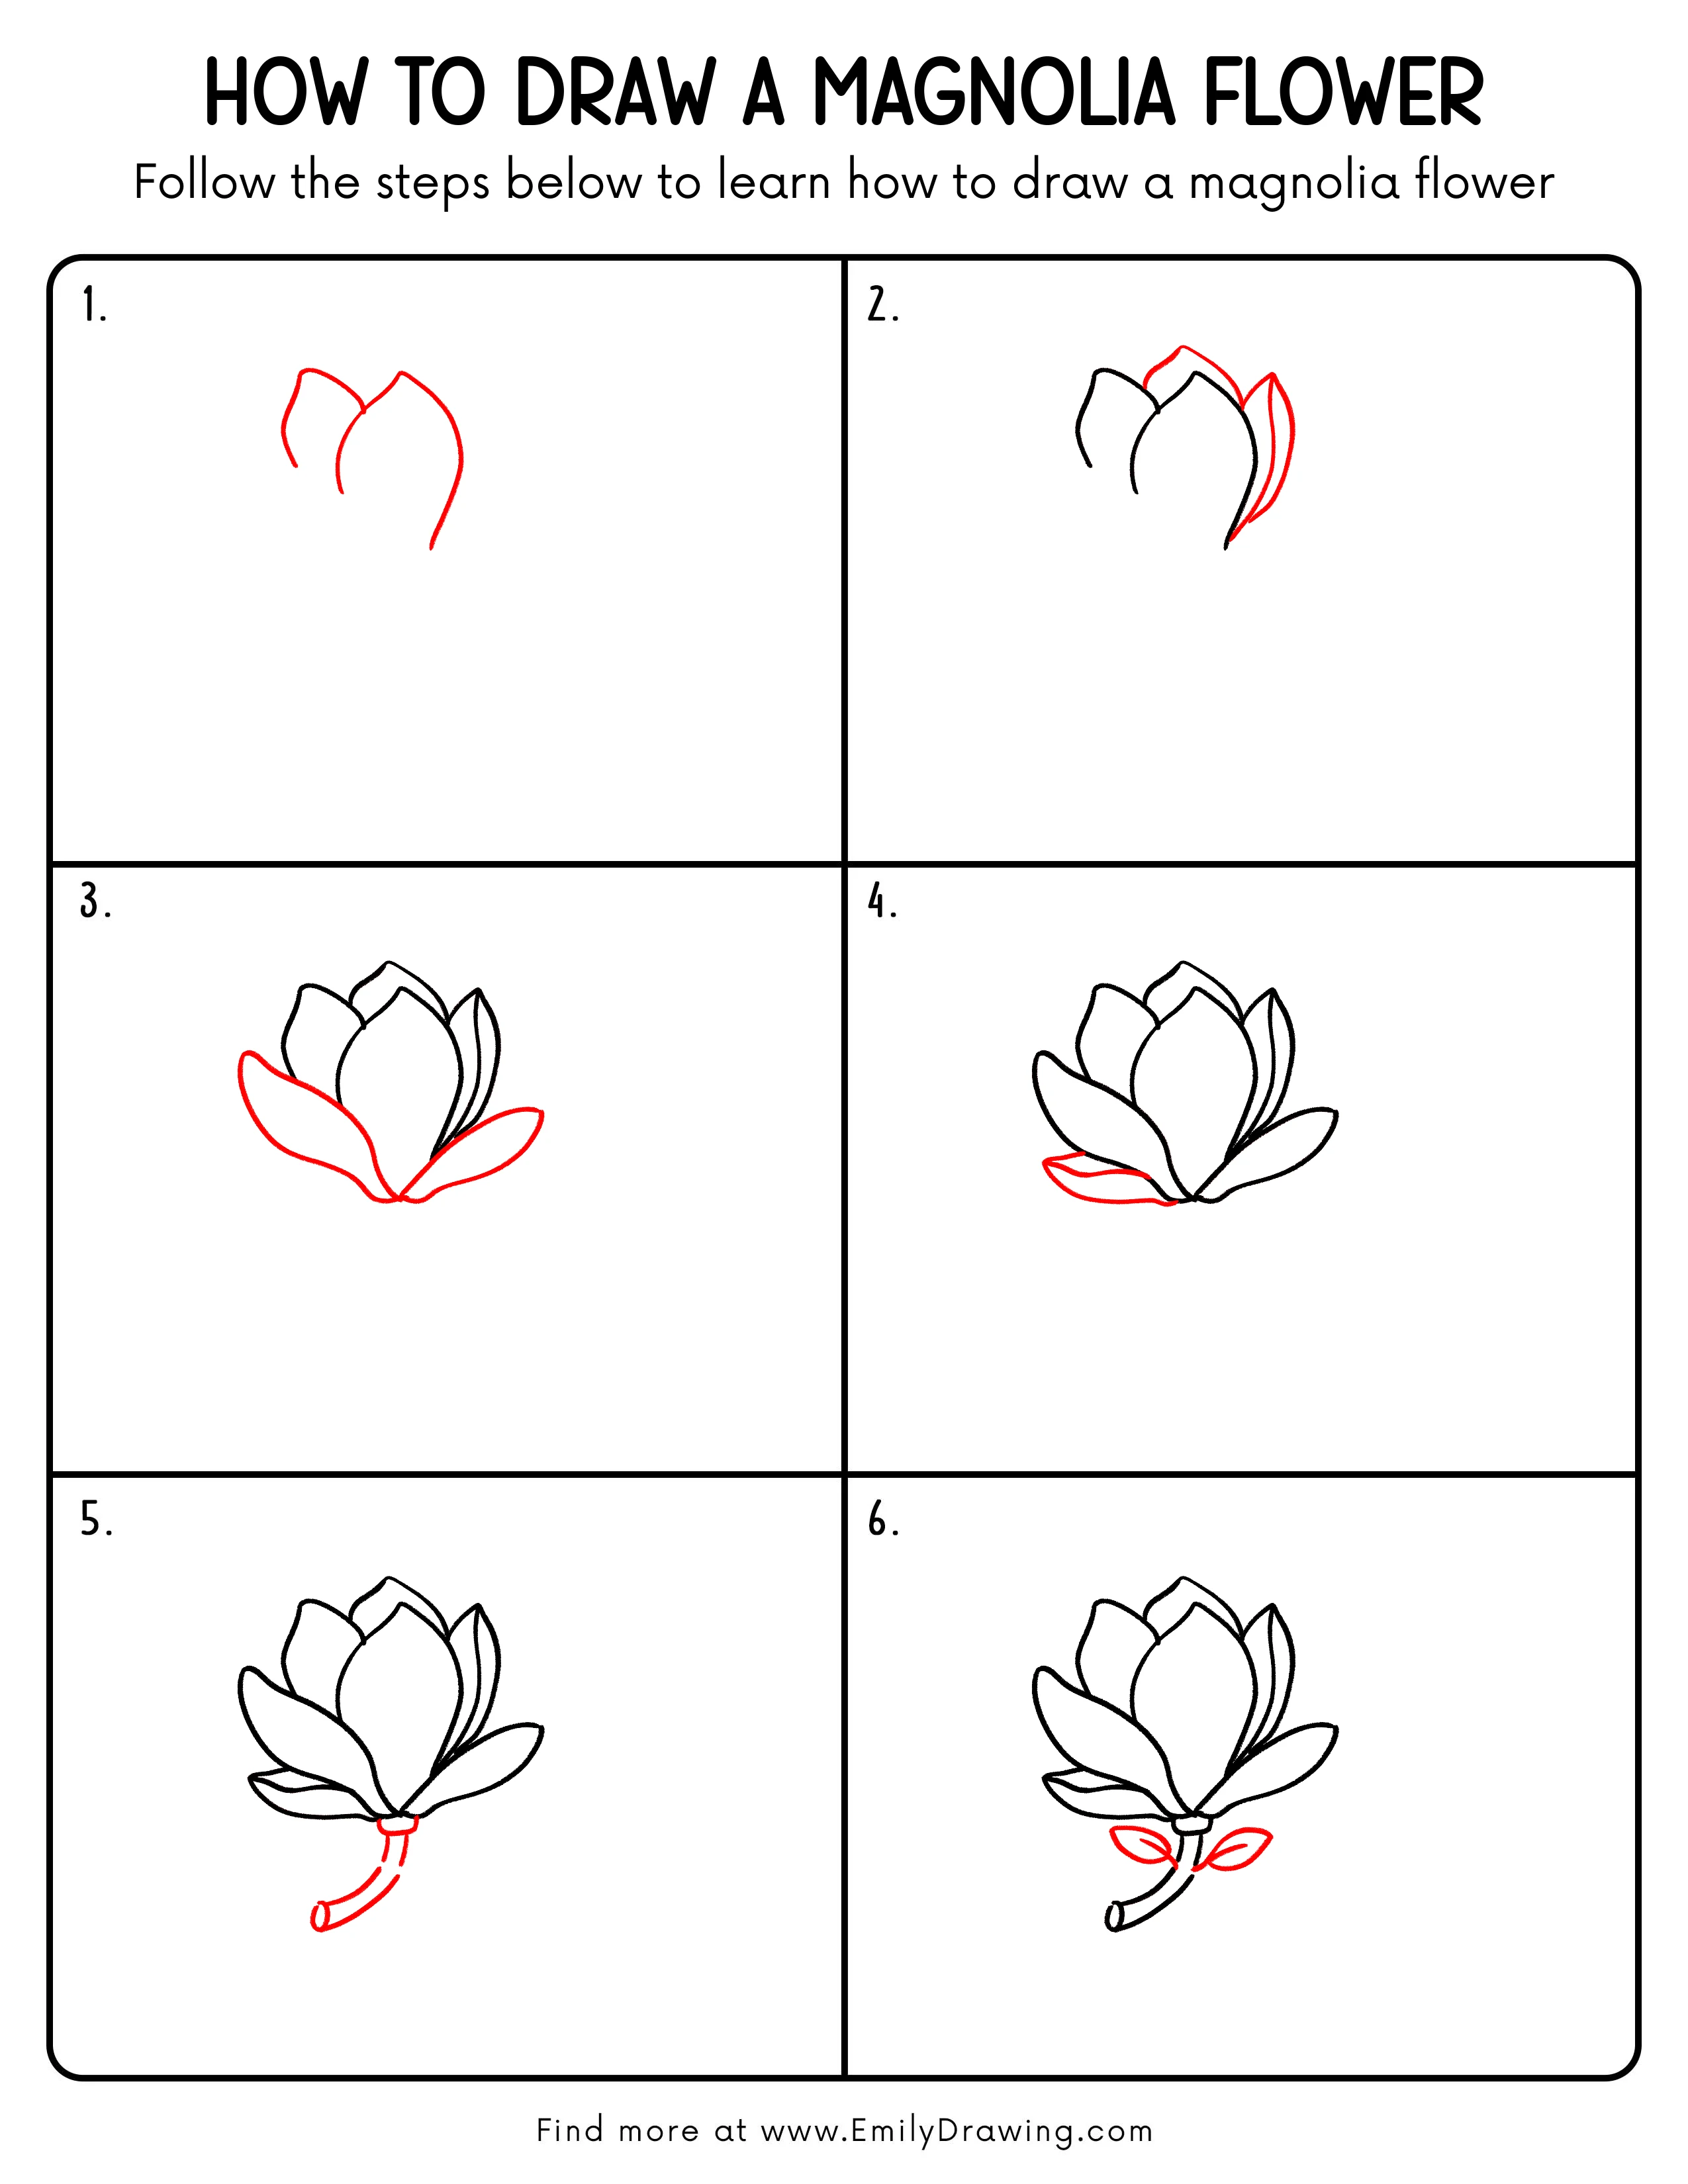
Step-by-Step Drawing Guide
Step 1: Draw the Outer Petal Shapes
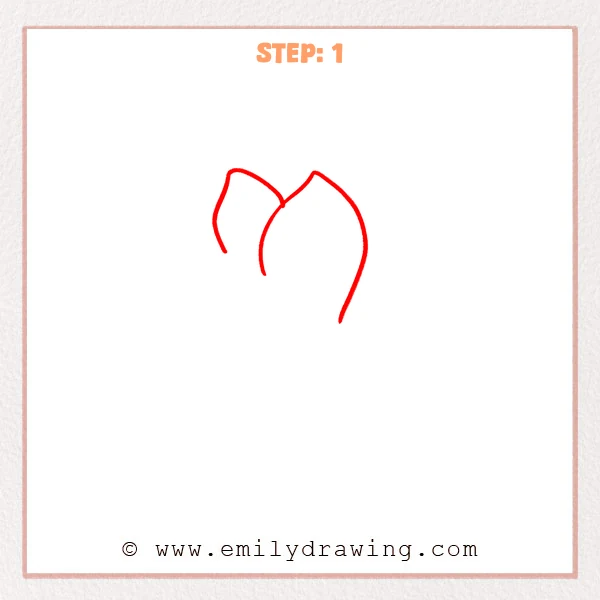
Start with curved lines to outline the upper petals of the magnolia flower. Let the lines spread outward from the center point, keeping the petal tips gently tapered. Keep the shapes open and simple for now.
Pro Tip: Keep the center meeting point clear so the later petals are easier to connect.
[Alt Text: A beginner magnolia flower sketch showing the first curved outer petal outlines at the top.]
Step 2: Add the Back Petals
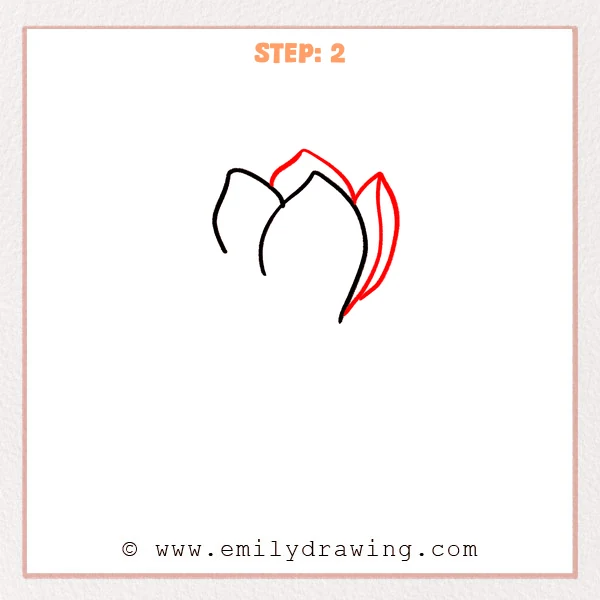
Add new petal outlines at the top and right side, letting them grow outward from near the center. Make the right petal longer and slimmer, then add an inner curved line to show its folded surface. This gives the flower more depth.
Pro Tip: Keep the right petal narrower than the middle petal to give the magnolia flower more depth.
[Alt Text: A magnolia flower sketch with added back petals and a folded right-side petal outline.]
Step 3: Draw the Open Front Petals
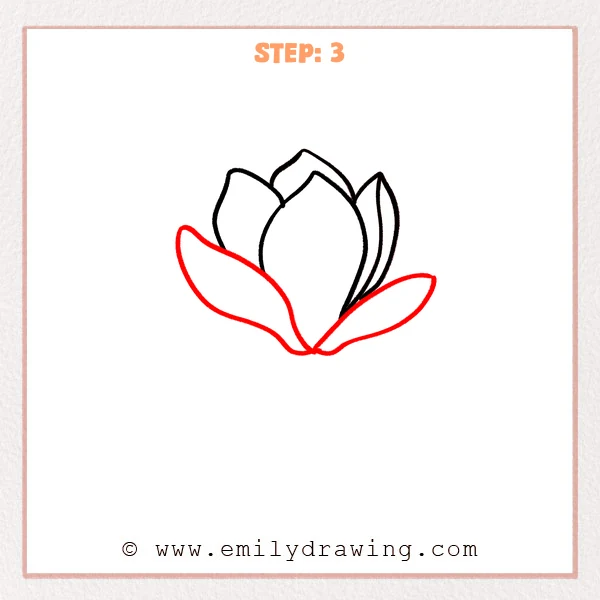
Add two wide front petals on the lower left and right sides of the flower. Let them spread outward from the bottom center, then curve gently back toward the flower’s middle. These petals help the blossom look fuller and more open.
Pro Tip: Make the front petals a little wider so the magnolia flower looks more open.
[Alt Text: A magnolia flower sketch with two wide front petals added below the earlier petal shapes.]
Step 4: Add the Lower Left Petal
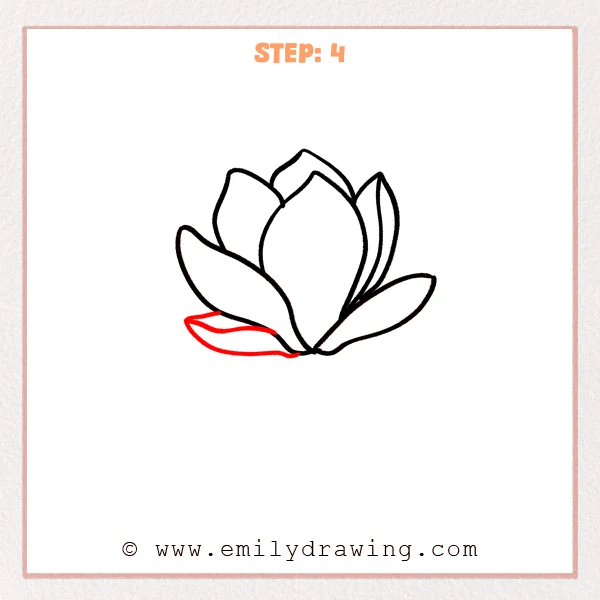
Add a smaller low petal on the lower left side, letting it stretch beside the large front petal. Use one inner curved line to show the thin edge and folded shape of the petal. This small detail makes the base look more layered.
Pro Tip: Keep this small petal lower so the base of the magnolia flower opens naturally.
[Alt Text: A magnolia flower sketch with a small folded lower-left petal added beneath the front petals.]
Step 5: Add the Base and Curved Stem
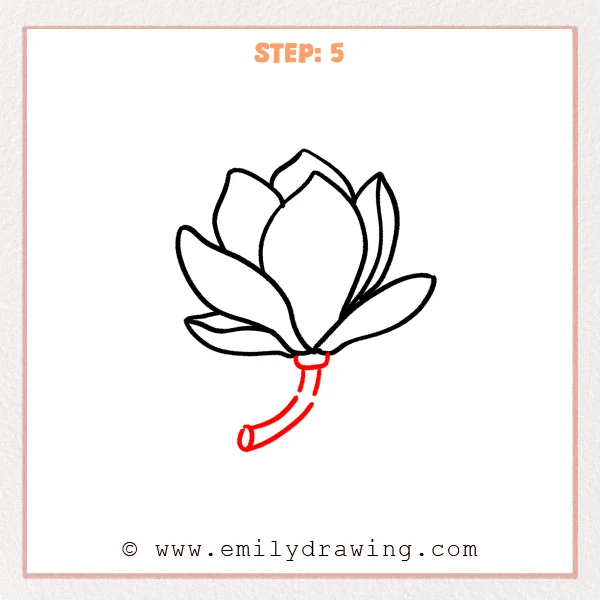
Draw a small base beneath the flower to connect all the petals naturally. Then add a curved stem below it, with a small round opening at the end to show the cut tip. Keep the stem smooth and slightly bent.
Pro Tip: Keep the stem much thinner than the petals so the magnolia flower feels light.
[Alt Text: A magnolia flower sketch with a small flower base and curved stem added beneath the petals.]
Step 6: Draw Two Small Leaves
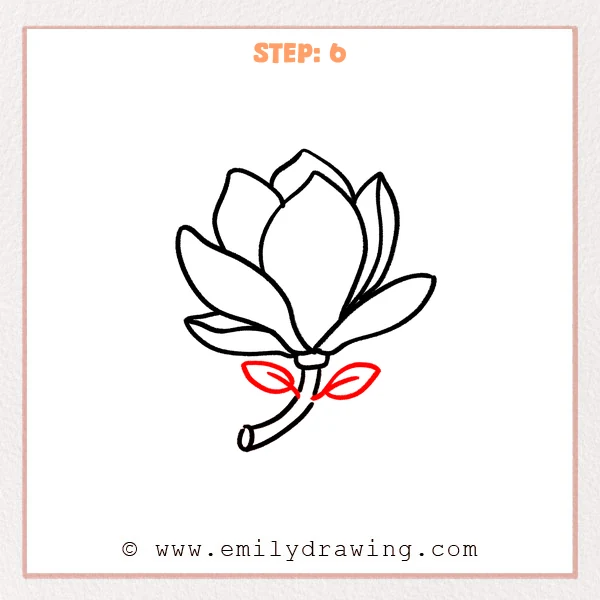
Add one small leaf on each side of the stem, letting them spread outward from near the flower stem. Place a short curved line inside each leaf to show the vein and direction. These final touches complete the flower drawing.
Pro Tip: Keep the two leaves similar in size, but angle them slightly differently for a natural look.
[Alt Text: A completed magnolia flower drawing with two small leaves added beside the curved stem.]
Step 7: Color in your drawing!
Fun Facts
- Magnolia flowers are among the oldest flowering plants on Earth.
- They are known for their large, elegant petals and soft fragrance.
- Magnolias often bloom in spring and are popular in gardens and parks.
Pin it now, Draw later!
You have now completed an easy drawing tutorial for a magnolia flower. You can leave it as a clean line drawing or add soft pink, white, or green colors for a finished look. Keep practicing this step by step drawing and try drawing more flowers to build your confidence.
Get the FREE Printable Drawing Guide
FREE Download Printable Magnolia Flower Drawing Tutorial
Frequently Asked Questions
Can beginners learn how to draw a magnolia flower?
Yes, this drawing for beginners uses simple curved shapes and easy steps.
Do I need to draw every petal perfectly?
No, small differences in petal shape can make the flower look more natural.
Can I color the magnolia flower after drawing it?
Yes, you can color the petals and leaves after finishing the outline to make your artwork more lively.