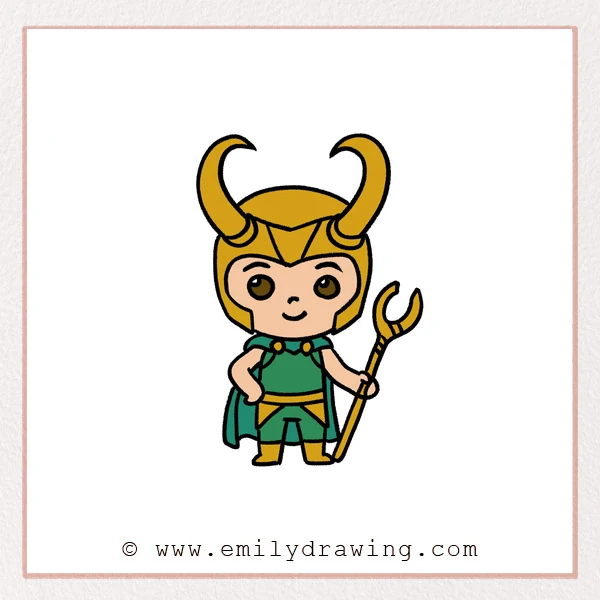
Learn how to draw Loki in a cute, beginner-friendly style. This step by step drawing guide builds the character slowly, starting with the horns and ending with the scepter. Take your time with each part, and keep the shapes simple and clear.
What You Will Need
- Pencil
- Eraser
- Black marker or pen
- Drawing paper
- Coloring tools, such as crayons, markers, or colored pencils
Here are my RECOMMENDED Art Supplies!
- Crayola Coloring Set (140 Pieces – Mega Value!)
- 24 Colored Crayon Set
- A4 Printer Paper
- Crayola Coloring Pencils
- HP Home Printer with Instant Ink!
Time needed:
21 minutes.
Step-by-Step Drawing Guide
Step 1: Draw Loki’s Twin Horn Outlines
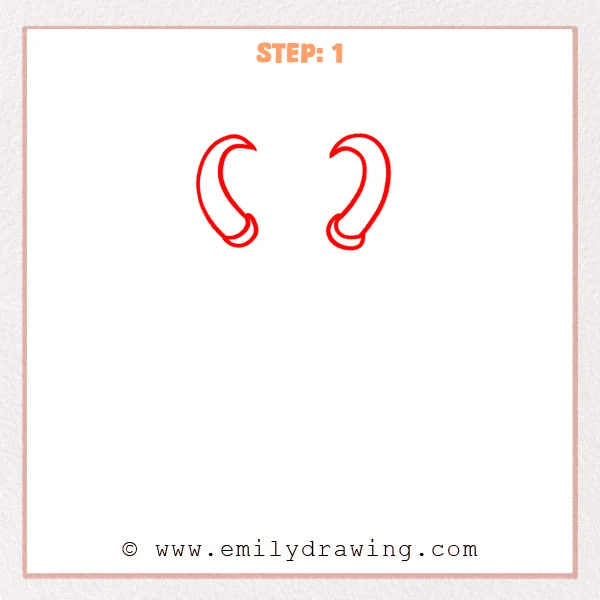
Start with two curved horns, shaped like long bean pods bending inward. Keep both sides balanced, and add a small curved rim at the base of each horn.
Pro Tip: Lightly mark the horn heights first so Loki’s headpiece stays more symmetrical.
Step 2: Add Loki’s Helmet Shape
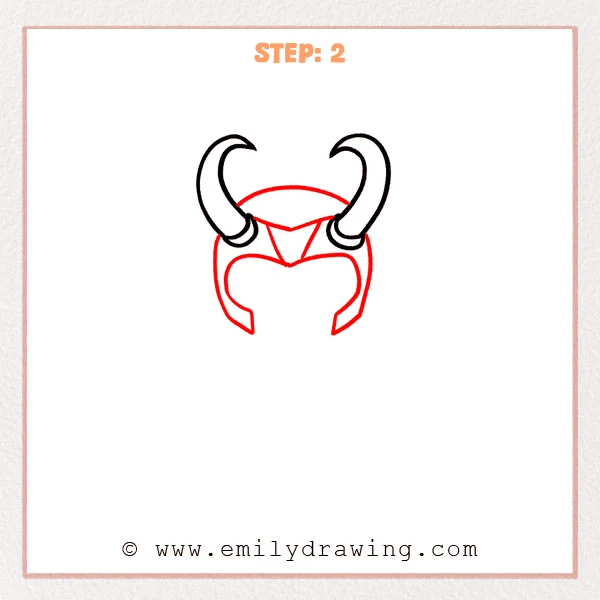
Under the horns, draw the rounded top of the helmet and let both sides curve down around the face. Add the pointed center decoration and the face opening so Loki’s helmet begins to take shape.
Pro Tip: Place the center point in the middle of the helmet so the whole design feels balanced.
Step 3: Draw Loki’s Cute Expression
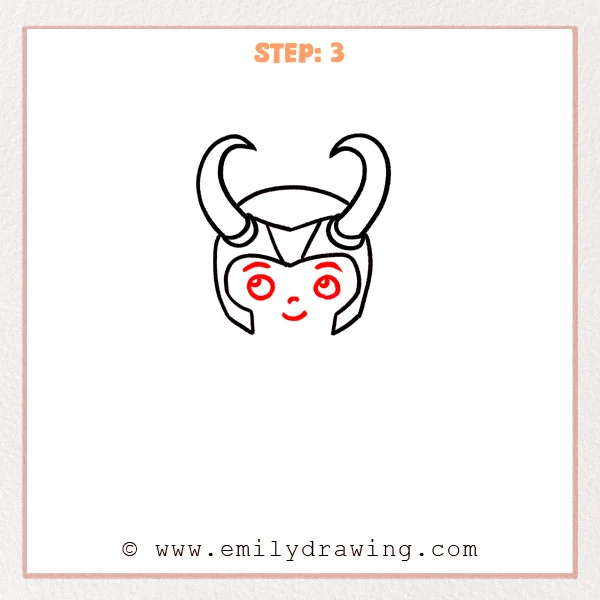
Inside the face opening, add two round eyes with small highlights to make them bright. Then draw the eyebrows, tiny nose, and smiling mouth so Loki looks more playful and cute.
Pro Tip: Keep both eyes at the same height and size so the expression looks neat.
Step 4: Add Loki’s Little Arms
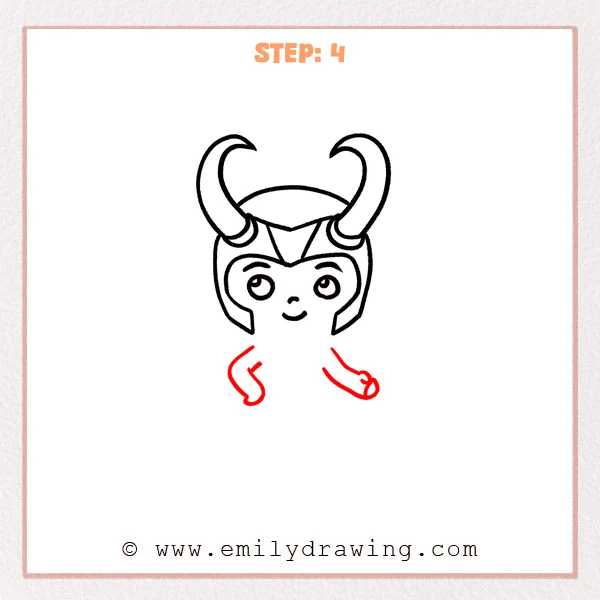
Below the head, draw two small curved arms on each side. Make the left arm curl gently like a hook, and stretch the right arm outward with tiny fingers at the end.
Pro Tip: Keep the arms much smaller than the helmet so Loki keeps a cute proportion.
Step 5: Draw the Collar and Body Outline
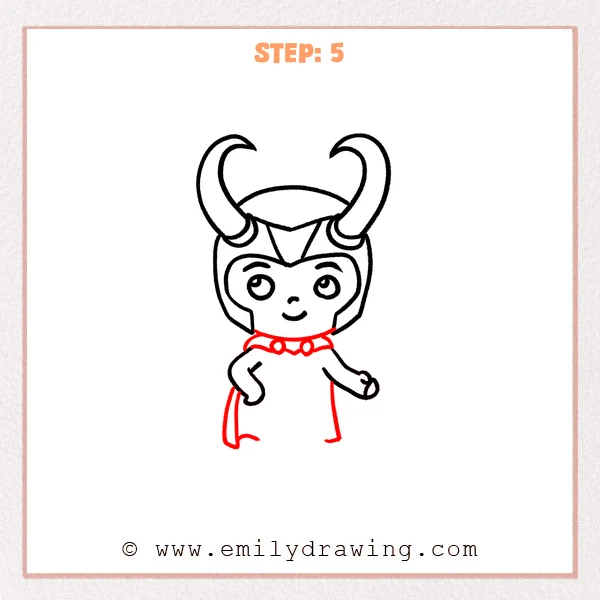
Under the head, add Loki’s cape collar with small round buttons and a pointed shape in the center. Then draw the long body sides downward, and add a hanging cape edge on the left.
Pro Tip: Let the body lines extend naturally from the collar, and avoid making them wider than the head.
Step 6: Add Costume Details
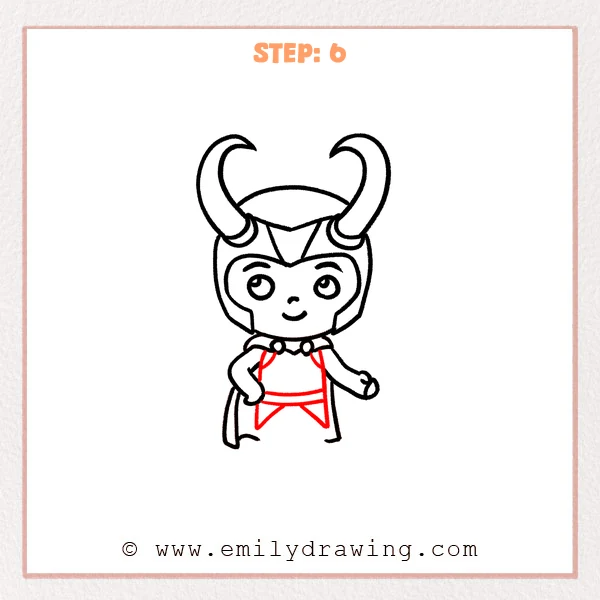
Add vertical chest lines and a curved belt across the body to complete Loki’s outfit. Then draw two pointed lower panels so the costume has more layered detail.
Pro Tip: Curve the belt gently across the body width so the clothing looks more natural.
Step 7: Draw Loki’s Legs and Boots
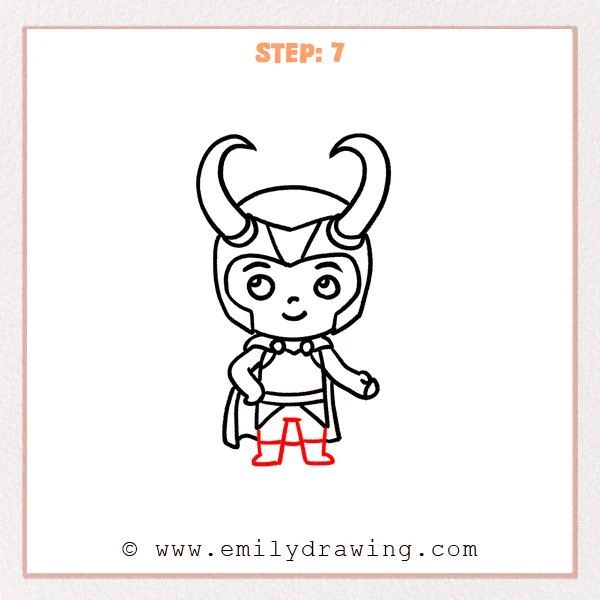
Below the body, add two short legs that extend naturally from the center of the costume panels. Then draw wider boot bottoms so Loki can stand firmly.
Pro Tip: Keep the bottoms of both boots at the same height so the pose feels balanced.
Step 8: Add Loki’s Scepter
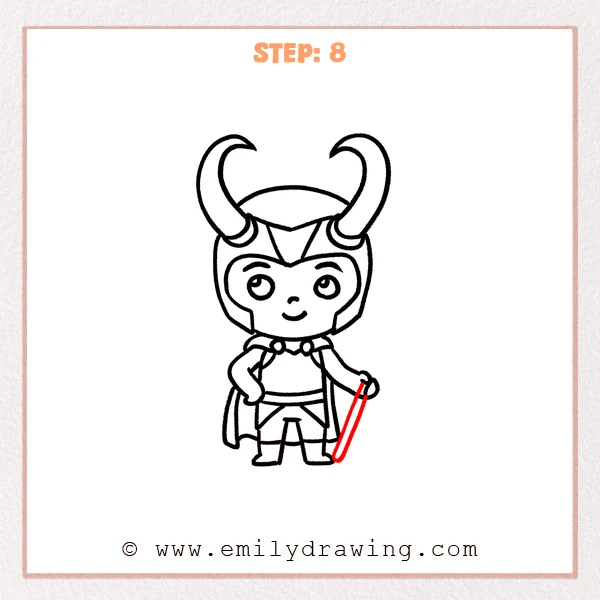
Beside the right hand, draw a long, slim scepter slanting downward from the grip. Use two parallel lines for the staff, and softly round the bottom end.
Pro Tip: Keep the scepter close to the hand so it looks like Loki is really holding it.
Step 9: Complete the Scepter Top
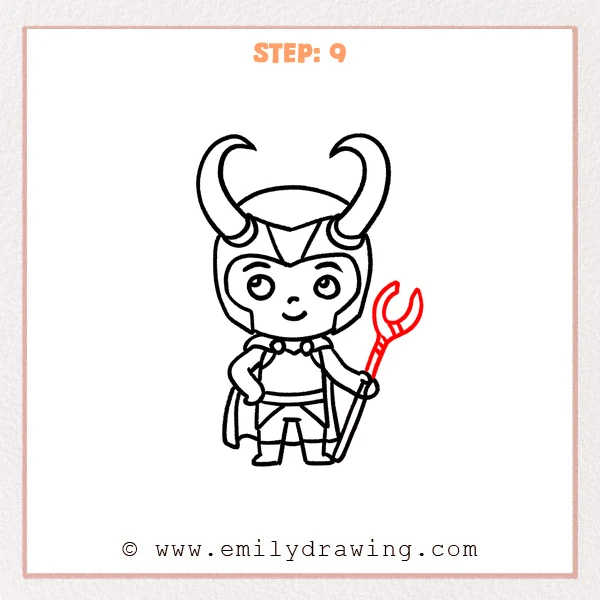
At the top of the scepter, add a crescent-shaped fork to make the weapon look more like Loki’s staff. Then draw a few short connector lines between the head and the handle so the detail is clearer.
Pro Tip: The scepter head can be wider than the handle, but keep it much smaller than the head.
Step 10: Color in your drawing!
Fun Facts
- Loki is known for clever tricks, quick thinking, and dramatic costume details.
- His horned helmet makes his silhouette easy to recognize.
- A scepter is a great drawing detail because it adds action to the pose.
- Chibi-style characters often have large heads and small bodies, which makes them look extra cute.
Pin it now, Draw later!
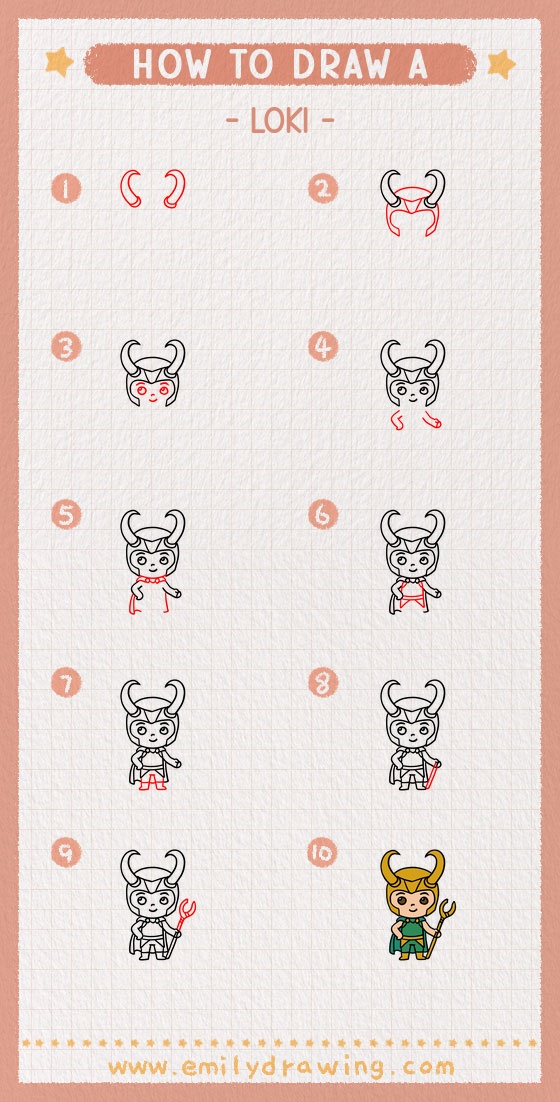
Now you know how to draw Loki using simple shapes and clear steps. Trace the final lines with a black marker, then erase any extra pencil marks. You can color the helmet gold, the outfit green and black, and the cape a rich shade of green or dark yellow.
For a finished look, add small shadows under the boots or a soft background behind the character. Keep practicing this easy drawing tutorial, and try drawing Loki again with a different pose or expression.
Get the FREE Printable Drawing Guide
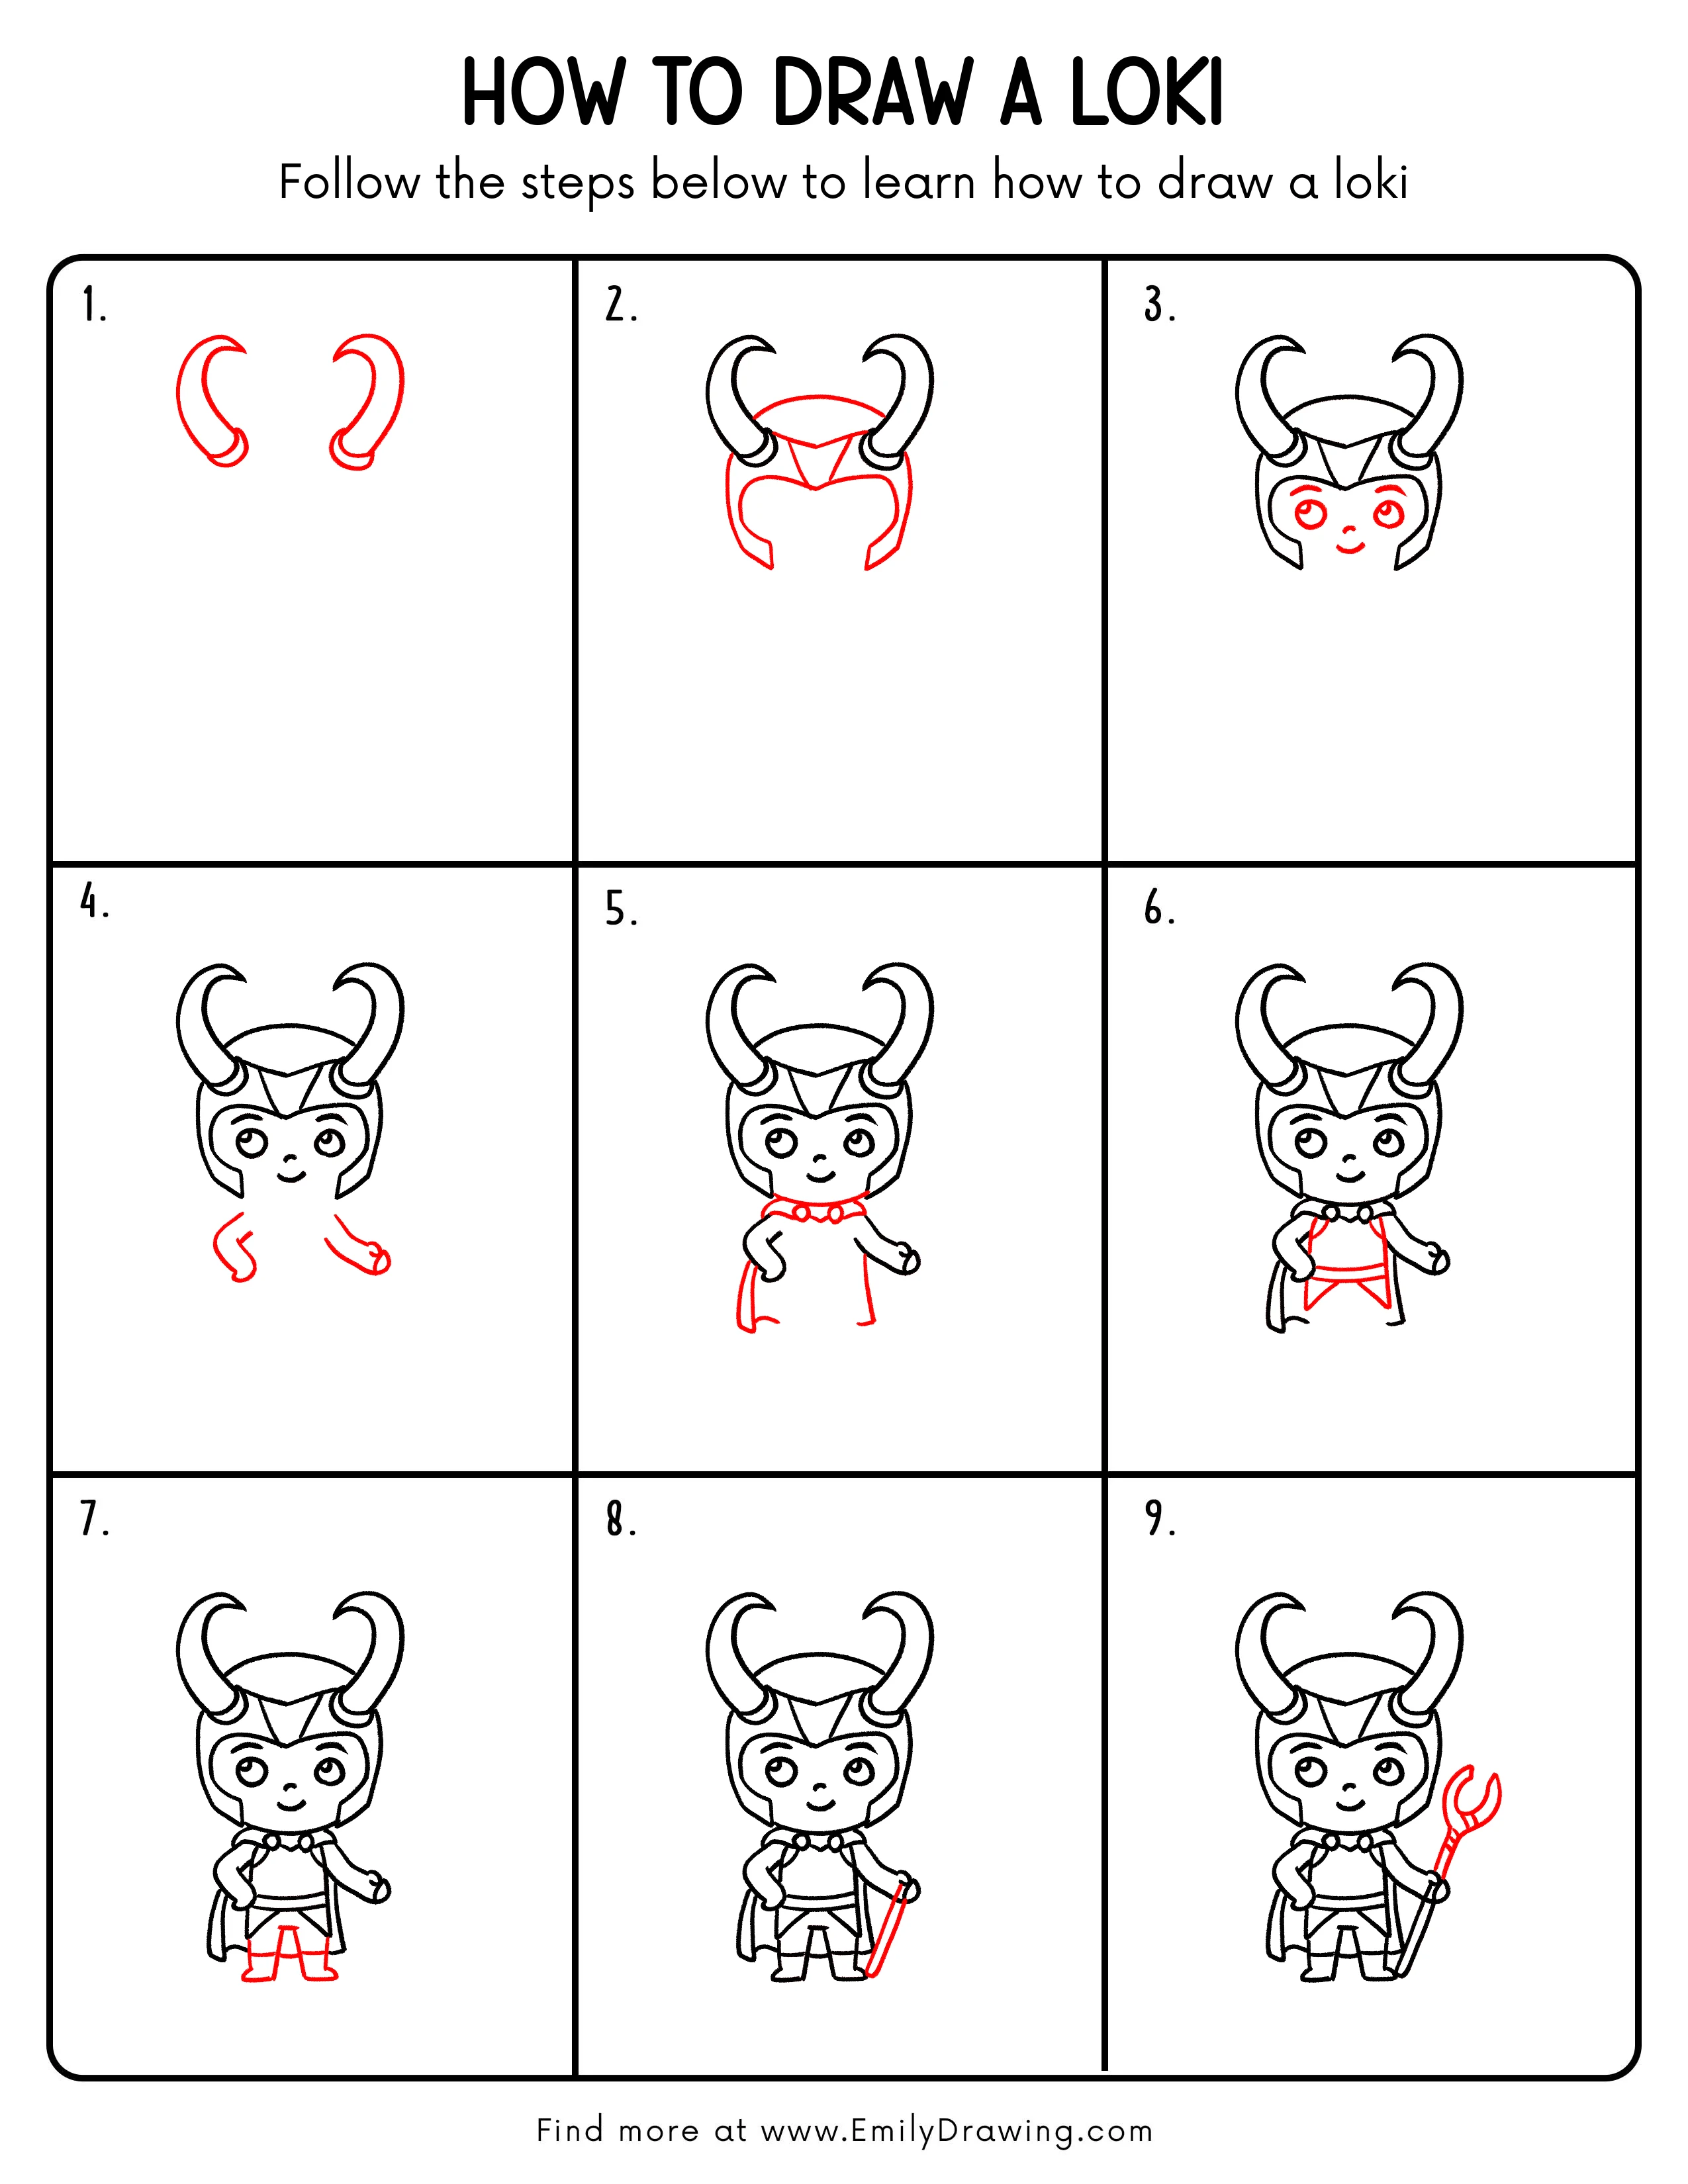
FREE Download Printable Loki Drawing Tutorial
Frequently Asked Questions
Is this Loki drawing good for beginners?
Yes. This drawing for beginners uses simple curves, rounded shapes, and small details added one step at a time.
What should I draw first when learning how to draw Loki?
Start with the horn shapes first because they help set the size and balance of the helmet.
Can I color this Loki drawing after finishing the outline?
Yes. After the outline is complete, use gold for the helmet, green for the outfit, and dark colors for the boots and details.