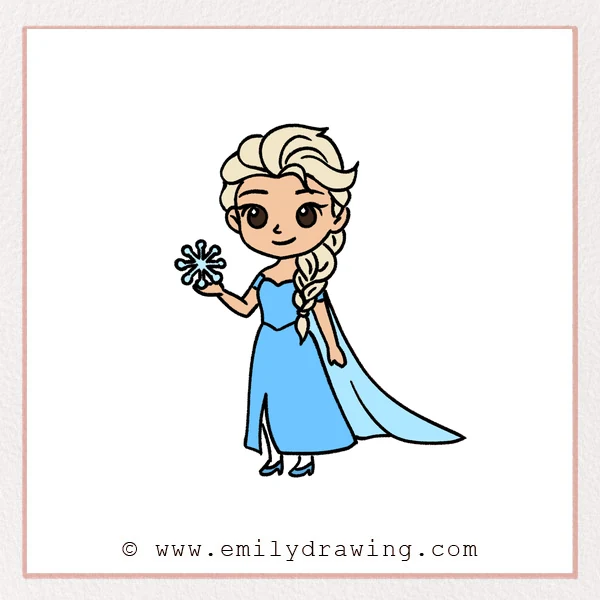
Drawing Elsa can feel calm and enjoyable when you take it one step at a time. In this easy drawing tutorial for beginners, you will build her face, braid, dress, and cape in simple stages. Take your time with each shape, and let the drawing grow little by little.
What You Will Need
- Pencil
- Eraser
- Black pen or marker
- Paper
- Colored pencils or crayons
Here are my RECOMMENDED Art Supplies!
- Crayola Coloring Set (140 Pieces – Mega Value!)
- 24 Colored Crayon Set
- A4 Printer Paper
- Crayola Coloring Pencils
- HP Home Printer with Instant Ink!
Time needed:
10 minutes.
Step-by-Step Drawing Guide
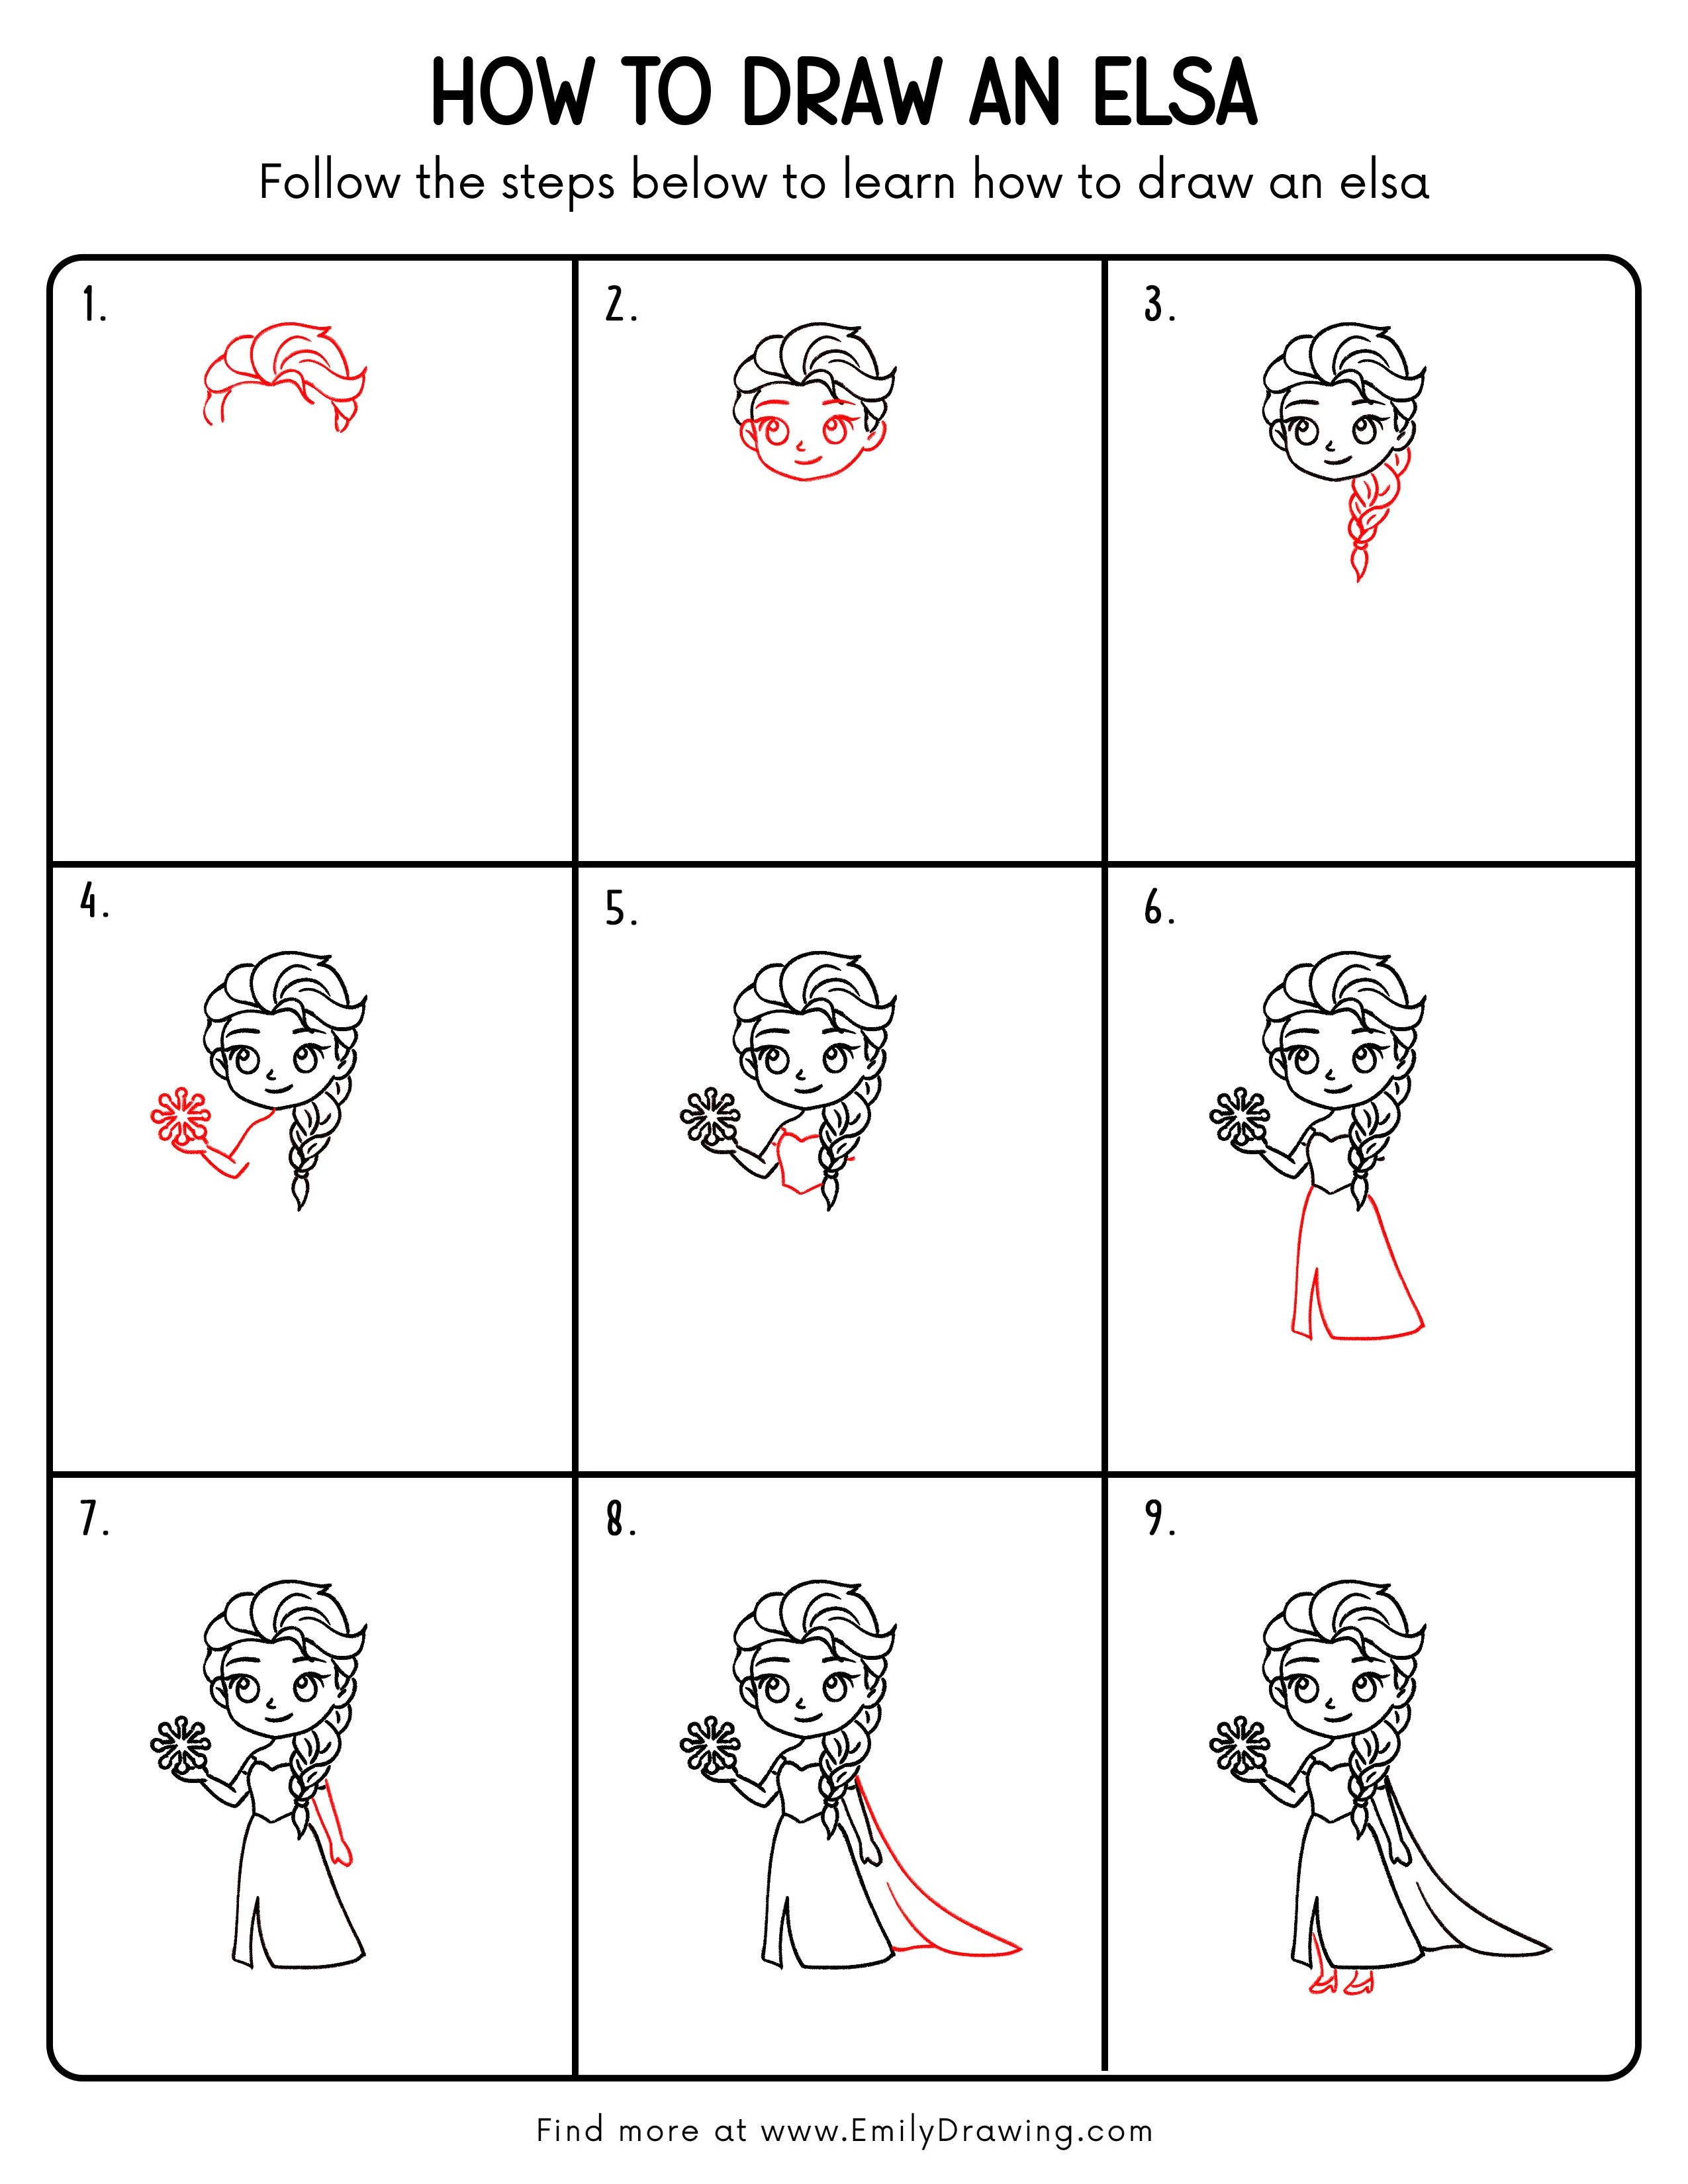
Step 1: Sketch Elsa’s Hair Shape
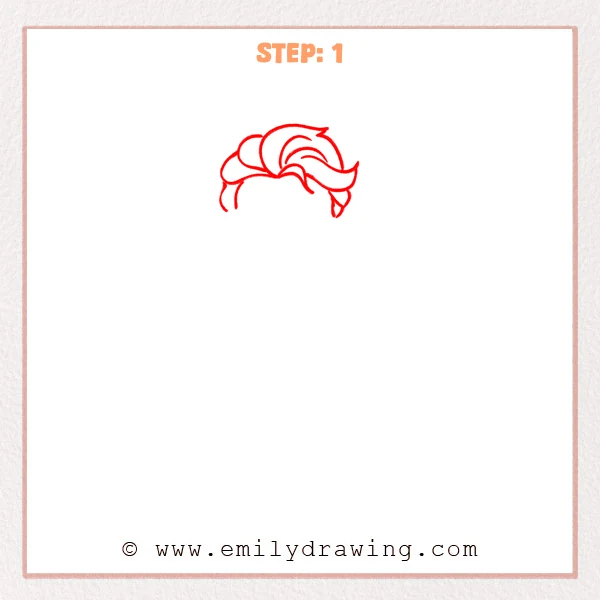
Start near the upper middle of the page and sketch the large, soft shape of the bangs. Then add curved hair sections on both sides, letting the ends sweep outward, and leave a small braid start at the lower right.
Pro Tip: Focus on the overall flow first, then add the curve of each hair section.
Step 2: Add Elsa’s Facial Features
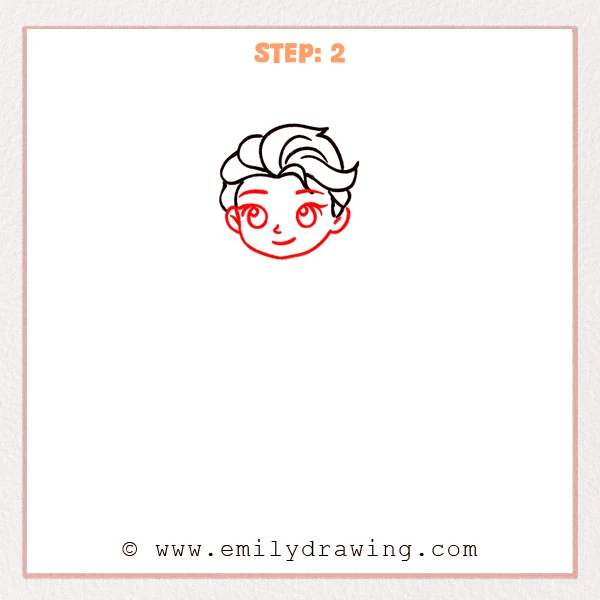
Under the hair, add a soft round face shape and place two large eyes in the middle area of the face. Then sketch gentle eyebrows, a small nose, a smiling mouth, and ears on both sides to give her a sweet, bright expression.
Pro Tip: Keep the eyes level with each other so the face looks balanced and cute.
Step 3: Continue Elsa’s Long Braid
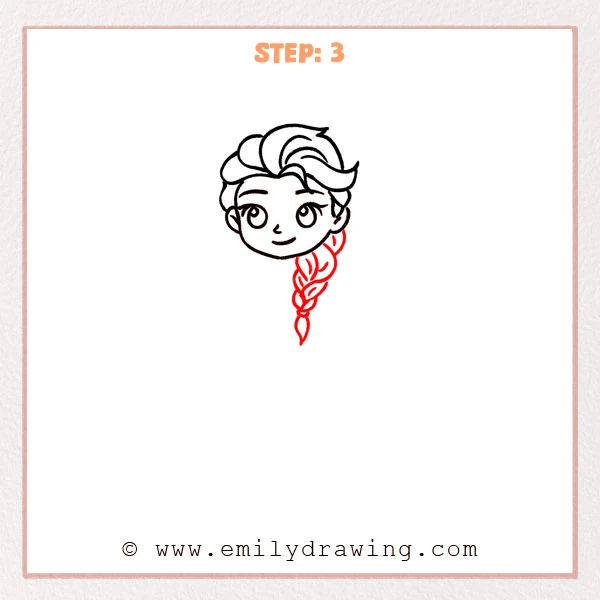
Start just below the right ear and extend the braid downward in linked sections. Shape each section like a soft leaf that overlaps the one above, then finish with a small pointed tip so the braid looks neat and hanging naturally.
Pro Tip: Let each braid section become slightly smaller as it goes down for a more natural look.
Step 4: Add the Upper Body and Snow Magic
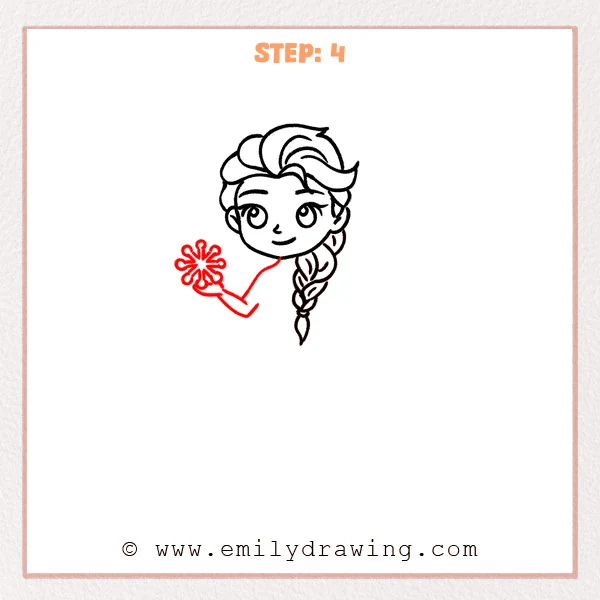
Start below the chin and add a slim neck with a simple upper body line. Then let one arm bend toward the left as if she is gently lifting her hand, and place a round snowflake above the palm using small balanced petal shapes to show Elsa’s icy magic.
Pro Tip: Keep each snowflake petal spaced evenly so the magic shape looks neat.
Step 5: Add the Top of Elsa’s Dress
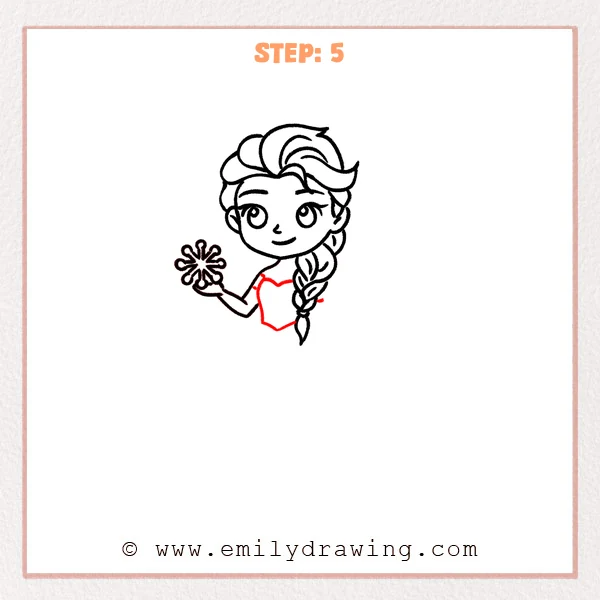
Below the neck, add the upper part of the dress with a soft heart-shaped neckline that follows the body. Then bring the sides inward a little so the bodice looks fitted and neat, leaving room for the skirt below.
Pro Tip: Keep both sides of the neckline even so the dress looks balanced.
Step 6: Add Elsa’s Long Skirt Shape
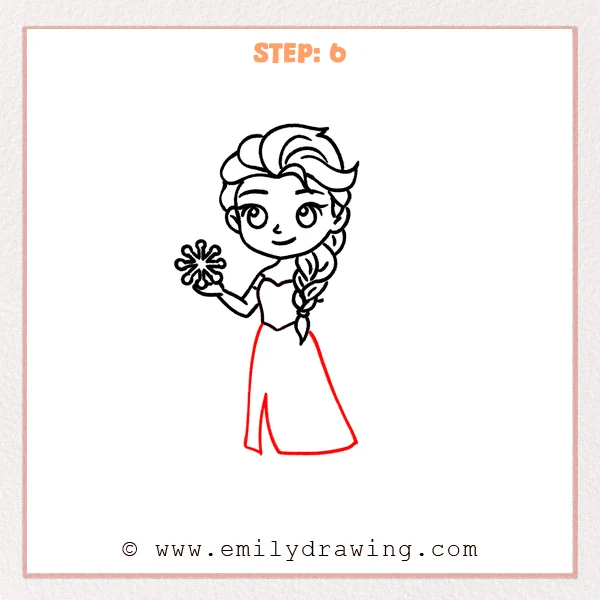
Continue the dress down from the waist with long skirt lines that open gently toward the bottom. Leave a slit shape on the left side, and let the right hem curve outward a little so the skirt feels light and flowing.
Pro Tip: Avoid making the skirt edges too straight, because a soft curve gives it more flow.
Step 7: Add the Other Arm
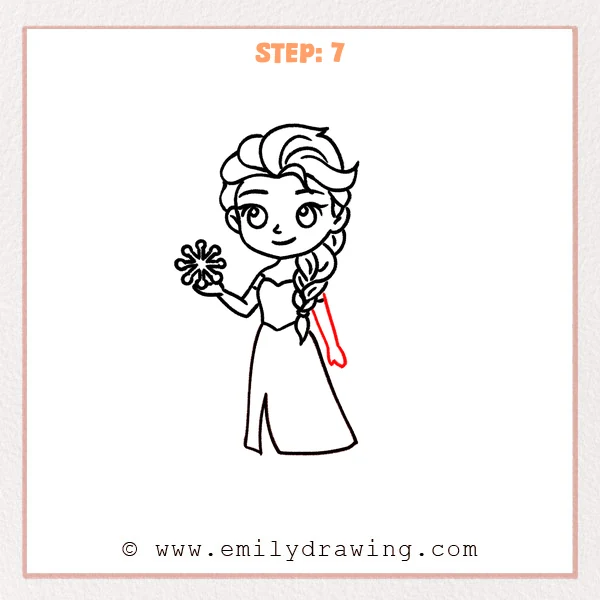
On the right side of the body, add the second arm hanging down in a relaxed pose. Let the line fall gently from the shoulder, and keep the hand small with simple rounded fingers so the character looks neat and cute.
Pro Tip: Compare the arm length with the dress so it does not become too long.
Step 8: Add Elsa’s Flowing Cape
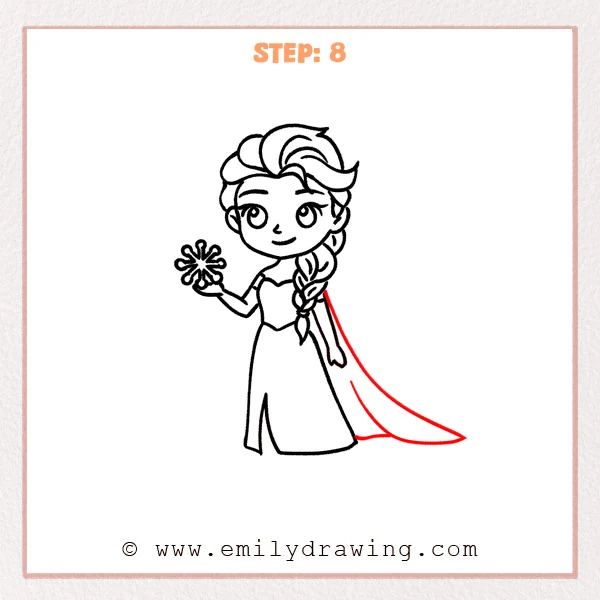
Start just behind the right shoulder and extend a long cape that opens softly toward the right side. Make the lower edge wider, then add an inner curved line to show the extra layer so the cape feels light and graceful.
Pro Tip: Let the outer cape line stretch a little longer so it feels more flowing.
Step 9: Add the Small Shoes Under the Dress
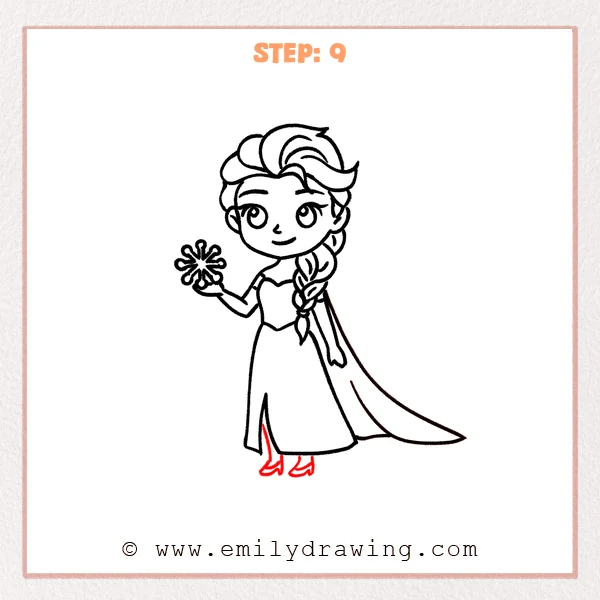
In the open space below the dress, add two small shoes peeking out from the hem. Let the toes tilt outward slightly, and keep the shapes simple and rounded so the standing pose feels light and natural.
Pro Tip: The shoes do not need to be exactly the same size, because a slight shift adds a more natural pose.
Step 10: Color in your drawing!
Fun Facts
- Elsa is known for her long side braid and icy magic.
- Her flowing cape helps make her silhouette easy to recognize.
- Snowflake shapes are a lovely detail to add when drawing her.
Pin it now, Draw later!
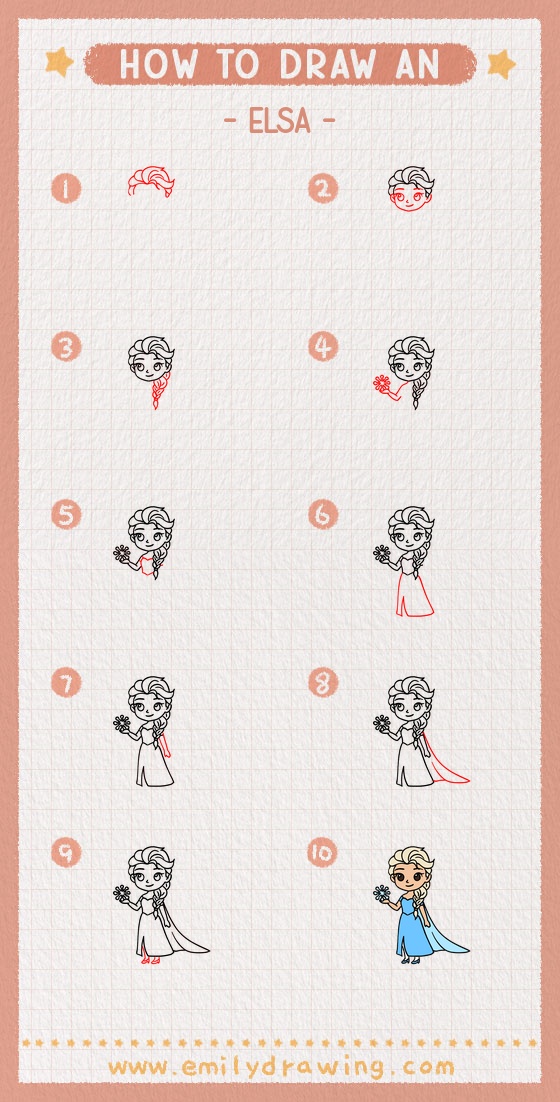
You now have a full step by step drawing of Elsa with her braid, gown, cape, and snow magic. Add light blue tones to the dress and cape, and use soft shading around the braid and skirt folds to give the drawing more depth. One common beginner mistake is making the arms or braid too long, so pause and compare proportions as you draw. Keep practicing this easy drawing tutorial, and try more drawing for beginners to build your confidence.
Get the FREE Printable Drawing Guide
FREE Download Printable Elsa Drawing Tutorial
Frequently Asked Questions
How do I draw Elsa’s braid more neatly?
Start with larger braid sections near the top and make them smaller as they go down. This helps the braid look natural.
What is the easiest part to draw first?
The hair shape is a good place to begin. It gives you a clear space for the face underneath.
How can I make the dress look more flowing?
Use gentle curved lines instead of stiff straight ones. A wider hem also helps the dress feel soft and graceful.