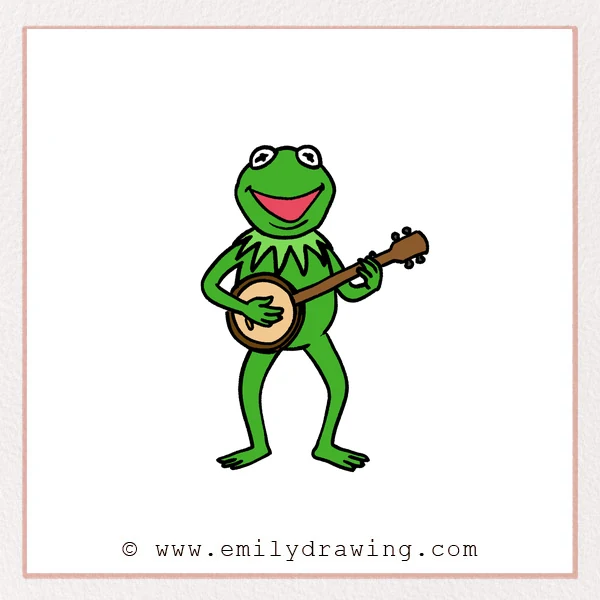
In this easy drawing tutorial, you will learn how to draw Kermit the Frog in a clear, beginner-friendly way. Each step builds slowly, from the smiling face to the full body and banjo. Take your time, follow the shapes, and enjoy creating a cheerful character drawing.
What You Will Need
- A pencil or drawing pen
- An eraser
- Paper
- Green, black, and red coloring tools
- A comfortable space to draw
Here are my RECOMMENDED Art Supplies!
- Crayola Coloring Set (140 Pieces – Mega Value!)
- 24 Colored Crayon Set
- A4 Printer Paper
- Crayola Coloring Pencils
- HP Home Printer with Instant Ink!
Time needed:
17 minutes.
Step-by-Step Drawing Guide
Step 1: Draw the Face, Eyes, and Big Smile
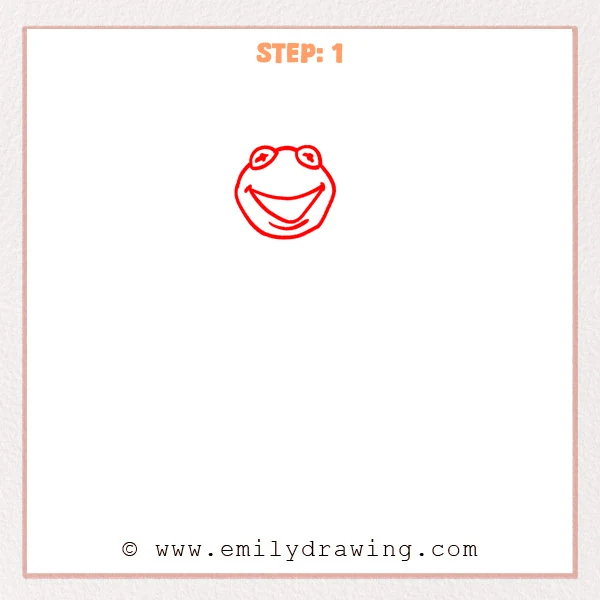
Start with a rounded outline for Kermit the Frog’s head. Then add two raised round eyes on top, and draw a wide curved smile with an open mouth in the center.
Pro Tip: Keep both eyes close in size so the expression looks cute and balanced.
Step 2: Add the Pointed Collar
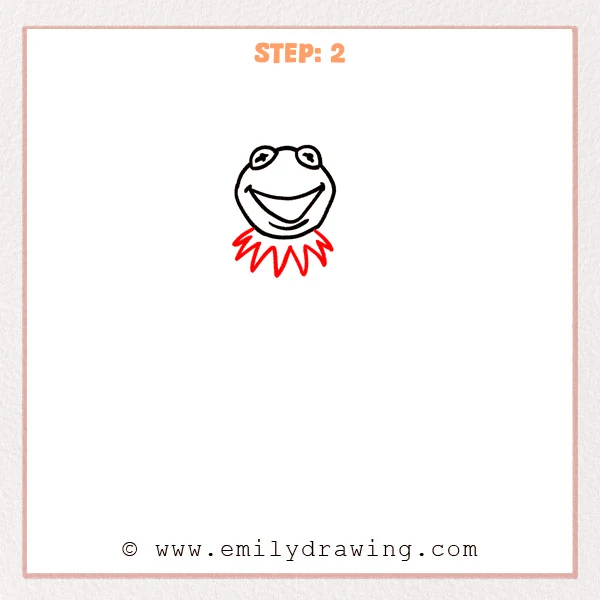
Draw a zigzag collar underneath the head. Use a row of pointed shapes that stretch downward to give Kermit the Frog his recognizable neck detail.
Pro Tip: Make the center points slightly longer so the collar looks more natural.
Step 3: Draw Both Arms and Hands
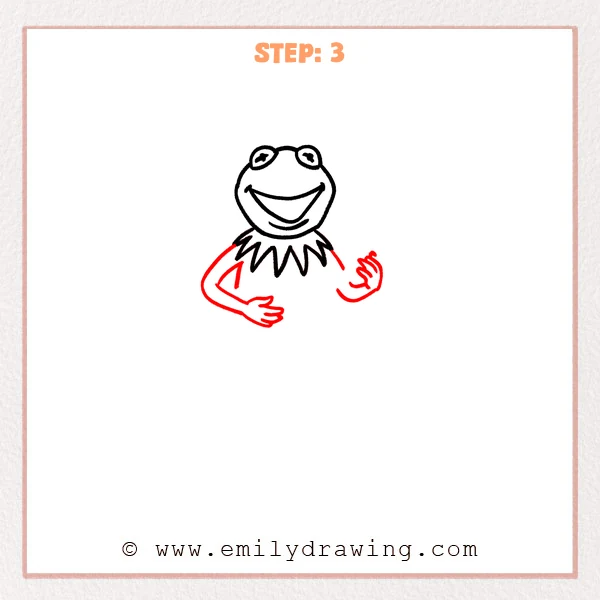
Add Kermit the Frog’s arms extending down from both sides of the collar. The left arm bends across the front, while the right arm lifts upward with simple curved fingers.
Pro Tip: Start with long curved arm lines first, then add the fingers slowly.
Step 4: Draw the Body and One Leg
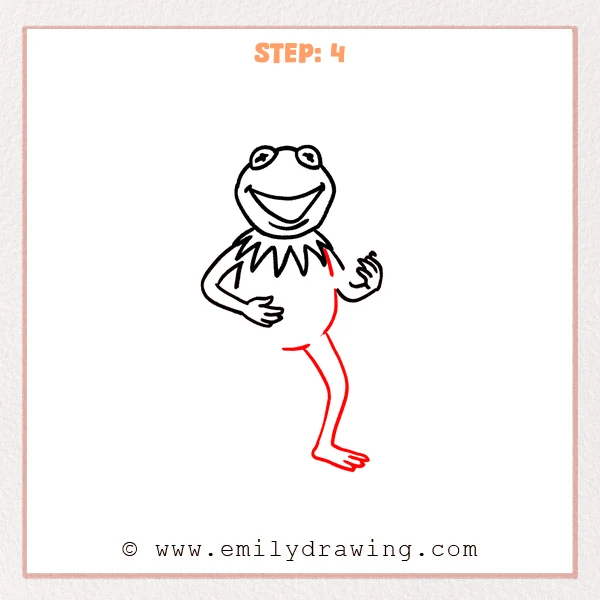
Continue the outline downward from the collar to form Kermit the Frog’s body. Then add one long curved leg, finishing it with a flat foot and simple toes.
Pro Tip: Keep the body lines soft so the leg connects naturally to the body.
Step 5: Add the Other Leg and Foot
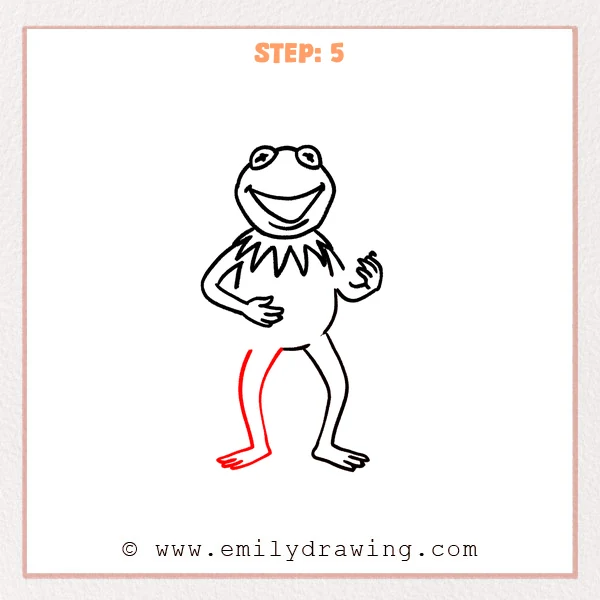
Draw the second leg downward from the other side of Kermit the Frog’s body. Let the foot stretch outward, then add a few short toe lines at the end.
Pro Tip: The two feet do not need to match exactly, but keep the pose looking steady.
Step 6: Add the Banjo
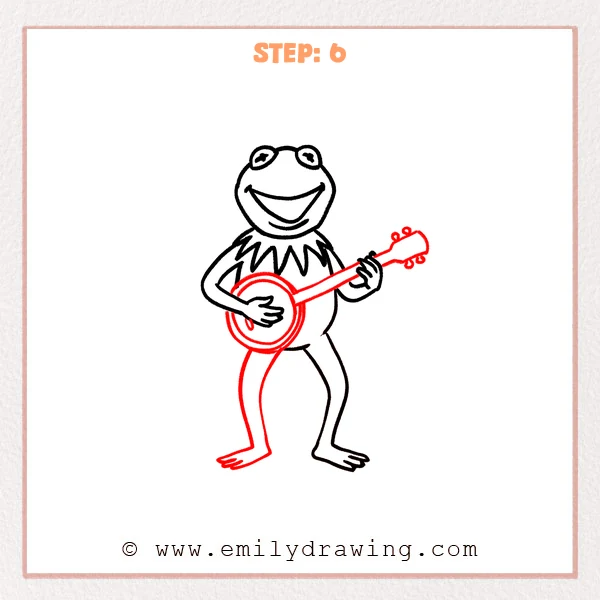
Draw a round banjo body in front of Kermit the Frog’s torso, then add a long neck across his arms. Add small tuning pegs on the headstock to make the instrument look complete.
Pro Tip: Let the neck pass through the right hand so it looks truly held.
Step 7: Color in your drawing!
Fun Facts
- Kermit the Frog is known for his wide smile and gentle, friendly expression.
- His pointed collar is one of the easiest details to recognize.
- Drawing a banjo adds personality and helps create a lively pose.
- This step by step drawing works well for beginners because it uses simple circles, curves, and zigzag shapes.
Pin it now, Draw later!
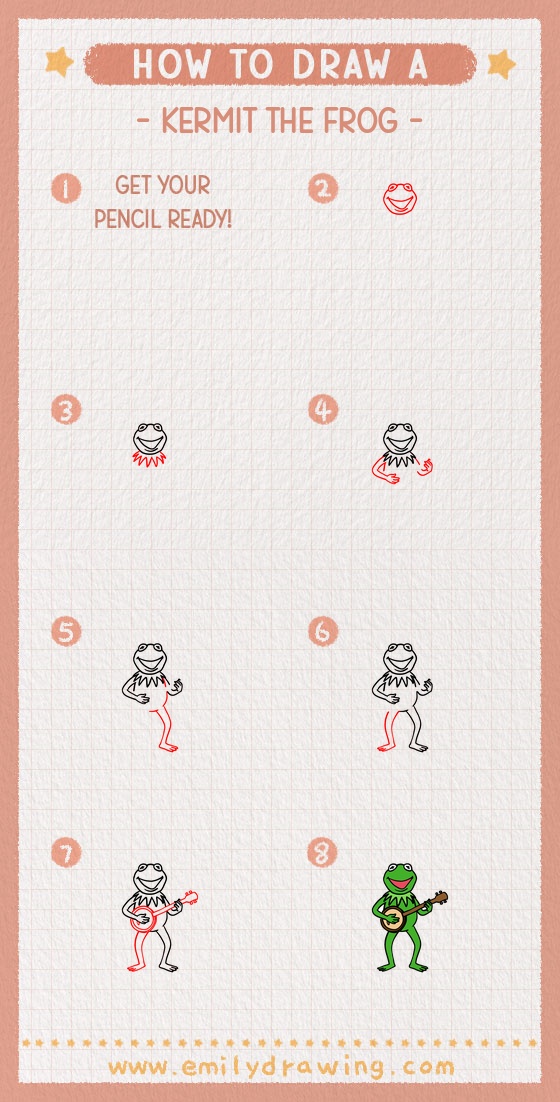
Now that your Kermit the Frog drawing is complete, you can trace the final lines with a darker pen. Add green coloring to the body, leave the eyes bright, and color the mouth carefully for a clean finish. Keep practicing this easy drawing tutorial, and try changing the pose or adding a simple background next time.
Get the FREE Printable Drawing Guide
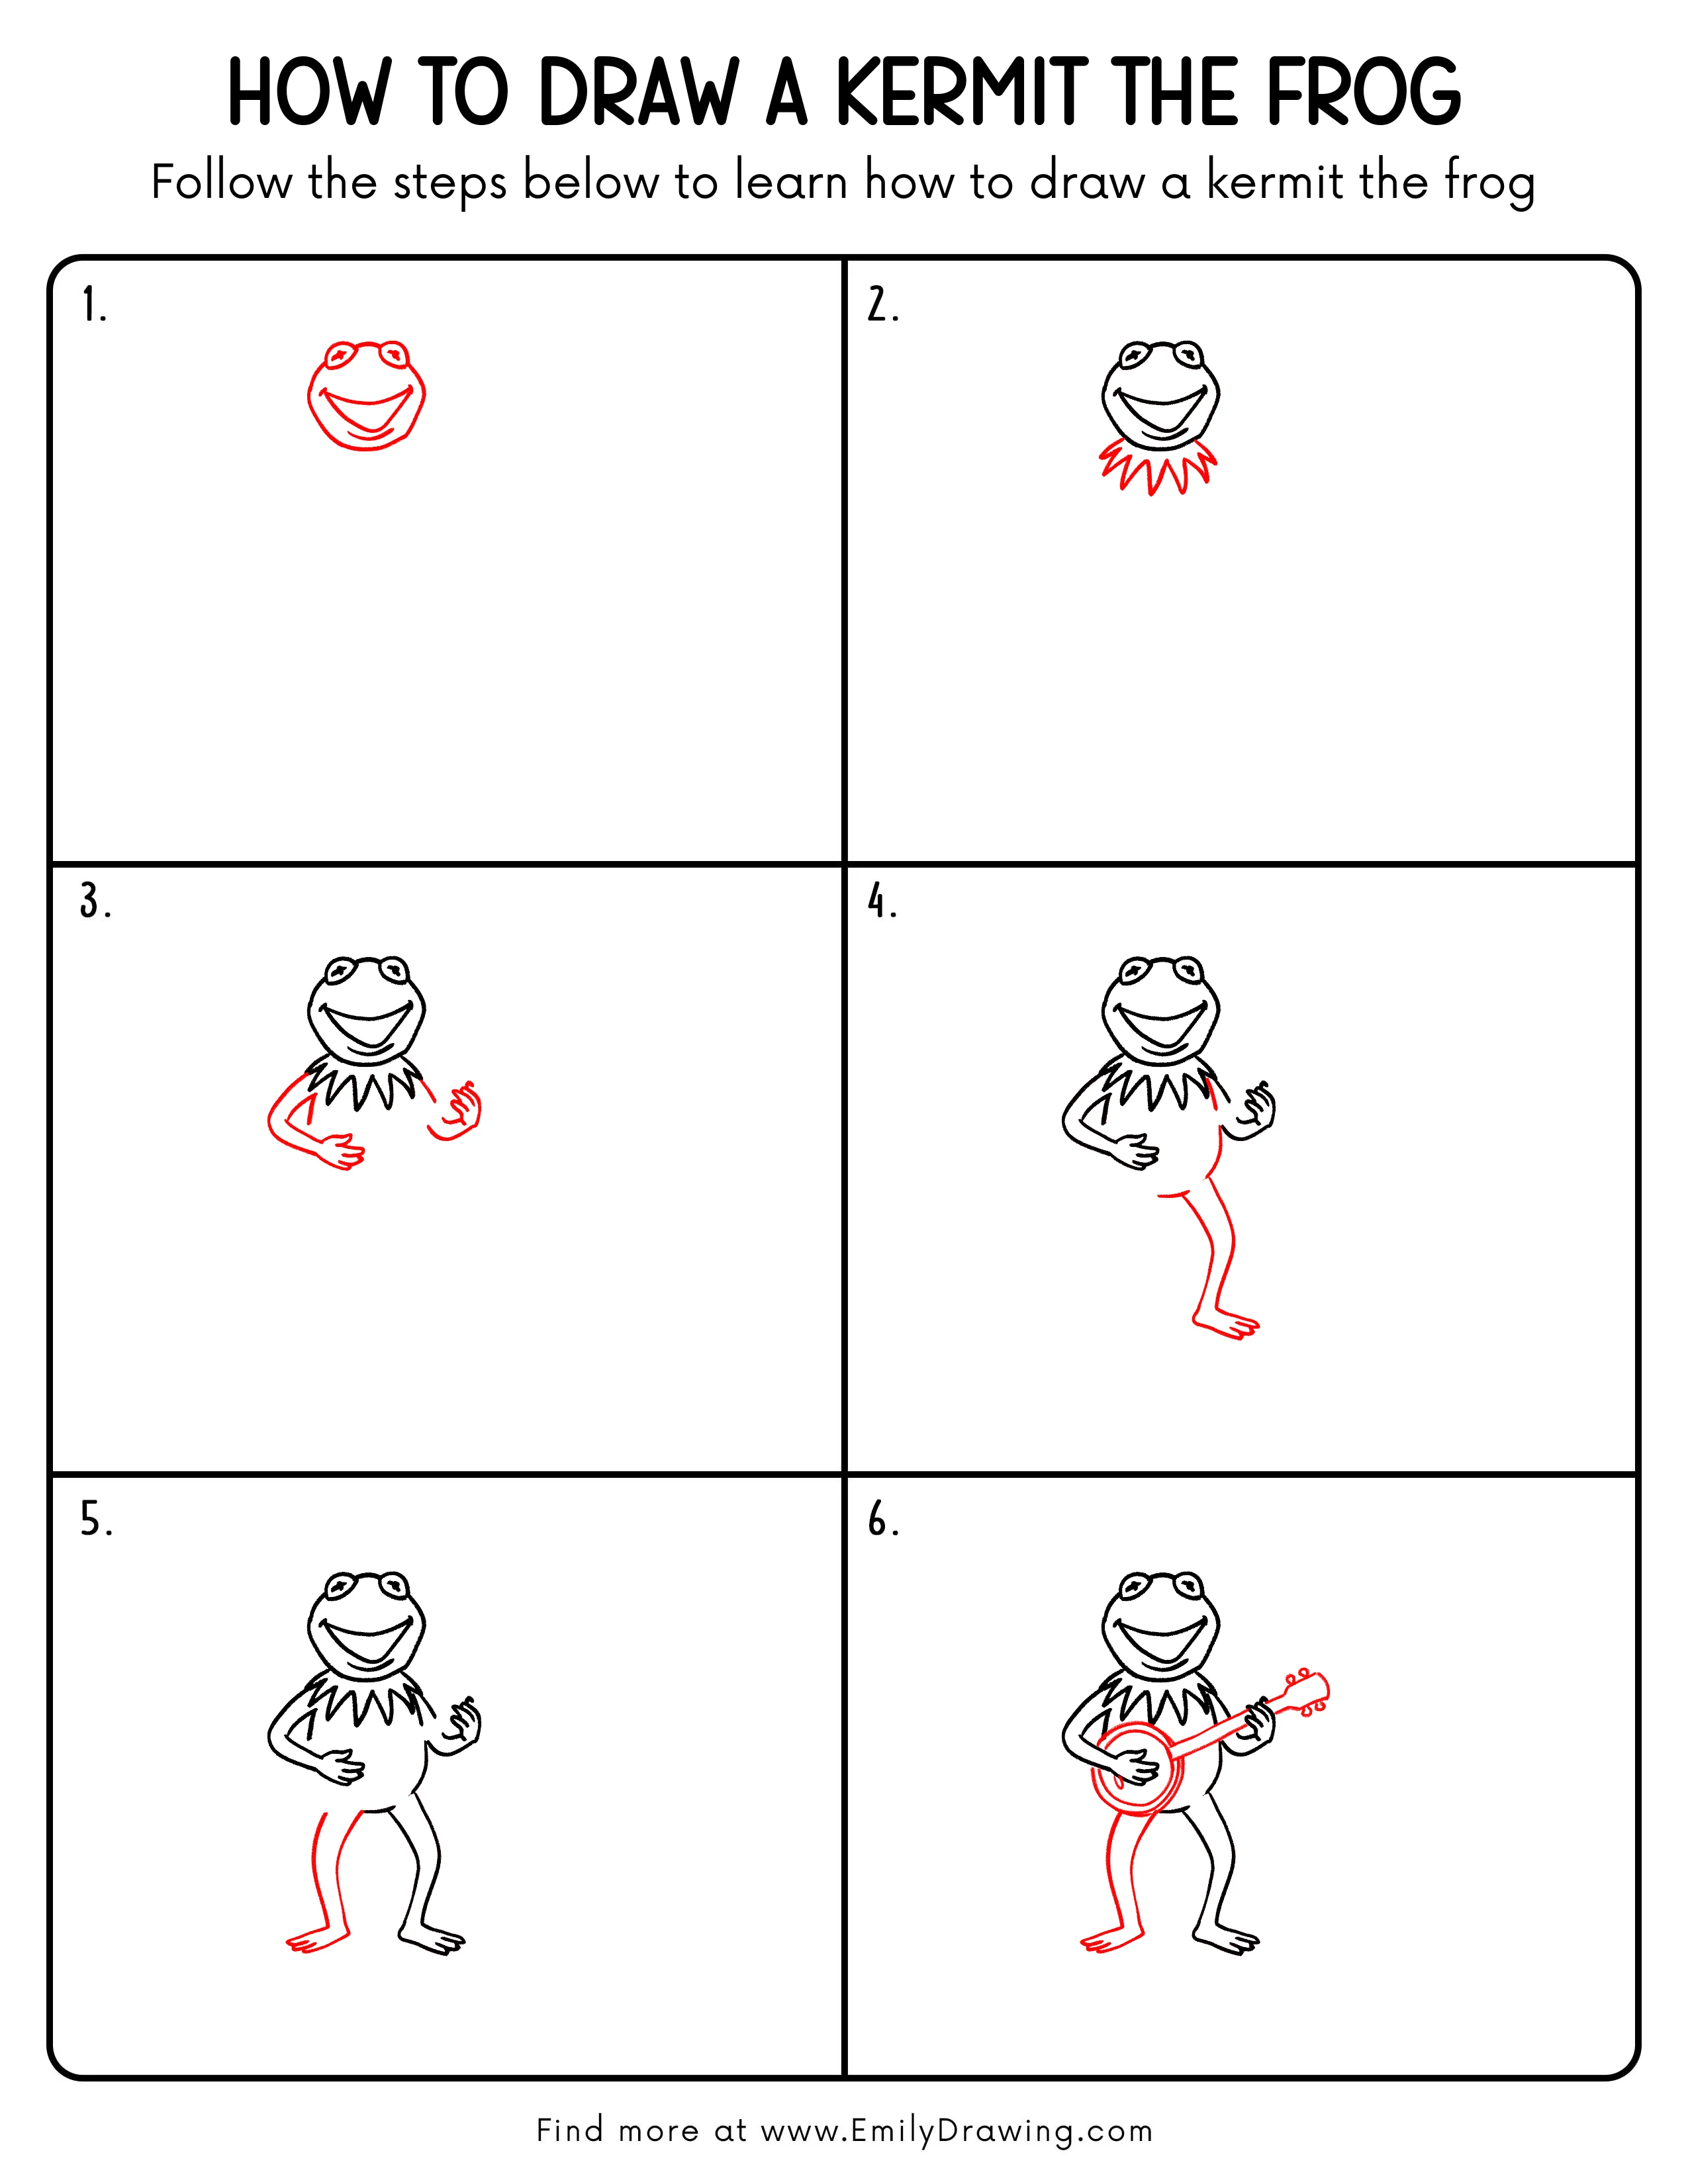
FREE Download Printable Kermit The Frog Drawing Tutorial
Frequently Asked Questions
Is this Kermit the Frog drawing good for beginners?
Yes. This drawing for beginners uses simple rounded shapes, curved lines, and easy details.
How can I make the face look more like Kermit the Frog?
Focus on the raised round eyes, big smile, and wide open mouth. These features make the character easy to recognize.
Can I draw the banjo after finishing the body?
Yes. Drawing the body first helps you place the banjo across the arms more naturally.