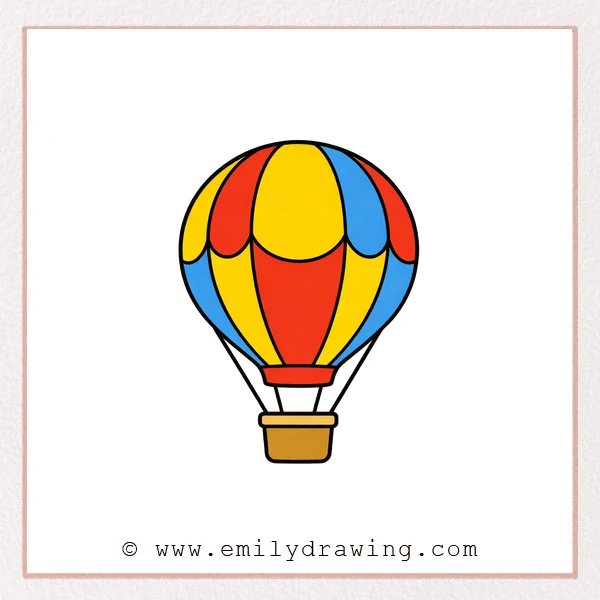
A hot air balloon is a great beginner drawing because it is mostly smooth curves.
You will build the balloon canopy first, then add panels, an opening, and a basket.
Take your time with symmetry, and your drawing will look calm and balanced.
What You Will Need
- Pencil
- Eraser
- Black marker or pen
- Colored pencils or crayons (optional)
Here are my RECOMMENDED Art Supplies!
- Crayola Coloring Set (140 Pieces – Mega Value!)
- 24 Colored Crayon Set
- A4 Printer Paper
- Crayola Coloring Pencils
- HP Home Printer with Instant Ink!
Time needed:
13 minutes.
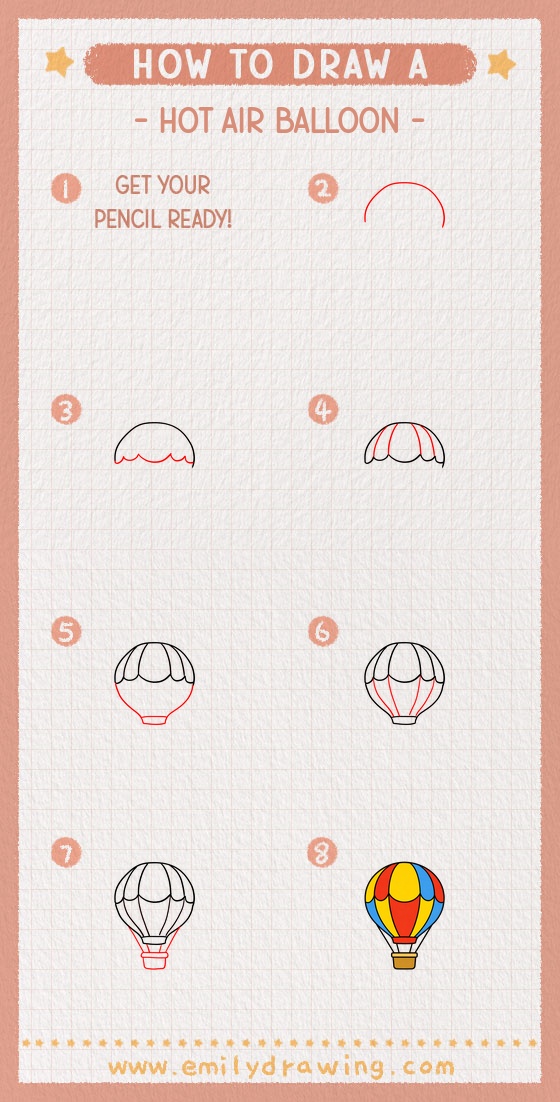
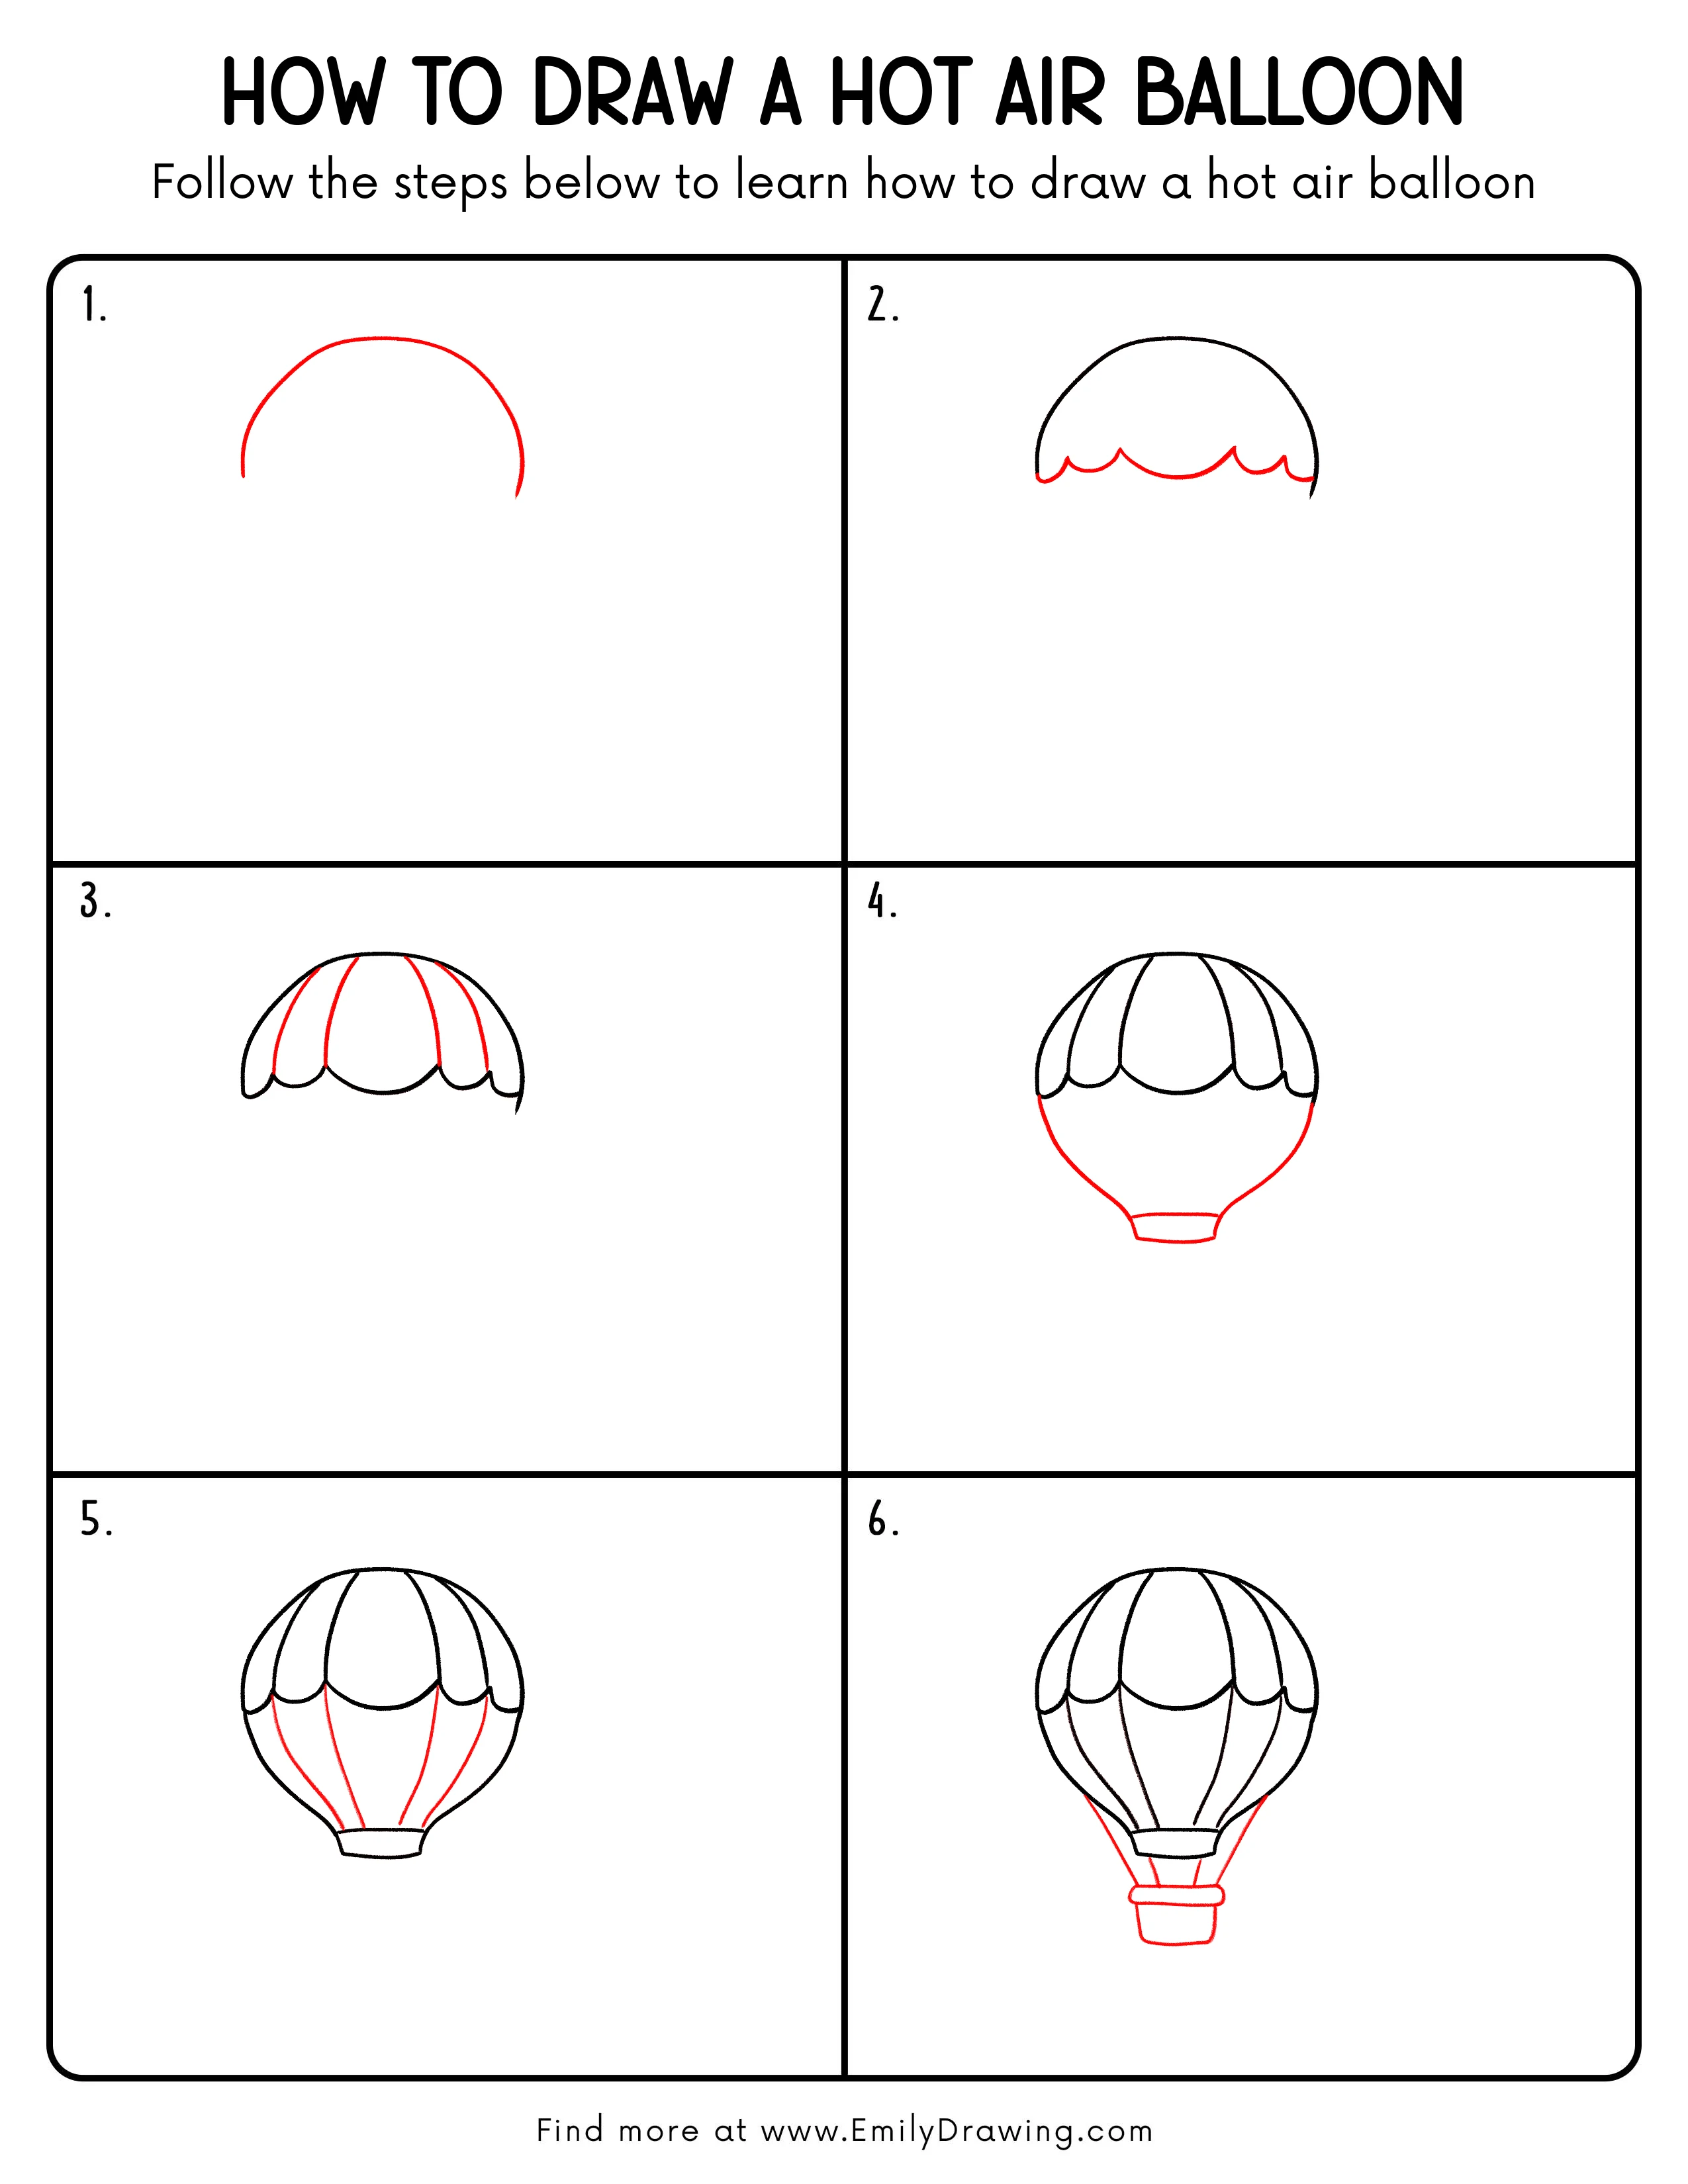
Step-by-Step Drawing Guide
Step 1: Draw the Balloon’s Top Curve
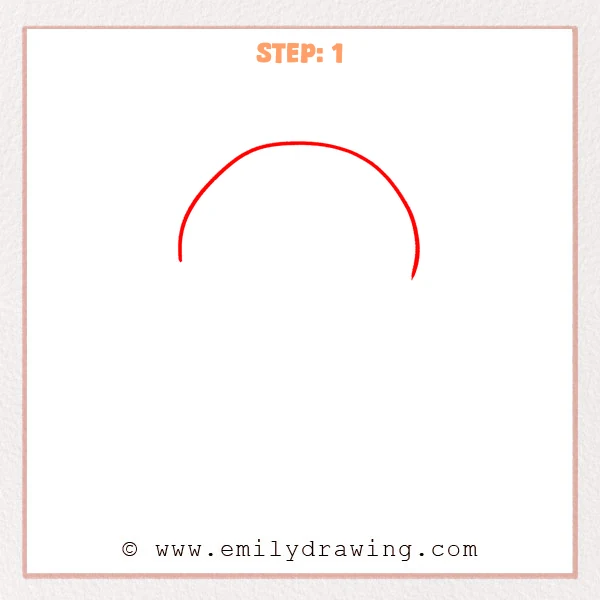
Start with a wide, smooth arc near the top of the page, like an upside-down “U.”
Leave the ends slightly open so you can connect the sides and bottom later.
Pro Tip: Keep the arc symmetric, with the highest point centered on the page.
Step 2: Add a Wavy Bottom Edge
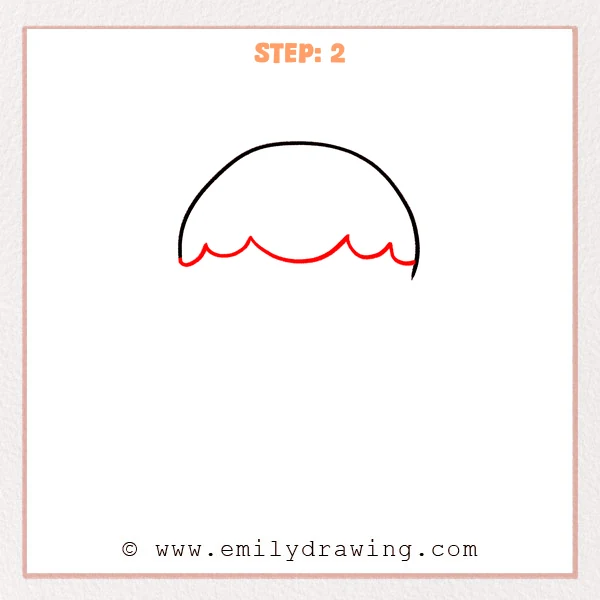
Draw a smooth wavy line under the top arc, like a row of rounded bumps for the balloon’s lower edge.
Connect both ends of the wavy line to the outer outline so the balloon shape feels complete.
Pro Tip: Keep the bumps a similar size so the edge looks neat and balanced.
Step 3: Draw the Vertical Panels
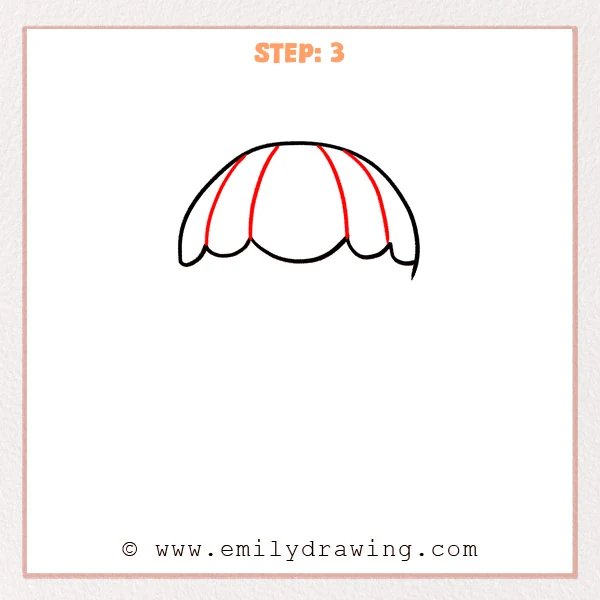
Add a few long, slightly curved vertical lines from the top arc downward to divide the balloon into panels.
Let each line gently curve and end near the scalloped edge so it feels rounded.
Pro Tip: Make the center panel a bit wider and the side panels slightly narrower for a rounded look.
Step 4: Complete the Lower Balloon and Opening
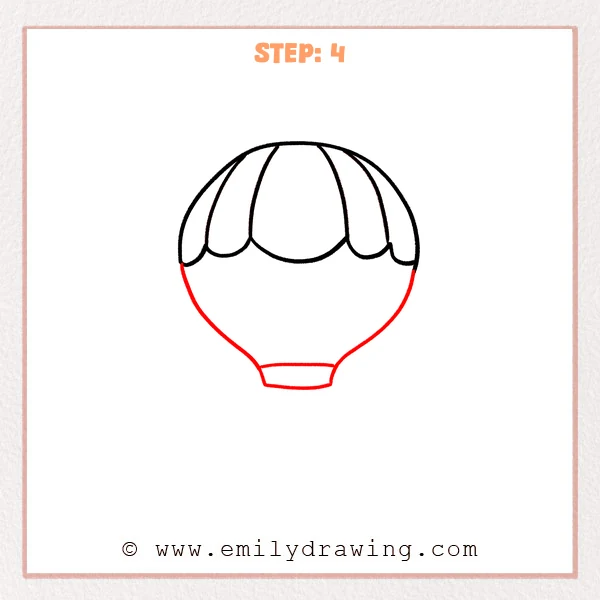
Draw two curved lines dropping from the sides, bulging outward, then narrowing inward to form the balloon’s lower half.
Add a short, flat oval ring at the bottom to show the balloon’s opening.
Pro Tip: Match the curve on both sides and avoid making the bottom point too sharp.
Step 5: Add the Lower Panel Lines
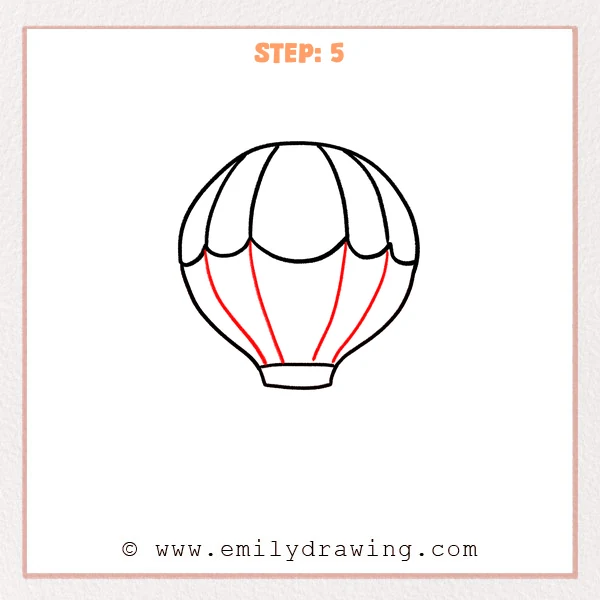
Draw a few curved vertical lines on the lower half, starting under the scalloped edge and flowing down toward the opening.
Let the lines gently narrow as they approach the bottom so the balloon feels wrapped and rounded.
Pro Tip: Don’t end every line at the exact same spot; slight spacing looks more natural.
Step 6: Draw the Ropes and Basket
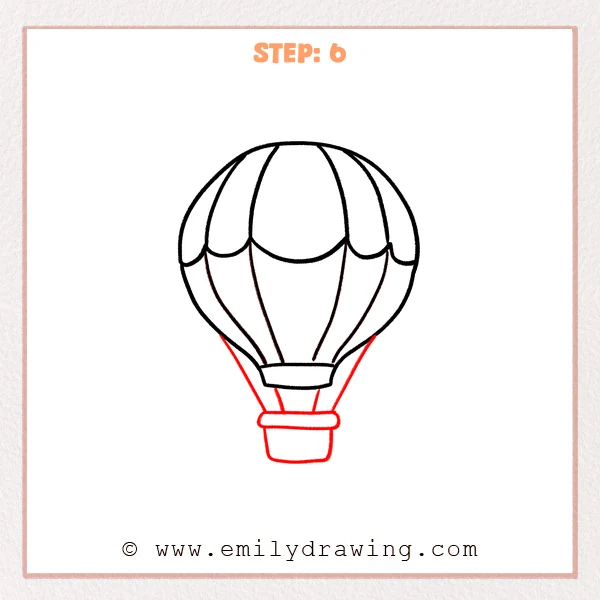
Add two slanted lines below the opening as ropes, guiding them down toward where the basket will sit.
Draw a rounded rectangle for the basket, then add a thick band across the top to make a sturdy rim.
Pro Tip: Make the basket a little wider than the opening so it feels stable.
Step 7: Color in your drawing!
Fun Facts
- Hot air balloons rise because warm air is lighter than cool air.
- Balloon fabric panels are sewn together, which is why the vertical sections are important.
- Many balloons have a “skirt” near the bottom to help guide heat into the envelope.
Pin it now, Draw later!
Trace your final lines with a pen, then erase any extra pencil marks.
Color each panel in a simple pattern, like stripes or alternating blocks.
You just finished a friendly hot air balloon drawing—try adding clouds or a sunny sky next!
Get the FREE Printable Drawing Guide
FREE Download Printable Hot Air Balloon Drawing Tutorial
Frequently Asked Questions
How do I make my hot air balloon look more round?
Use gentle curves for the panel lines and keep the center panel slightly wider than the sides.
This makes the canopy feel like it is wrapping around a 3D shape.
What if my balloon looks uneven on one side?
Lightly sketch a center line first and measure the left and right widths as you draw.
Small adjustments to the side curves can quickly restore symmetry.
How can I add more detail without making it messy?
Add only a few simple extras, like a small weave pattern on the basket or a tiny flag on top.
Keep details spaced out so the drawing stays clean and easy to read.