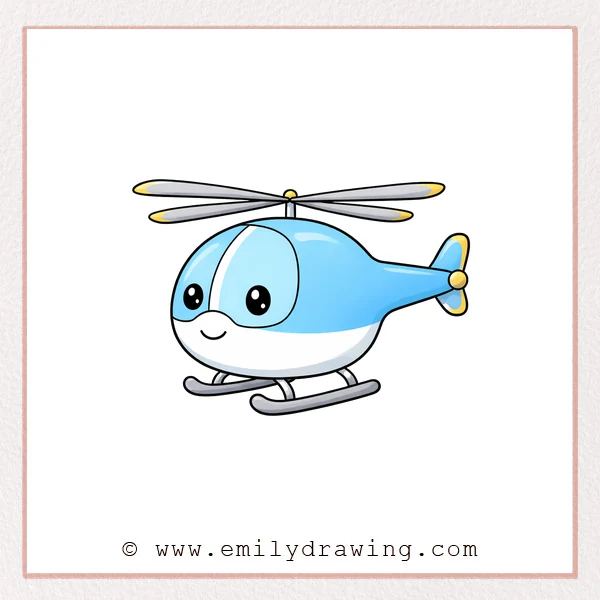
This easy drawing tutorial shows you how to draw a cute helicopter.
We will build it one simple shape at a time, then add fun details.
Take your time, and keep your lines light as you sketch.
What You Will Need
- Pencil
- Eraser
- Black marker or pen
- Paper
- Optional: colored pencils or markers
Here are my RECOMMENDED Art Supplies!
- Crayola Coloring Set (140 Pieces – Mega Value!)
- 24 Colored Crayon Set
- A4 Printer Paper
- Crayola Coloring Pencils
- HP Home Printer with Instant Ink!
Time needed:
24 minutes.
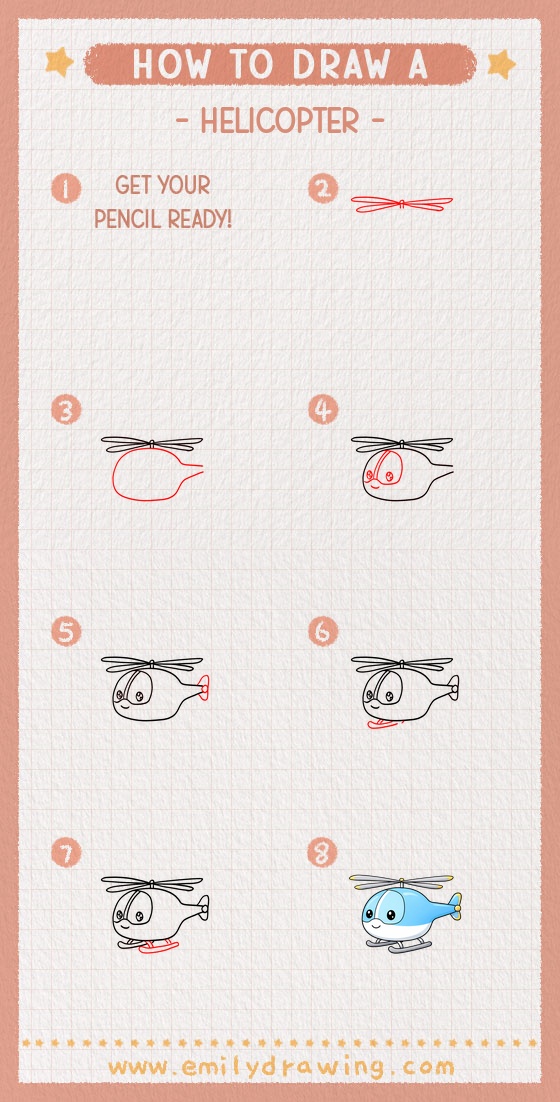
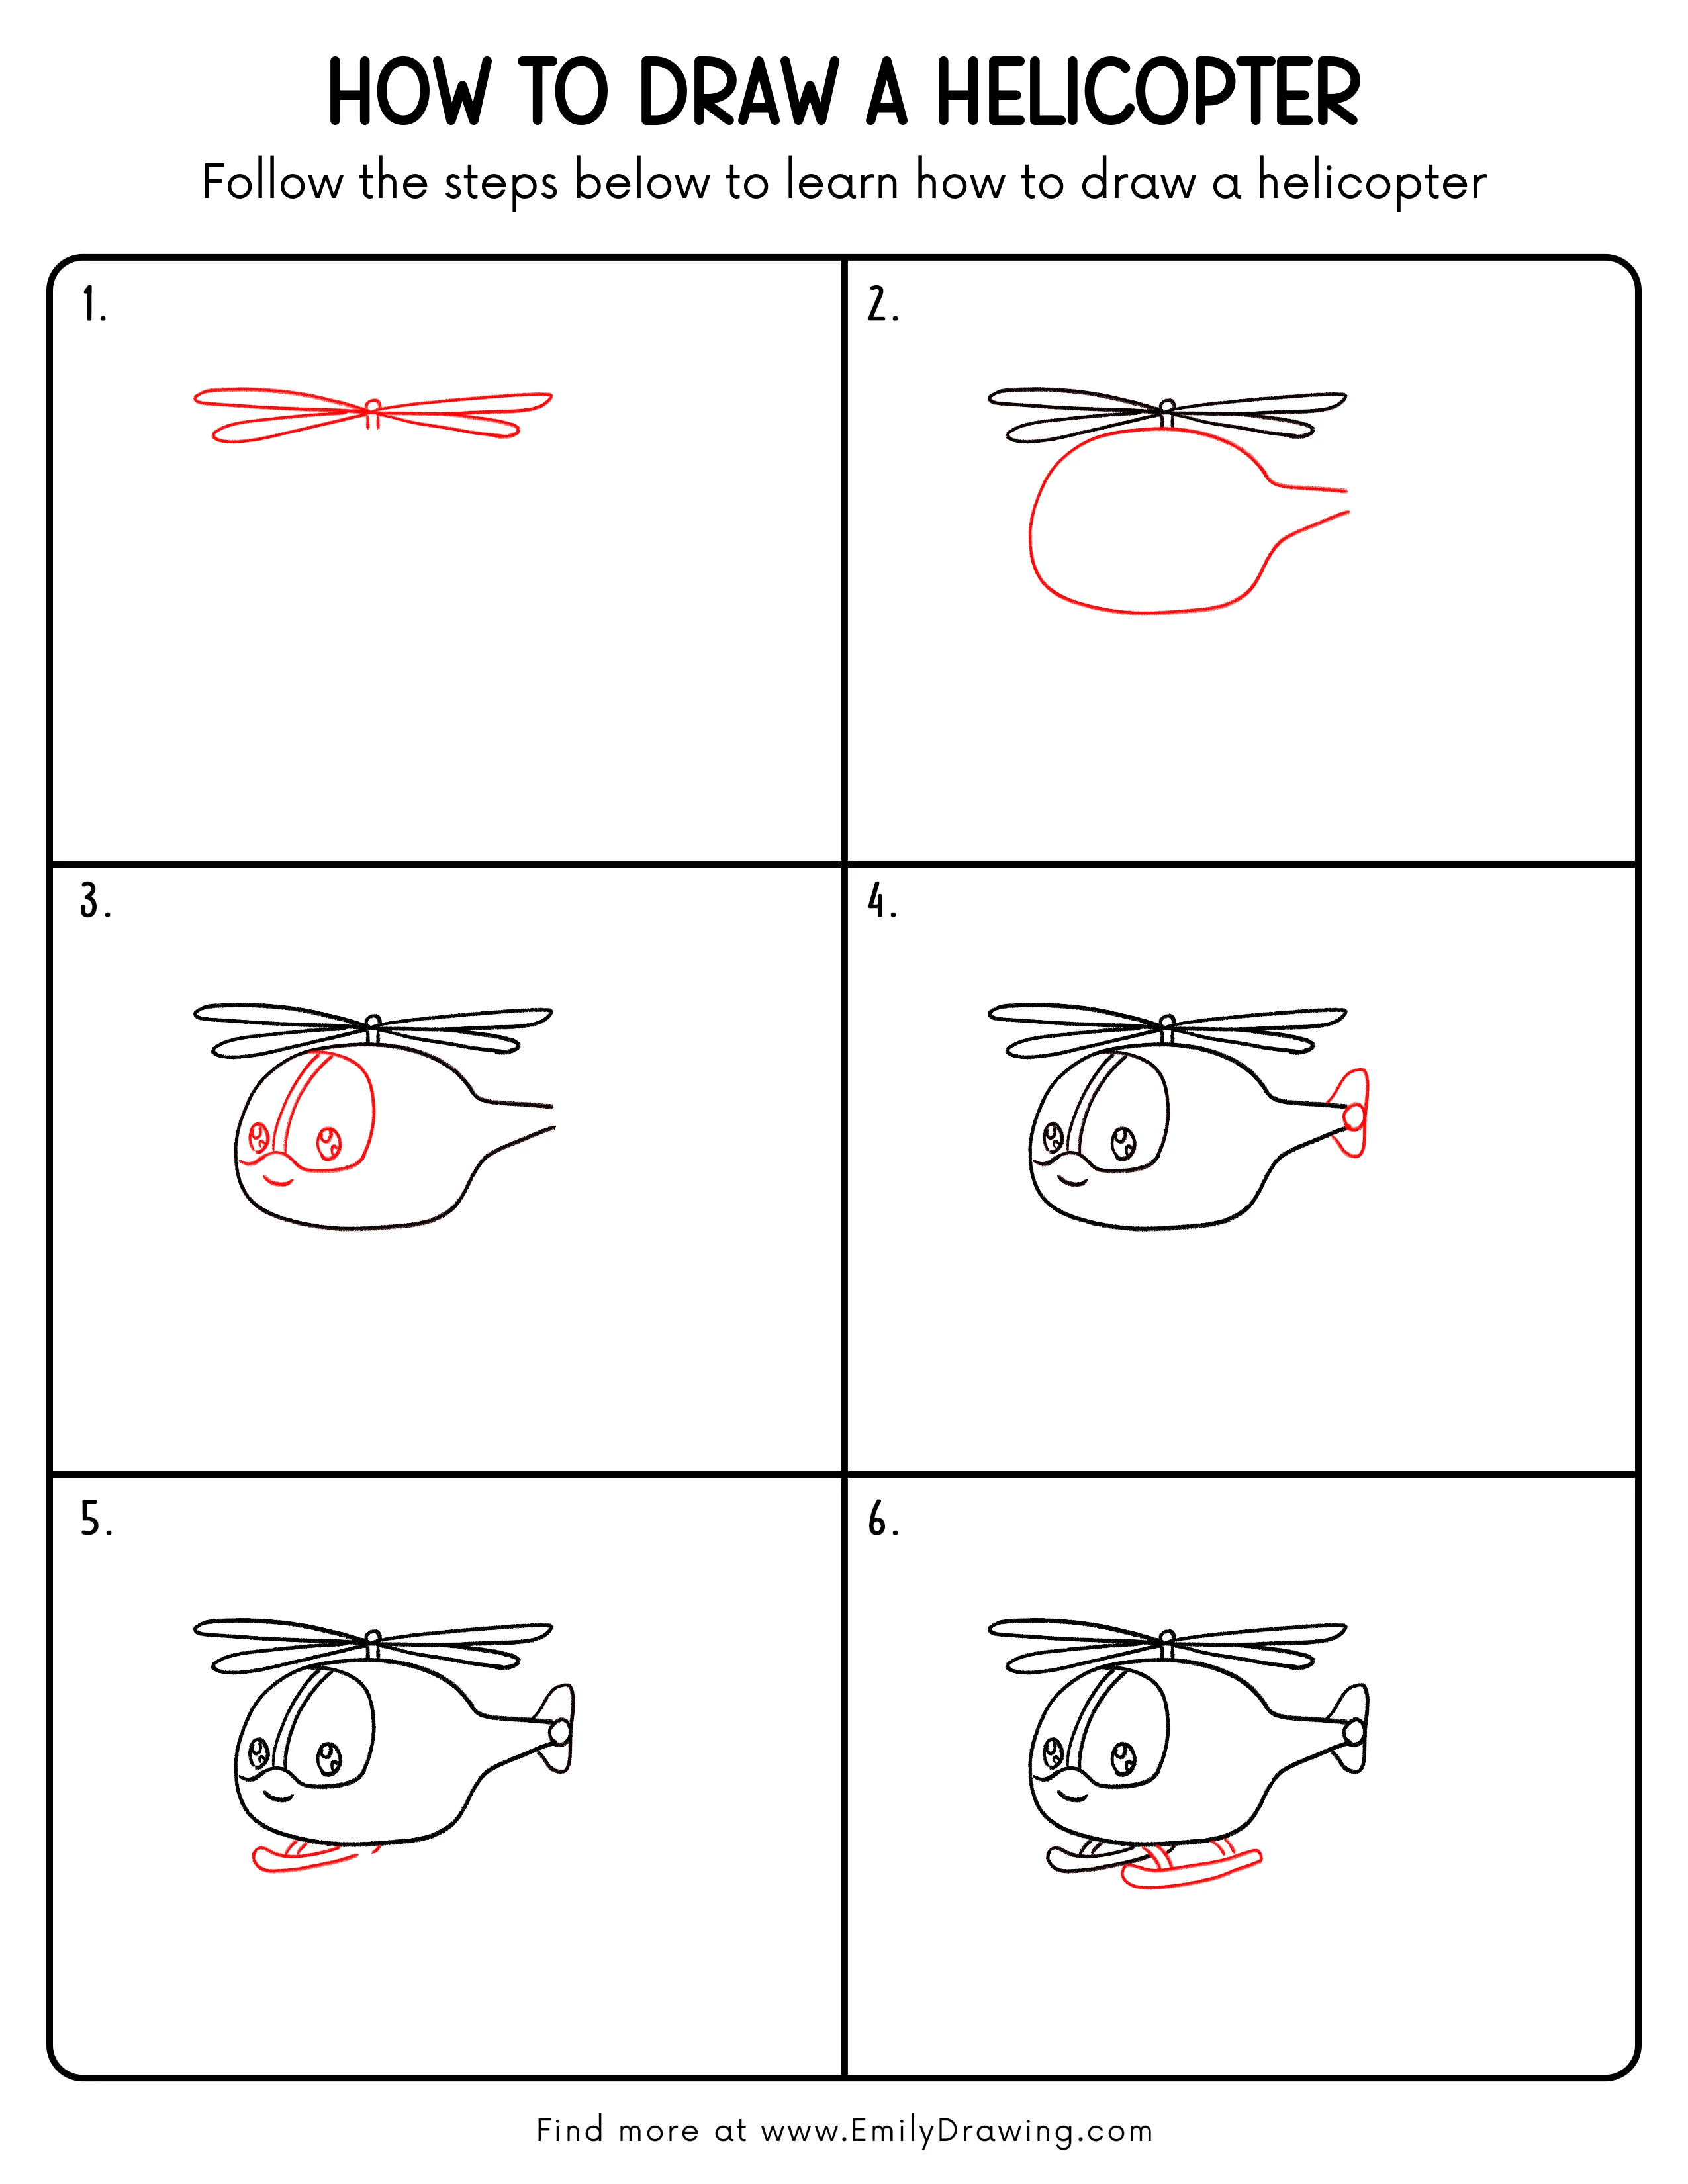
Step-by-Step Drawing Guide
Step 1: Block In the Main Rotor
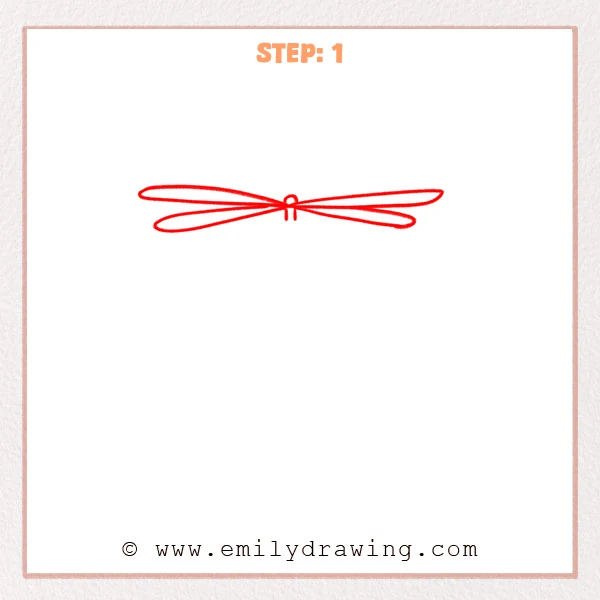
Near the top of the page, draw a long, thin oval for one rotor blade.
From the same center point, draw a second long oval crossing it, then add a small circle as the rotor hub.
Keep the shapes smooth and simple for now.
Pro Tip: Keep both ovals the same length and thickness, aligned to one center point.
Step 2: Draw the Fuselage Outline
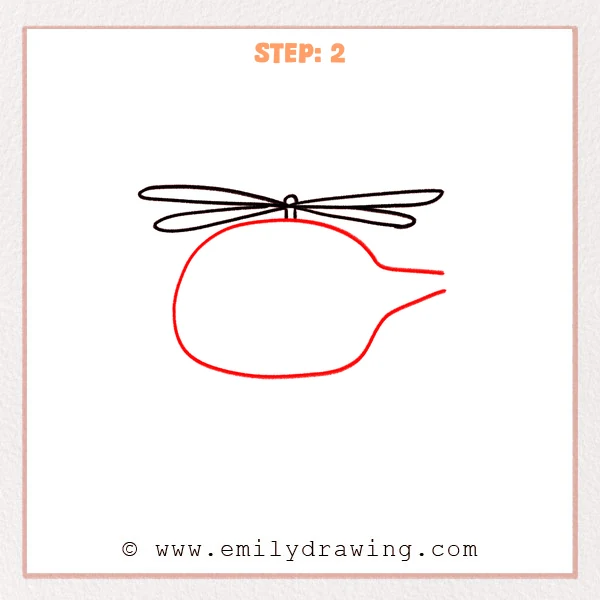
Under the rotor, draw a large rounded shape for the helicopter body.
Extend a narrower shape to the right to start the tail boom, keeping the top of the body close to the rotor hub.
Let the body feel soft and balloon-like.
Pro Tip: Make the body much shorter than the rotor, and start the tail from the back half.
Step 3: Add the Cockpit and a Cute Face
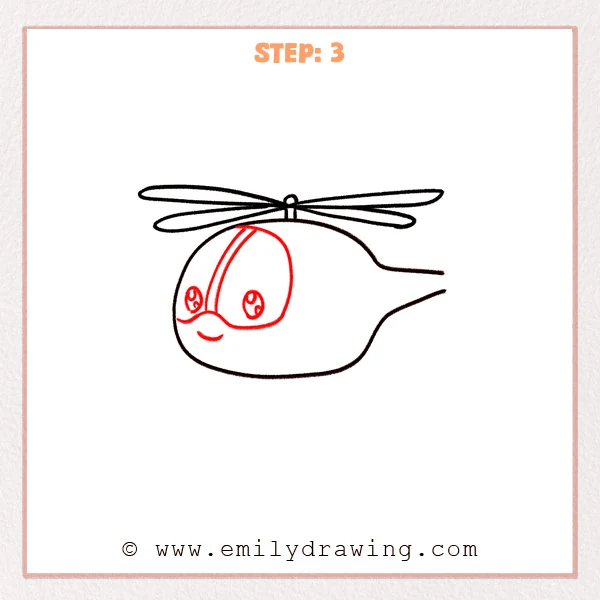
Draw two large oval cockpit windows on the front half of the body, like big goggles.
Add a curved vertical divider under the rotor hub, then draw shiny eyes inside the windows and a small smiling curve.
Keep the face simple and friendly.
Pro Tip: Keep both windows the same size and spacing, and place the face toward the front.
Step 4: Add the Tail Rotor
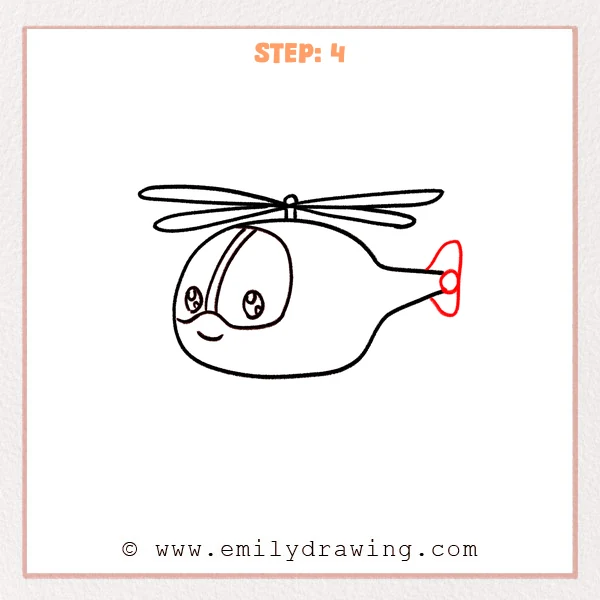
Draw a small circle at the very end of the tail as the rotor center.
Around it, draw a rounded vertical blade shape so it reads like a tiny fan.
Make this part neat and compact.
Pro Tip: Keep the tail rotor much smaller than the cockpit, and place it at the tail tip.
Step 5: Add the Landing Skids
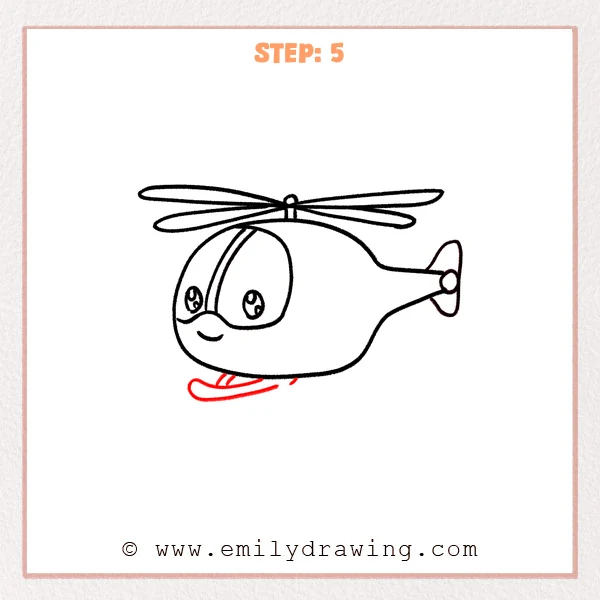
Under the body, draw a long curved “ski” shape for the landing skid.
Add two short support struts from the belly down to the skid to connect it.
Curve the ends slightly upward.
Pro Tip: Make the skid slightly narrower than the body, with gently upturned ends.
Step 6: Finish the Second Skid and Struts
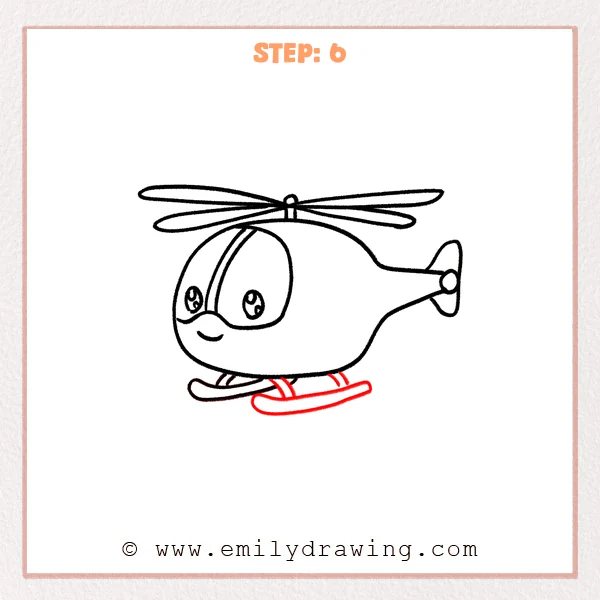
Draw a second curved landing skid under the body, roughly parallel to the first one.
Add a few more short support struts so the belly connects securely to both skids.
Keep the struts evenly spaced for a tidy look.
Pro Tip: Keep both skids the same curve and length, with evenly spaced struts.
Step 7: Color in your drawing!
Fun Facts
- Helicopters can hover in place because their rotor blades generate lift while spinning.
- A tail rotor helps stop the helicopter body from spinning the opposite direction.
- Many helicopters can move sideways, backward, and forward without turning first.
Pin it now, Draw later!
Trace your final lines with a pen, then erase the extra sketch marks.
If you want, add simple color blocks like a bright body and dark windows.
You just learned how to draw a helicopter step by step—try drawing a whole flying scene next!
Get the FREE Printable Drawing Guide
FREE Download Printable Helicopter Drawing Tutorial
Frequently Asked Questions
How can I make my helicopter look more realistic?
Add a small door line, a tiny light near the nose, and a few panel seams on the body.
Why do my rotor blades look uneven?
Check that both blade ovals share the same center point and match in length.
Can I draw a different style of helicopter?
Yes—change the body shape, make the tail longer, or add extra windows for a new design.