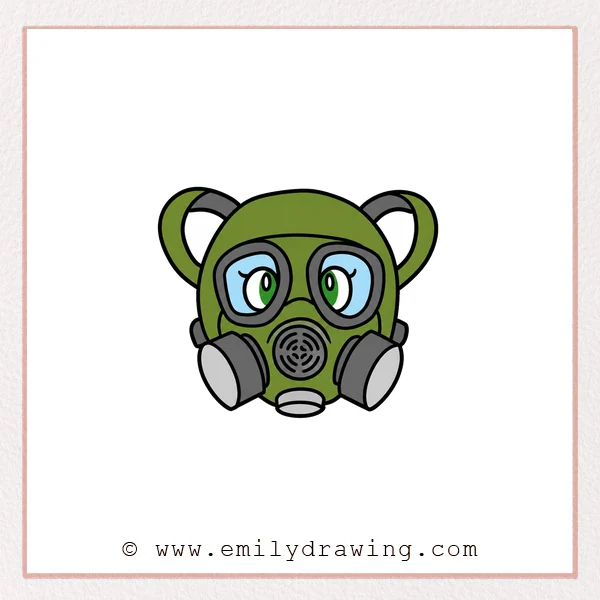
Learn how to draw a gas mask with large goggles and two side filter canisters. This easy drawing tutorial uses nested curves, rounded shapes, and simple grille marks. The design includes cartoon eyes, making it a playful exercise in drawing for beginners.
What You Will Need
- A pencil
- An eraser
- Drawing paper
- Colored pencils or crayons (optional)
Here are my RECOMMENDED Art Supplies!
- Crayola Coloring Set (140 Pieces – Mega Value!)
- 24 Colored Crayon Set
- A4 Printer Paper
- Crayola Coloring Pencils
- HP Home Printer with Instant Ink!
Time needed:
12 minutes.
Step-by-Step Drawing Guide
Step 1: Start the Left Side Loop
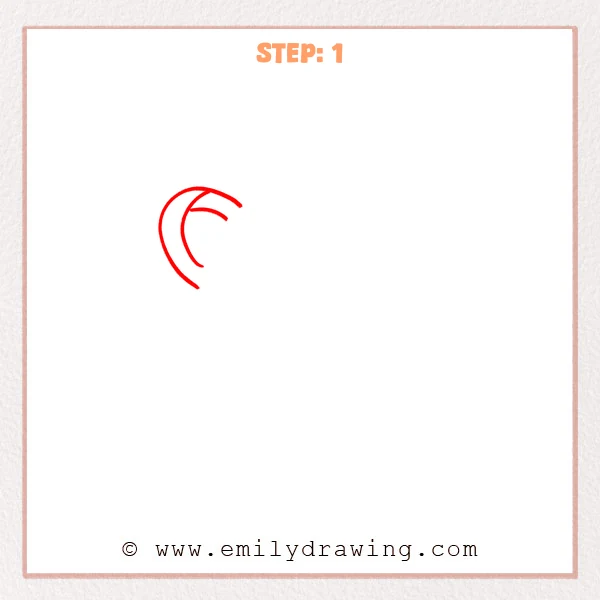
Draw a large open curve near the upper left of your page. Add an inner curve joining its top and a short curved crosspiece pointing right.
Pro Tip: Keep the lower ends open for the central mask added later.
Step 2: Add the Right Side Loop
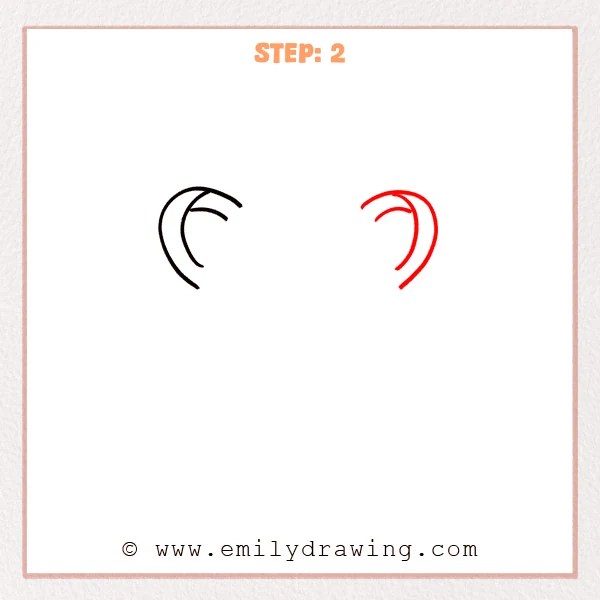
Draw a similar open loop on the right side. Add its inner curve and a short crosspiece pointing toward the center.
Pro Tip: Leave a broad gap between the two loops for the mask.
Step 3: Outline the Main Mask
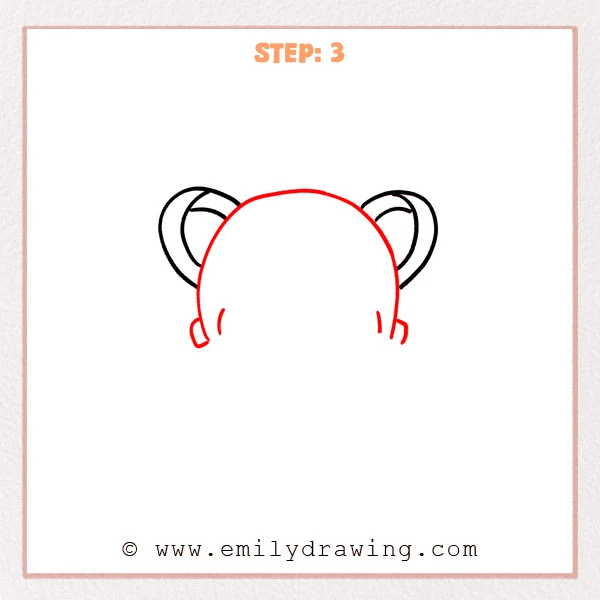
Draw a broad domed outline between and in front of the loops. Extend its sides downward, leaving the bottom open. Add a small rounded tab outside each lower side and a short inner cheek curve.
Pro Tip: Let the main outline hide the inner ends of the side loops.
Step 4: Draw the Goggles and Eyes
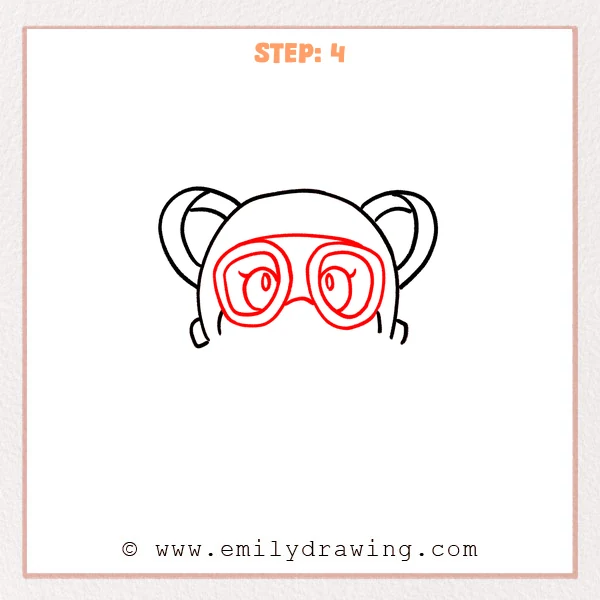
Draw two large rounded goggle frames with smaller matching inner outlines. Connect their tops with an arch and their inner sides with a curved bridge. Inside each lens, add an oval eye, a small pupil, and a short eyelash.
Pro Tip: Leave a clear band between each goggle’s outer and inner edges.
Step 5: Attach the Side Filter Canisters
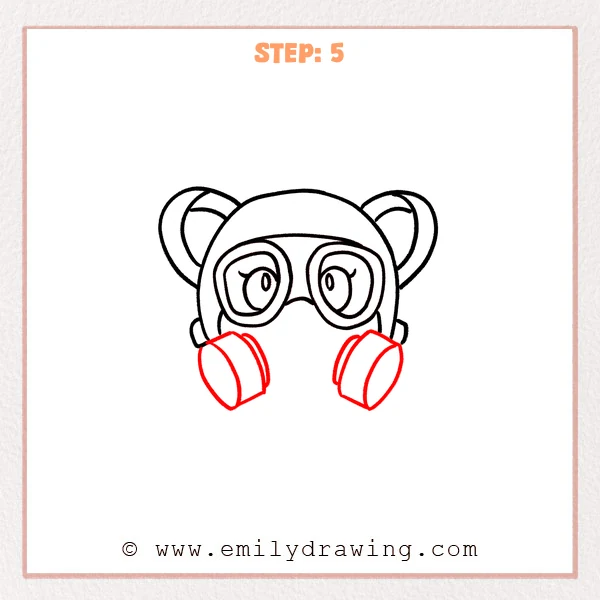
Draw a tilted filter canister below each goggle using a broad curved end. Connect each end to the mask with short sloping edges. Add a narrow curved collar behind each canister near its attachment.
Pro Tip: Angle the two canisters outward from the center of the mask.
Step 6: Finish the Center Grille and Bottom
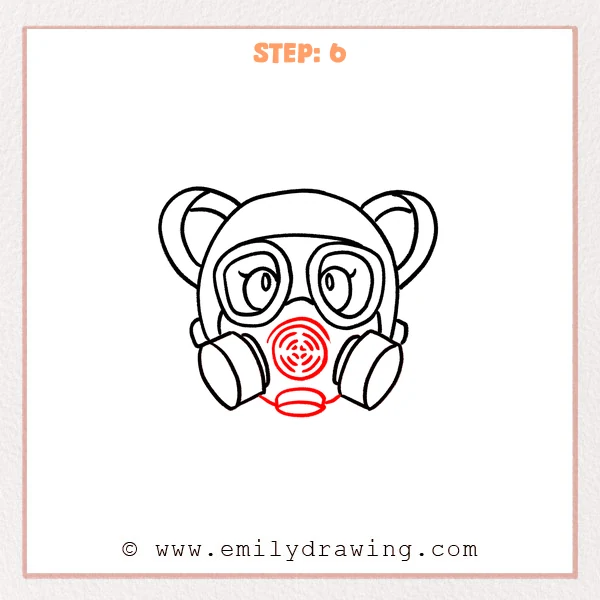
Draw a round central grille and an extra arch just above it. Fill the grille with nested broken arcs and tiny central openings. Connect the lower mask edges to a small bottom fitting with a curved oval base.
Pro Tip: Keep small spaces between the grille marks so they remain distinct.
Step 7: Color in your drawing!
Fun Facts
- Nested outlines give the gas mask goggles visible rims without shading.
- The tilted canisters make this gas mask drawing look less flat.
- Broken arcs suggest the central grille while leaving the small pattern readable.
Pin it now, Draw later!
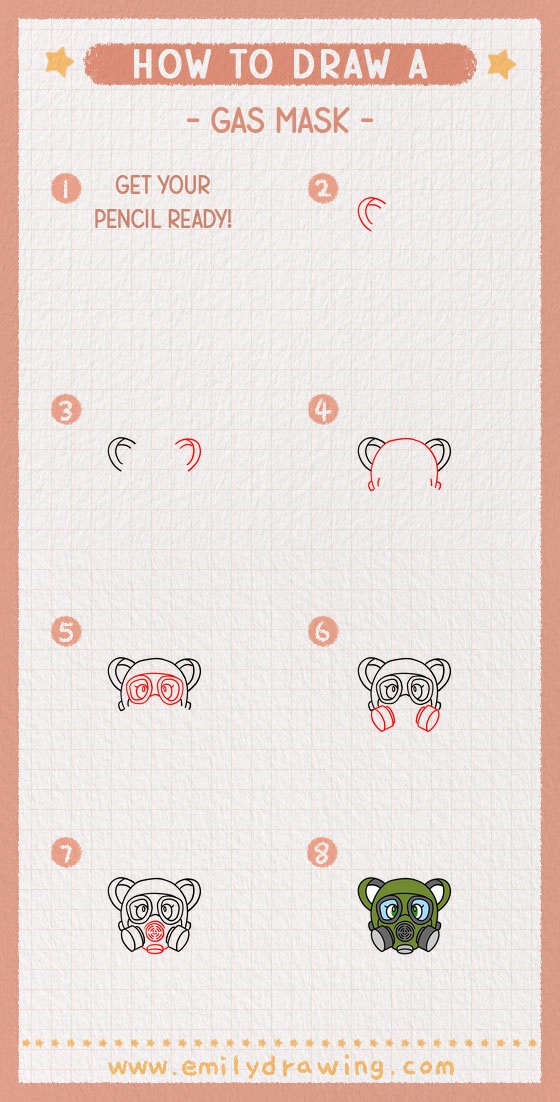
Your gas mask step by step drawing now has large goggles, side filters, and a patterned central grille. Check that the small grille marks stay separated and the canisters remain balanced. Try adding a simple color palette to the finished drawing when you are ready.
Get the FREE Printable Drawing Guide
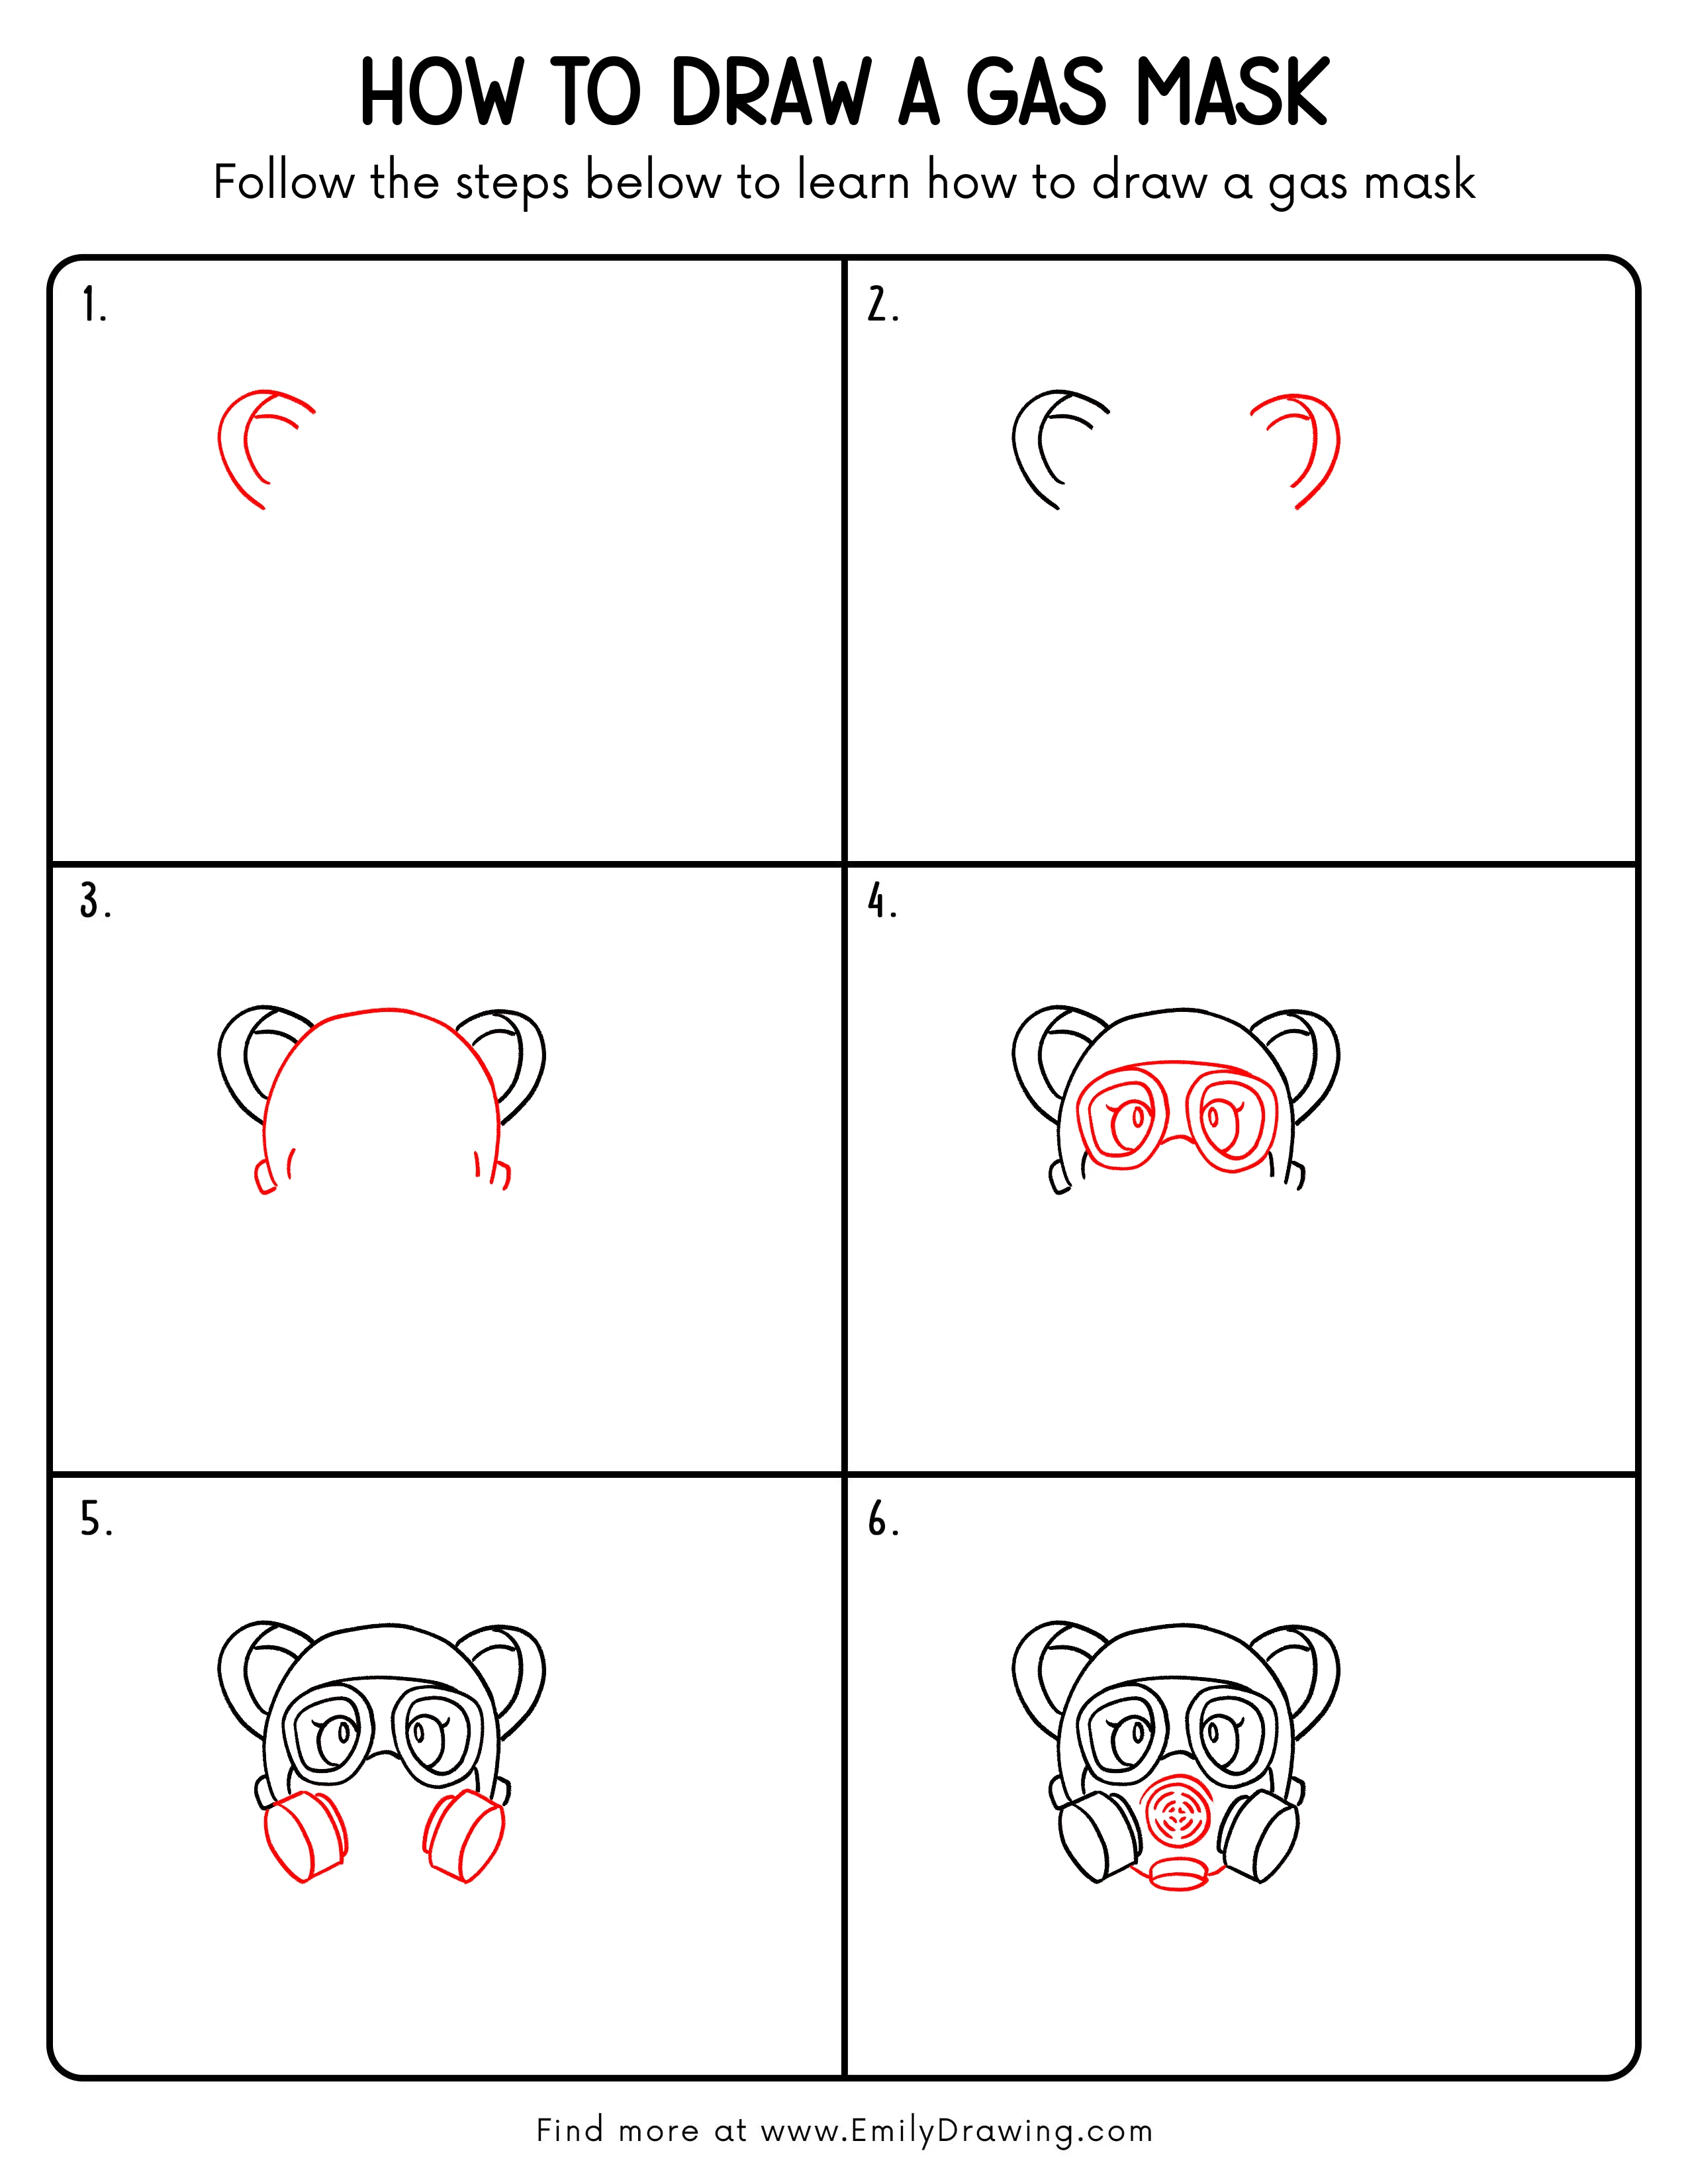
FREE Download Printable Gas Mask Drawing Tutorial
Frequently Asked Questions
How do I draw the gas mask goggles evenly?
Compare their outer widths before adding the inner outlines. Keep the space between each pair of outlines fairly consistent.
Can I simplify the gas mask grille?
Yes. Use fewer broken arcs and keep the tiny center openings clear. A simple readable pattern works better than crowded marks.