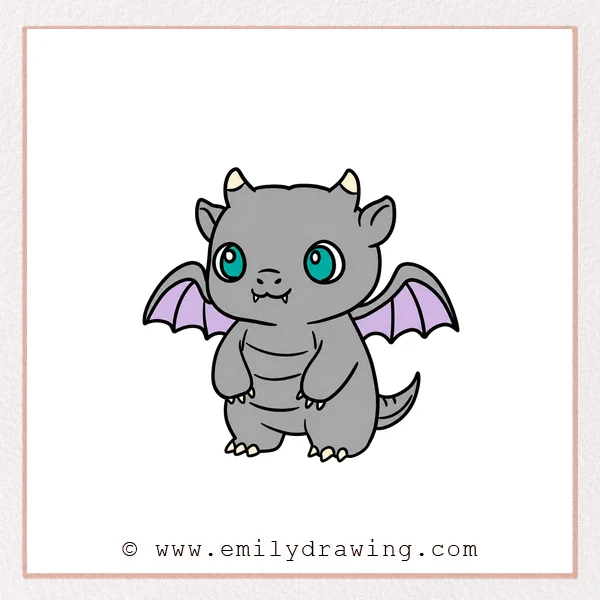
Learn how to draw a gargoyle with small horns, wide wings, and a friendly face. This step by step drawing combines rounded body shapes with pointed claws and wing tips. You can practice each new shape without adding complicated texture.
What You Will Need
- A pencil
- An eraser
- Drawing paper
- Colored pencils or crayons (optional)
Here are my RECOMMENDED Art Supplies!
- Crayola Coloring Set (140 Pieces – Mega Value!)
- 24 Colored Crayon Set
- A4 Printer Paper
- Crayola Coloring Pencils
- HP Home Printer with Instant Ink!
Time needed:
16 minutes.
Step-by-Step Drawing Guide
Step 1: Outline the Horned Head
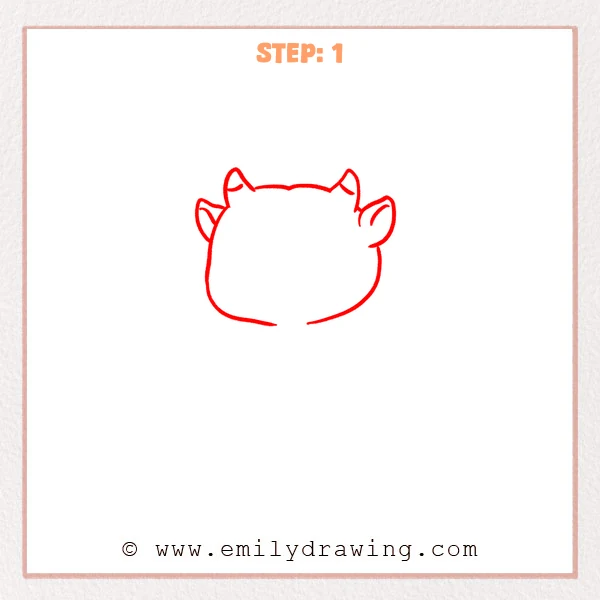
Draw a broad rounded head with a small gap at the chin. Shape two short horns above it and pointed ears at the sides. Add a curved division inside each horn and each ear.
Pro Tip: Leave space beside the head for the wings added later.
Step 2: Add the Eyes and Little Fangs
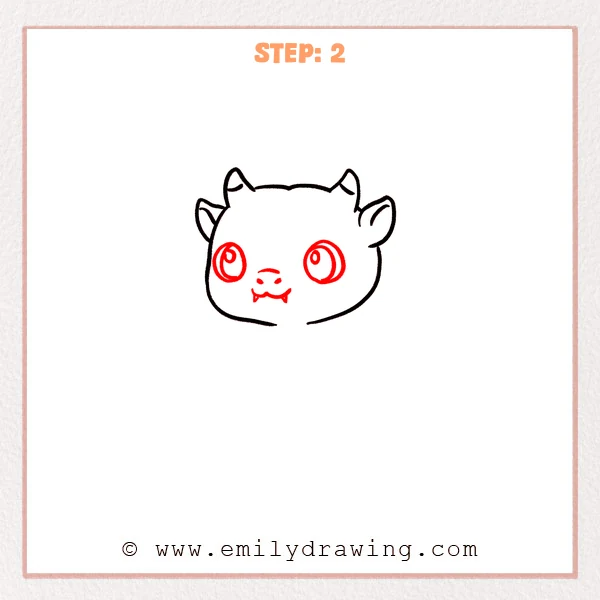
Draw two large oval eyes with inner curves and small highlight loops. Add a short nose arch with two nostril dots below it. Draw a small double-curved mouth and a tiny fang at each end.
Pro Tip: Keep the fangs short so the face remains gentle.
Step 3: Spread the Wings
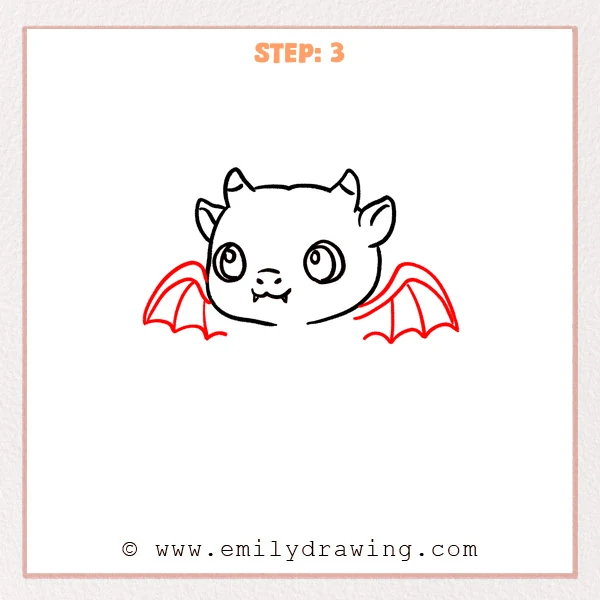
Draw a broad arched wing extending from each side of the head. Shape the lower edges with curved scallops ending in points. Add an inner upper border and curved ribs leading toward the lower points.
Pro Tip: Keep the wing ribs inside the outer wing outlines.
Step 4: Draw the Short Arms
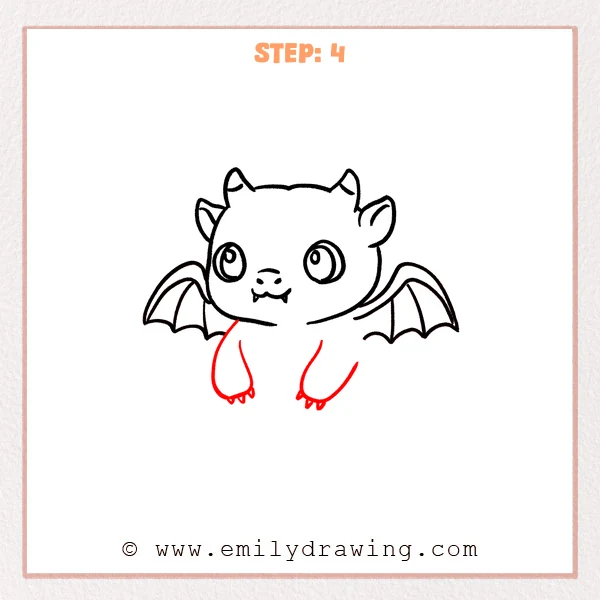
Draw two short rounded arms hanging below the head. Curve their inner edges toward the middle of the body. Add three small pointed claws along each hand’s bottom edge.
Pro Tip: Leave an open space between the arms for the belly.
Step 5: Build the Body and Feet
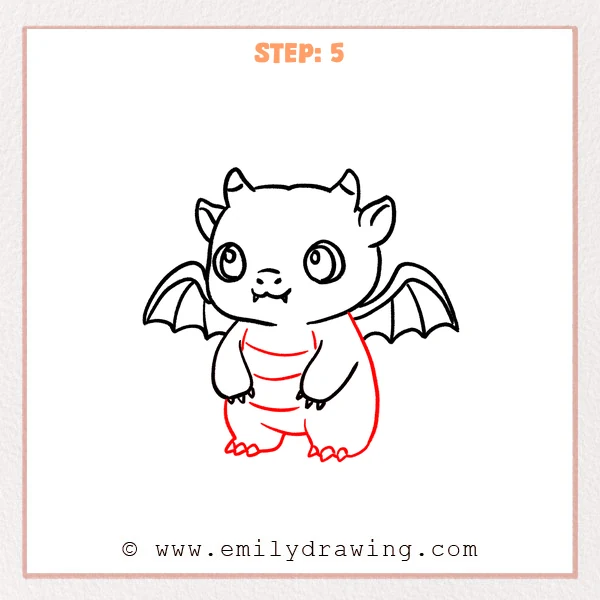
Draw a plump torso behind the arms, curving down into two feet. Add three pointed toe claws to each foot and short shoulder creases. Place three curved belly lines and a lower curve between the legs.
Pro Tip: Keep the belly lines gently bowed to match the rounded torso.
Step 6: Add the Curved Tail
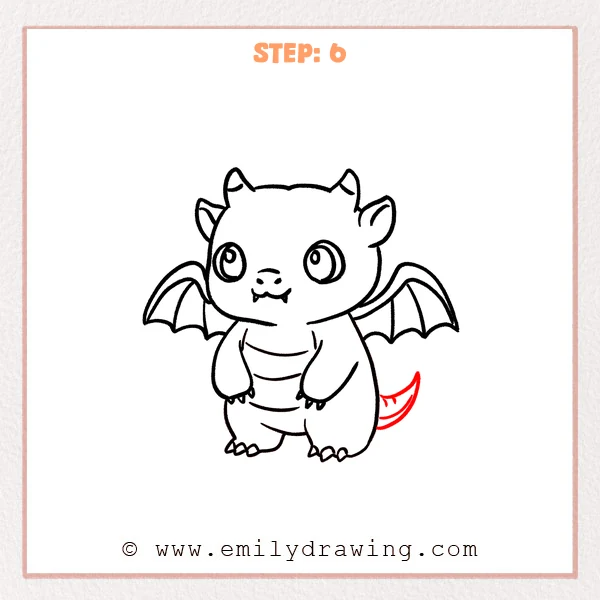
Draw a pointed tail curving outward from behind the right side. Add an inner curve along its lower edge and two short marks near its base.
Pro Tip: Let the tail disappear behind the body at its attachment.
Step 7: Color in your drawing!
Fun Facts
- Scalloped wing edges and curved ribs make the gargoyle’s wings readable with few lines.
- Small claws and fangs add pointed accents to an otherwise rounded drawing.
- Curved belly lines repeat the rounded shape of the gargoyle’s torso.
Pin it now, Draw later!
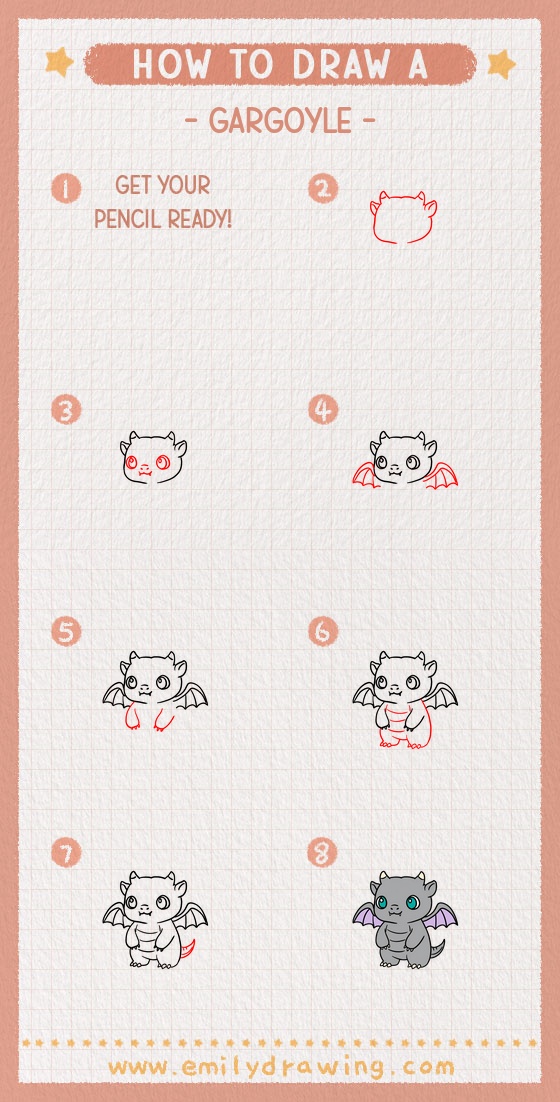
Your gargoyle drawing now includes horns, pointed ears, spread wings, little claws, and a curved tail. Check that the wing ribs stay separate from the face. Try a simple stone gray or an imaginative color palette when you are ready.
Get the FREE Printable Drawing Guide
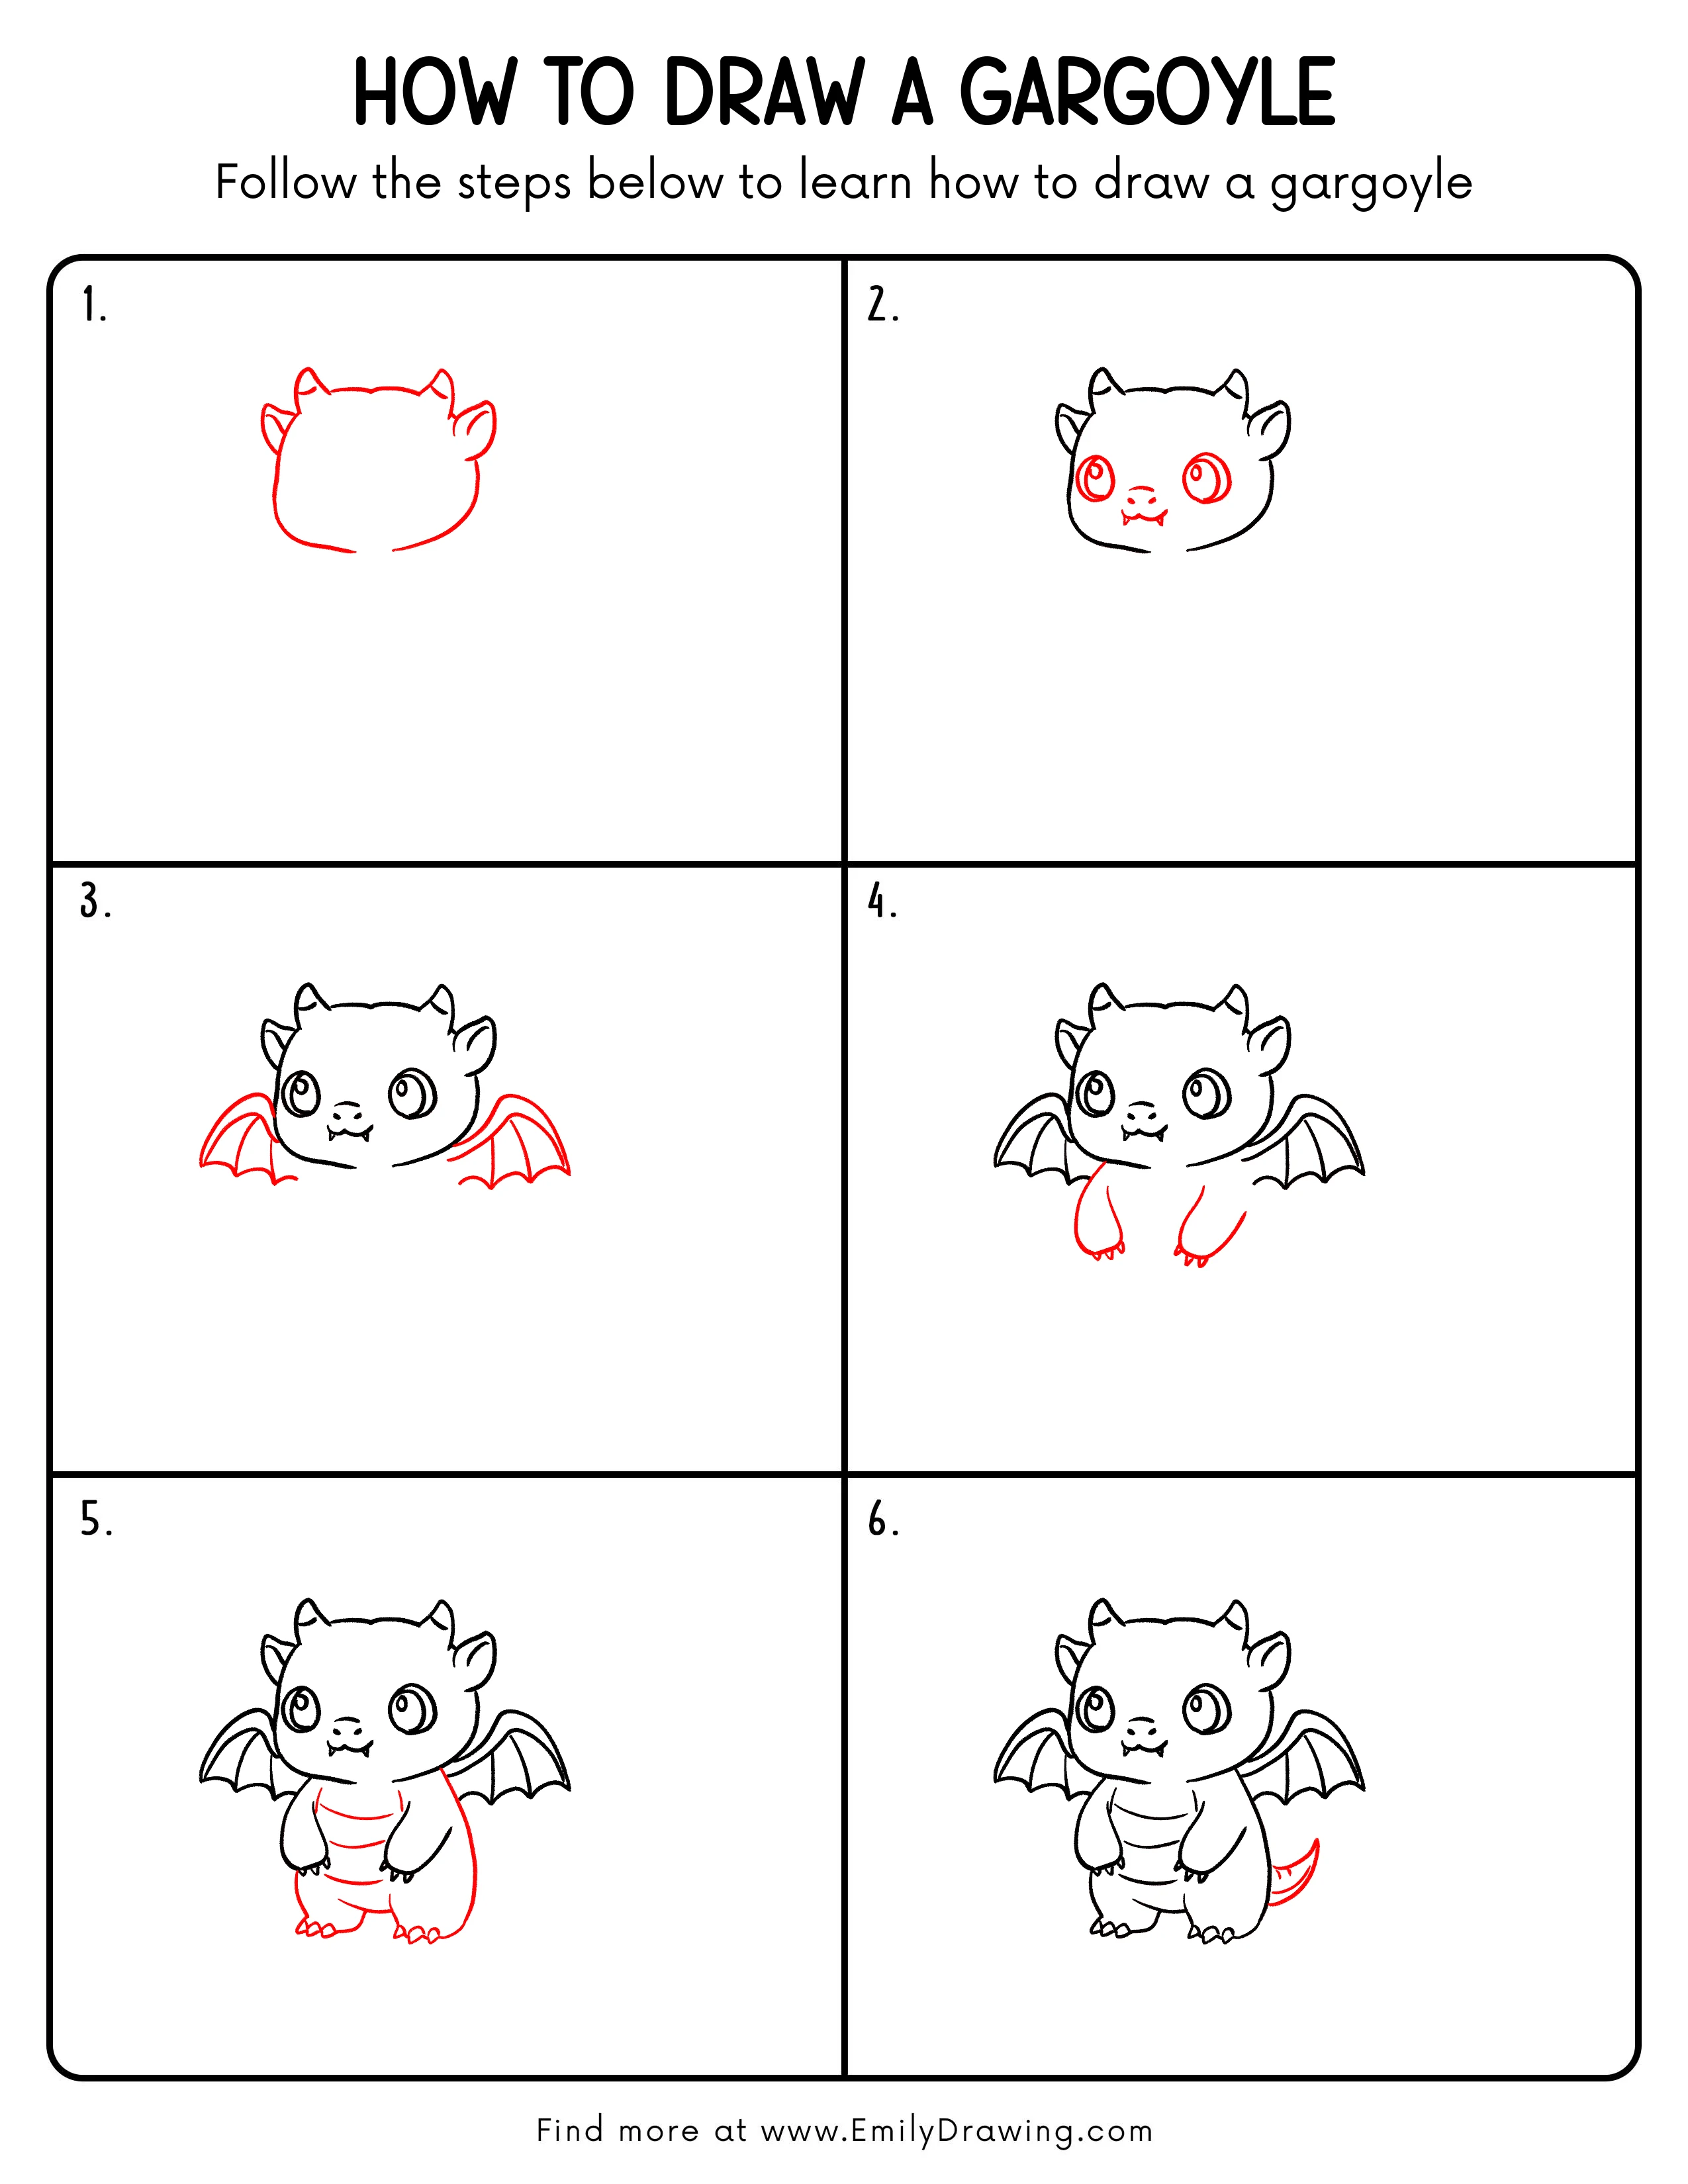
FREE Download Printable Gargoyle Drawing Tutorial
Frequently Asked Questions
How can I make both gargoyle wings look balanced?
Compare their outer tips and their top arches. Matching their general size matters more than making every scallop identical.
Can beginners simplify the gargoyle’s claws?
Yes. Use small triangular points and leave clear gaps between them. Larger drawing paper can make those details easier in this easy drawing tutorial.