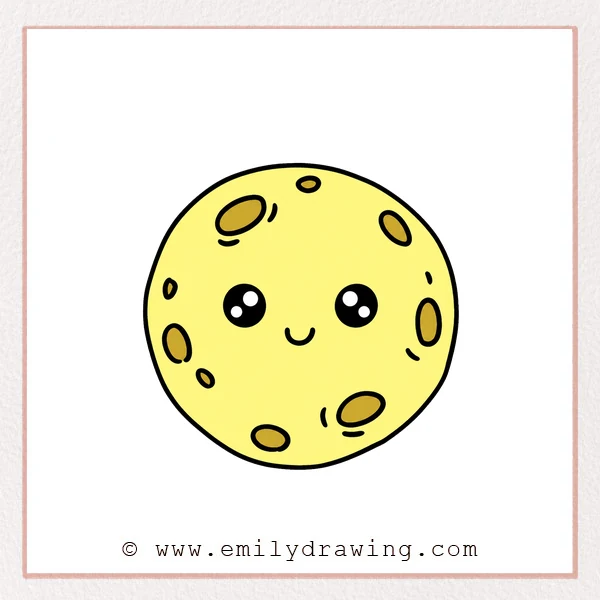
Learn how to draw a full moon with simple craters and a cheerful cartoon face. This easy drawing tutorial gives you practice with circles, tilted ovals, and short curves. Build the surface details gradually, leaving the middle open for the expression.
What You Will Need
- A pencil
- An eraser
- Drawing paper
- Colored pencils or crayons (optional)
Here are my RECOMMENDED Art Supplies!
- Crayola Coloring Set (140 Pieces – Mega Value!)
- 24 Colored Crayon Set
- A4 Printer Paper
- Crayola Coloring Pencils
- HP Home Printer with Instant Ink!
Time needed:
20 minutes.
Step-by-Step Drawing Guide
Step 1: Draw the Round Moon Outline
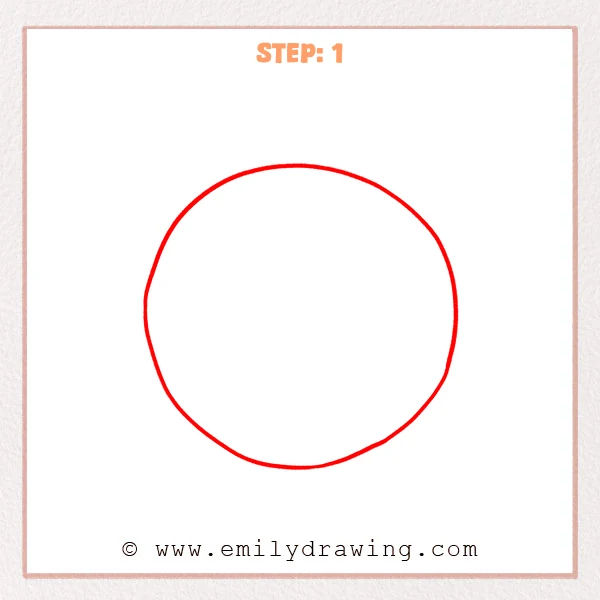
Draw one large circle near the center of your paper. Join the curve gently to complete the full moon outline.
Pro Tip: Turn your paper as needed to make the large curve comfortable.
Step 2: Start the Upper Left Craters
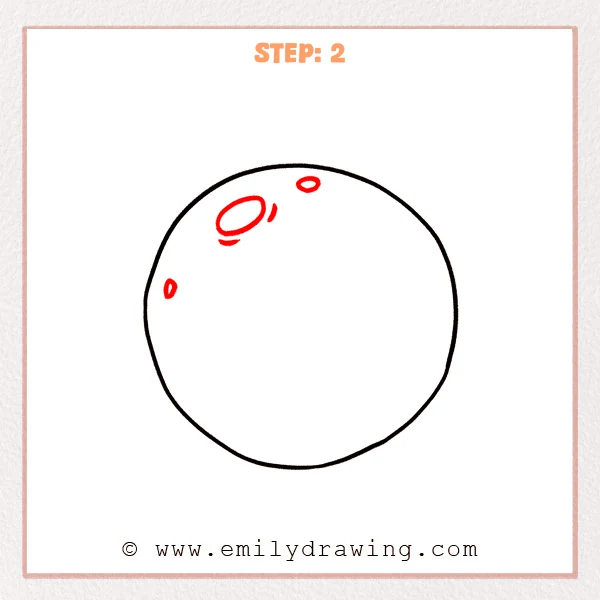
Draw a tilted oval crater near the upper left edge. Add short curved marks below it and beside its right edge. Place one small oval near the top and another along the left side.
Pro Tip: Keep every crater inside the outer moon outline.
Step 3: Add Craters Along the Sides
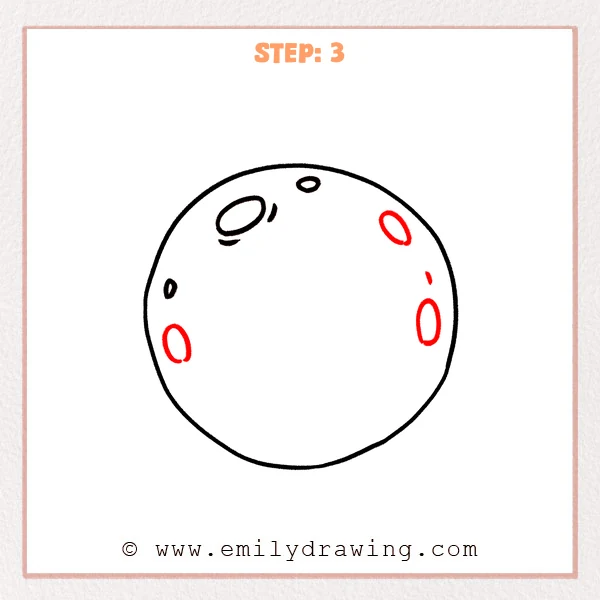
Draw a tilted oval crater near the upper right edge. Add an upright oval on the right and an open oval on the lower left. Place a short curved surface mark above the upright right crater.
Pro Tip: Vary the oval angles so the crater arrangement feels less repetitive.
Step 4: Fill Two Lower Spaces
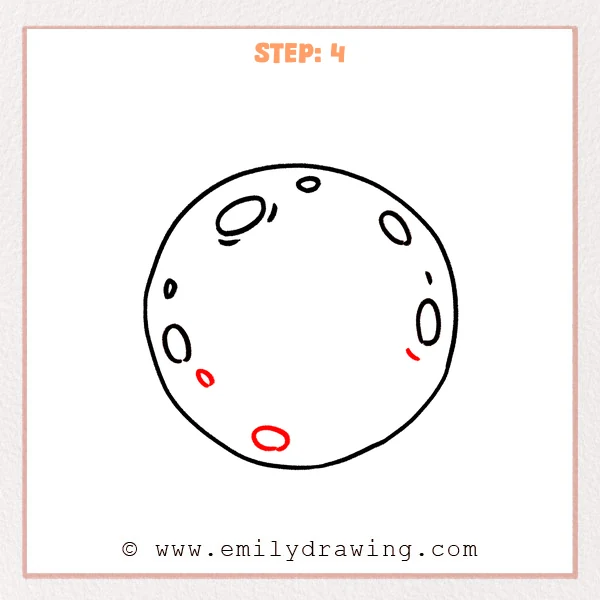
Draw a small tilted oval below the lower left crater. Add a wider oval near the bottom of the moon. Place a short curve just below and left of the middle right crater.
Pro Tip: Leave the central area clear for the face added later.
Step 5: Draw the Lower Right Crater
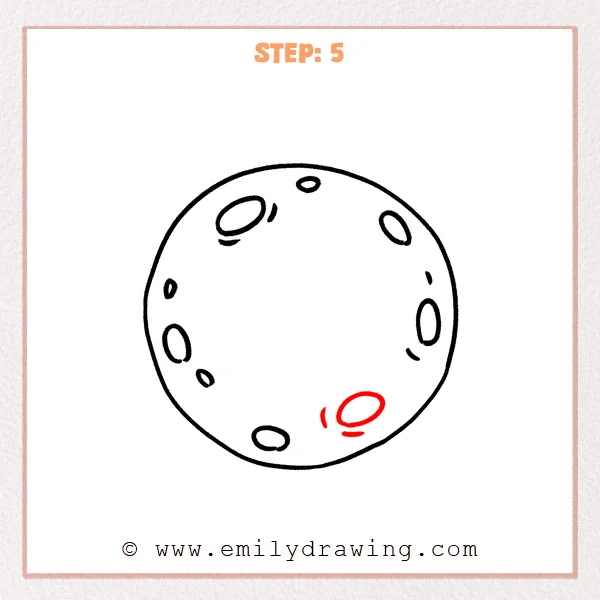
Add a broad tilted oval in the lower right area. Draw one short curved mark to its left and another underneath.
Pro Tip: Leave a small gap between the crater and each nearby mark.
Step 6: Give the Moon a Happy Face
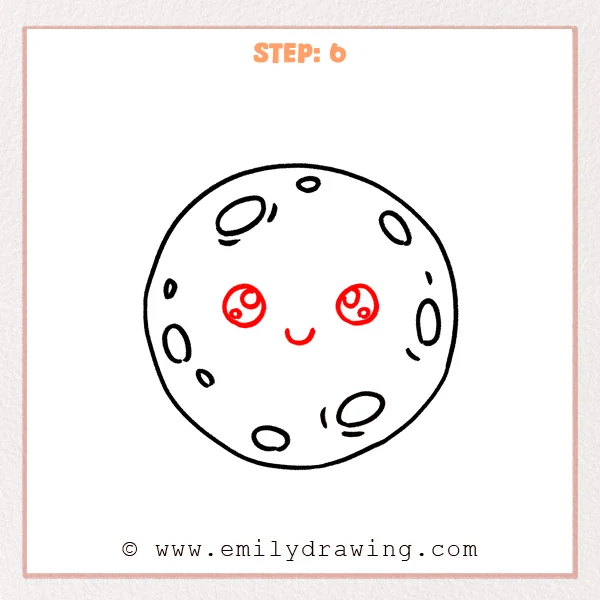
Draw two large round eyes across the open middle area. Place one larger and one smaller highlight circle inside each eye. Add a gently curved smile between and below the eyes.
Pro Tip: Keep the smile smaller than either eye to preserve the gentle expression.
Step 7: Color in your drawing!
Fun Facts
- Tilted oval craters add variety while keeping the full moon drawing simple.
- The craters form a loose border around the open central face.
- Small circles inside the eyes provide space for bright highlights when coloring.
Pin it now, Draw later!
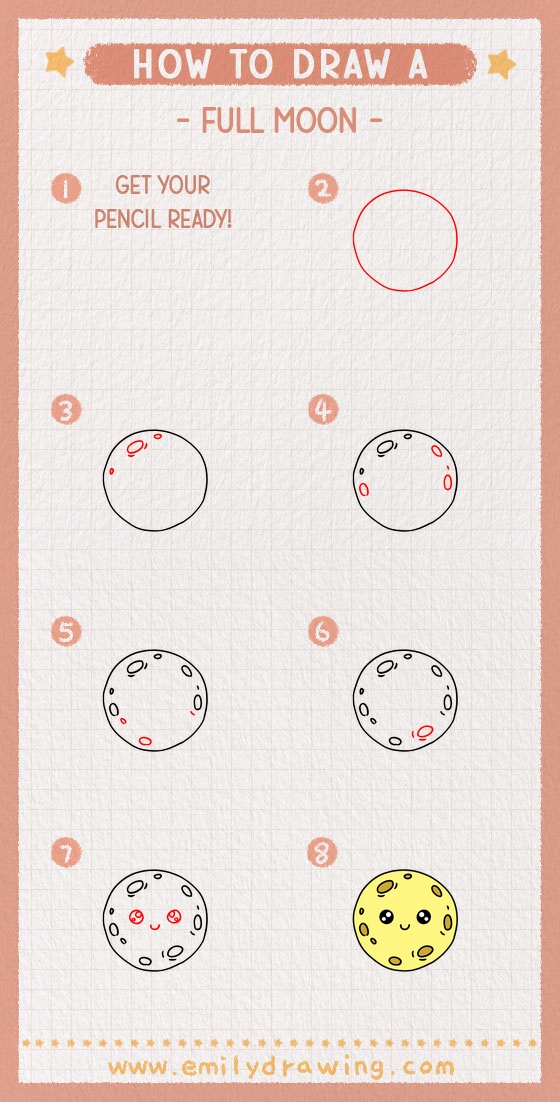
Your full moon step by step drawing now combines a round outline, scattered craters, and a smiling face. Check that the crater details leave the eyes clear. Try a soft yellow or gray palette for your moon when you are ready.
Get the FREE Printable Drawing Guide
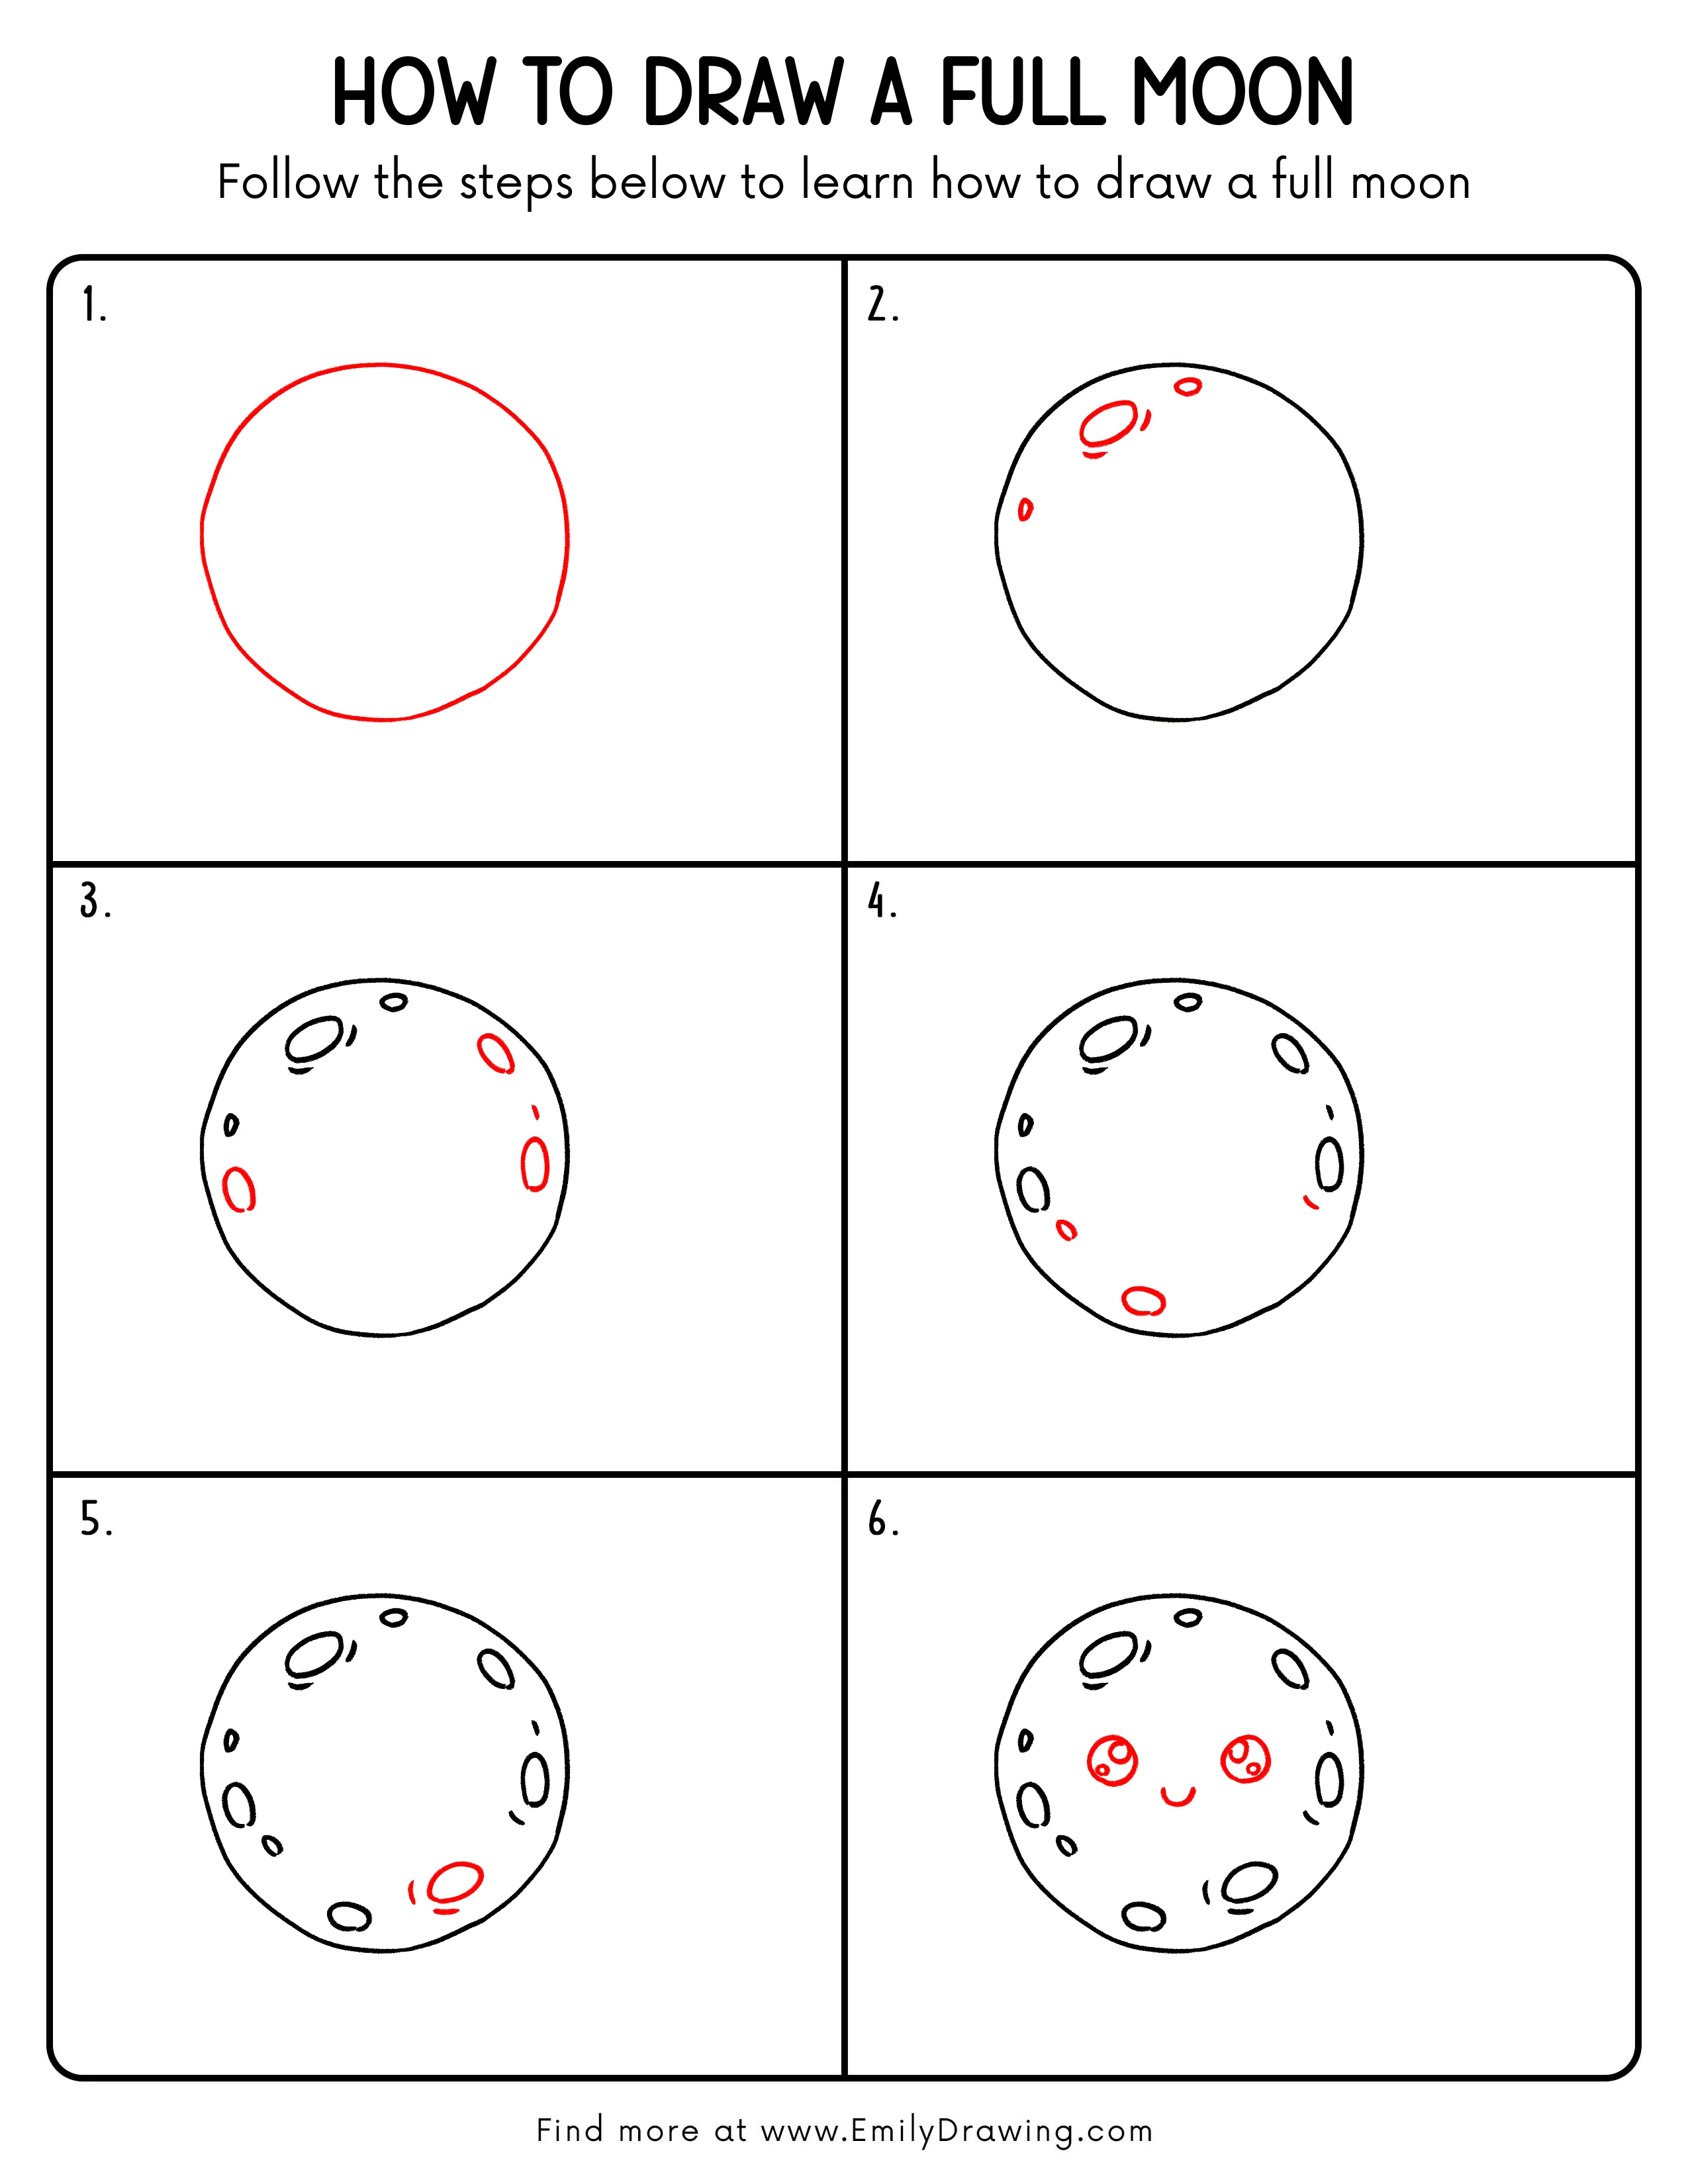
FREE Download Printable Full Moon Drawing Tutorial
Frequently Asked Questions
Does my full moon outline need to be a perfect circle?
No. A softly rounded outline works well for this cartoon. Use light pencil strokes so you can adjust the shape comfortably.
How do I keep the full moon face easy to see?
Place the craters closer to the outer edge and leave the middle open. Keep the two eyes separated with enough room for the smile.