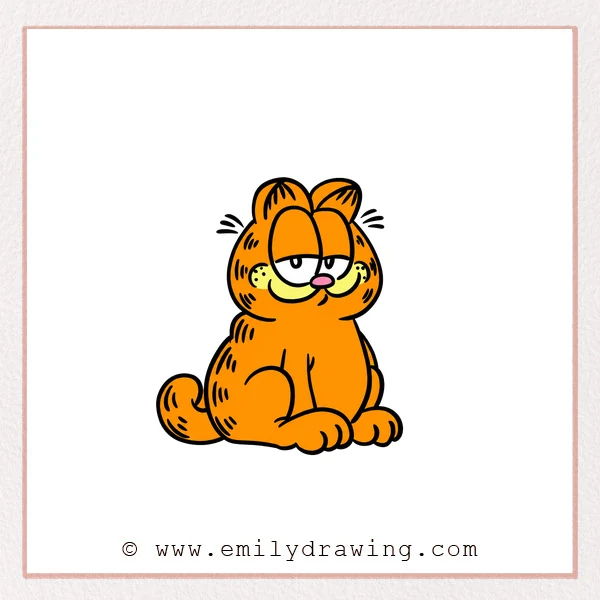
Learn how to draw Garfield with a rounded body and his familiar sleepy expression. This easy drawing tutorial builds the seated pose with broad curves and simple paw shapes. Save the stripes and curled tail for the final step.
What You Will Need
- A pencil
- An eraser
- Drawing paper
- Colored pencils or crayons (optional)
Here are my RECOMMENDED Art Supplies!
- Crayola Coloring Set (140 Pieces – Mega Value!)
- 24 Colored Crayon Set
- A4 Printer Paper
- Crayola Coloring Pencils
- HP Home Printer with Instant Ink!
Time needed:
11 minutes.
Step-by-Step Drawing Guide
Step 1: Outline the Head and Ears
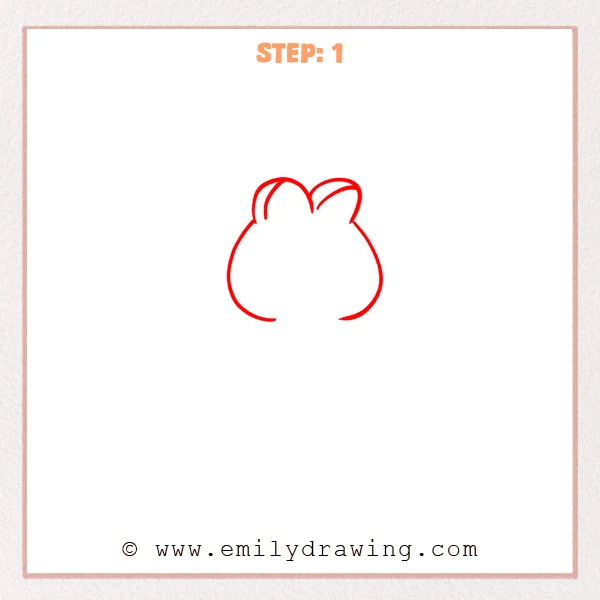
Draw two rounded ears meeting at the top of the head. Add a curved inner line inside each ear. Extend both sides downward into broad cheeks, leaving the chin area open.
Pro Tip: Make the cheeks wider than the pair of ears.
Step 2: Draw the Sleepy Face
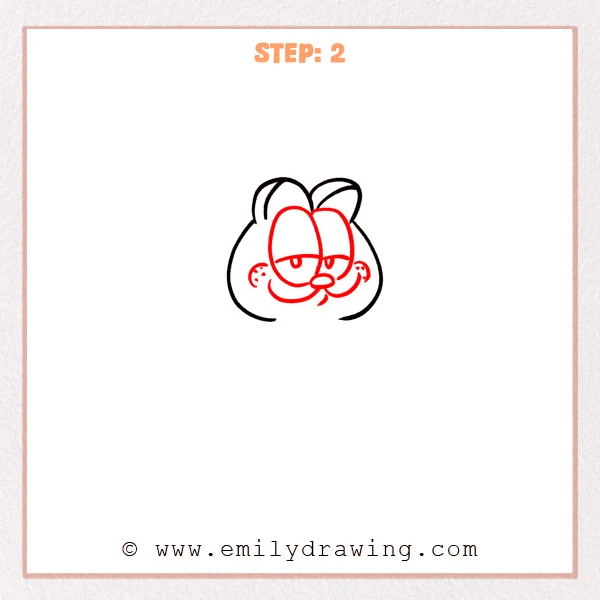
Draw two tall touching oval eyes with low eyelids and small pupils. Add an oval nose above two broad curved muzzle lines. Place freckles at the outer muzzle ends and a short mouth curve below the nose.
Pro Tip: Keep both eyelids near the same height for Garfield’s relaxed expression.
Step 3: Shape the Left Body and Paw
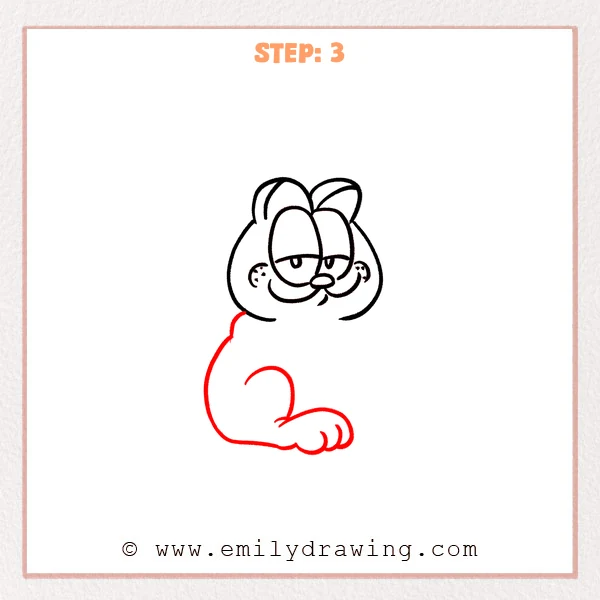
Curve the left shoulder downward into a rounded body side. Sweep the bottom edge into a large paw with curved toe divisions. Add an inward curled line above the paw to suggest the seated haunch.
Pro Tip: Keep the paw low and broad beneath the rounded haunch.
Step 4: Add the Right Body and Paw
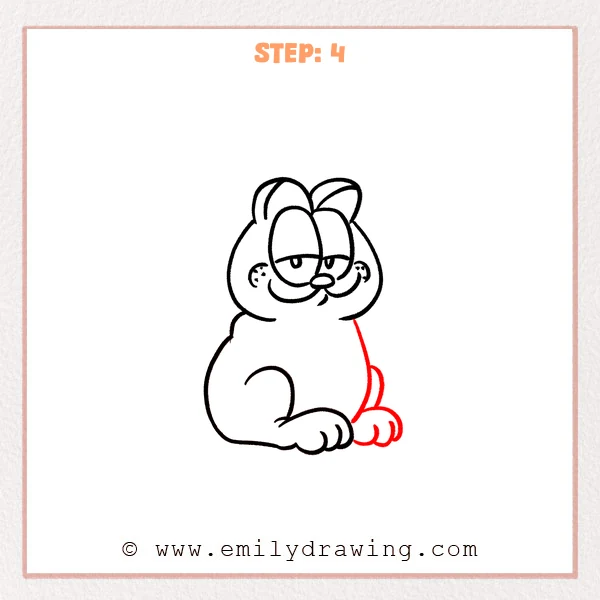
Draw a smooth body curve down from the right cheek. Add a narrow curved leg shape beside it and a rounded paw below. Divide the paw with short curved toe marks.
Pro Tip: Let the right paw sit slightly behind the larger left paw.
Step 5: Define the Front Legs
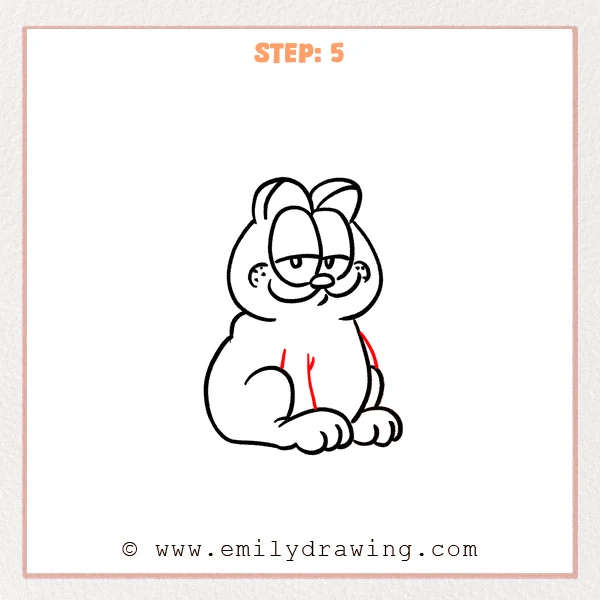
Draw a long inner front-leg curve from the chest to the left paw. Add its short forked crease near the top. Place a short line above the haunch and another along the outer right shoulder.
Pro Tip: Stop the long inner line at the top of the paw.
Step 6: Finish the Tail and Stripes
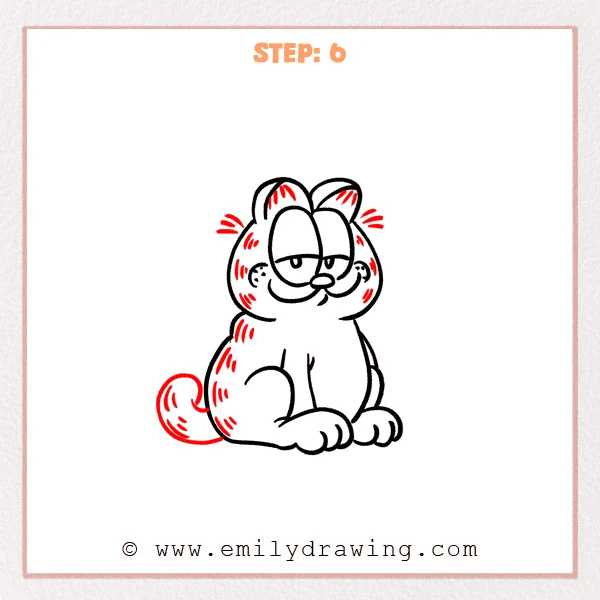
Draw a thick curled tail sweeping out behind the left body. Add grouped short stripes inside the ears, along the cheeks, body, and tail. Place three short whisker strokes outside each side of the head.
Pro Tip: Let the stripe groups follow the nearby curved body edges.
Step 7: Color in your drawing!
Fun Facts
- Low eyelids create Garfield’s sleepy look with just two curved lines.
- Groups of short stripes help describe the rounded body without shading.
- The curled tail balances the wide paws in this seated Garfield drawing.
Pin it now, Draw later!
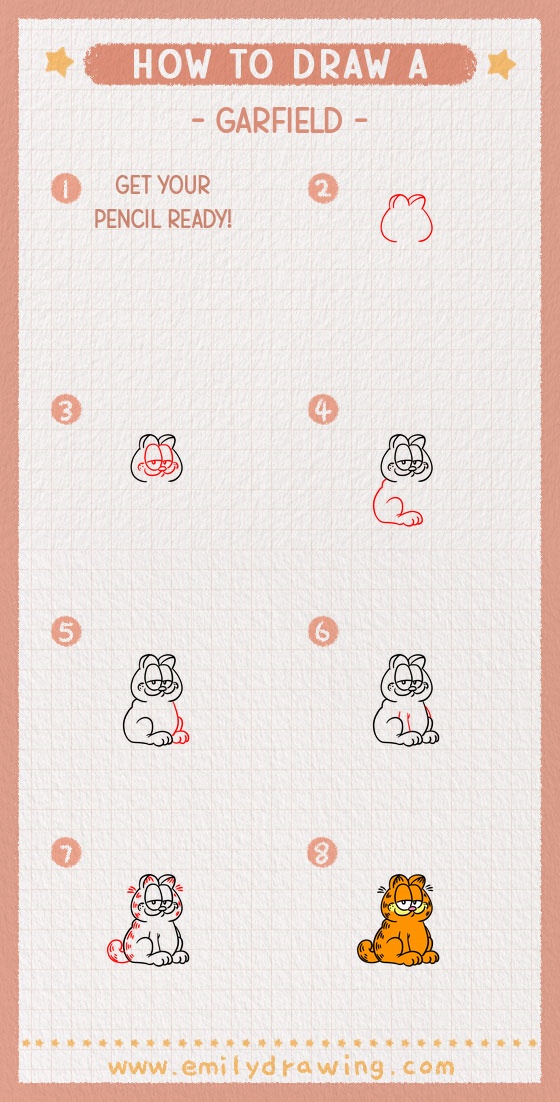
Your Garfield step by step drawing now has sleepy eyes, broad paws, a curled tail, and familiar stripes. Check the separation between the paws and the curve of each eyelid. Try coloring Garfield with a warm orange palette when you are ready.
Get the FREE Printable Drawing Guide
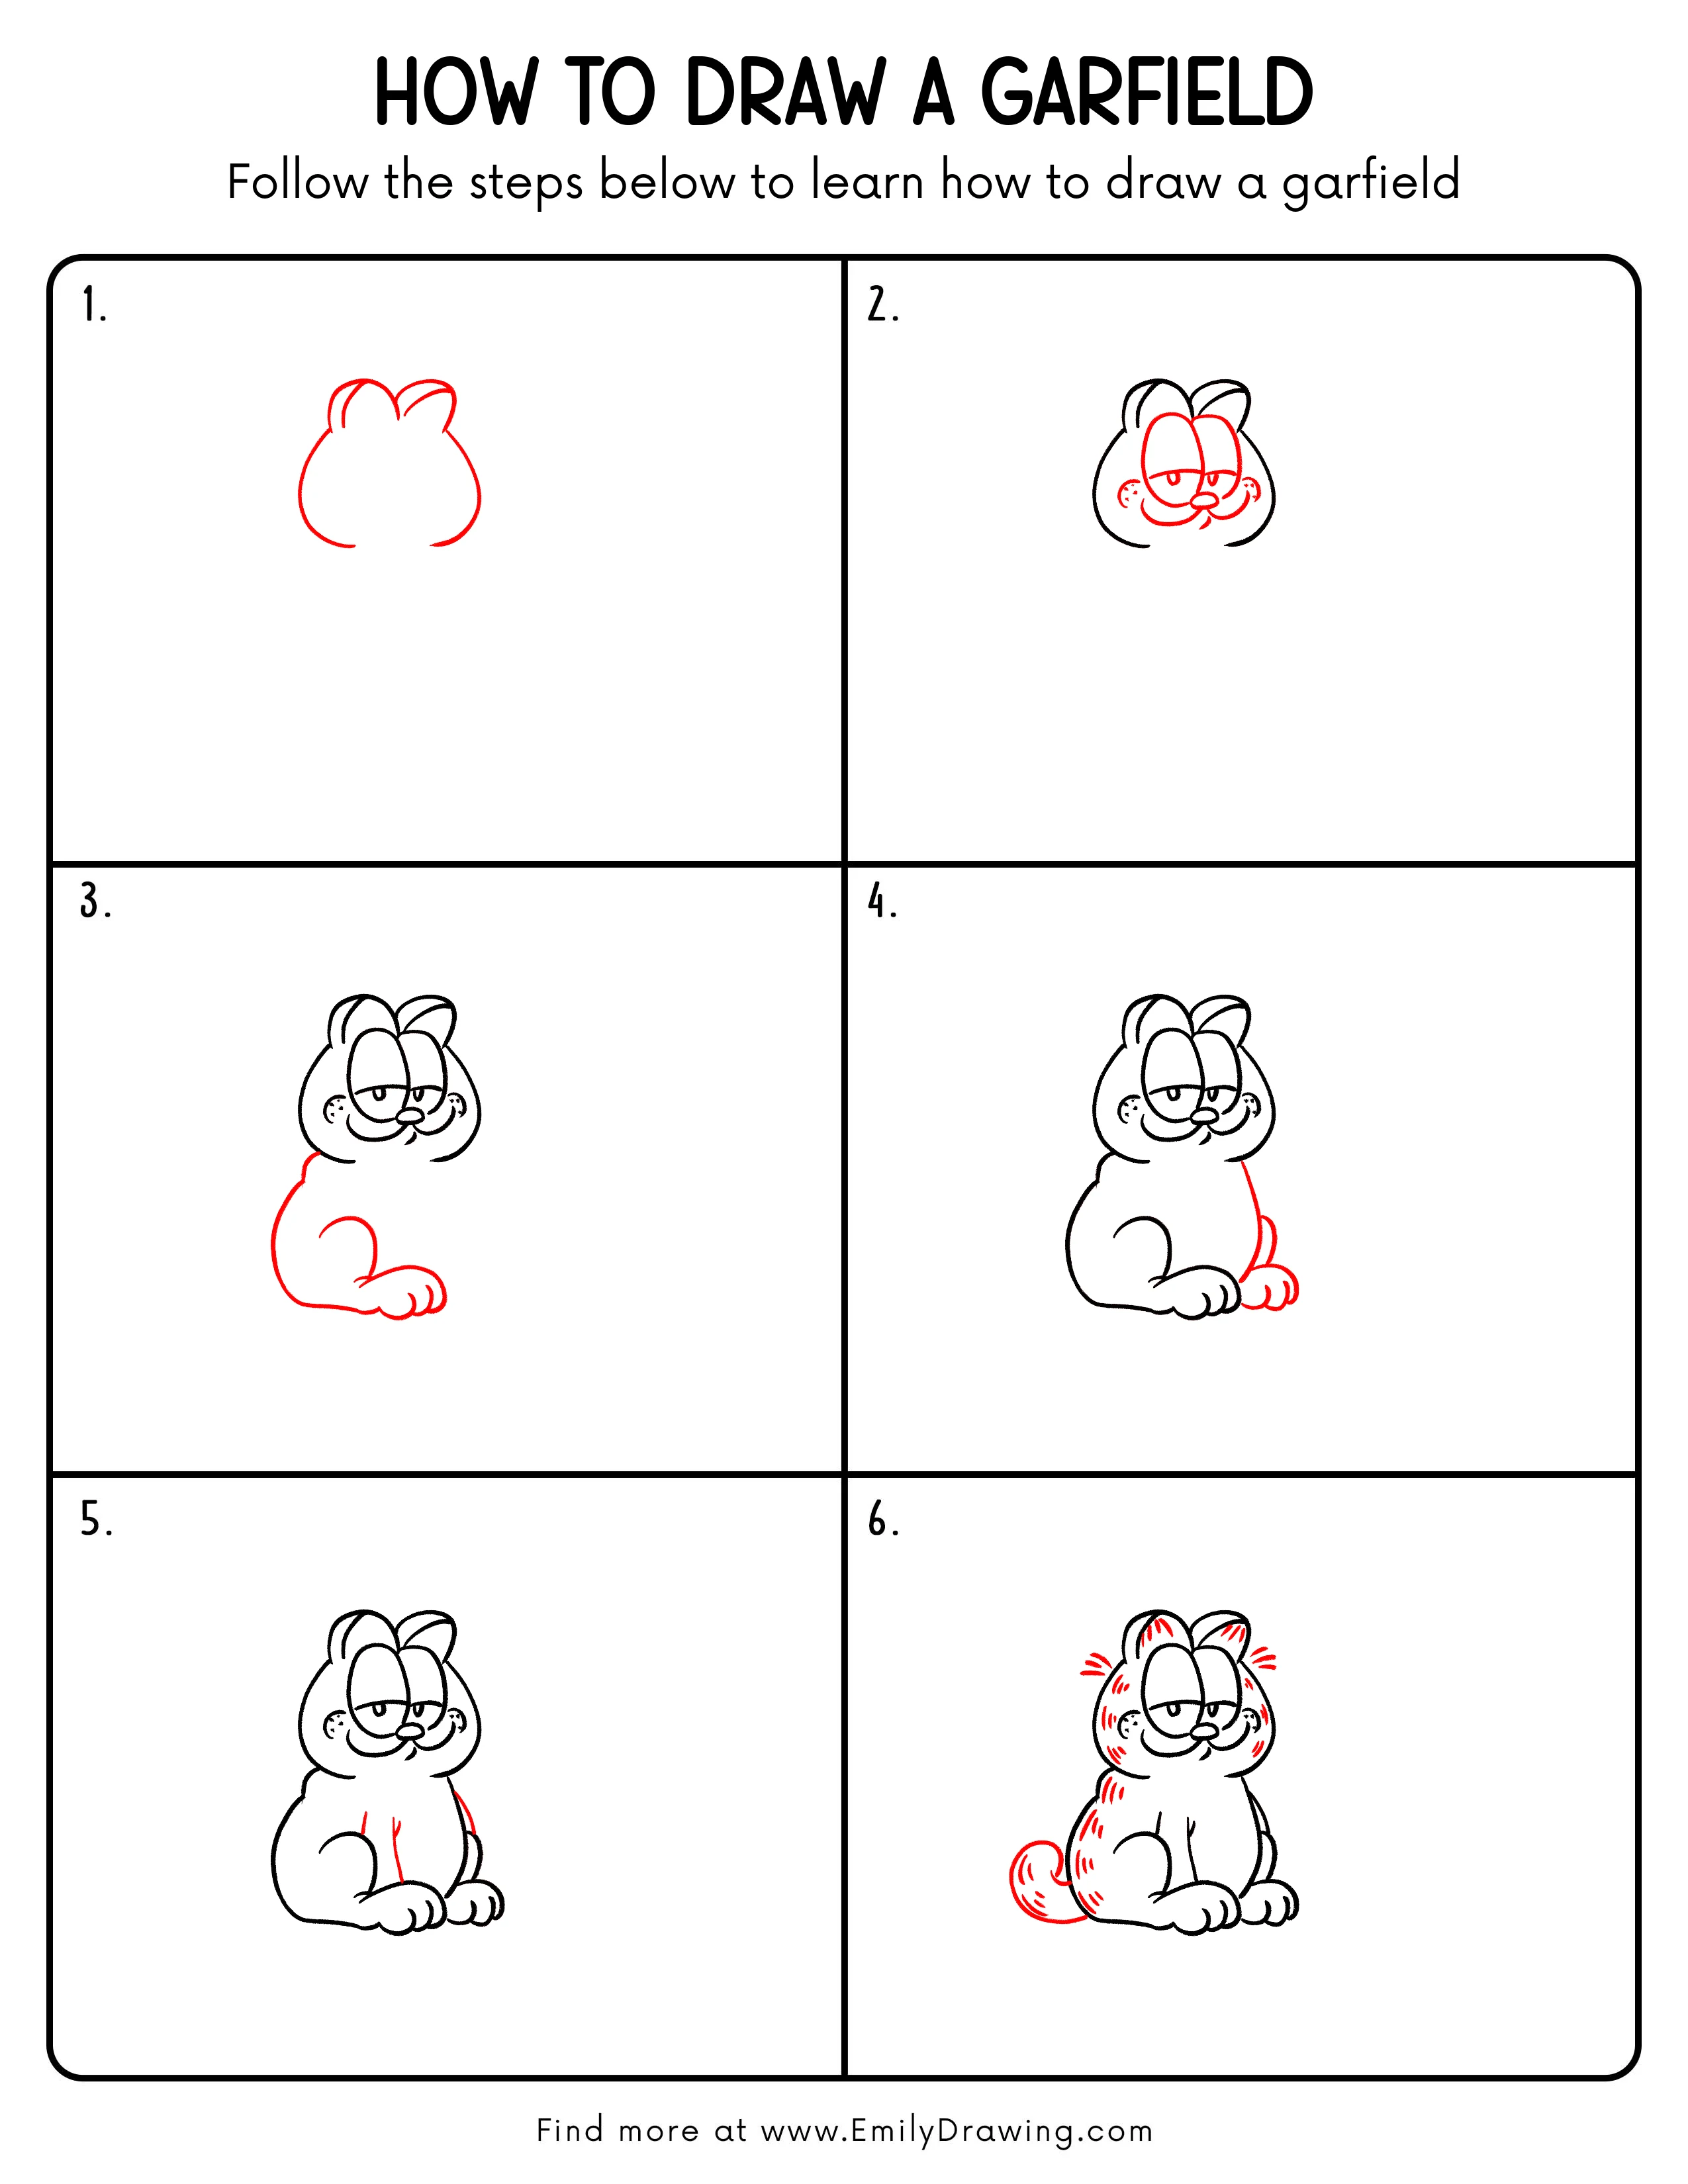
FREE Download Printable Garfield Drawing Tutorial
Frequently Asked Questions
How do I keep Garfield’s expression relaxed?
Keep the eyelids low and almost level across the eyes. Small pupils beneath those lids help preserve the sleepy expression.
How many stripes should I add to Garfield?
Use a few clear groups instead of filling every empty space. Follow the ears, cheeks, back, and tail while leaving the face readable.