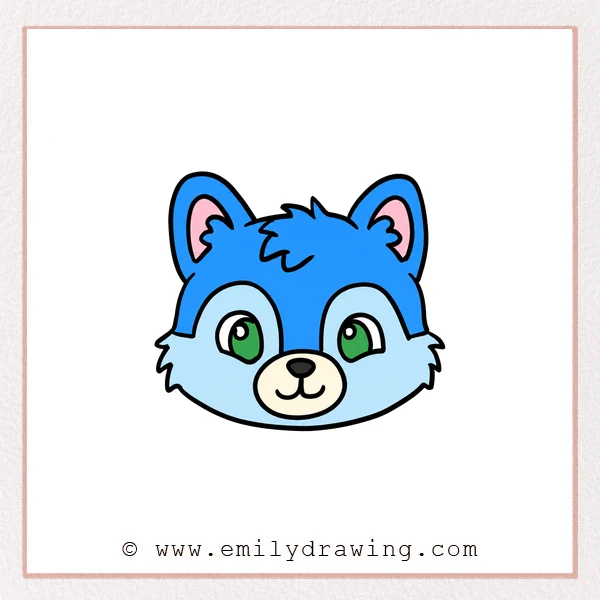
Learn how to draw a furry head with tall ears, tufted cheeks, and bright cartoon eyes. The lesson uses rounded arches alongside short pointed fur shapes. This step by step drawing leaves the smaller facial details until the end.
What You Will Need
- A pencil
- An eraser
- Drawing paper
- Colored pencils or crayons (optional)
Here are my RECOMMENDED Art Supplies!
- Crayola Coloring Set (140 Pieces – Mega Value!)
- 24 Colored Crayon Set
- A4 Printer Paper
- Crayola Coloring Pencils
- HP Home Printer with Instant Ink!
Time needed:
21 minutes.
Step-by-Step Drawing Guide
Step 1: Begin the Left Ear
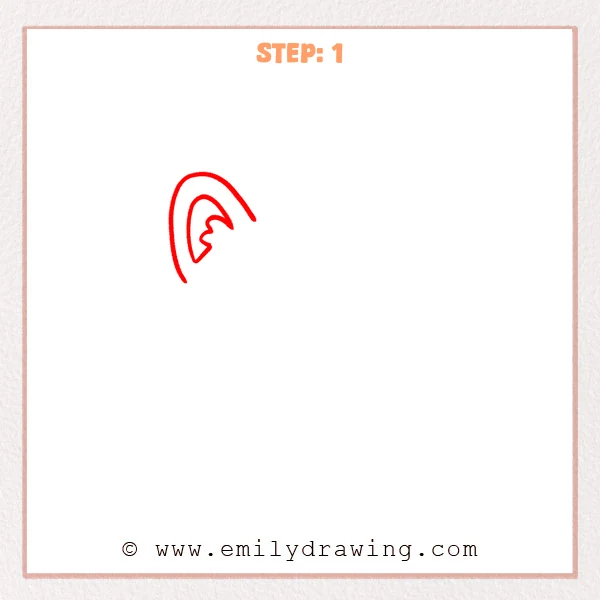
Draw a tall rounded ear outline on the left. Add a smaller inner shape with two soft fur bumps along its right edge.
Pro Tip: Leave the bottom of the outer ear open for the cheek.
Step 2: Add the Right Ear and Forelock
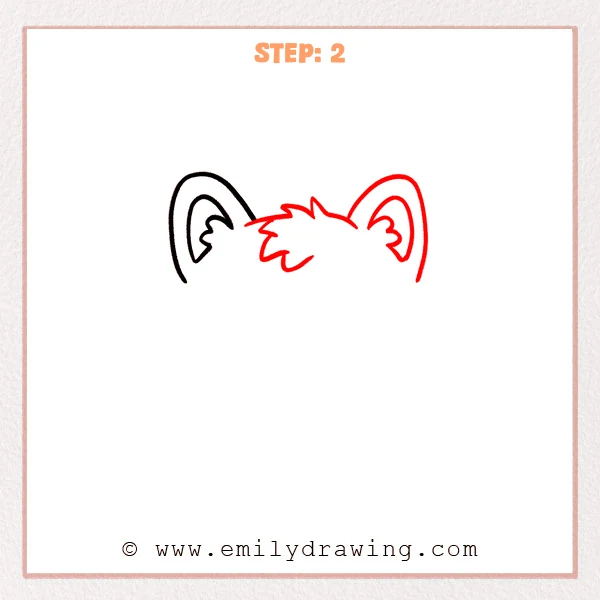
Draw a matching tall ear on the right with its own tufted inner shape. Connect the ear bases with a short pointed crown of fur. Extend a larger zigzag forelock downward into the forehead.
Pro Tip: Use a few broad points so the forelock stays easy to read.
Step 3: Outline the Cheeks and Chin
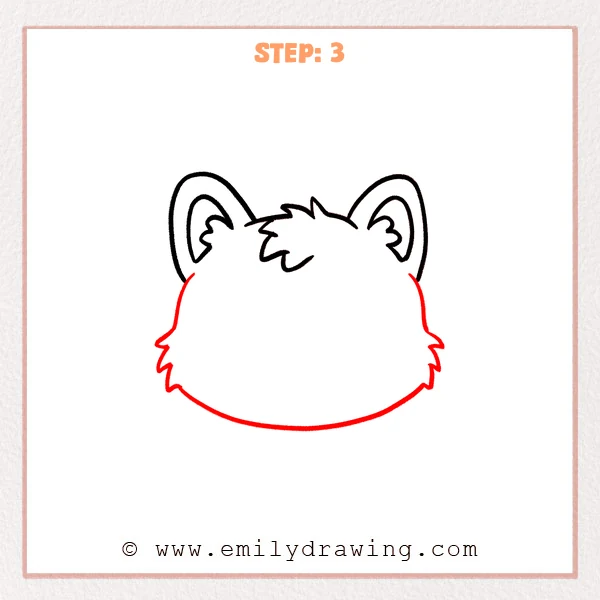
Extend the head sides downward from the bottoms of the ears. Add several outward fur points on each cheek. Join both cheeks with a broad, gently curved chin.
Pro Tip: Keep the chin lower than the cheek tufts to leave room for the muzzle.
Step 4: Frame the Eye Areas
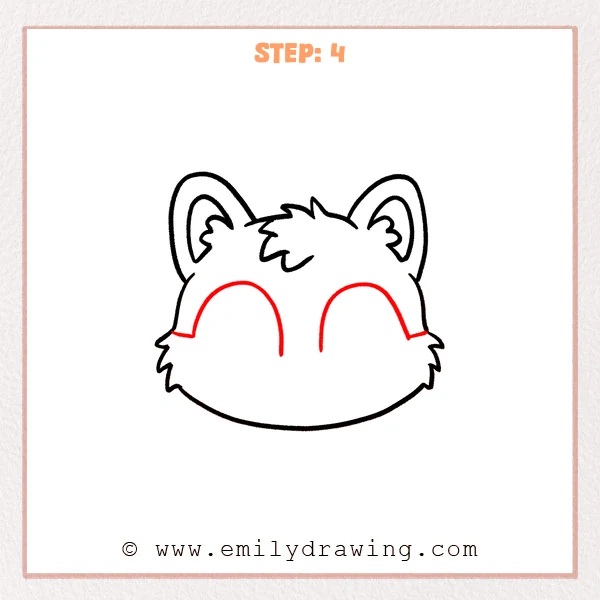
Draw a tall arch over each side of the face. Extend each outer end toward the cheek and leave the inner end pointing downward.
Pro Tip: Keep a narrow open space between the two arches.
Step 5: Draw the Eyes
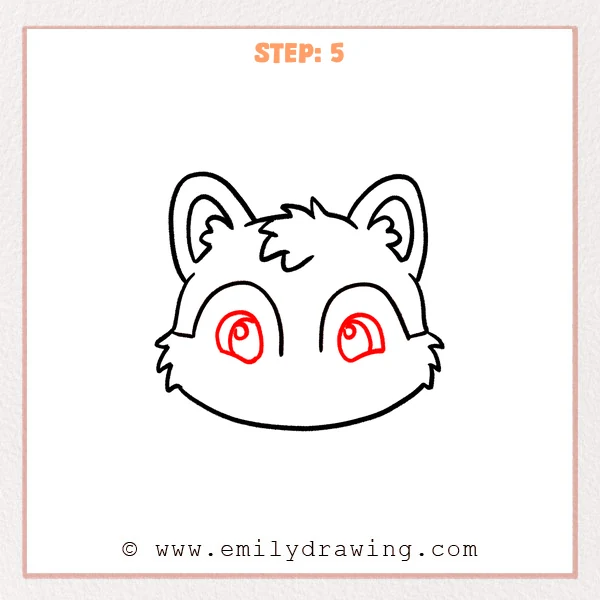
Draw two rounded eyes inside the arches with slightly slanted lower edges. Add an inner curved line and a small highlight loop in each eye.
Pro Tip: Aim both small highlight loops toward the upper inner portions of the eyes.
Step 6: Finish the Muzzle and Smile
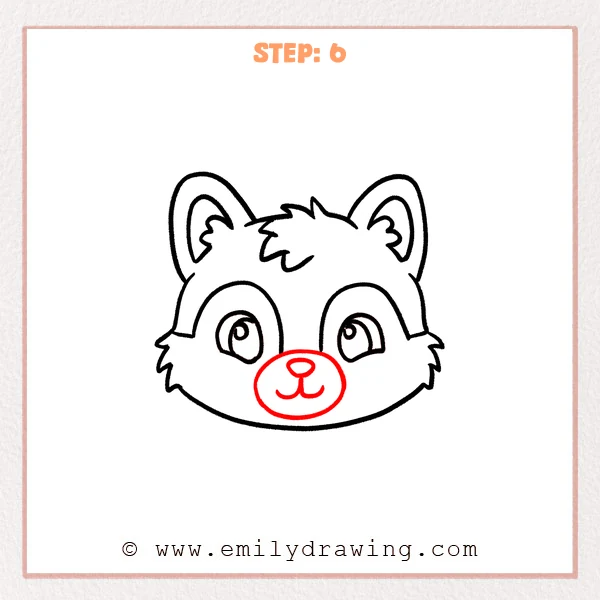
Draw a broad oval muzzle below and between the eyes. Add a small rounded triangular nose near the muzzle’s top. Extend a short line down from the nose into two upward smile curves.
Pro Tip: Center the muzzle beneath the gap between the eye arches.
Step 7: Color in your drawing!
Fun Facts
- A few pointed cheek tufts can suggest fur without drawing individual hairs.
- The furry head combines smooth ear curves with angular forehead tufts.
- The large oval muzzle separates the nose and smile from the surrounding face.
Pin it now, Draw later!
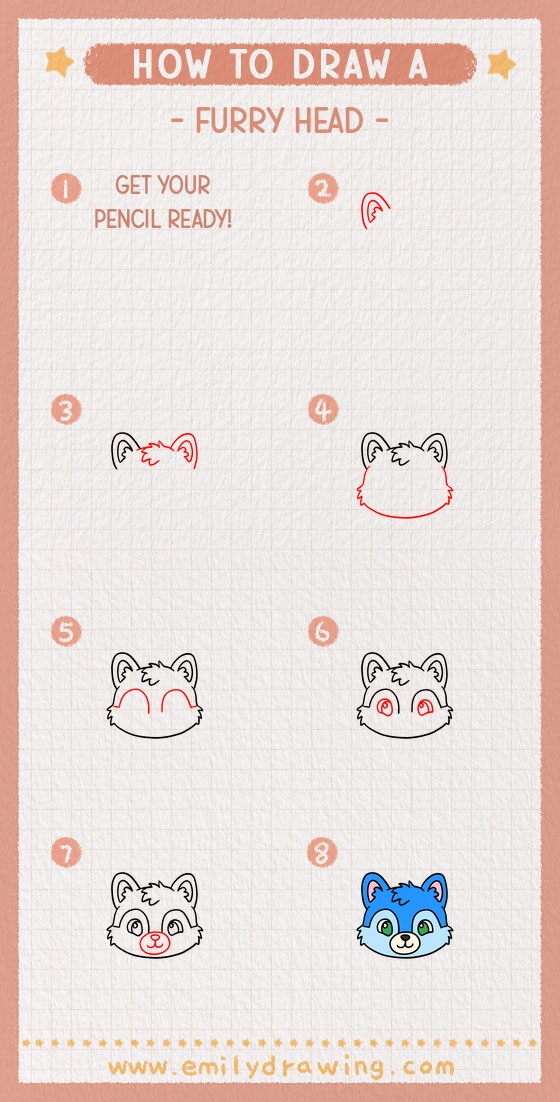
Your furry head drawing now includes tall ears, cheek tufts, framed eyes, and a smiling muzzle. Check the space around the forelock and the balance of the ears. Try choosing two contrasting fur colors for your character when you are ready.
Get the FREE Printable Drawing Guide
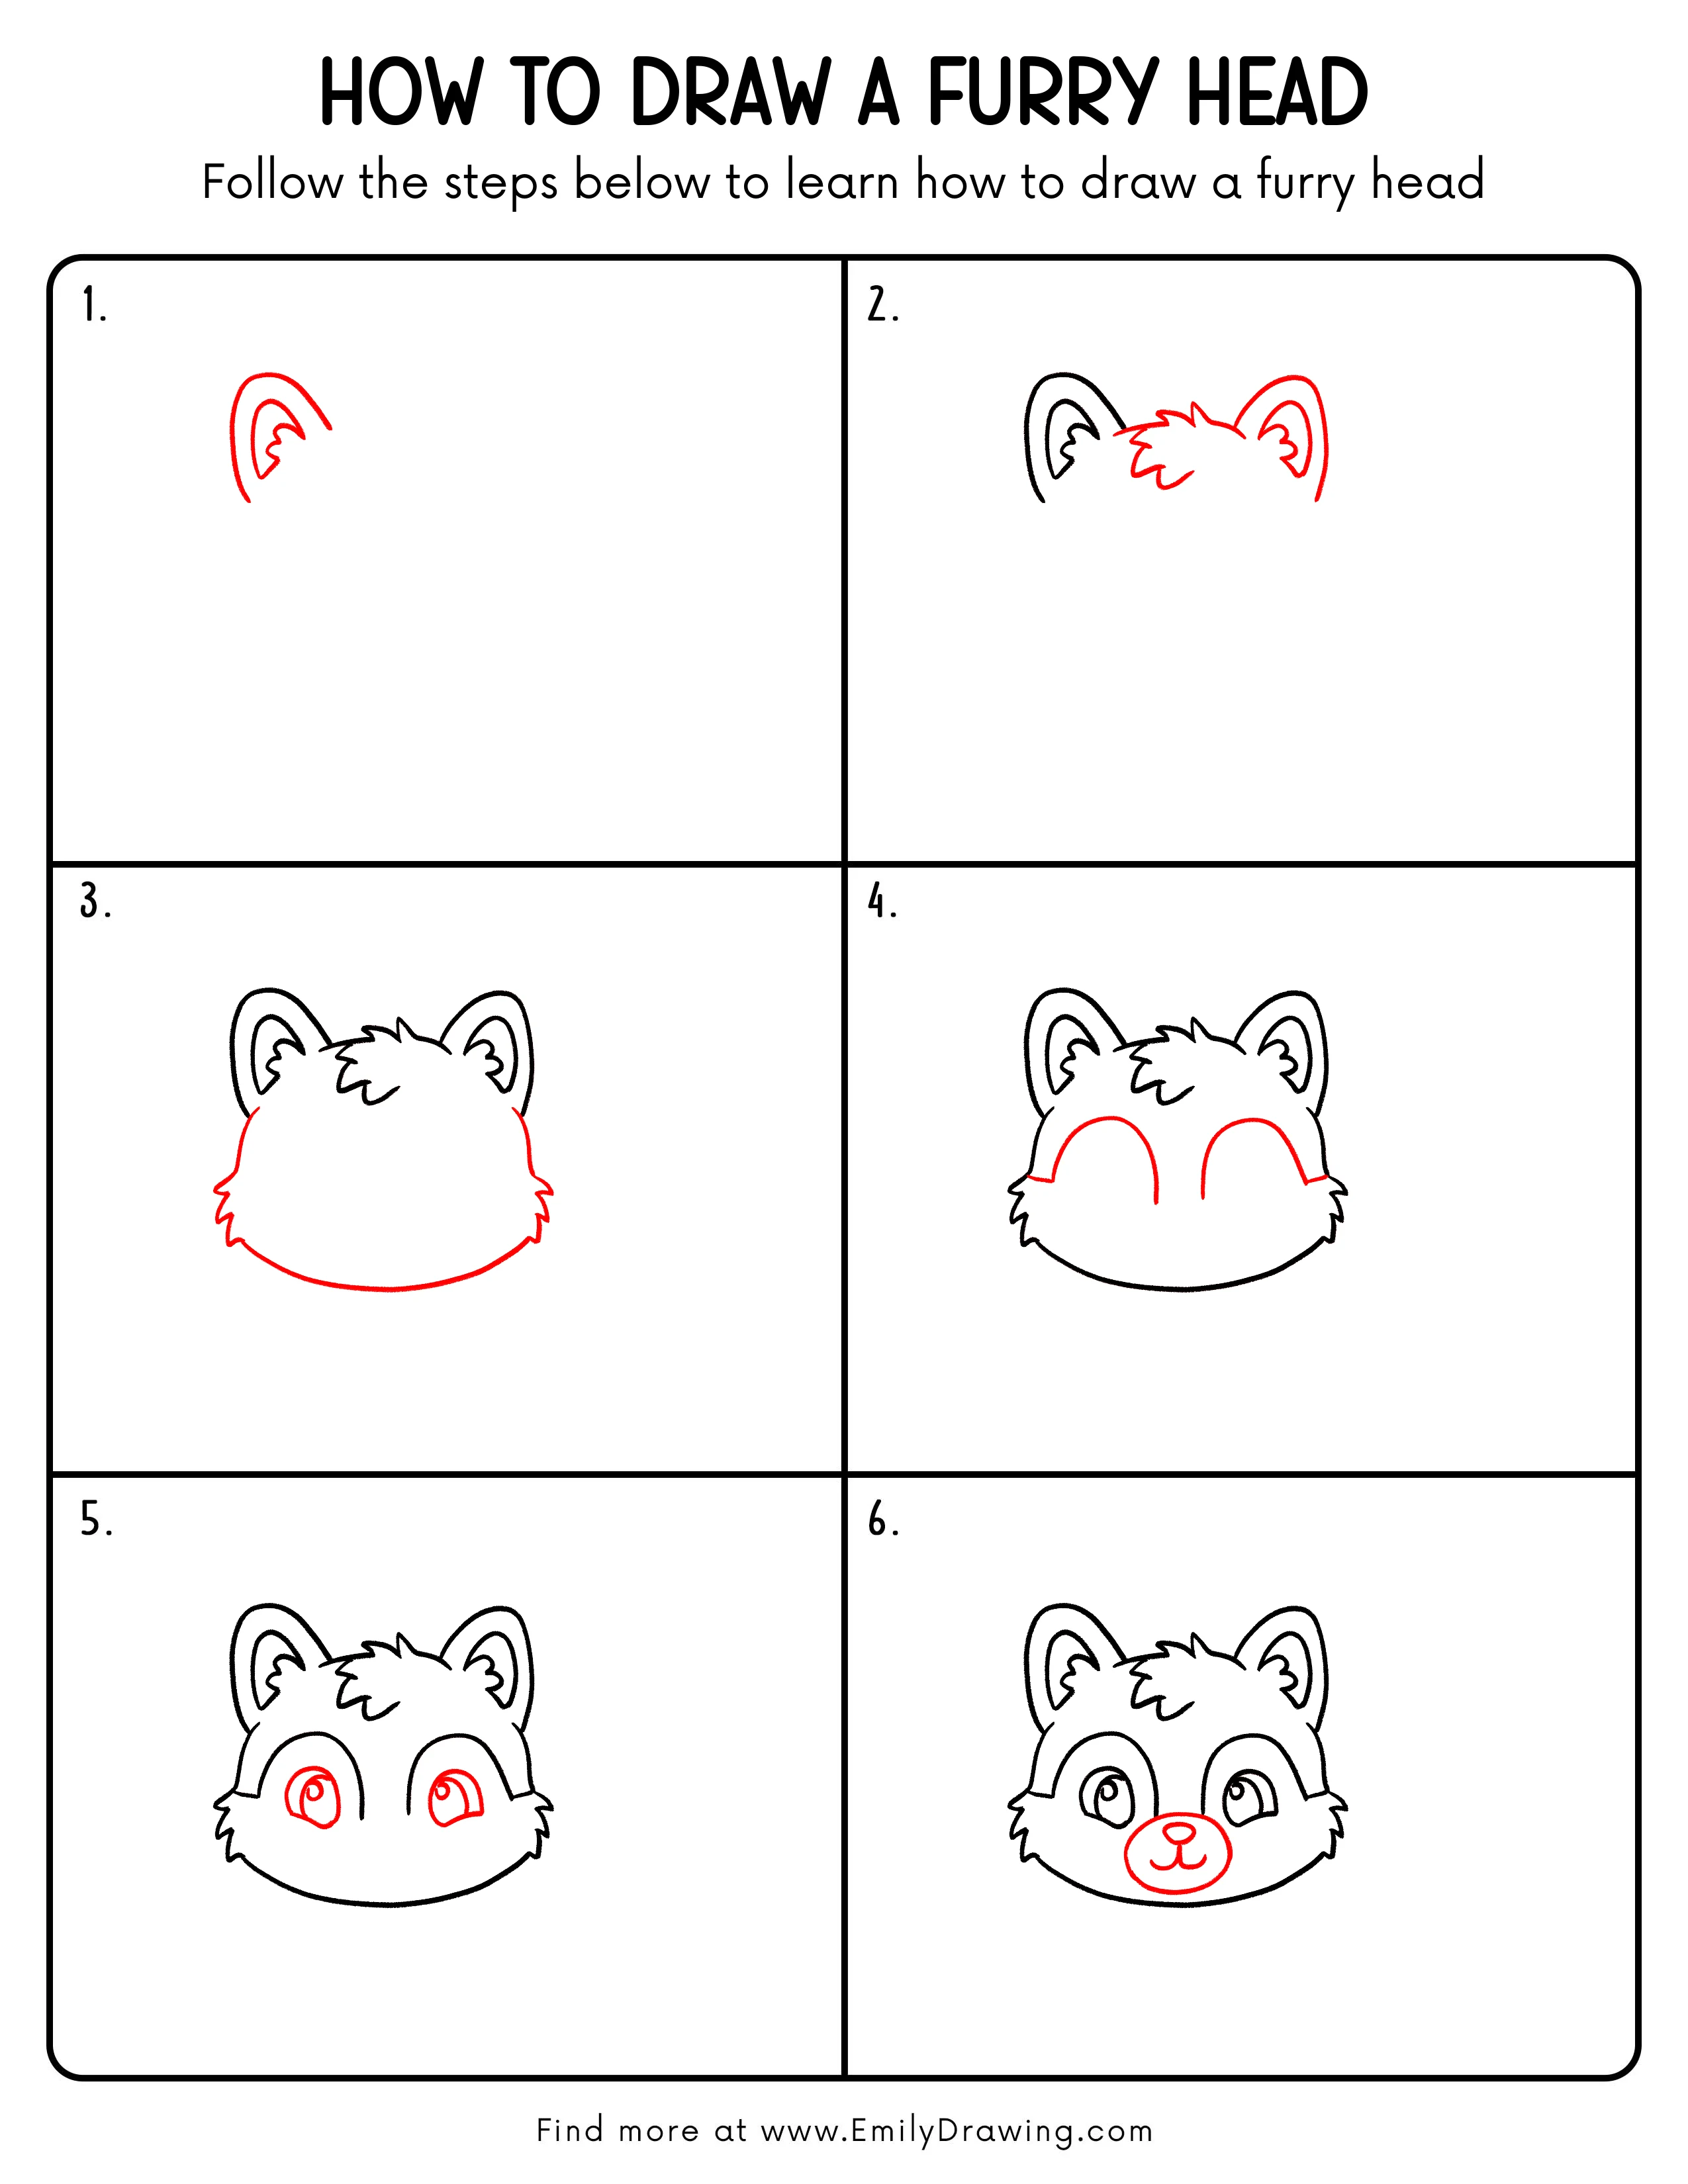
FREE Download Printable Furry Head Drawing Tutorial
Frequently Asked Questions
How can I make the furry head tufts easier to draw?
Use fewer, larger points instead of many tiny zigzags. Let each point return smoothly to the main outline.
Where should the furry head’s muzzle sit?
Place it below the eyes and above the chin. Keep its center aligned with the gap between the eye arches.