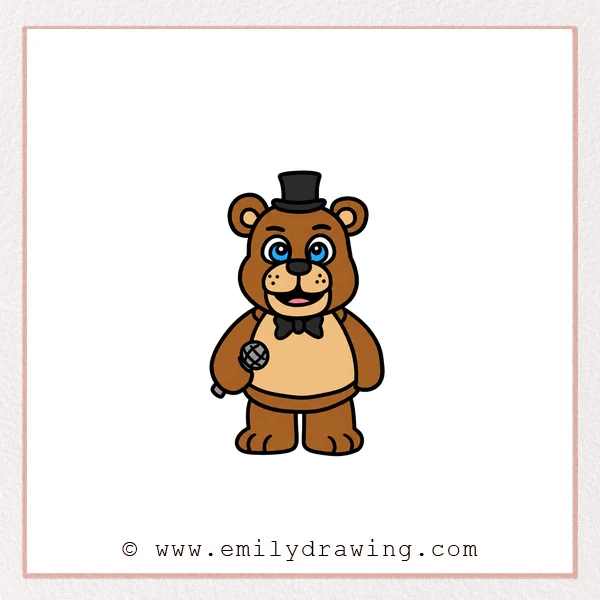
Learn how to draw Freddy Fazbear with round ears, a friendly muzzle, and a small top hat. This easy drawing tutorial uses curved shapes to build the character from the ears downward. Take your time with the face before adding the body and accessories.
What You Will Need
- A pencil
- An eraser
- Drawing paper
- Colored pencils or crayons (optional)
Here are my RECOMMENDED Art Supplies!
- Crayola Coloring Set (140 Pieces – Mega Value!)
- 24 Colored Crayon Set
- A4 Printer Paper
- Crayola Coloring Pencils
- HP Home Printer with Instant Ink!
Time needed:
13 minutes.
Step-by-Step Drawing Guide
Step 1: Draw Two Rounded Ears
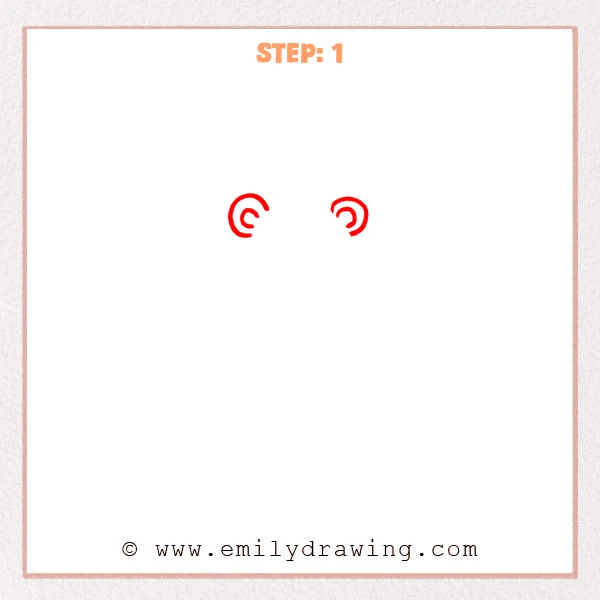
Draw two open circular ears near the upper middle of your paper. Add a smaller curved loop inside each ear.
Pro Tip: Leave a broad gap between the ears for Freddy Fazbear’s head.
Step 2: Outline the Head and Eyes
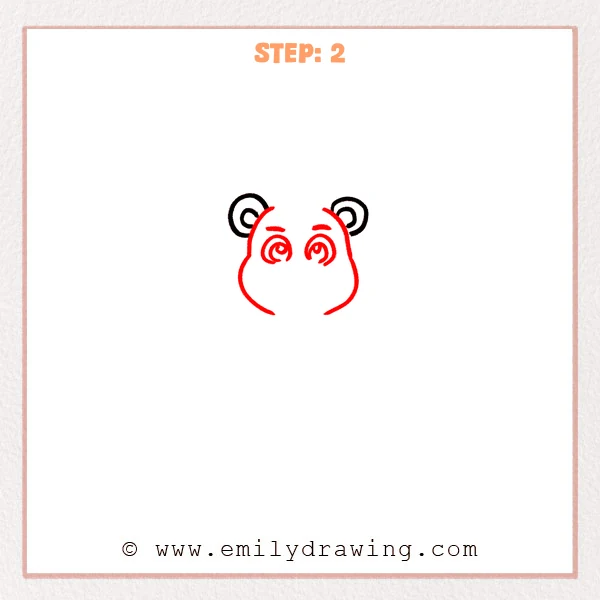
Curve the head sides downward from the ears into broad cheeks. Add two large oval eyes with inner curves and highlighted pupils. Place a short thick eyebrow above each eye.
Pro Tip: Leave the top and bottom of the head open for later shapes.
Step 3: Build the Muzzle and Smile
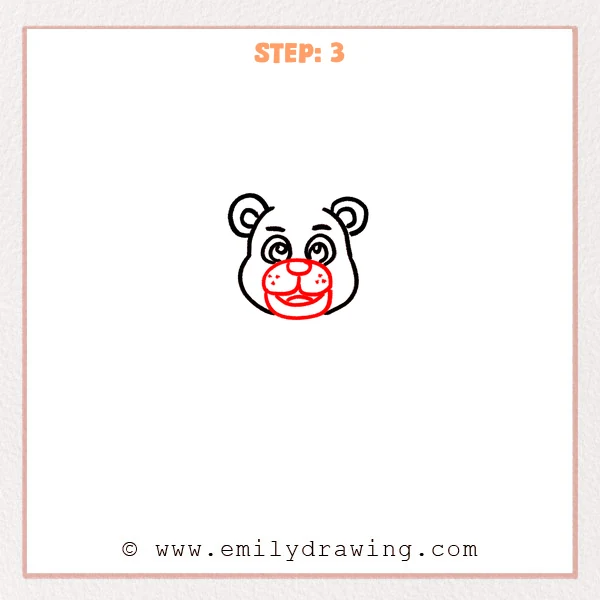
Draw a broad two-lobed muzzle beneath the eyes with a rounded nose. Add three small freckles on each side of the muzzle. Draw the open smiling mouth, its inner tongue curve, and rounded lower jaw.
Pro Tip: Center the nose between the eyes before shaping the muzzle lobes.
Step 4: Add the Torso and Arms
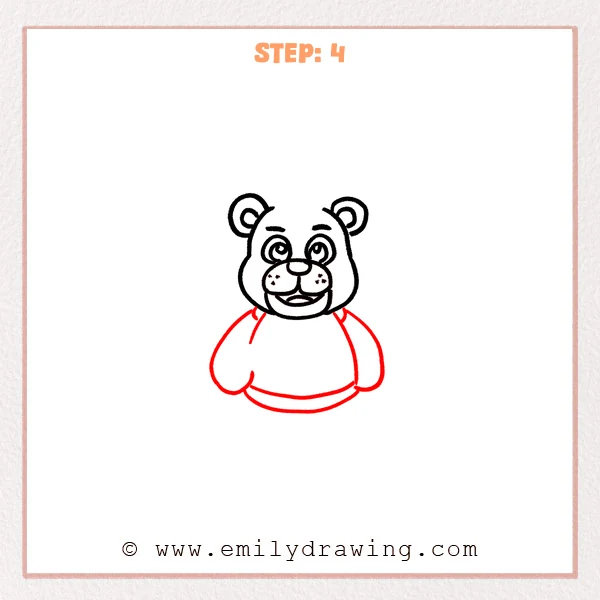
Draw a rounded torso beneath the head with a curved lower band. Add a long rounded arm along each side of the body. Place a short curved joint mark beside each shoulder.
Pro Tip: Keep the torso broad enough to fit between the hanging arms.
Step 5: Draw the Bow Tie and Microphone
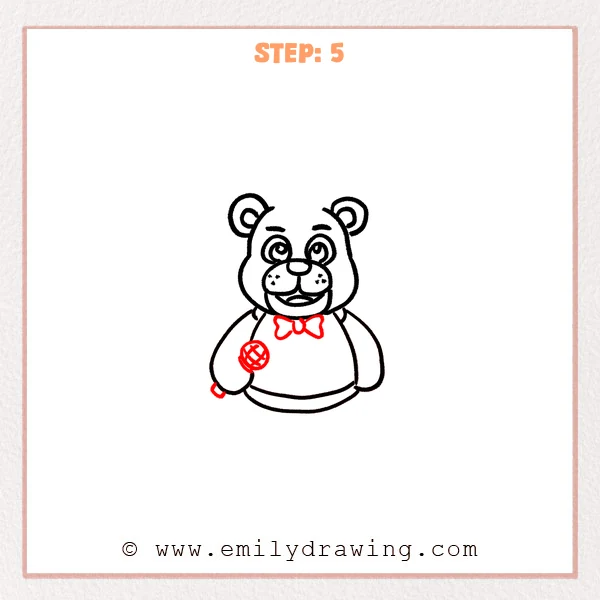
Draw a small bow tie directly below the chin. Add a round microphone head beside the hand on the left. Cross its head with diagonal grille lines and show its short handle below the hand.
Pro Tip: Keep the microphone grille lines inside the round microphone head.
Step 6: Finish the Hat and Feet
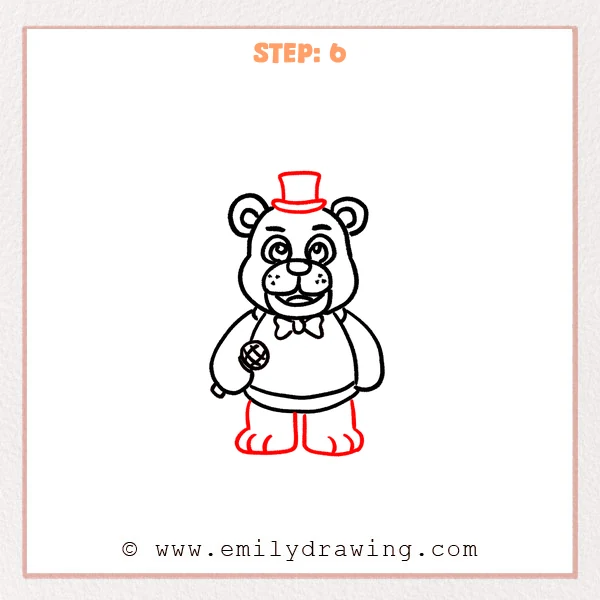
Draw a short top hat and curved brim between the ears. Add two short legs beneath the body band with wide rounded feet. Use small curved marks to separate the toes.
Pro Tip: Place the hat above the gap between the eyebrows.
Step 7: Color in your drawing!
Fun Facts
- Freddy Fazbear’s round ears and broad muzzle make the bear shape clear in this drawing.
- The crossed microphone lines suggest a grille using only a few strokes.
- A centered top hat and bow tie give the drawing a balanced arrangement.
Pin it now, Draw later!
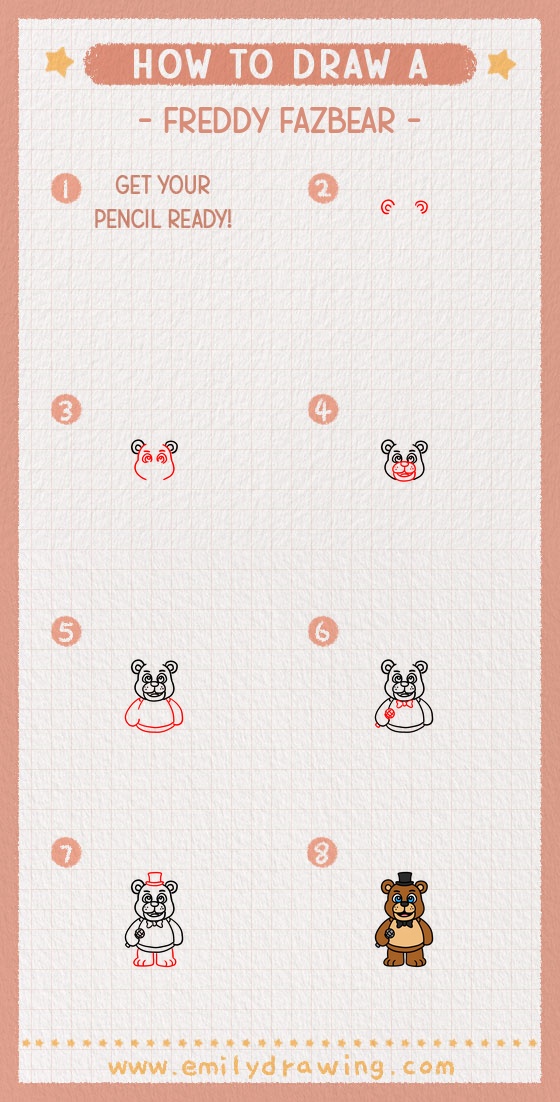
This step by step drawing of Freddy Fazbear now includes the face, body, microphone, and top hat. Check the spaces around the eyes and the small bow tie. Try adding your favorite colors to your finished drawing when you are ready.
Get the FREE Printable Drawing Guide
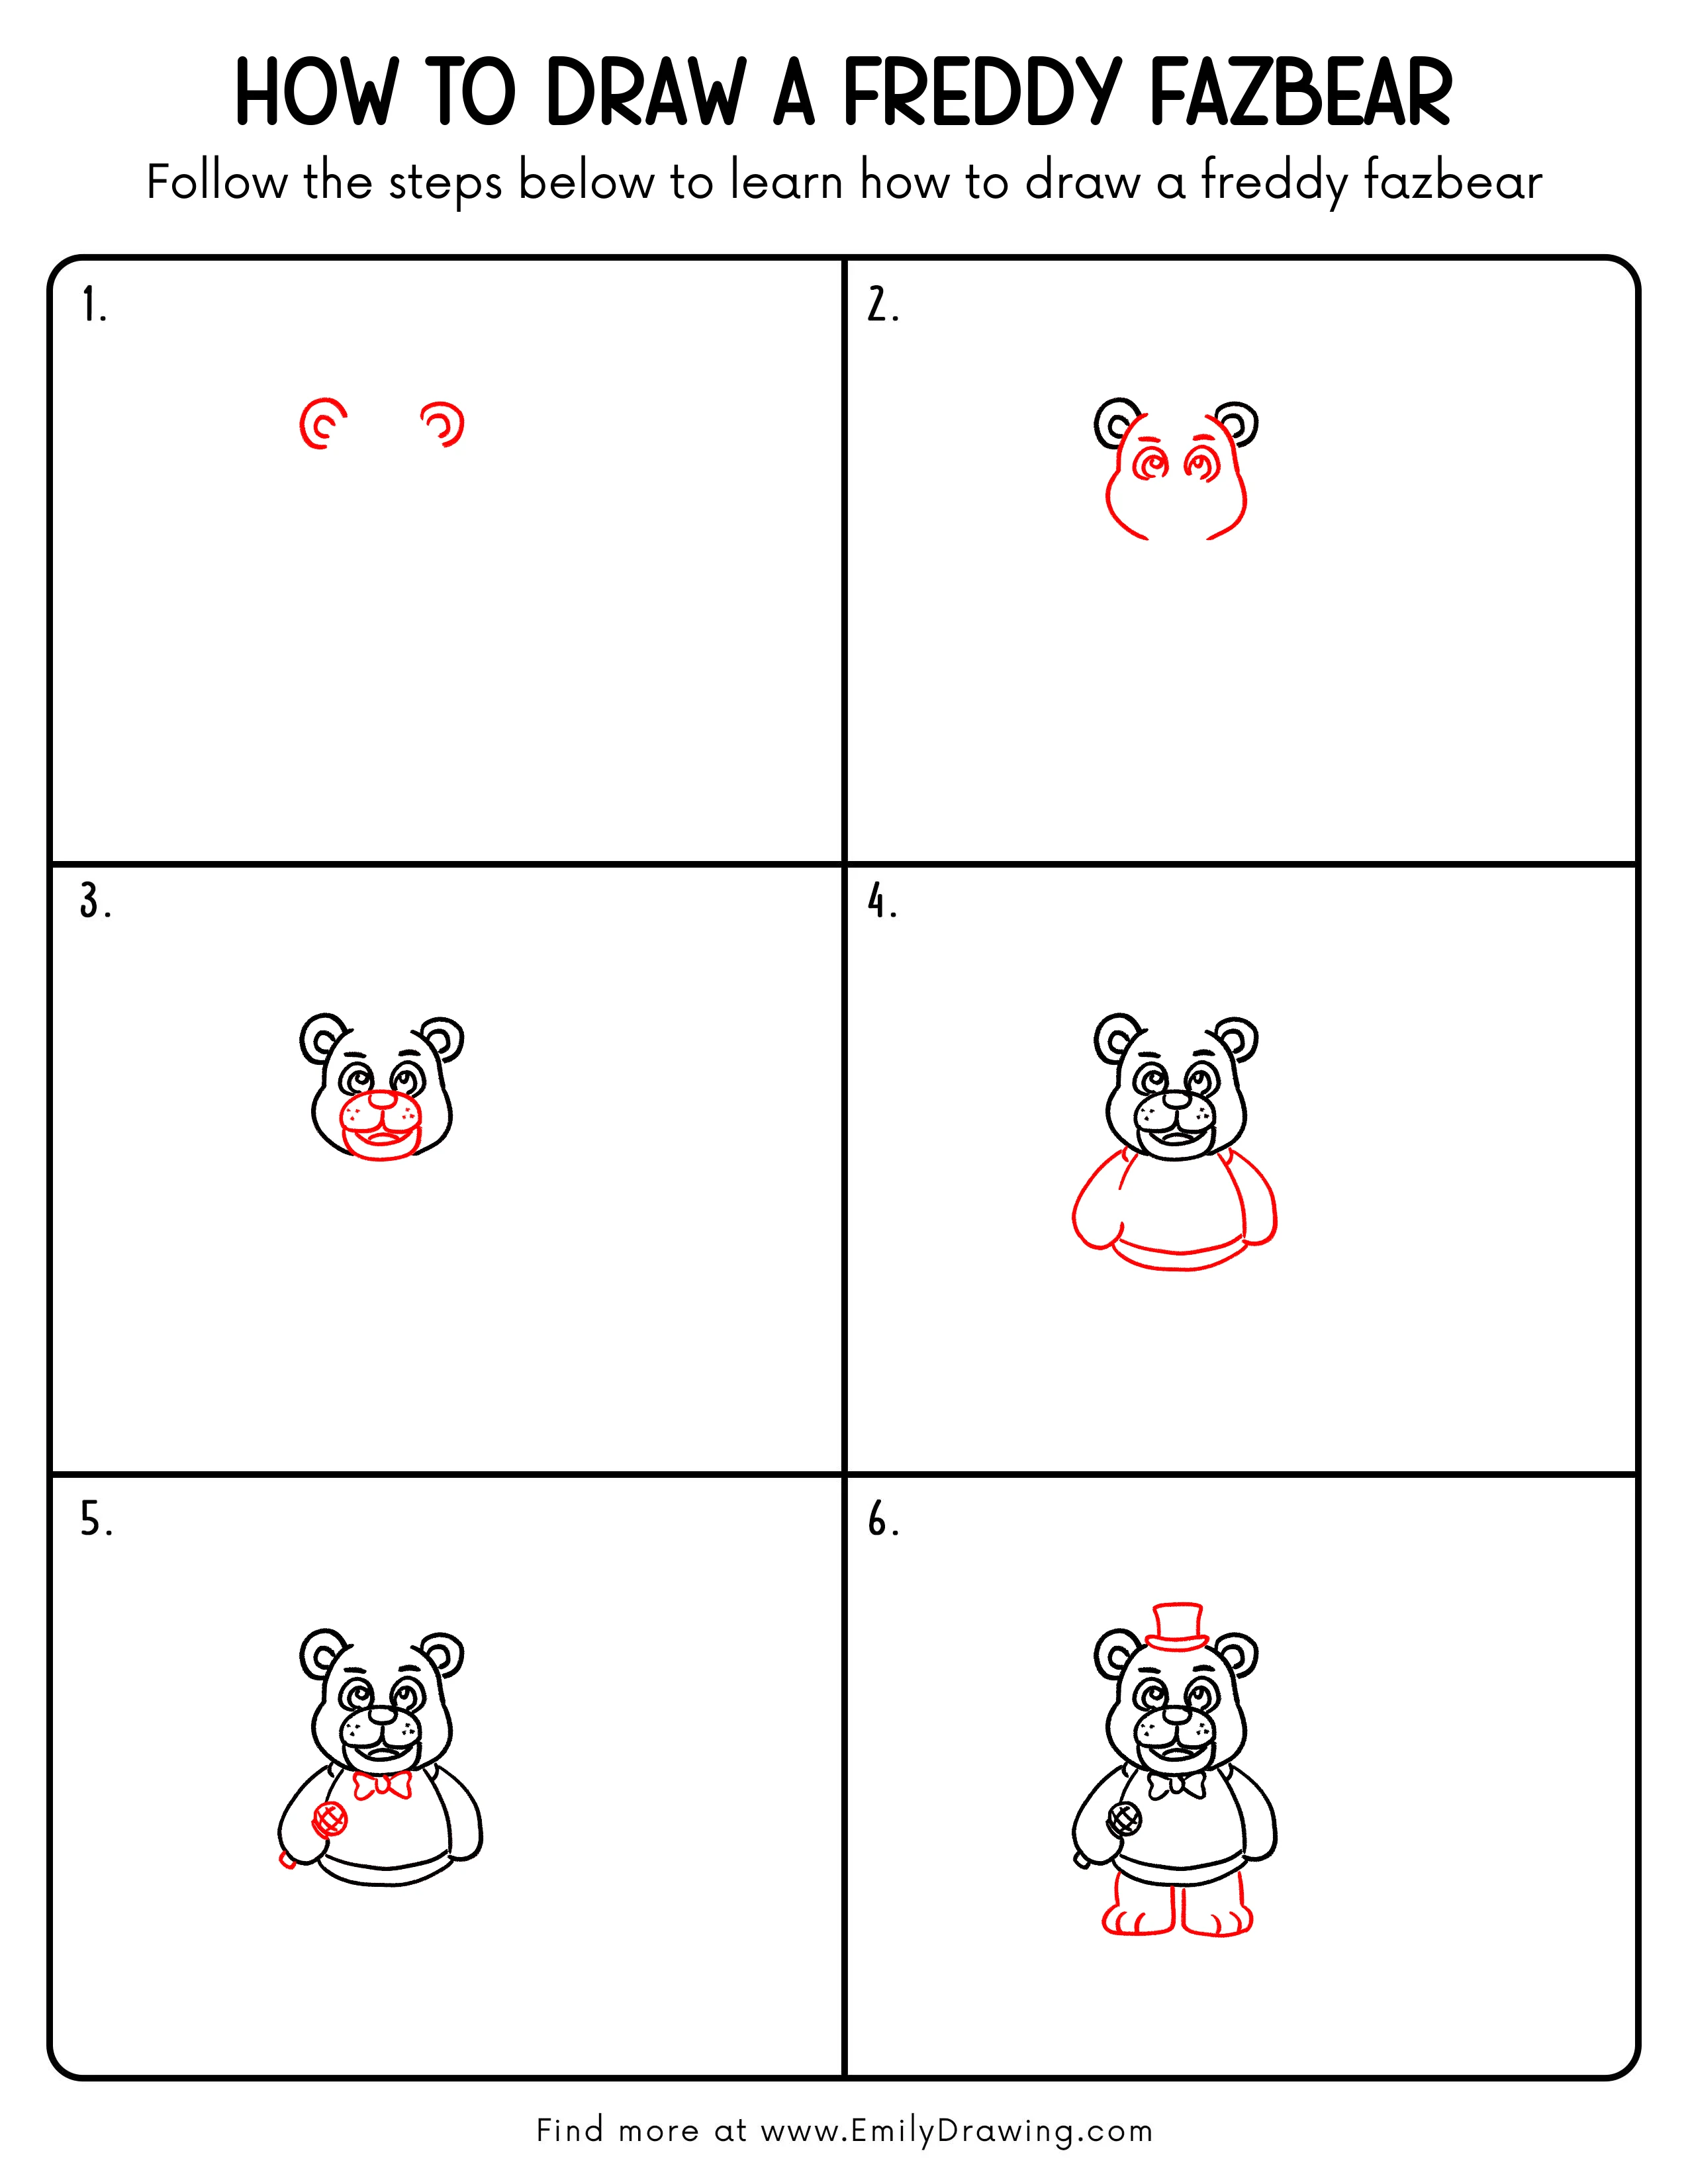
FREE Download Printable Freddy Fazbear Drawing Tutorial
Frequently Asked Questions
How can I keep Freddy Fazbear’s eyes balanced?
Compare their width and height before adding the pupils. Place the eyebrows just above the eyes with similar spacing.
What is the easiest way to draw Freddy Fazbear’s microphone?
Start with the round head, then add just a few diagonal crossing lines. The short handle should appear below the hand.