This easy drawing tutorial shows how to draw a leg using simple guides.
You will build the toes, outline, and heel one calm step at a time.
Take your time and keep your lines light before you finalize them.
What You Will Need
- Pencil or digital brush
- Eraser (or undo)
- Black pen/liner (optional for final lines)
- Plain paper or a blank canvas
Here are my RECOMMENDED Art Supplies!
- Crayola Coloring Set (140 Pieces – Mega Value!)
- 24 Colored Crayon Set
- A4 Printer Paper
- Crayola Coloring Pencils
- HP Home Printer with Instant Ink!
Time needed:
11 minutes.
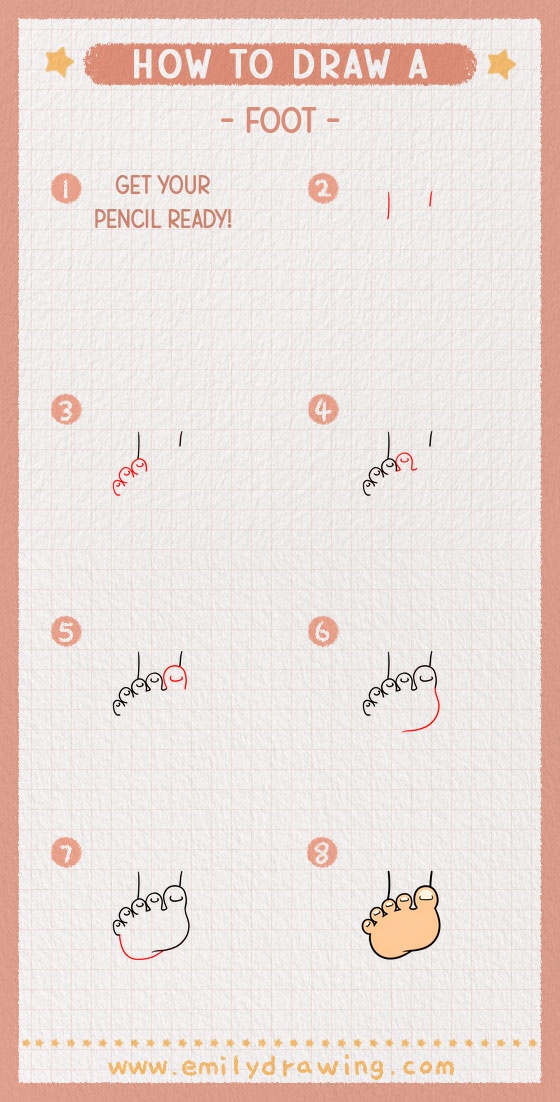
Step-by-Step Drawing Guide
Step 1: Draw two vertical guides for the legs
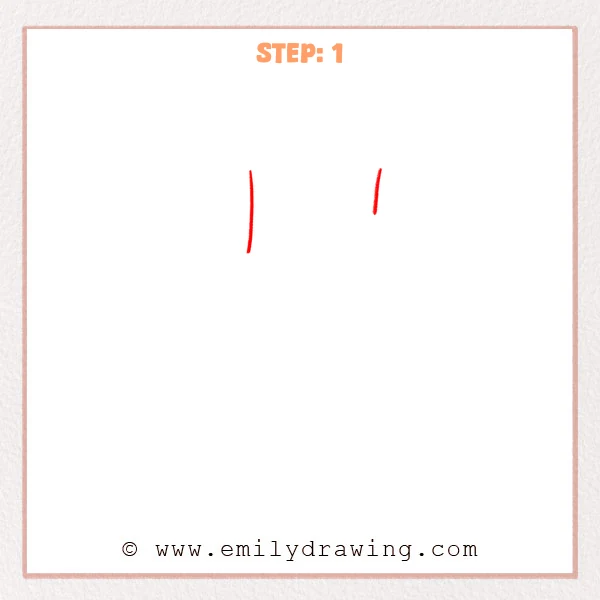
Near the top of the page, draw two short vertical lines to place and aim the legs.
Make the left line longer and straighter, and keep the right line shorter for later attachment.
Pro Tip: Keep the two guides roughly parallel so the legs feel naturally aligned.
Step 2: Add the toe bumps and inner curves
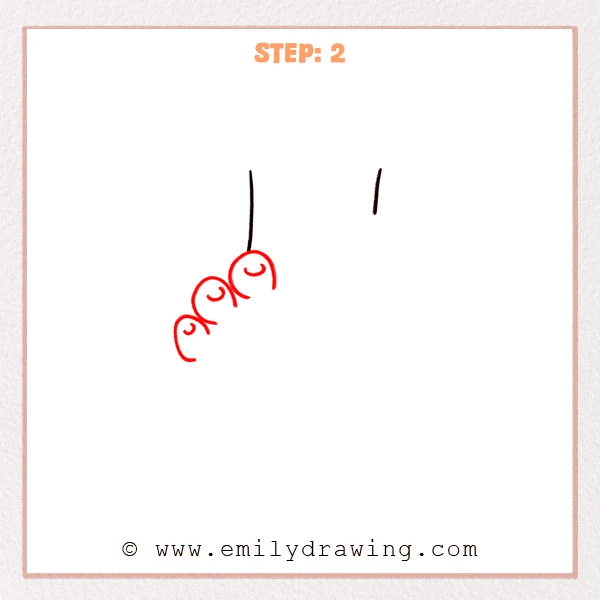
At the lower end of the longer left guide line, draw four connected curled arcs for the toes, getting smaller as they move left.
Inside each toe arc, add a small curved line to suggest the toe pad and nail area.
Pro Tip: Keep the biggest toe closest to the vertical guide and taper the rest smaller for a natural look.
Step 3: Trace cleaner toe outlines

Redraw the outlines of the three left toes with a darker, cleaner line to lock in their shapes.
Then enlarge and complete the big toe outline on the right, letting the bottom edge curl outward slightly.
Pro Tip: Try to trace with single smooth strokes and fewer touch-ups for rounder toes.
Step 4: Refine the big toe and add the nail curve
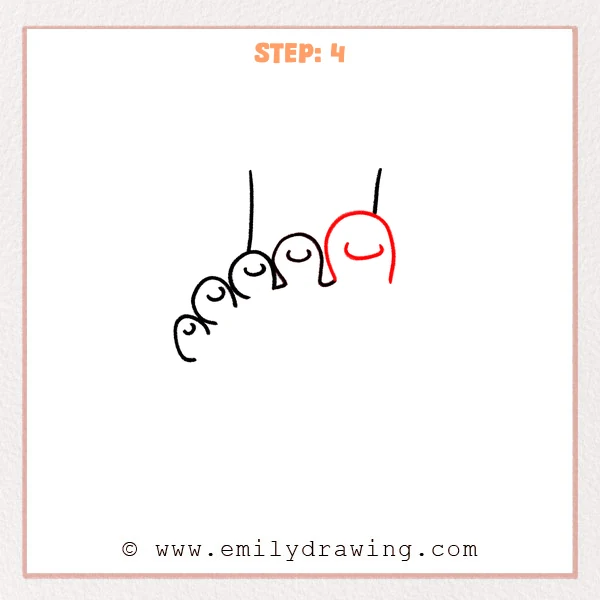
Make the big toe on the far right fuller and rounder, with a larger smooth top arc.
Inside the big toe, draw a wider curved line to suggest the toenail shape.
Pro Tip: Keep the big toe’s top rounded like a half-circle, not pointed.
Step 5: Draw the outer edge and sole curve
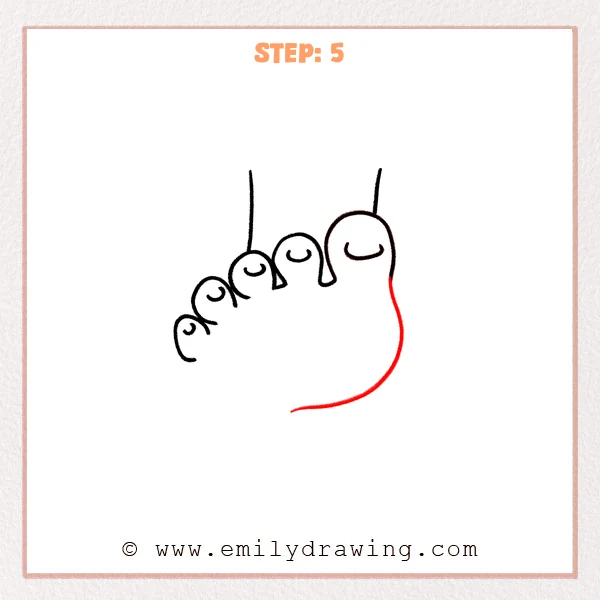
From the right side of the big toe, pull a long smooth curve downward to form the outer foot edge.
Continue the curve into a gentler sweep toward the lower left to suggest the sole outline.
Pro Tip: Let the outer edge curve start steeper and then flatten for a grounded sole.
Step 6: Complete the sole and heel curve
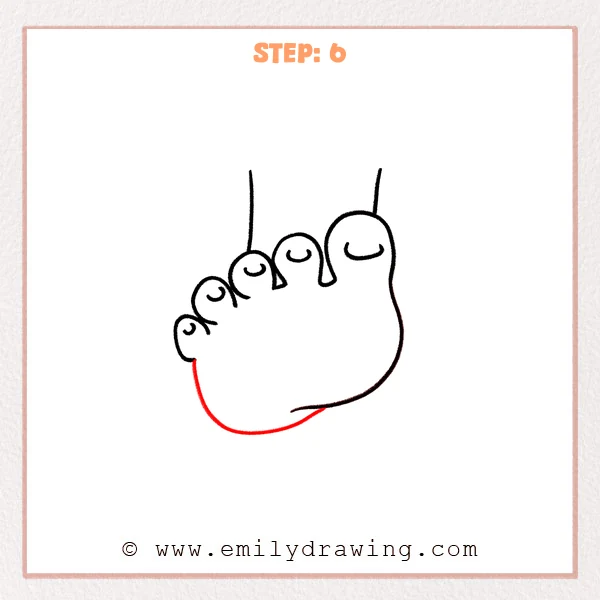
Starting under the smallest toe on the left, draw a long curved line sweeping right to form the sole and heel edge.
Let the curve lift slightly in the middle, then connect smoothly into the existing bottom line.
Pro Tip: Keep the heel area rounder and a bit wider so the foot feels grounded.
Step 7: Color in your drawing!
Fun Facts
- Your toes usually step down in size from the big toe toward the smallest toe.
- A rounded heel helps the foot feel like it can carry weight.
- Clean, confident curves often look more natural than many short strokes.
Pin it now, Draw later!
Go back and gently smooth any bumpy curves along the toes and heel.
Erase extra guide marks and keep only the lines you want to show.
You now have a clear leg-and-foot outline—try drawing it again from a new angle to practice.
Get the FREE Printable Drawing Guide
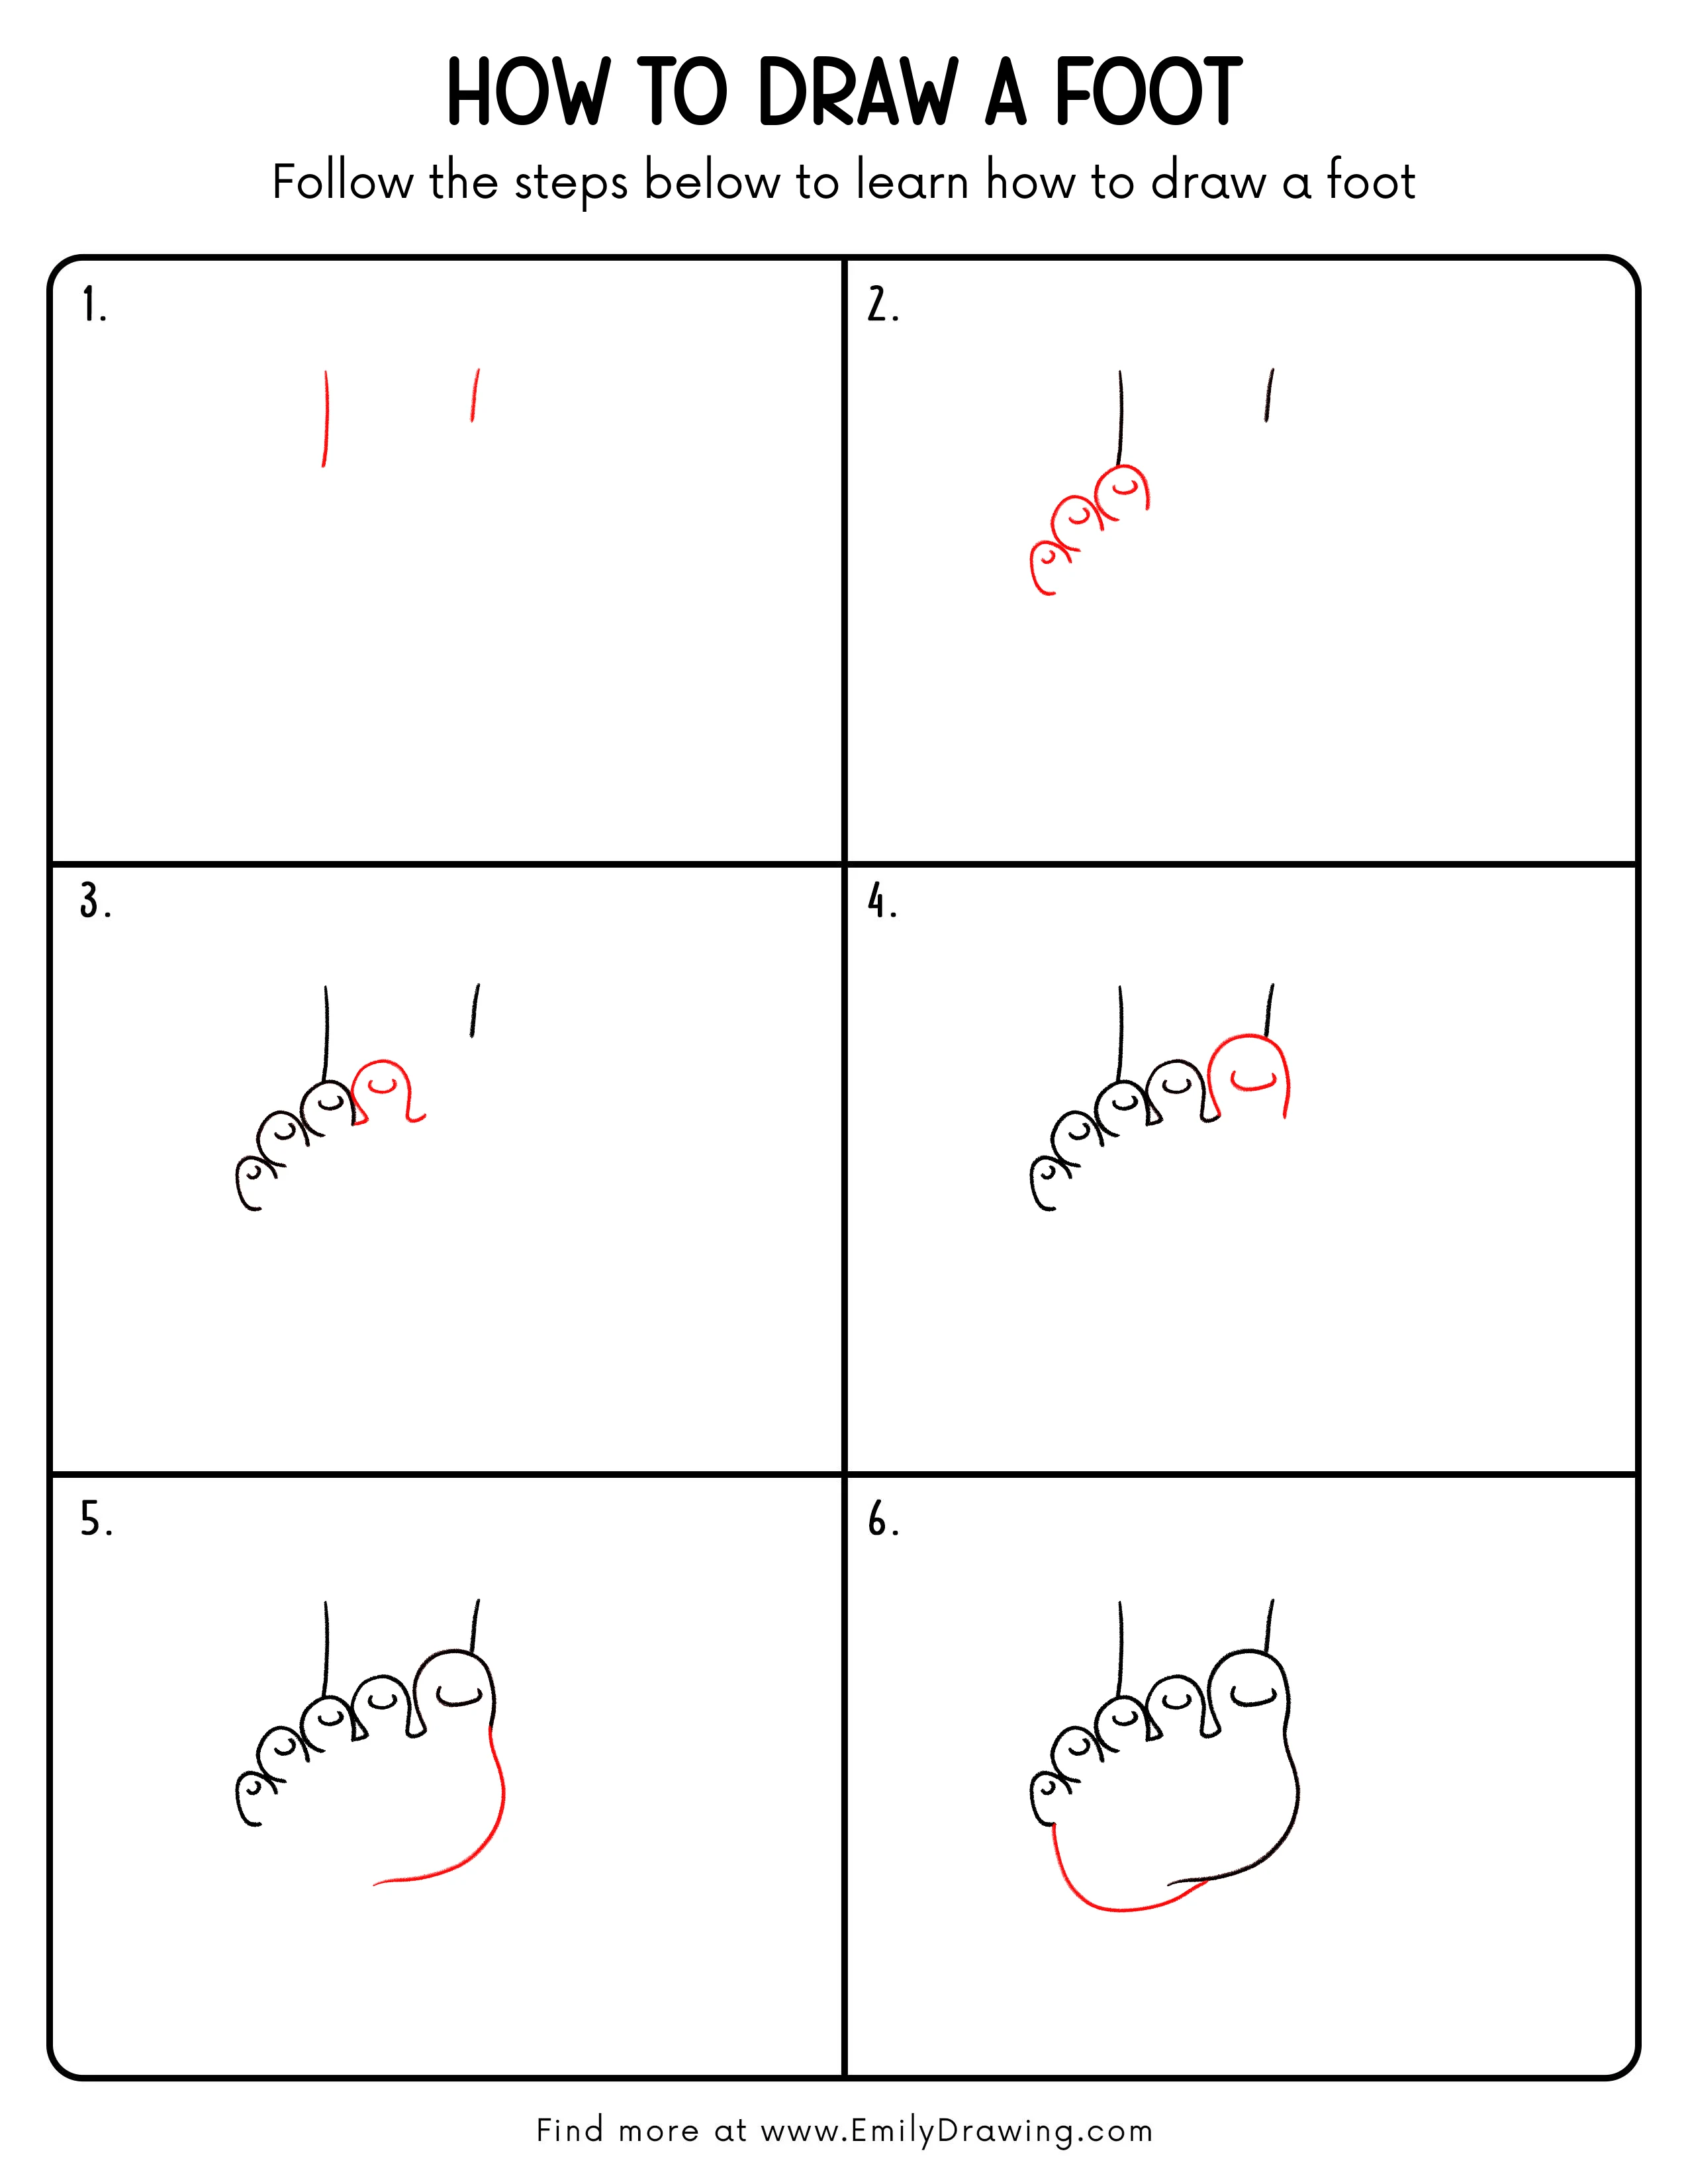
FREE Download Printable Foot Drawing Tutorial
Frequently Asked Questions
How can I make the toes look less stiff?
Use rounder arcs and vary the toe sizes slightly, keeping the big toe largest.
What if my heel looks too pointy?
Widen the heel and redraw the bottom curve as a softer, fuller arc.
Should I draw dark lines from the start?
Start light first, then trace darker only after the shapes feel correct.