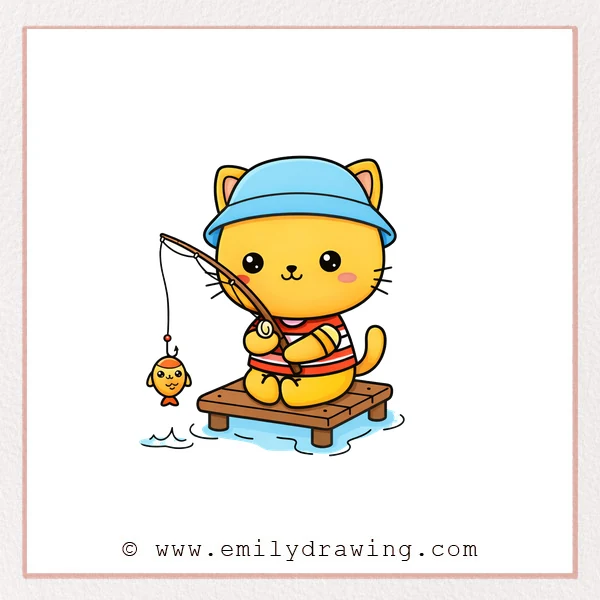
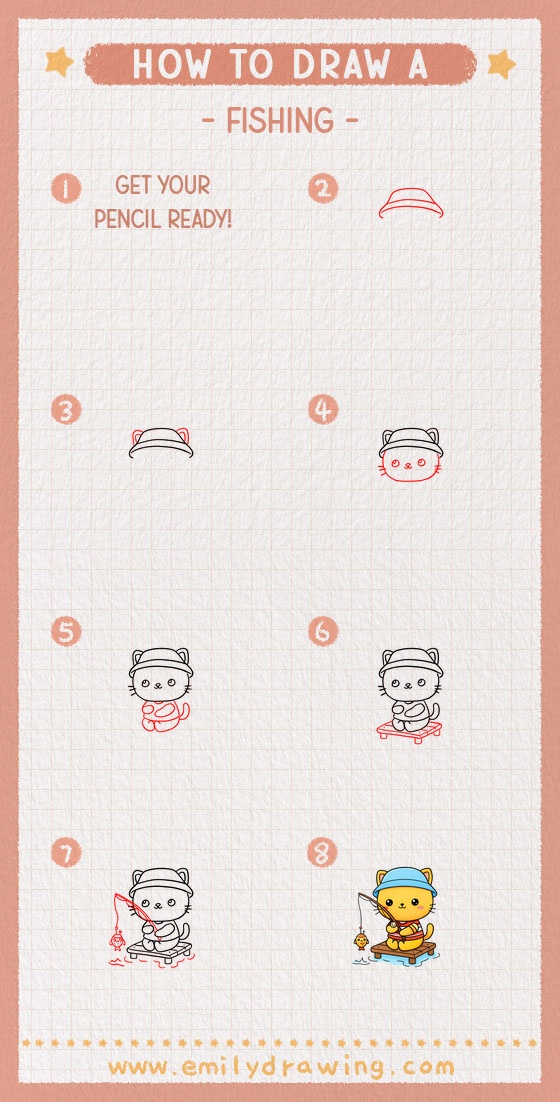
This easy drawing tutorial shows a cute cat fishing in a simple, kid-friendly style.
You will build the picture step by step, starting with the hat and ending with the fishing scene.
Take your time, and keep your lines light until you like the shapes.
What You Will Need
- Pencil
- Eraser
- Black pen or marker
- Paper
- Optional: Colored pencils or markers
Here are my RECOMMENDED Art Supplies!
- Crayola Coloring Set (140 Pieces – Mega Value!)
- 24 Colored Crayon Set
- A4 Printer Paper
- Crayola Coloring Pencils
- HP Home Printer with Instant Ink!
Time needed:
18 minutes.
Step-by-Step Drawing Guide
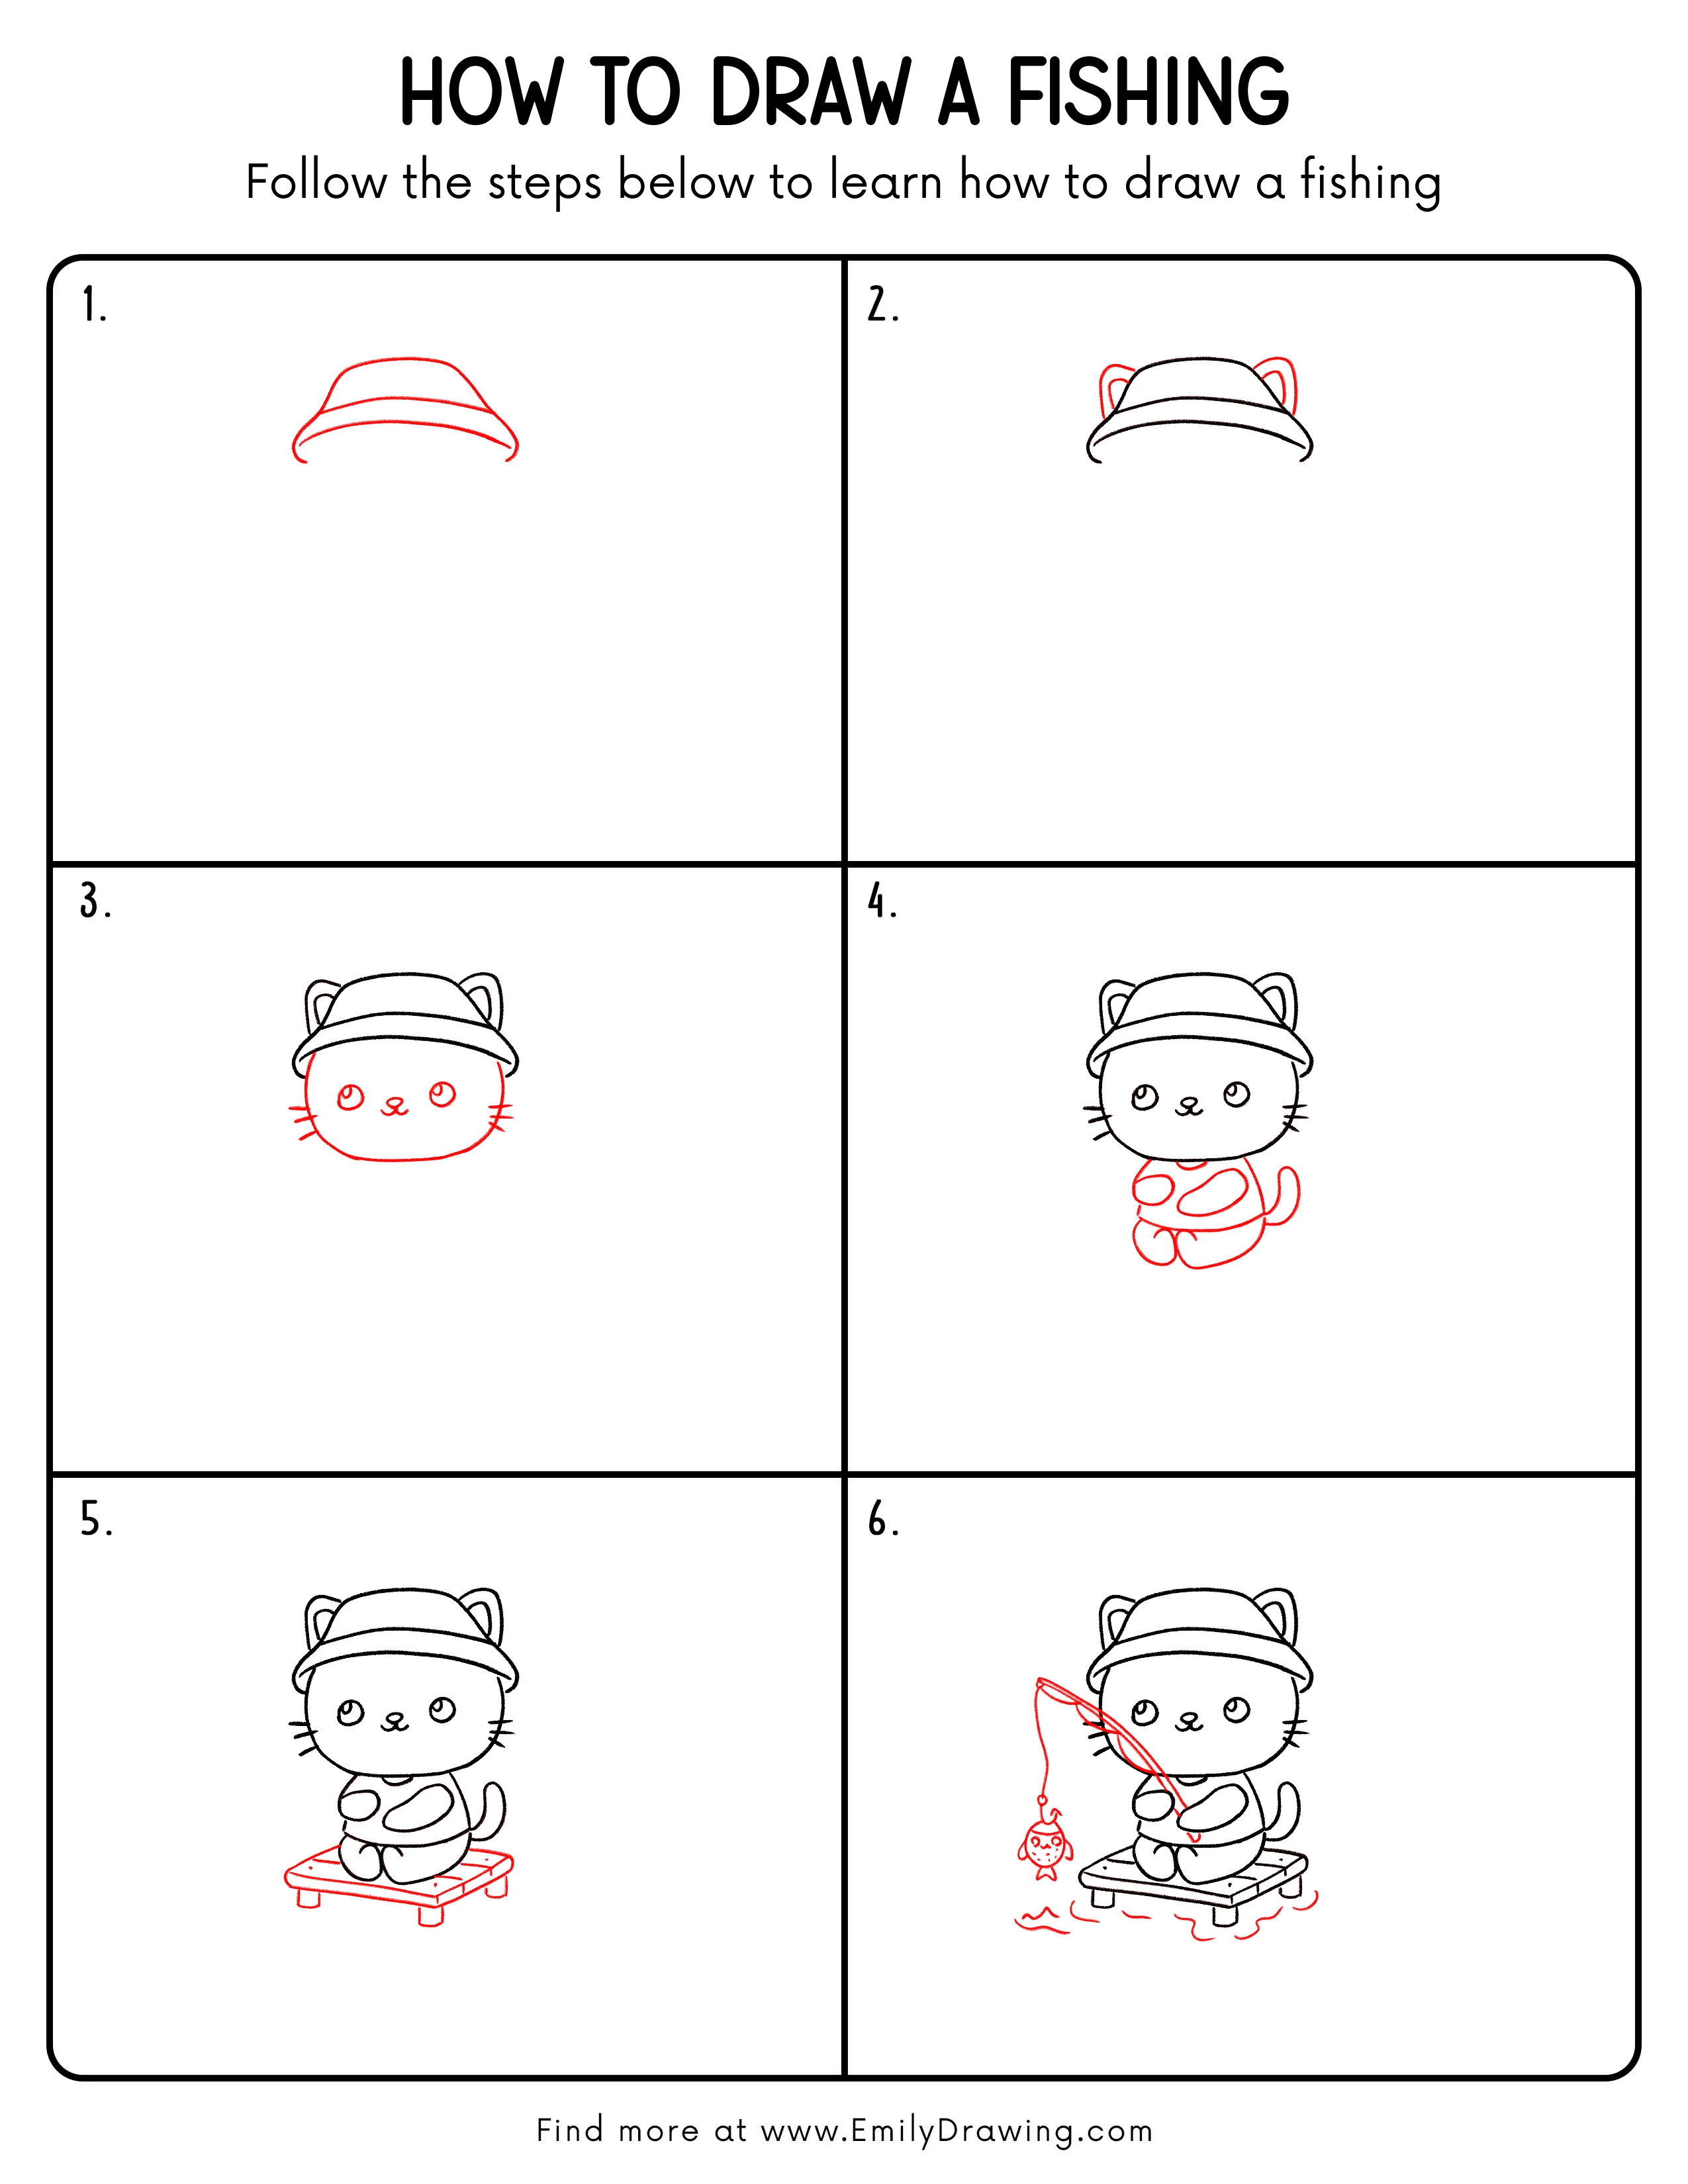
Step 1: Sketch the Basic Fishing Hat Shape
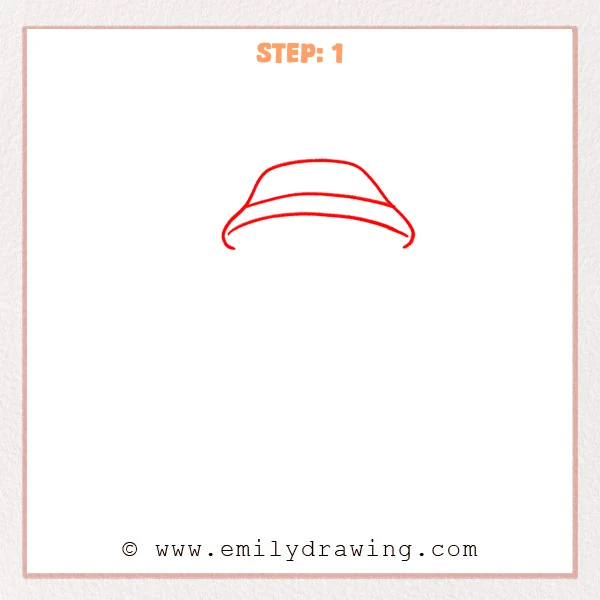
Draw a smooth, rounded dome to form the top of the hat.
Add a curved band line underneath to separate the crown from the brim.
Then draw a wider brim curve and let both ends dip slightly.
Pro Tip: Keep the brim curve wider and flatter than the crown for a true fishing hat look.
Step 2: Darken the Hat Lines and Add Side Loops
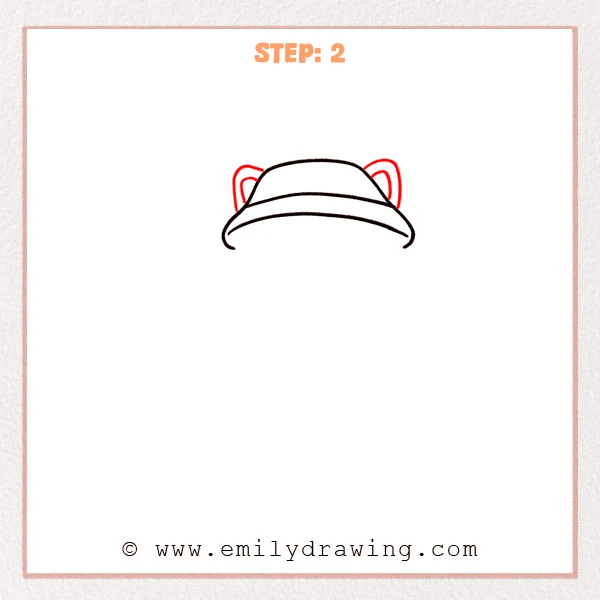
Trace over the crown and brim outline with a darker line to make it cleaner.
Then draw a rounded curved loop on each side of the hat, peeking out from behind.
Add a second inner curve inside each loop to show thickness.
Pro Tip: Keep the two side loops symmetrical, with matching height and width.
Step 3: Draw the Cat Face Under the Hat
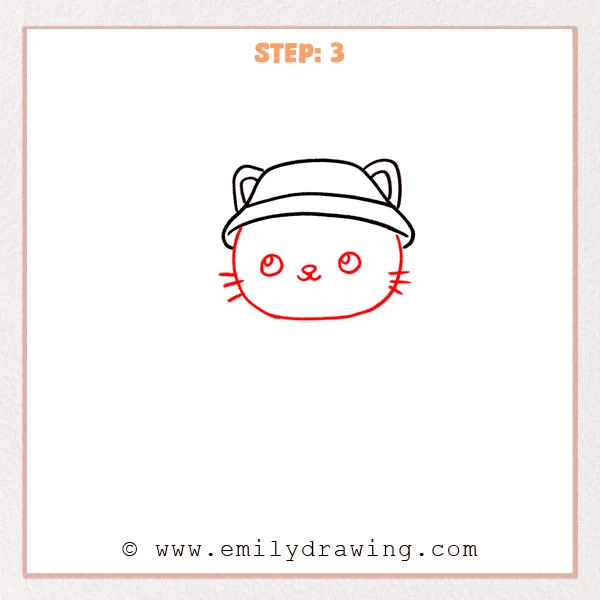
Draw a rounded face shape under the brim, with a gentle bulge on each side.
Add two round eyes and draw a small highlight inside each one.
Finish with a tiny nose-and-mouth in the center, then add three short whisker lines on both sides.
Pro Tip: Keep both eyes at the same height and centered around the nose.
Step 4: Add the Cat Body, Paws, Legs, and Tail
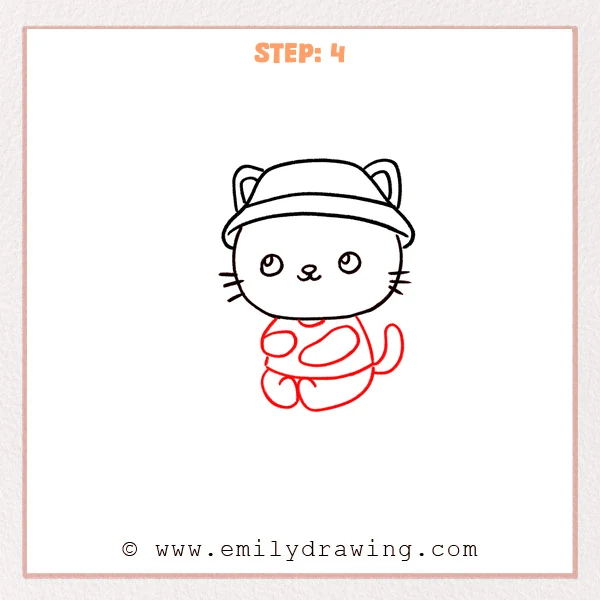
Draw a small body shape under the head, then add a curved neckline for the shirt collar.
Use two oval shapes for the front paws, placed in front of the body.
Add a curved tail on the right side, then draw the sitting legs: one rounded foot on the left and a longer curved leg on the right.
Pro Tip: Make the body much smaller than the head, and keep paws and legs extra round for a cute look.
Step 5: Draw a Simple Wooden Stool

Draw a flat rounded rectangle under the cat to form the stool seat.
Add a few long plank lines across the top to show wooden boards.
Finish by drawing short rounded legs underneath and add tiny dots for screw or nail details.
Pro Tip: Make the stool slightly wider than the body so the sitting pose feels stable.
Step 6: Add the Fishing Rod, Line, Fish, and Water Ripples
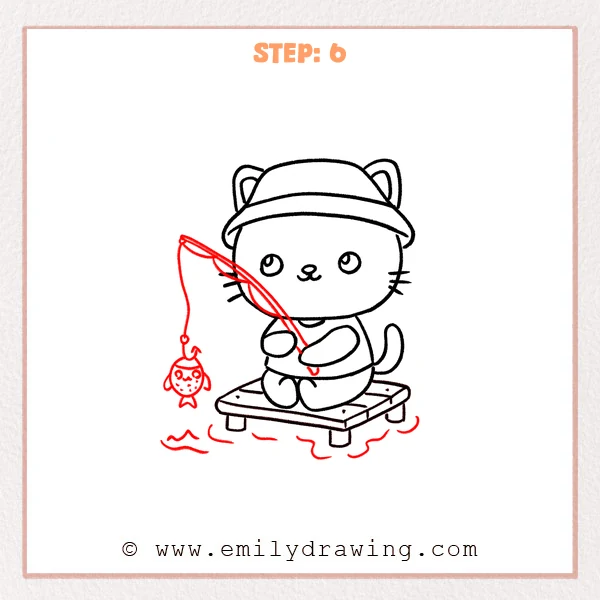
Draw a curved fishing rod coming from the cat’s paws and slanting to the left, then add an inner line to give it thickness.
From the rod tip, draw a hanging fishing line with a small ring and hook at the end.
Add a little fish on the hook, then draw a few wavy lines under the stool to show water.
Pro Tip: Curve the rod smoothly in the same direction as the line for a natural look.
Step 7: Color in your drawing!
Fun Facts
- Many cats are curious about water, even if they do not like getting wet.
- Fishing rods bend because the line pulls against the flexible pole.
- Simple cartoon faces look cutest when the features stay centered and balanced.
Pin it now, Draw later!
Go over your final lines with a clean, steady stroke, and erase extra sketch marks.
You can color the hat, shirt, fish, and stool to make the scene feel lively.
Now you know how to draw a fishing cat step by step—try drawing a bigger fish next time!
Get the FREE Printable Drawing Guide
FREE Download Printable Fishing Drawing Tutorial
Frequently Asked Questions
How do I make the cat look cuter?
Make the head bigger than the body, keep the eyes round, and use short whiskers.
What if my fishing rod looks crooked?
Redraw it as one smooth curve first, then add the inner line to match.
Can I change the scene?
Yes—add more waves, a small bucket, or a second fish to create a new story.