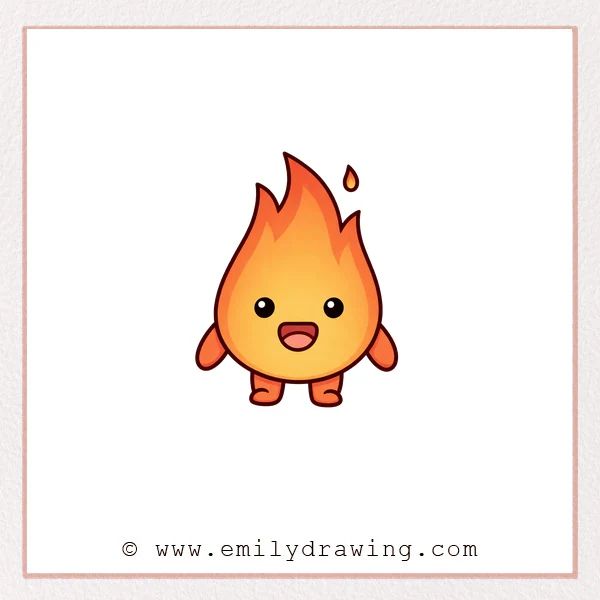
This easy drawing tutorial shows how to draw flames as a cute character.
You will build the shape first, then add a face and small details.
Take your time and keep your lines light until you like the silhouette.
What You Will Need
- Pencil
- Eraser
- Black pen or marker
- Paper
- Colored pencils or markers (optional)
Here are my RECOMMENDED Art Supplies!
- Crayola Coloring Set (140 Pieces – Mega Value!)
- 24 Colored Crayon Set
- A4 Printer Paper
- Crayola Coloring Pencils
- HP Home Printer with Instant Ink!
Time needed:
21 minutes.
Step-by-Step Drawing Guide
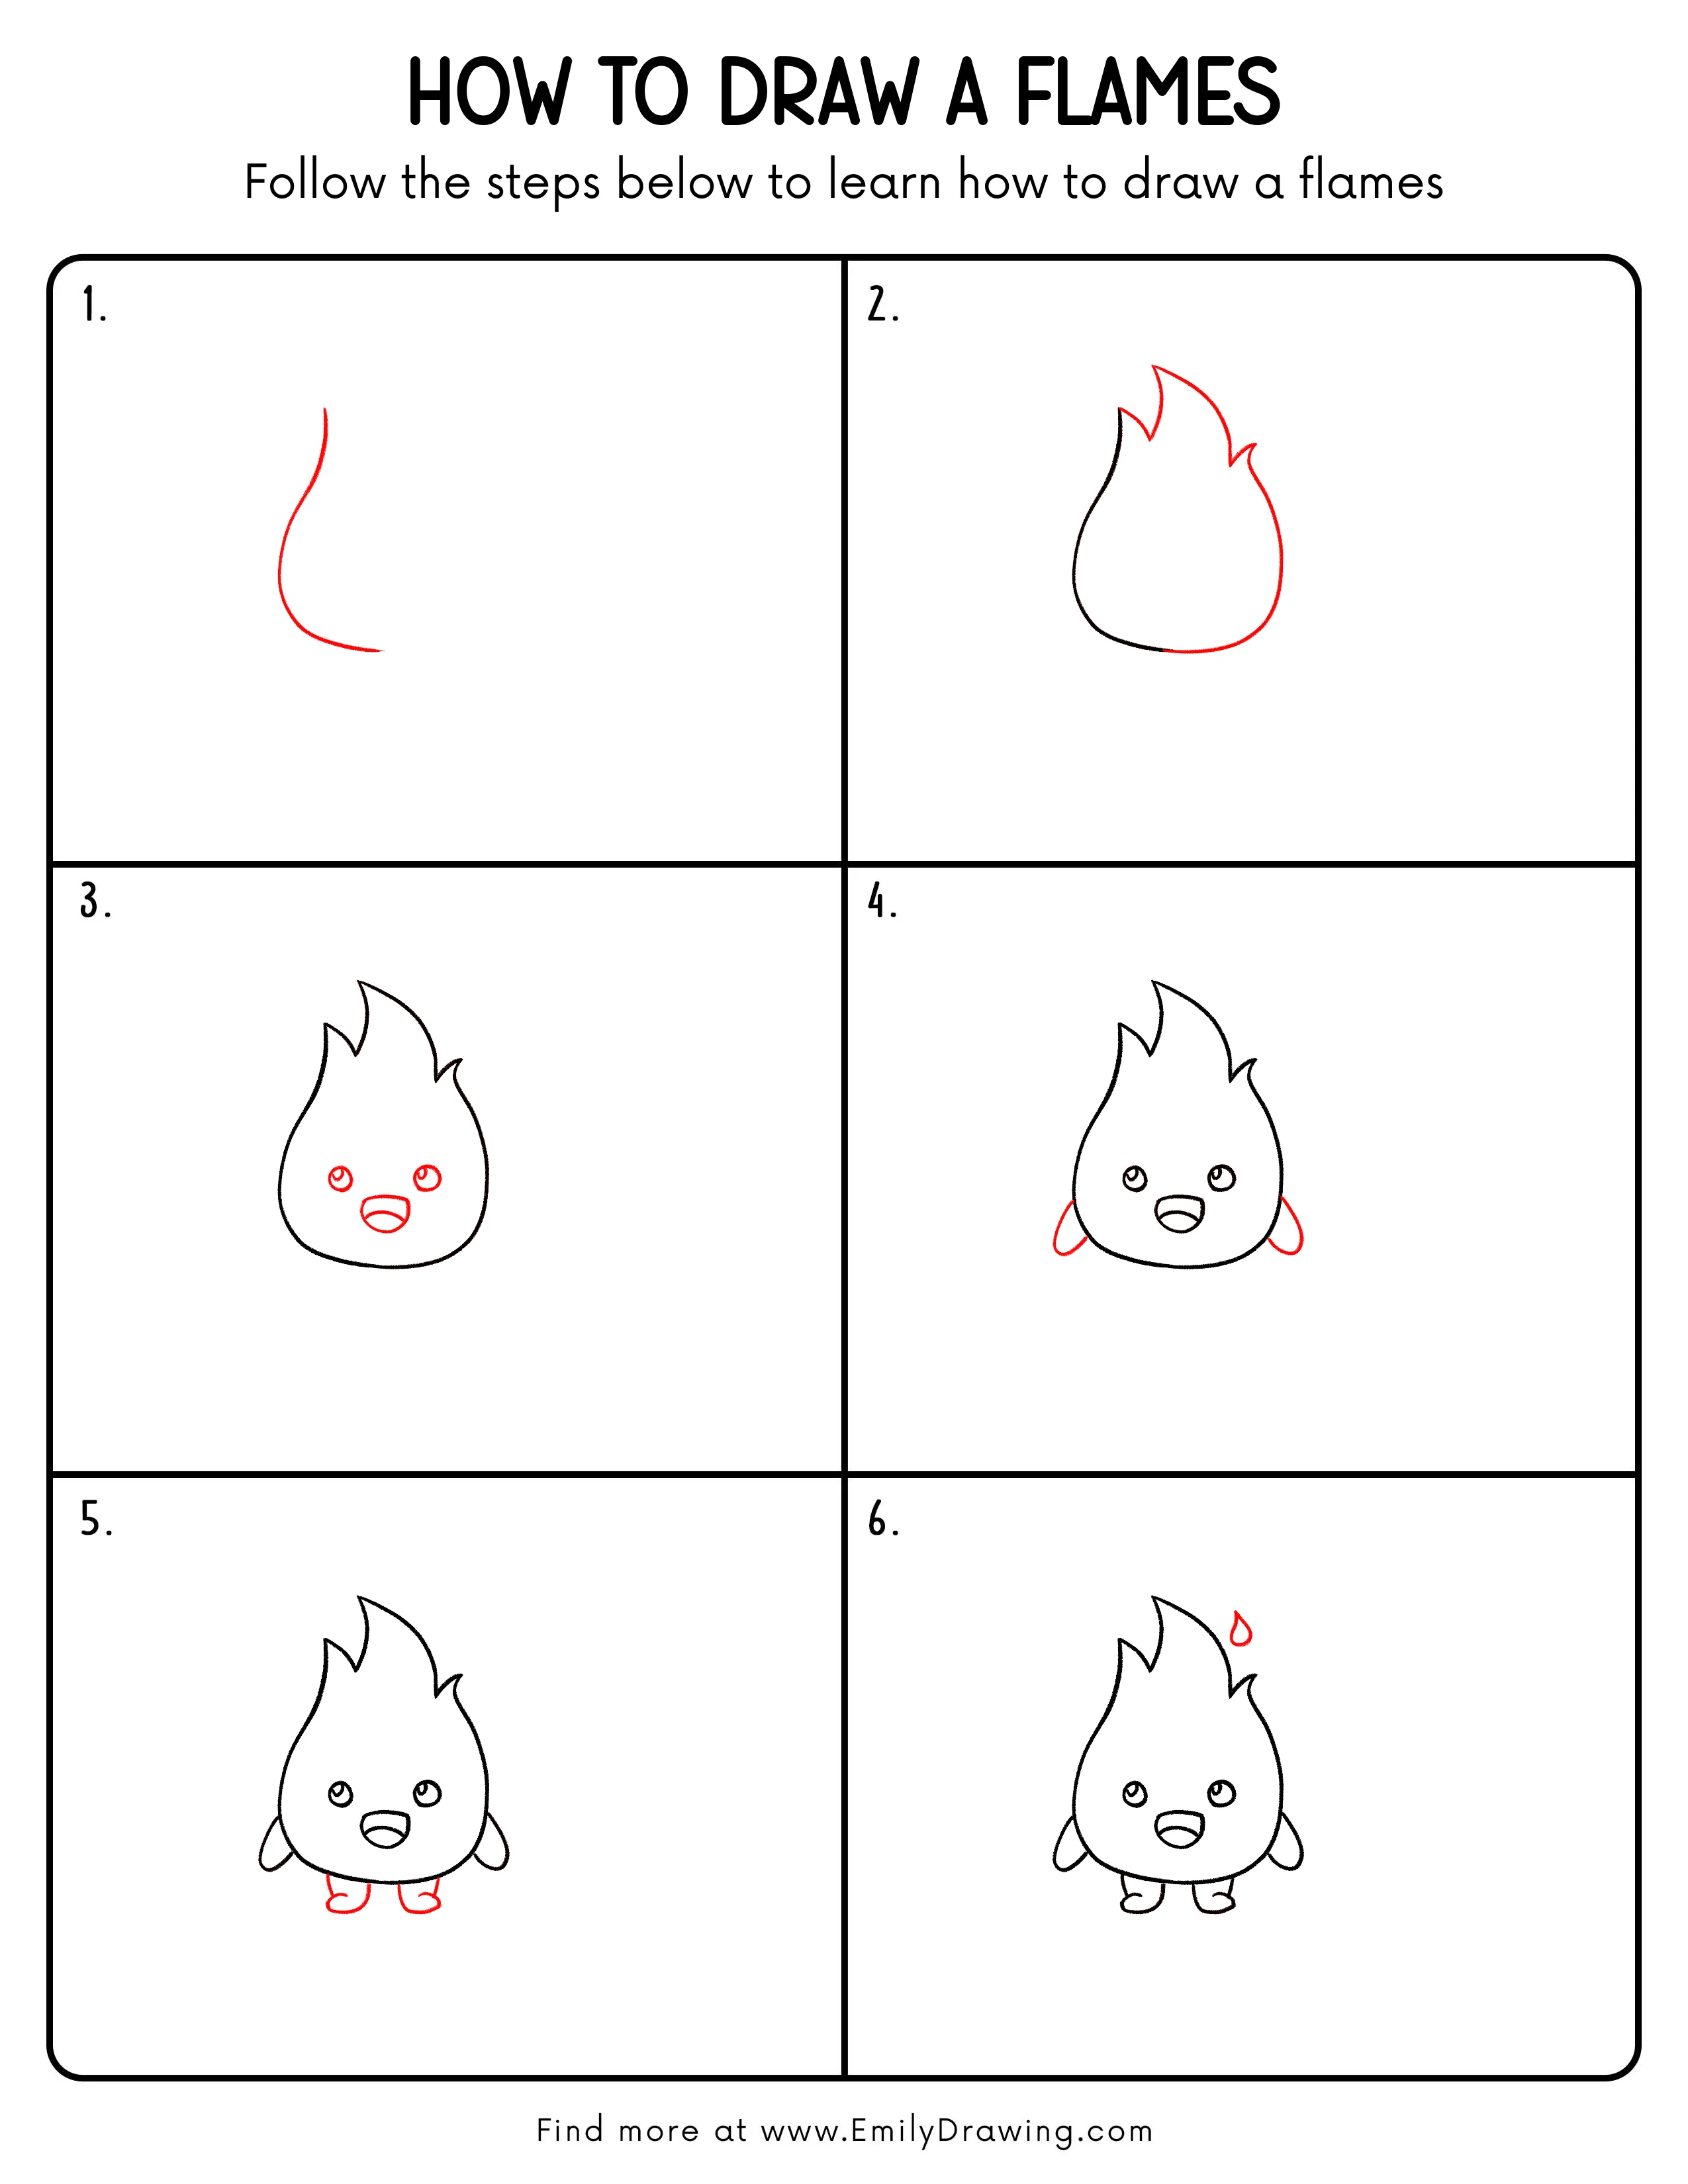
Step 1: Draw the Main Flame Outline
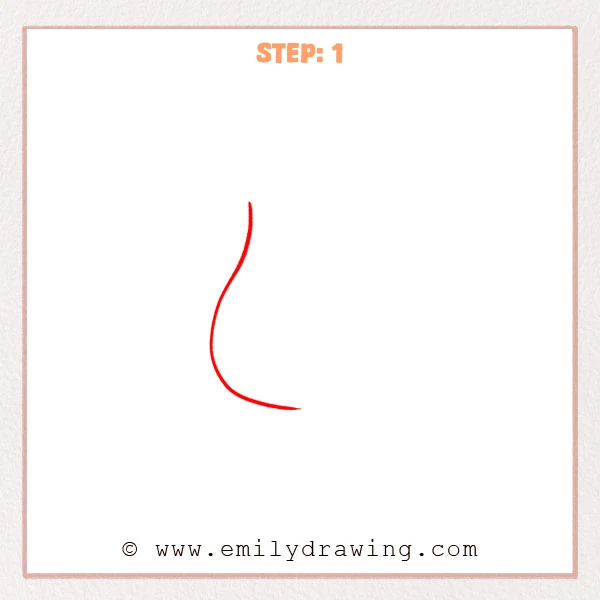
Start with one long S-shaped curve to form one side of the flame.
Let the bottom sweep outward, then taper back into a sharp tip.
Pro Tip: Keep it narrower at the top, wider near the base, then taper to a point.
Step 2: Complete the Outer Flame Shape
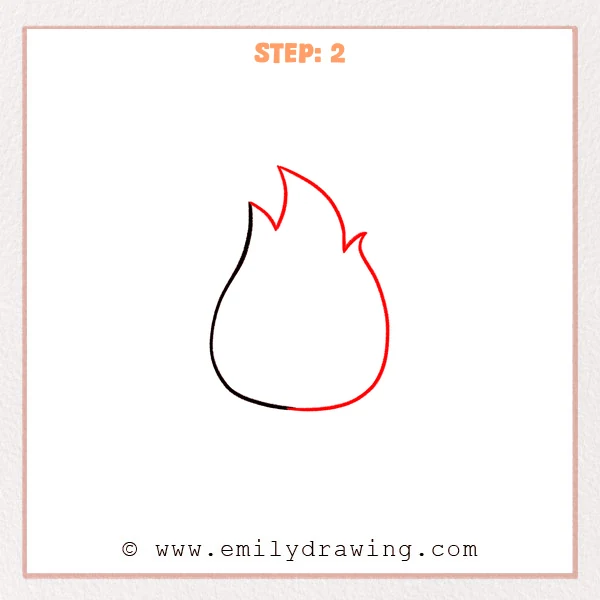
Add the outer contour on the other side and connect the bottom into a rounded flame base.
Create a few pointed tongues at the top, linking them with smooth curves.
Pro Tip: Vary the size of the top points to make the flames feel lively.
Step 3: Add a Cute Face
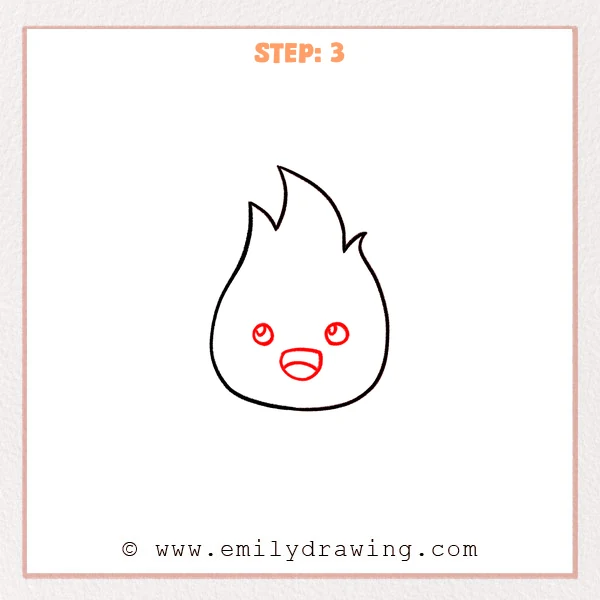
Draw two round eyes near the upper middle, then add a small highlight in each.
Below them, add an open mouth and use curved lines to show the inner mouth shape.
Pro Tip: Keep both eyes on the same level to make the face look balanced.
Step 4: Add Small Arms
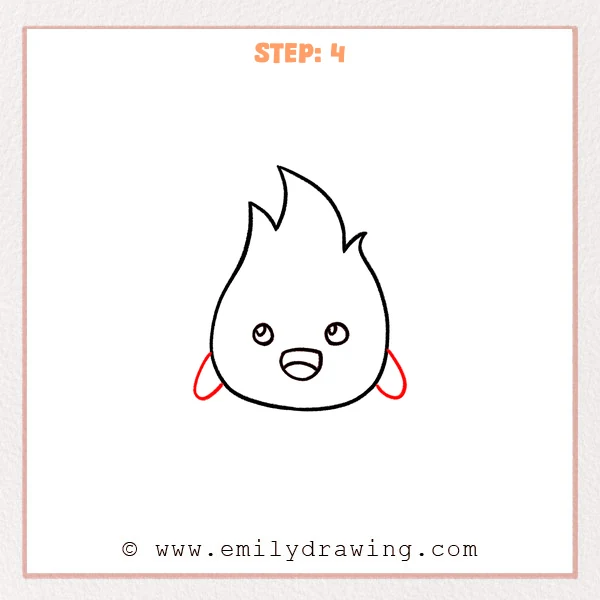
Draw a small oval arm on each lower side of the body, curving out and back in.
Keep both arms similar in size, but tilt them slightly differently for energy.
Pro Tip: Don’t make the arms too big; keep them within about one-third of the body width.
Step 5: Draw the Little Feet
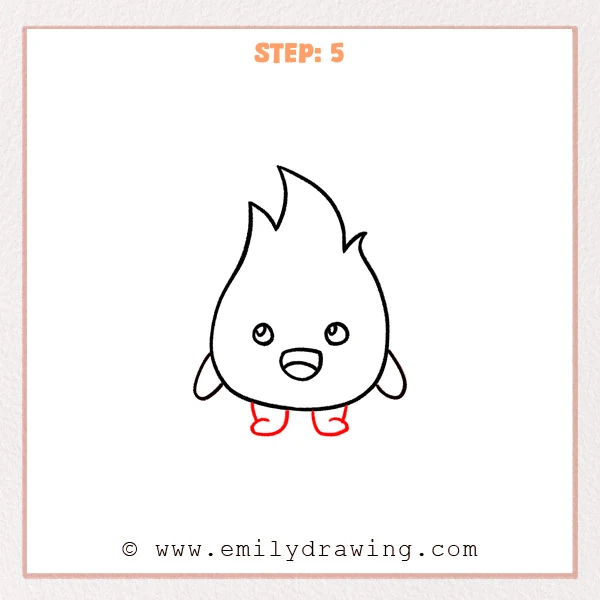
Under the bottom edge, add two short legs shaped like simple rounded socks.
Give each foot a small bump at the front to form a cute toe and instep.
Pro Tip: Keep the feet fairly close so they look like they support the body.
Step 6: Add a Small Spark
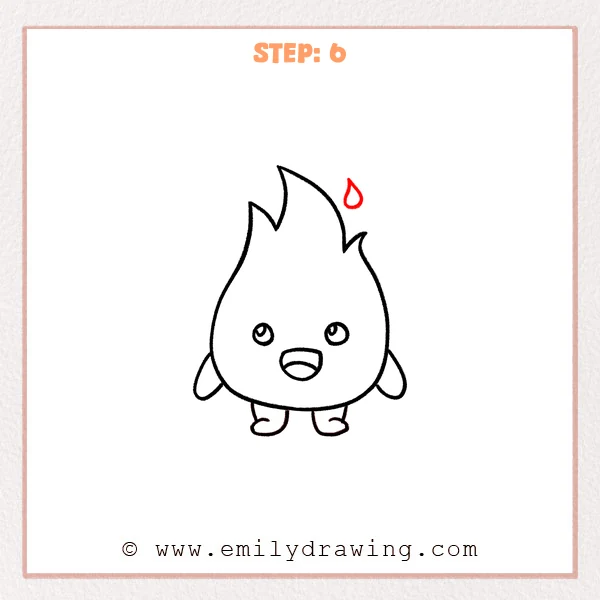
Draw a small teardrop shape near the upper right of the flame, with the tip pointing up.
Outline it cleanly so it reads as a tiny ember or flickering spark.
Pro Tip: Keep the spark under about one-fifth of the head width for a balanced look.
Step 7: Color in your drawing!
Fun Facts
- Flames often look pointed because hot gases rise and stretch upward.
- A candle flame can show different colors based on temperature and fuel.
- Tiny “sparks” are small glowing bits of burning material.
Pin it now, Draw later!

Trace your final lines with a black pen, then erase leftover pencil marks.
You can color the flame with yellow in the center and orange or red on the edges.
Now you know how to draw flames step by step—try drawing a whole group of little flames next.
Get the FREE Printable Drawing Guide
FREE Download Printable Flames Drawing Tutorial
Frequently Asked Questions
How do I make my flames look more natural?
Use smooth curves and vary the size and spacing of the flame points.
Can I draw flames without a character face?
Yes, simply skip the eyes and mouth and add a smaller inner flame shape instead.
What’s an easy way to color flames?
Start with light yellow inside, then blend to orange and red toward the outside.