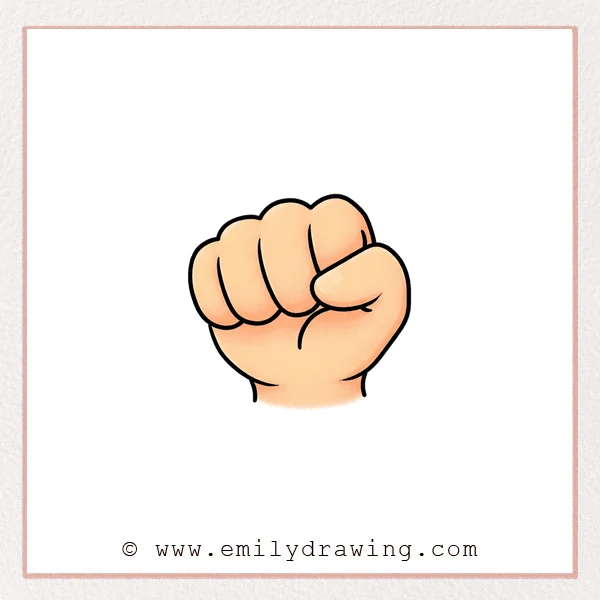
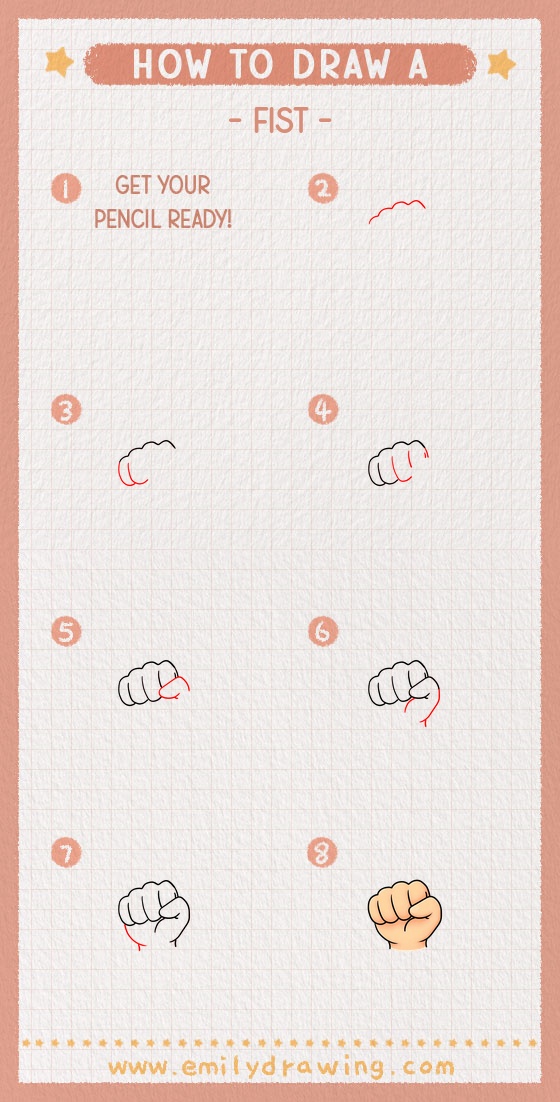
Learning how to draw a fist can feel tricky at first, but it becomes much easier when you build it one shape at a time. In this easy drawing tutorial, you will sketch the knuckles, add the folded fingers, and finish the palm and thumb with simple curved lines. This step by step drawing guide is designed for beginners who want a calm and clear way to practice hand drawing.
What You Will Need
- Pencil
- Eraser
- Black pen or marker
- Paper
- Colored pencils or crayons, if you want to color your drawing
Here are my RECOMMENDED Art Supplies!
- Crayola Coloring Set (140 Pieces – Mega Value!)
- 24 Colored Crayon Set
- A4 Printer Paper
- Crayola Coloring Pencils
- HP Home Printer with Instant Ink!
Time needed:
17 minutes.
Step-by-Step Drawing Guide
Step 1: Sketch the Top Knuckle Curve
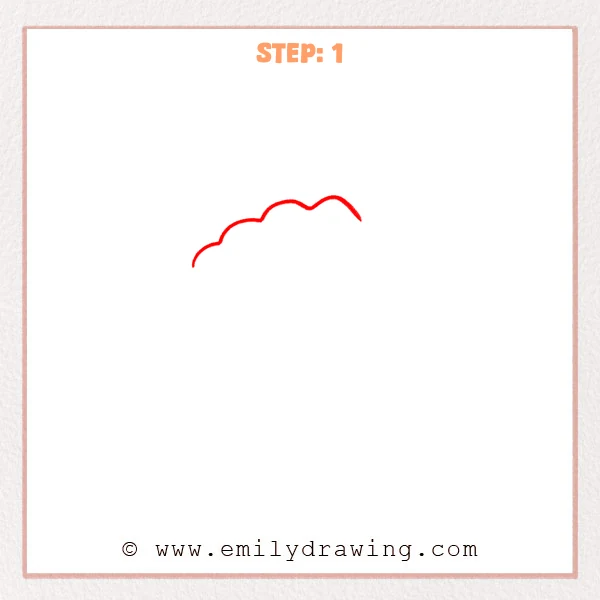
Start near the upper middle area and add one gently bumpy line. Let it rise and dip like a row of soft rounded bumps to show the top edge of the knuckles on a closed fist.
Pro Tip: Let each bump vary slightly in size so the fist looks more natural.
Step 2: Add the Left Outer Shape of the Fist
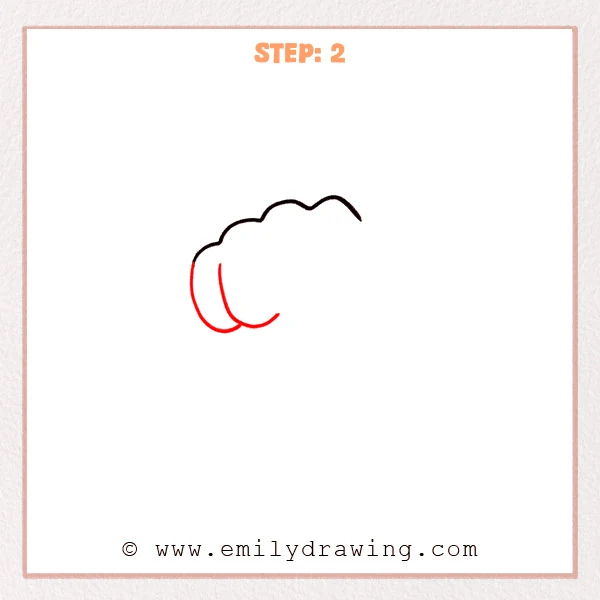
Next, add two long curved lines on the left side, letting them fall naturally from beneath the knuckles. Keep the lower ends softly rounded to show the front two folded fingers of the fist.
Pro Tip: Leave a little space between the curves so the finger layers read more clearly.
Step 3: Add the Middle and Right Finger Shapes
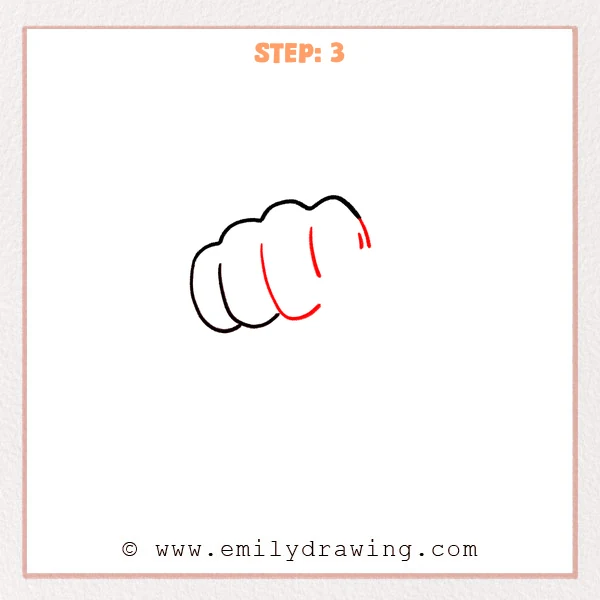
Continue by placing one curved line down the middle, then extend the outer edge of the finger on the right side. Add a short curved mark near the upper right to show the small visible edge of the outer folded finger.
Pro Tip: Keep the middle line shorter than the outer contour so the finger layers feel more natural.
Step 4: Add the Thumb Wrapping Across the Front
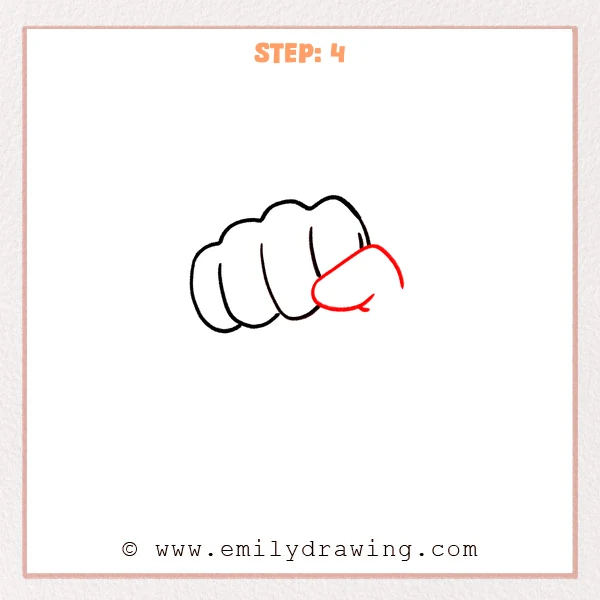
Now add a large rounded thumb shape on the front right, letting it slant across the fingers. Leave a small curved point at the lower edge to show where the tip of the thumb folds back.
Pro Tip: Keep the thumb full and rounded so the overlap at the front of the fist reads clearly.
Step 5: Add the Lower Palm and Wrist Lines
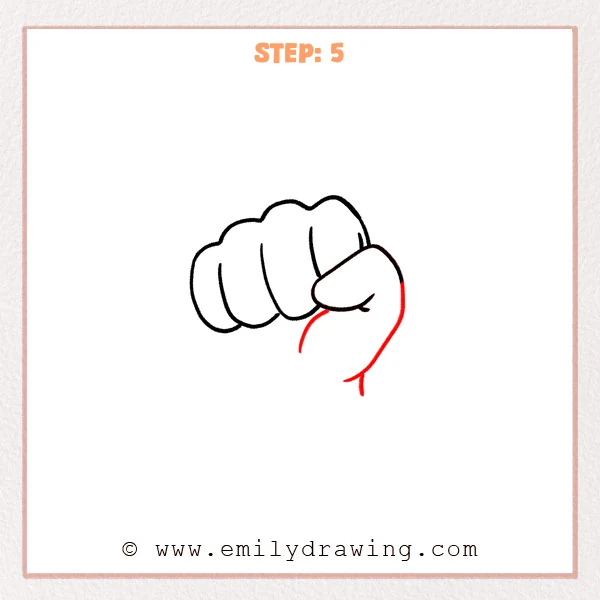
Next, extend a curved line down from beneath the thumb to form the outer edge of the palm, then let it bend gently back toward the left. Add a short line at the bottom to suggest the wrist opening and give the fist a fuller shape.
Pro Tip: Keep the outer palm curve smooth so the fist feels solid and natural.
Step 6: Add the Left Palm Base and the Other Side of the Wrist
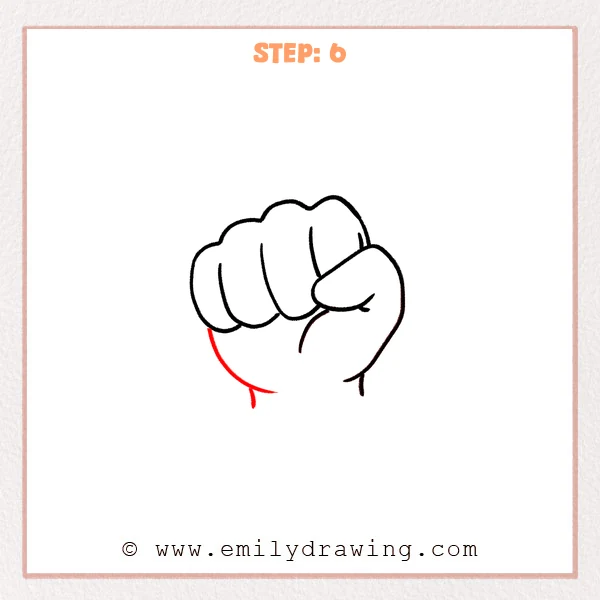
Now extend a broad curved line from the lower left to connect the base of the palm under the fist. Add one short line nearby to show the other edge of the wrist, so the hand shape feels more complete.
Pro Tip: Keep the palm-base curve wide so the lower part of the fist feels balanced.
Step 7: Color in your drawing!
Fun Facts
- A fist looks compact because the fingers fold tightly into the palm.
- The knuckles create the bumpy top shape you see first in a clenched hand.
- Artists often practice fists to understand basic hand structure and overlap.
Pin it now, Draw later!
You now have a clear fist drawing built from simple curved shapes. Add light shading under the knuckles, around the thumb, and near the palm base to give the hand more depth. You can also color the skin evenly first, then darken the shadow areas gently for a softer result. A common beginner mistake is making every finger the same width, which can flatten the drawing. Keep practicing these rounded forms, and try more easy drawing tutorials to grow your confidence step by step.
Get the FREE Printable Drawing Guide
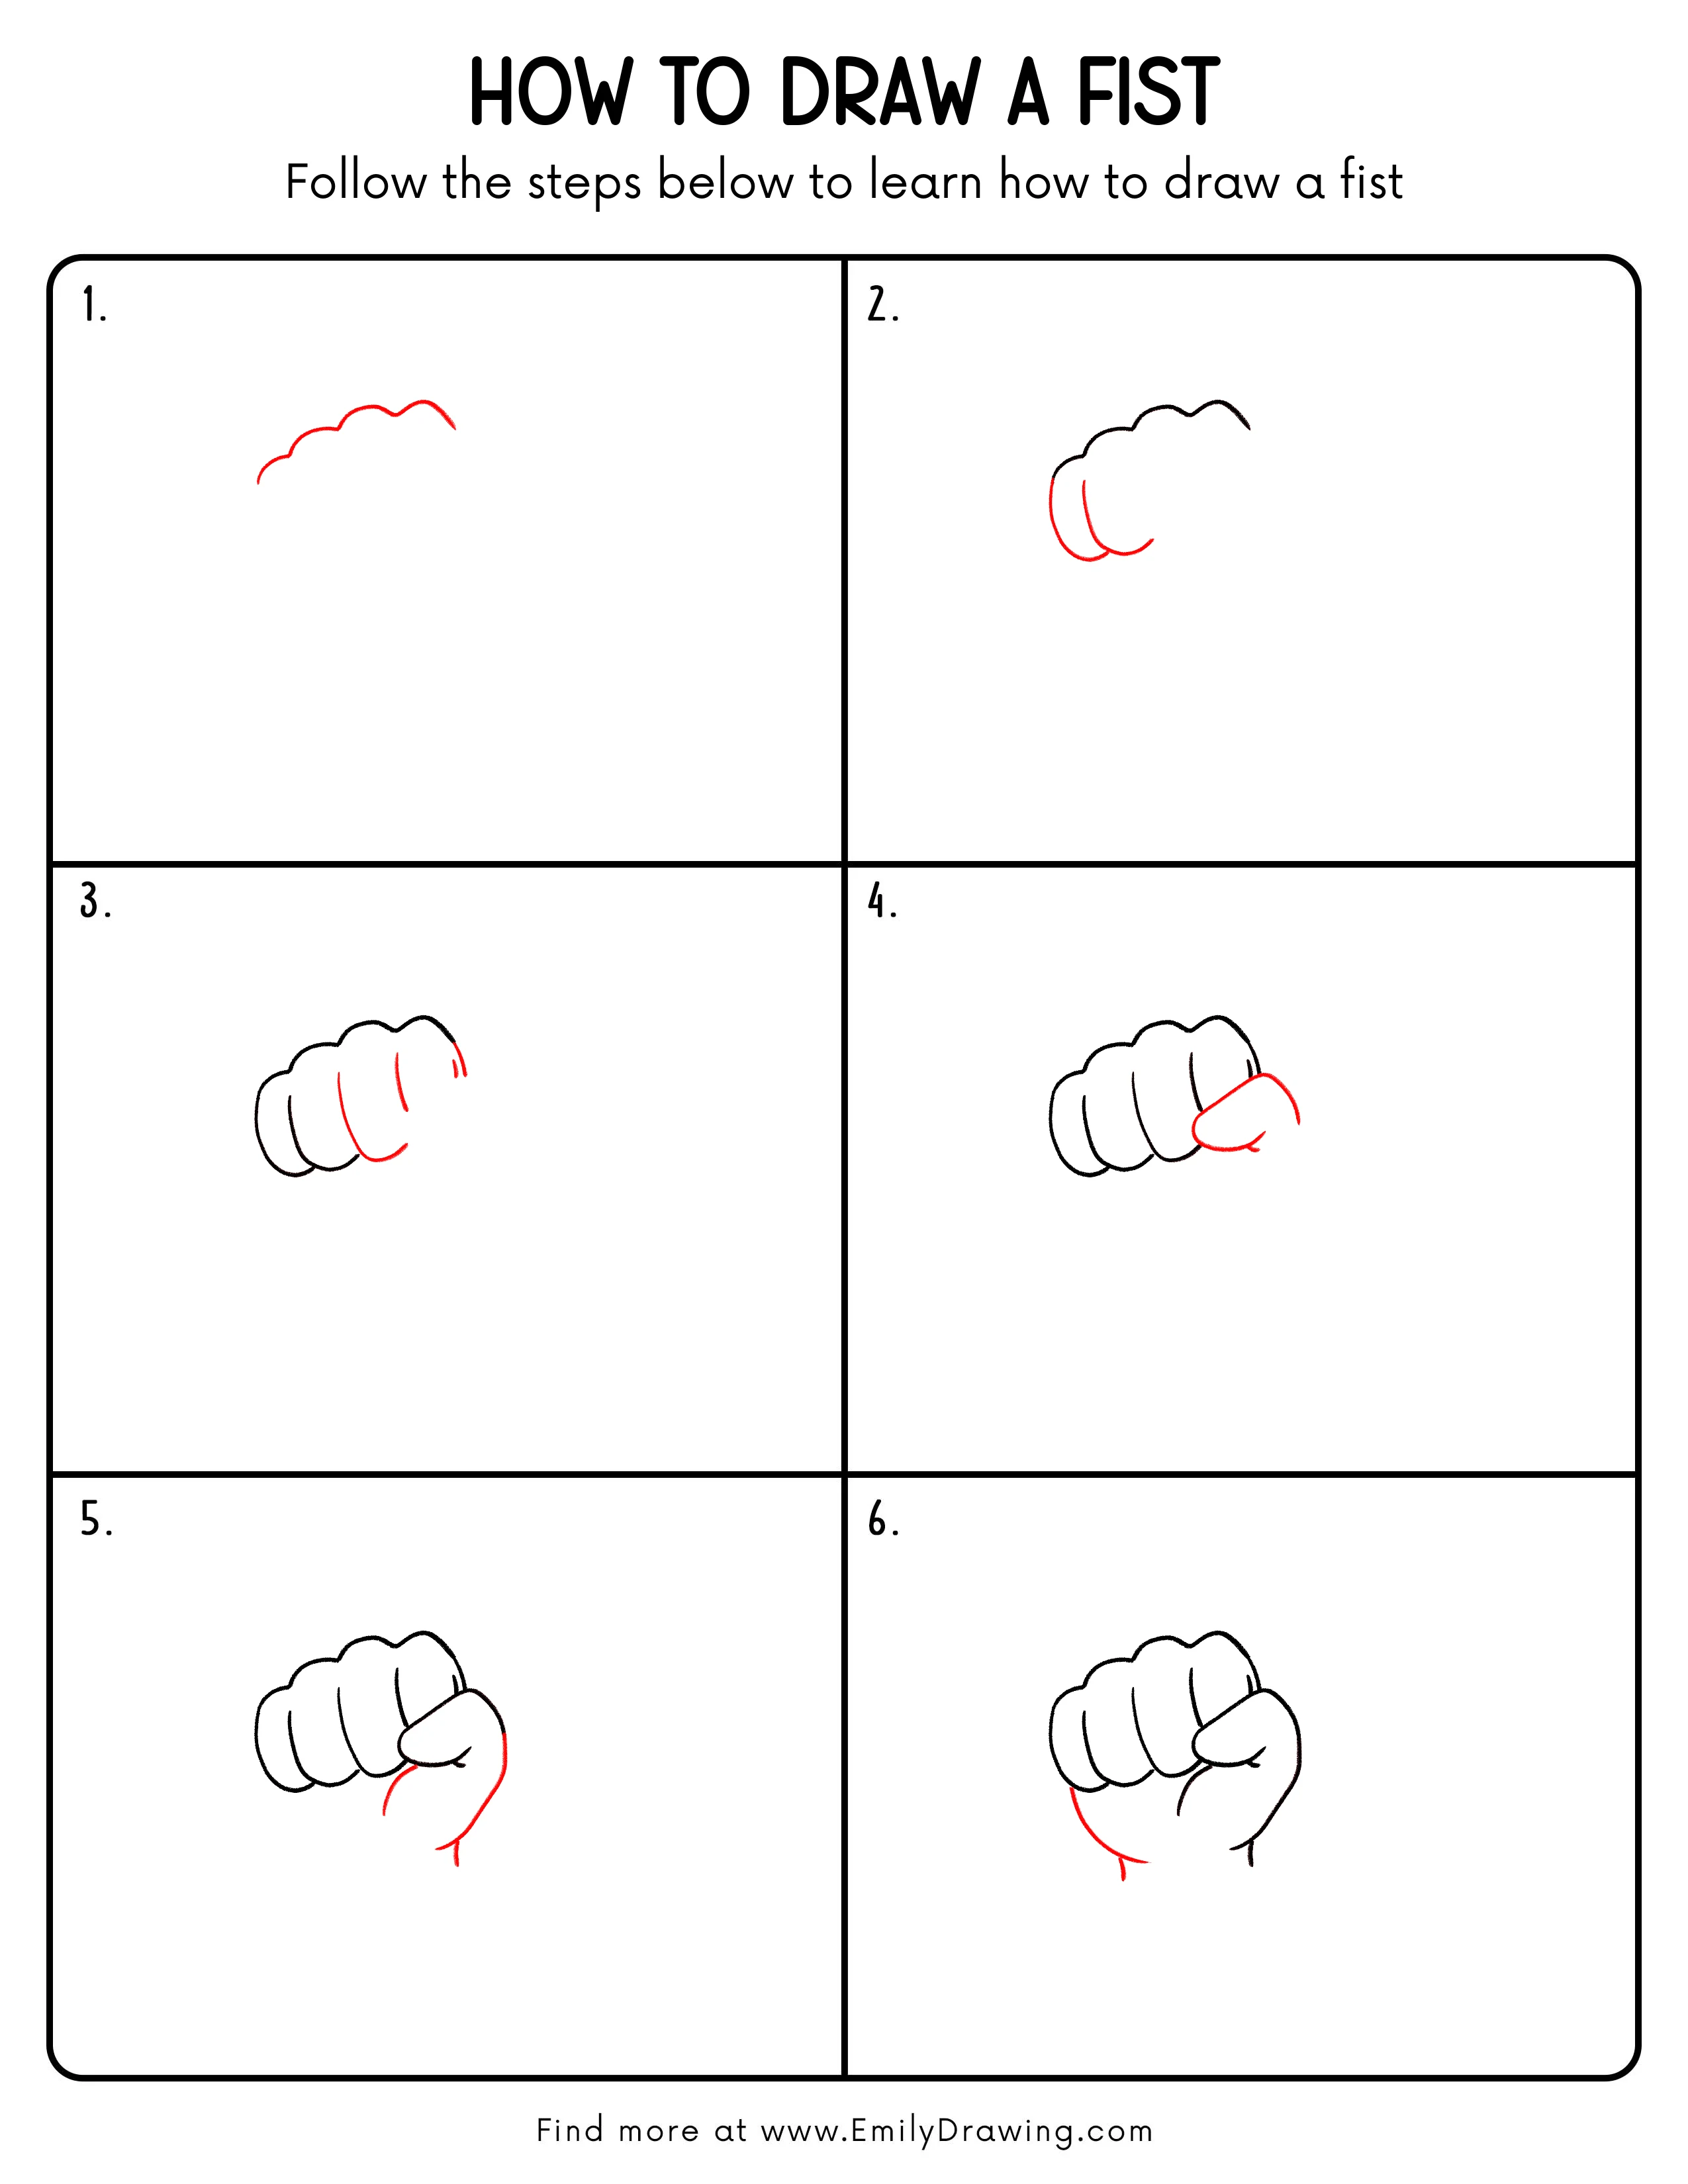
FREE Download Printable Fist Drawing Tutorial
Frequently Asked Questions
Is drawing a fist hard for beginners?
Not when you break it into small curved shapes. Start with the knuckles and build the hand slowly.
Why does the thumb go across the front?
In a closed fist, the thumb wraps over the folded fingers. This helps the fist look natural and secure.
How can I make my fist drawing look more real?
Use soft shading, vary the finger widths slightly, and keep the overlaps clear between the thumb and fingers.