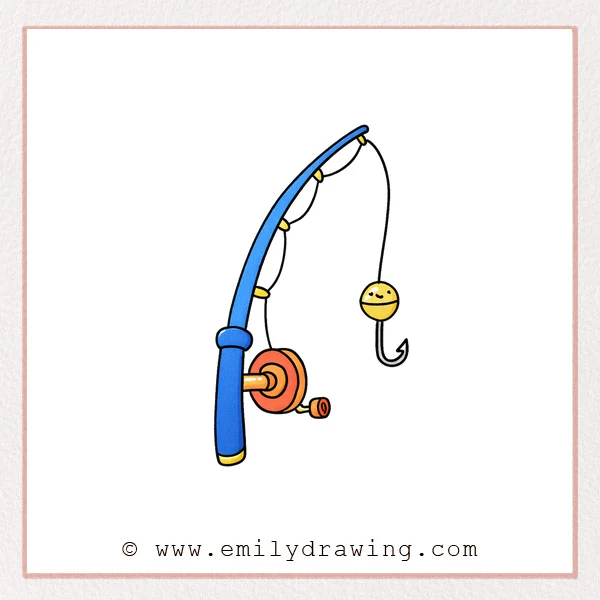
Drawing a fishing pole is a calm and simple activity for beginners. In this easy drawing tutorial, you will build the picture one small part at a time, from the handle to the reel, line, bobber, and hook.
What You Will Need
- Pencil
- Eraser
- Black pen or marker
- Paper
- Colored pencils or crayons
Here are my RECOMMENDED Art Supplies!
- Crayola Coloring Set (140 Pieces – Mega Value!)
- 24 Colored Crayon Set
- A4 Printer Paper
- Crayola Coloring Pencils
- HP Home Printer with Instant Ink!
Time needed:
14 minutes.
Step-by-Step Drawing Guide
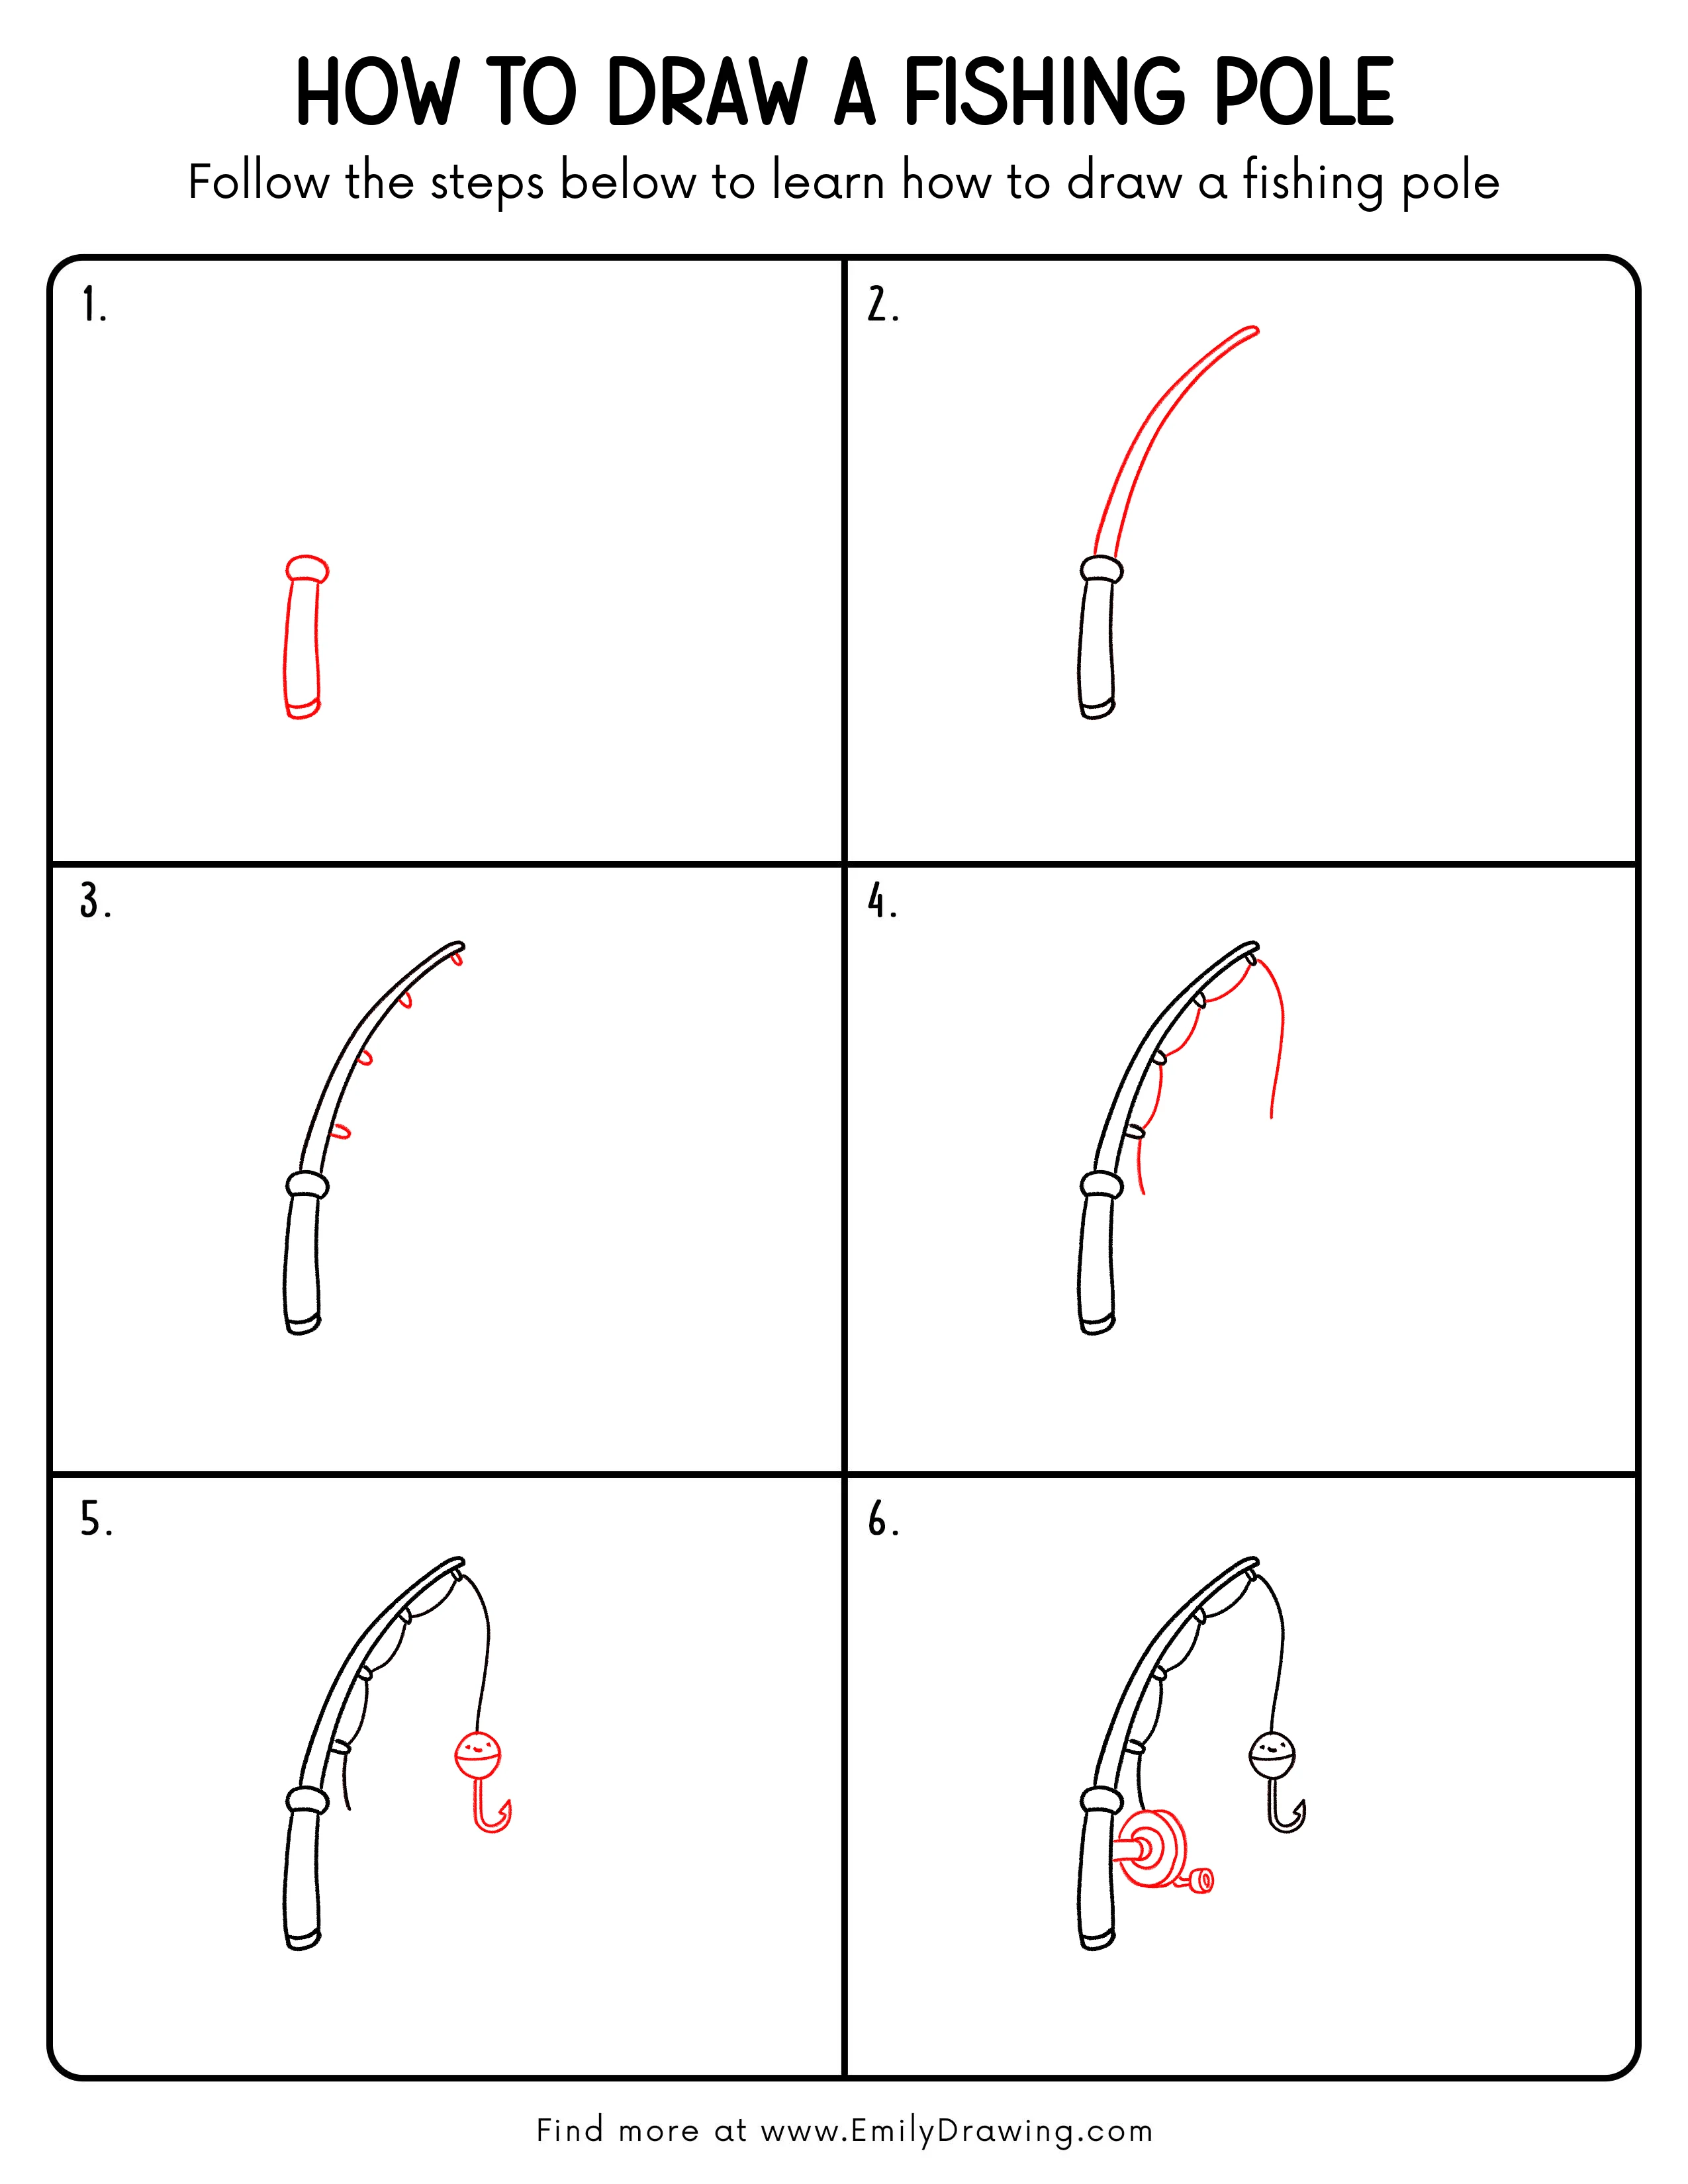
Step 1: Draw the Fishing Rod Handle
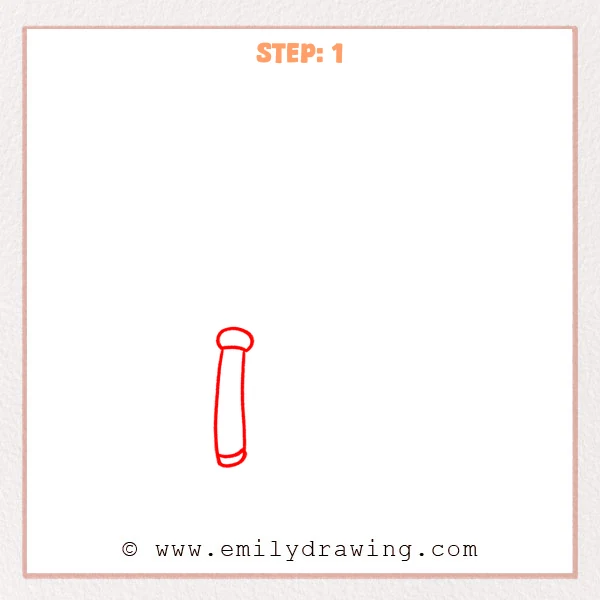
Start with a tall, narrow shape near the lower part of the page for the handle. Add a rounded cap at the top and a soft curved band at the bottom so the handle feels finished.
Pro Tip: Keep the sides of the handle steady so the whole fishing rod looks neat.
Step 2: Add the Curved Fishing Rod
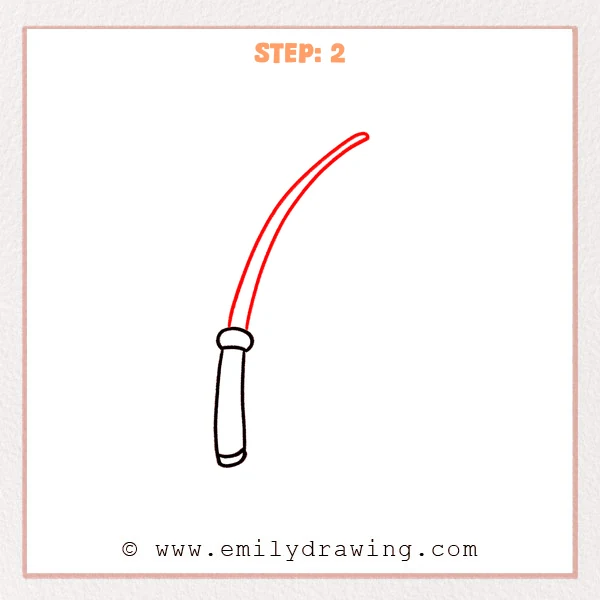
Start from the top of the handle and extend two smooth lines up toward the right to form the rod. Let it bend gently and close the tip with a rounded end so it looks light and flexible.
Pro Tip: Keep the space between the curved lines even so the rod feels balanced.
Step 3: Add the Line Guides
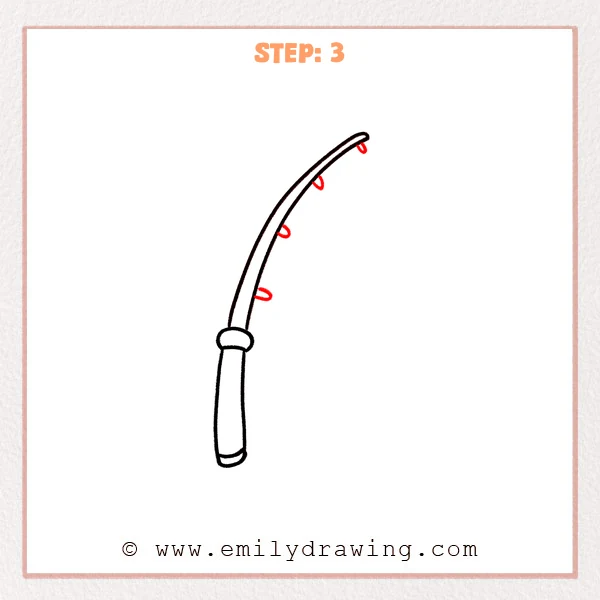
Place a few small oval guides along the outer side of the curved rod. Space them as they rise upward, and let them become slightly smaller near the tip for a natural look.
Pro Tip: Let each guide follow the curve of the rod so the direction feels clear and smooth.
Step 4: Add the Fishing Line
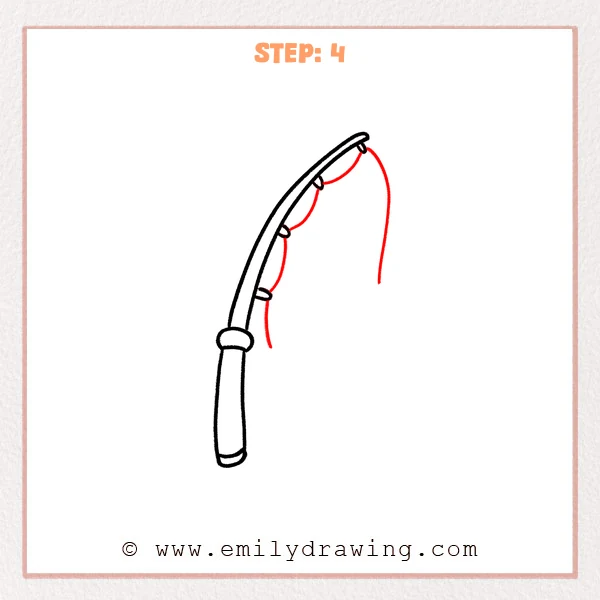
Start from each guide and add curved fishing lines that hang naturally beneath the rod. Let the front line be the longest so the fishing pole feels lively and in motion.
Pro Tip: Keep the line softly curved instead of straight so it looks more natural.
Step 5: Add the Bobber and Hook
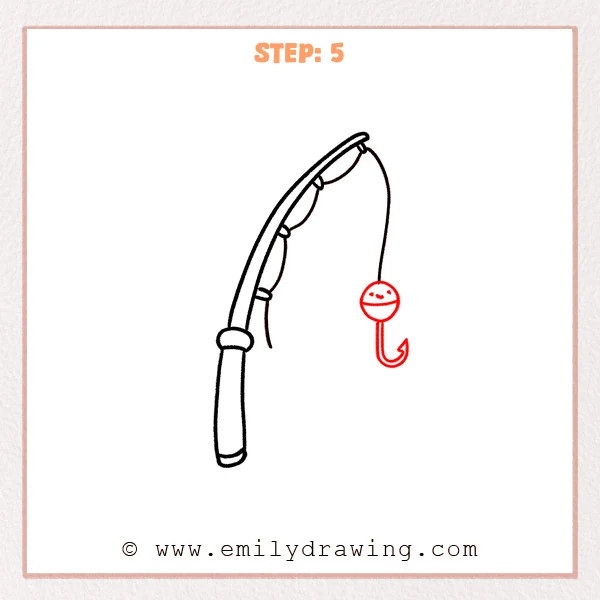
At the end of the longest line, add a round bobber and divide it with a curved line across the middle. Then extend a curved hook from the bottom, letting the tip turn inward to give the fishing pole a finished look.
Pro Tip: Make the bobber and hook slightly larger so the final details stand out clearly.
Step 6: Add the Reel
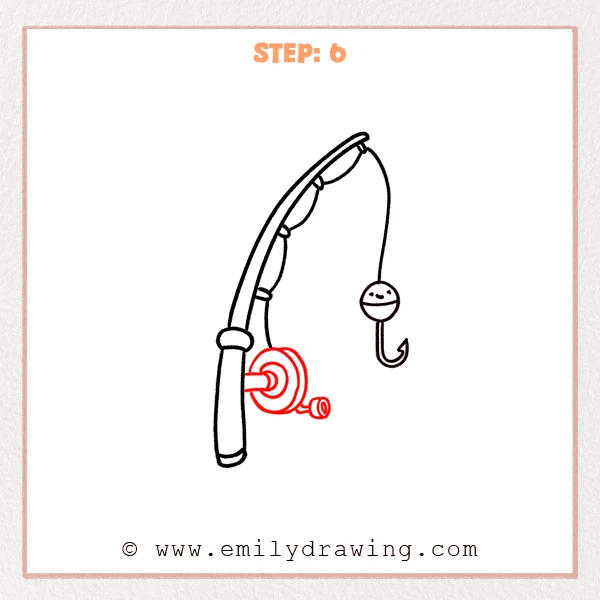
Near the upper right side of the handle, add a round reel with a few inner circles to show its shape. Then attach a short crank and a small handle beside it so the fishing pole looks complete.
Pro Tip: Keep the reel close to the upper part of the handle so it feels placed naturally.
Step 7: Color in your drawing!
Fun Facts
- A fishing pole is also called a fishing rod.
- The small rings on the rod help guide the fishing line.
- A bobber floats on water and helps show when a fish bites.
Pin it now, Draw later!
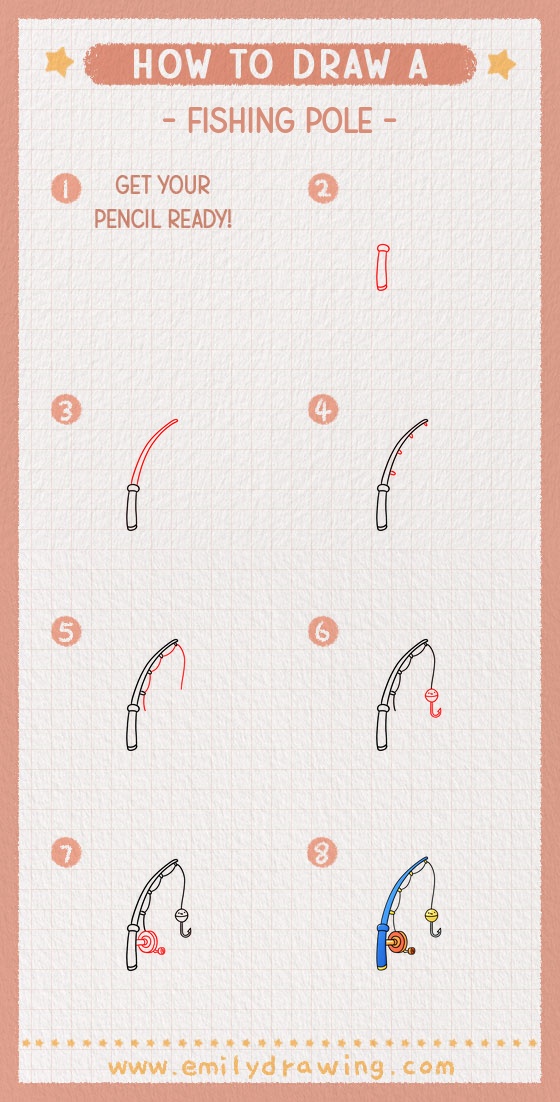
You now have a complete fishing pole drawing built in six easy steps. Start with the handle, add the curved rod, then finish with the guides, line, bobber, hook, and reel.
For coloring, try brown or black for the handle and rod, red and white for the bobber, and gray for the hook. You can also add light shading along one side of the rod and reel to make them look round.
One common beginner mistake is making the fishing line too stiff. Let it curve gently so the drawing feels softer and more natural.
Keep practicing this step by step drawing, and try drawing it again with a fish or a lake scene next time.
Get the FREE Printable Drawing Guide
FREE Download Printable Fishing Pole Drawing Tutorial
Frequently Asked Questions
Is this fishing pole drawing good for beginners?
Yes. This easy drawing tutorial uses simple shapes and gentle curves.
How can I make the fishing pole look more realistic?
Add light shading, keep the line smooth, and make the guides smaller near the tip.
Can I color the fishing pole in different ways?
Yes. You can use realistic colors or bright playful colors to make your drawing unique.