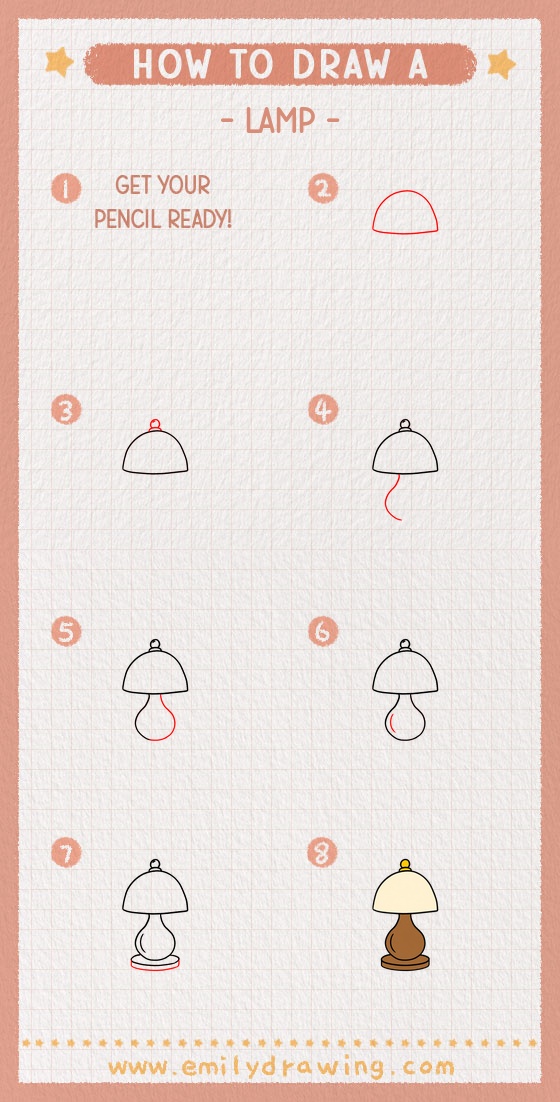
Learning how to draw a lamp is a fun and simple art activity for beginners. This easy drawing tutorial breaks the lamp into clear shapes, so you can follow along one step at a time. If you enjoy step by step drawing and drawing for beginners, this lesson is a great place to start.
What You Will Need
- Drawing paper
- Pencil
- Black pen or marker
- Eraser
- Red pencil or colored pencil for guide lines (optional)
Here are my RECOMMENDED Art Supplies!
- Crayola Coloring Set (140 Pieces – Mega Value!)
- 24 Colored Crayon Set
- A4 Printer Paper
- Crayola Coloring Pencils
- HP Home Printer with Instant Ink!
Time needed:
14 minutes.
Step-by-Step Drawing Guide
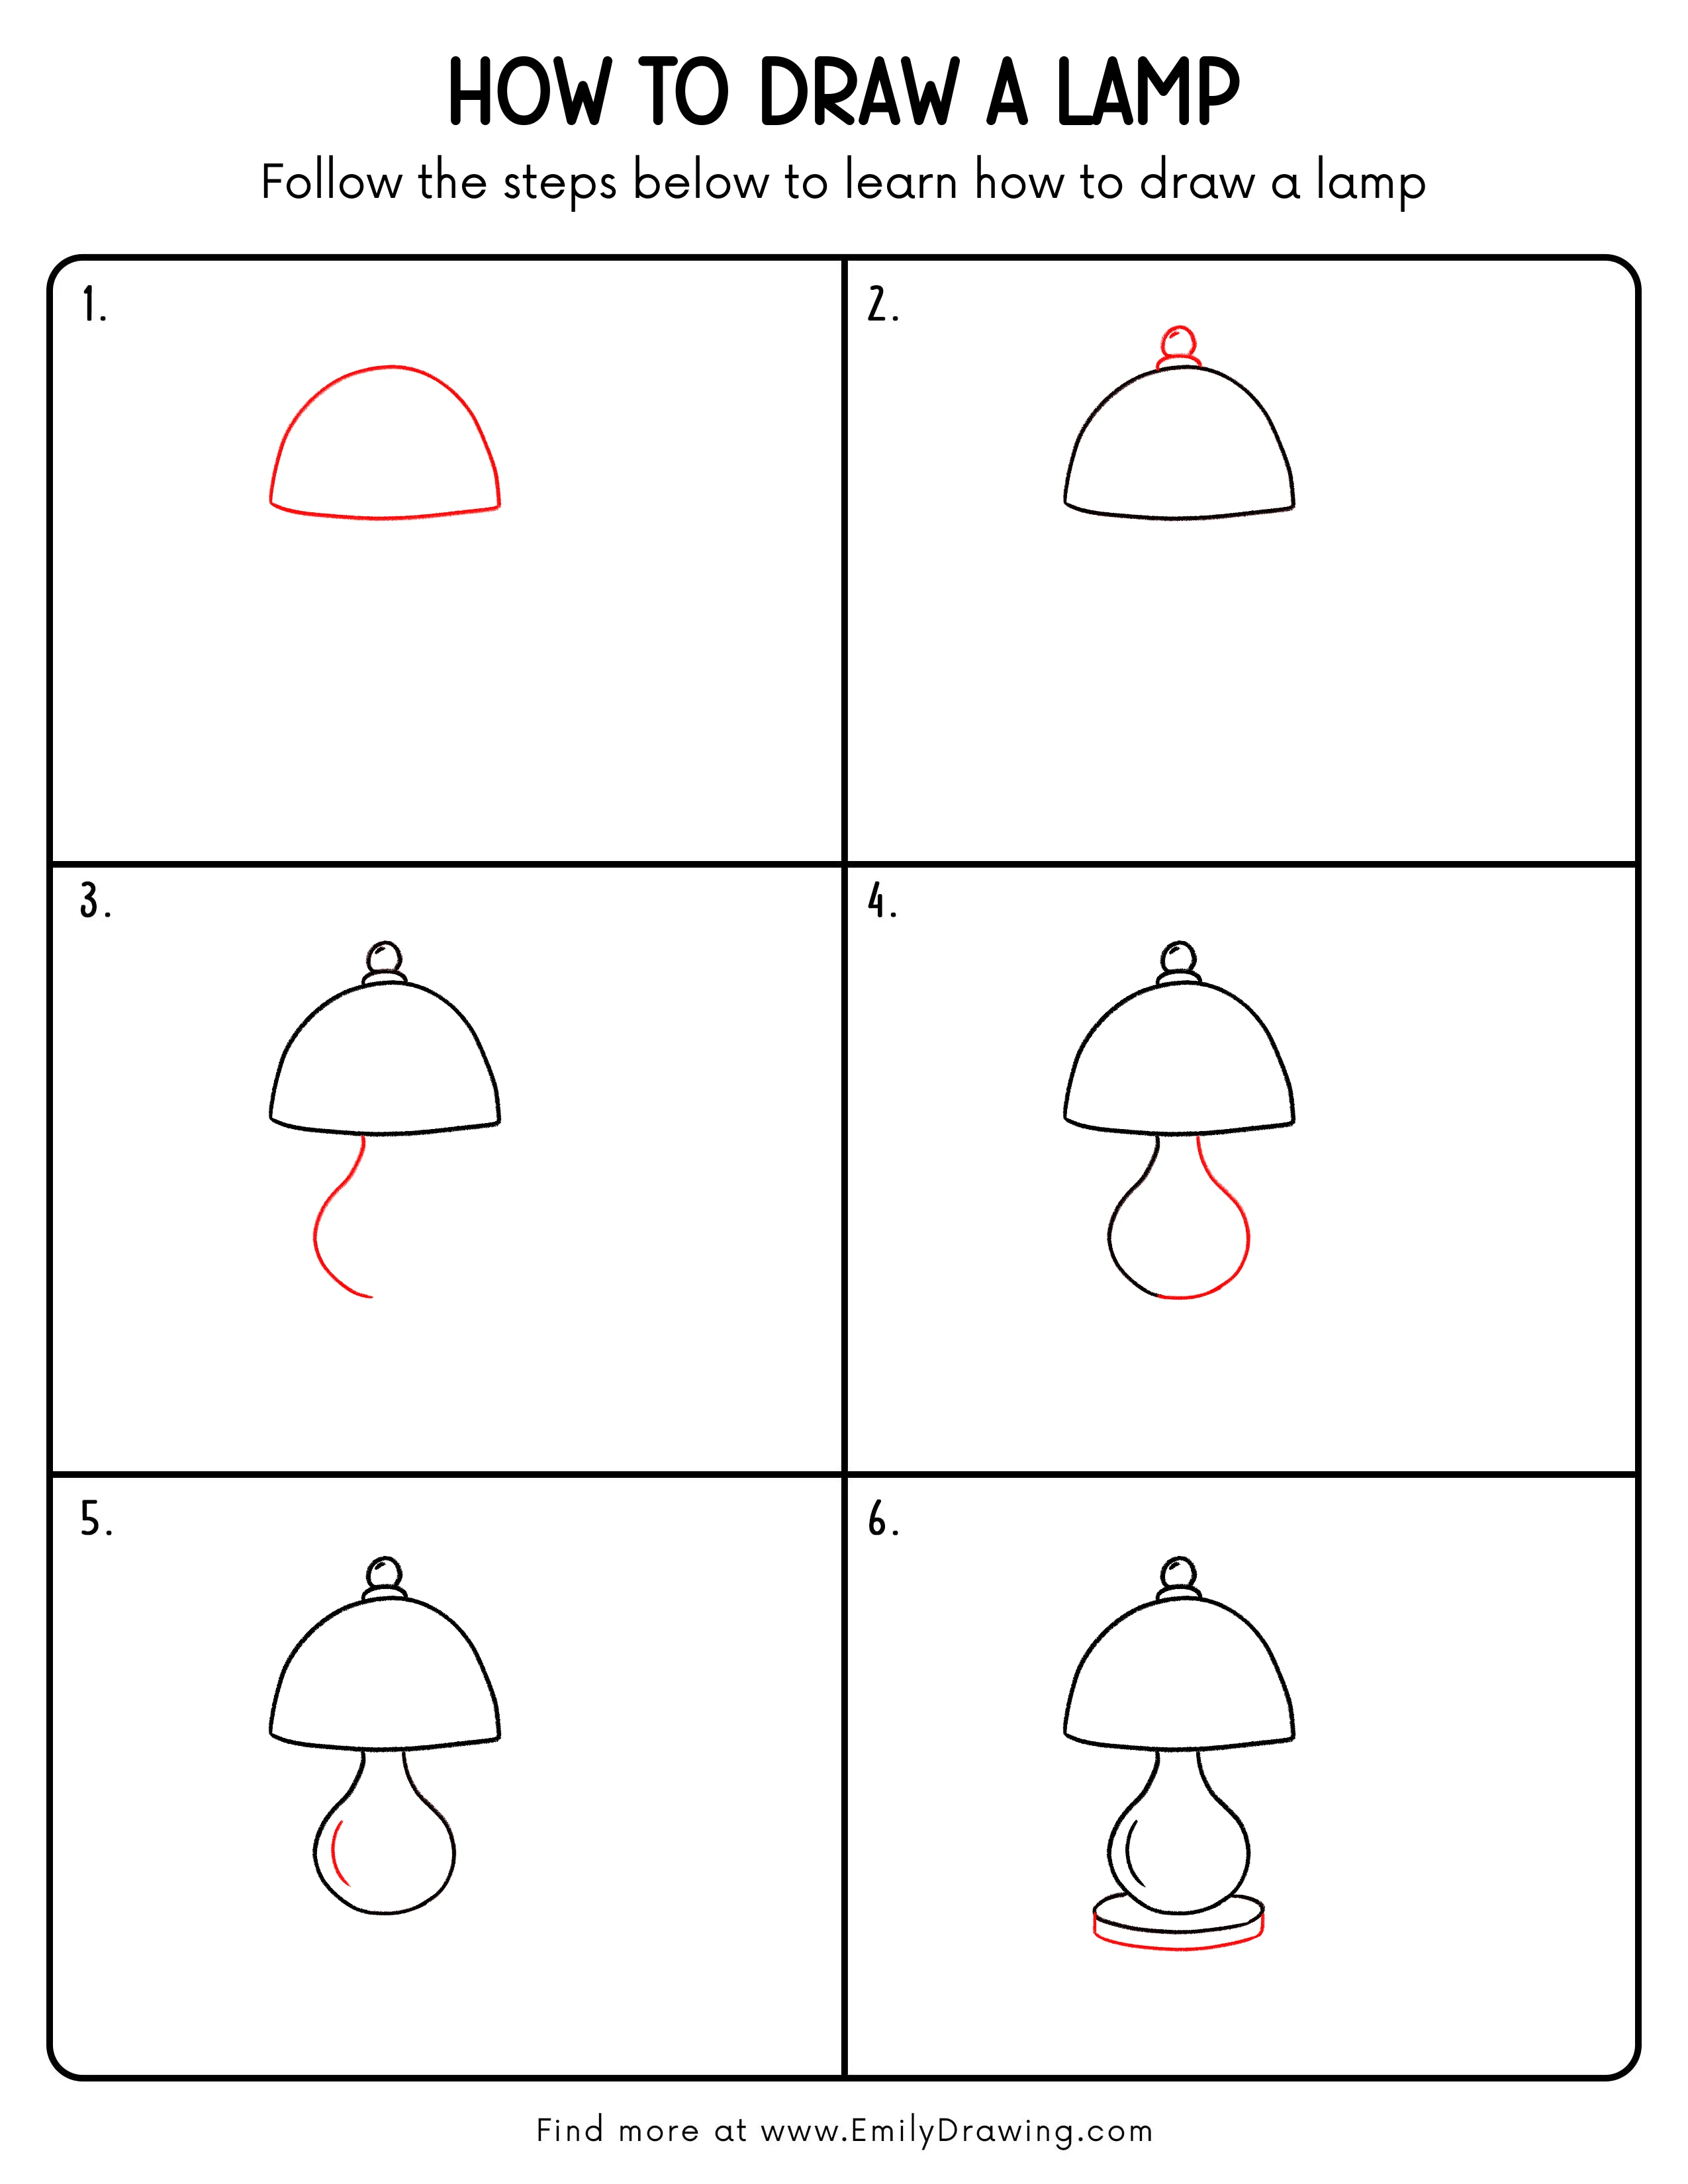
Step 1: Draw the Lampshade Shape
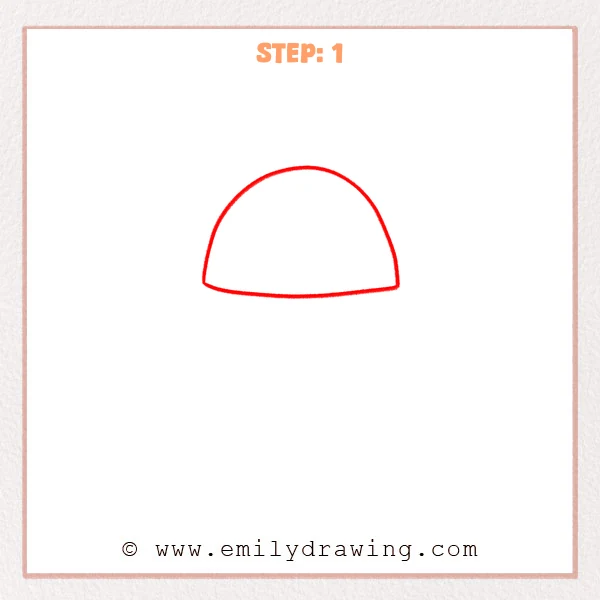
Start with a wide curved arch, like a low half-circle. Then connect both ends with a slightly curved line at the bottom to make the basic lampshade outline. Keep the shape large and simple.
Pro Tip: Try to keep both sides close in height so the lampshade looks balanced.
[Alt Text: A simple beginner drawing of a lamp starts with a rounded lampshade outline.]
Step 2: Add the Top Ring
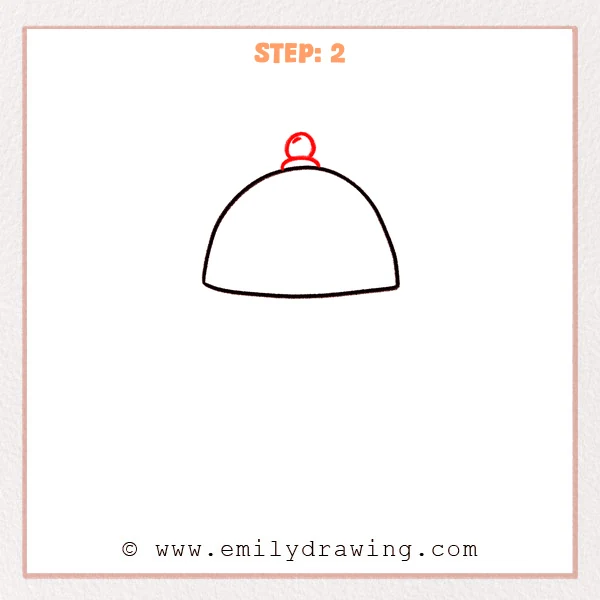
Darken the lampshade outline so the main shape is easier to see. On the top center of the shade, draw a small base and then add a round ring above it. This creates the top detail of the lamp.
Pro Tip: Center the ring above the shade so the lamp feels steady and neat.
[Alt Text: A beginner lamp drawing adds a small top base and round ring above the lampshade.]
Step 3: Draw the Curved Cord

From the middle of the lampshade’s bottom edge, draw a long curved line downward. Let the line bend gently as it moves down. This becomes the hanging cord area of the lamp.
Pro Tip: A soft curve looks more natural than a perfectly straight line.
[Alt Text: A beginner lamp drawing adds one long curved line below the lampshade to begin the hanging section.]
Step 4: Complete the Light Bulb Outline
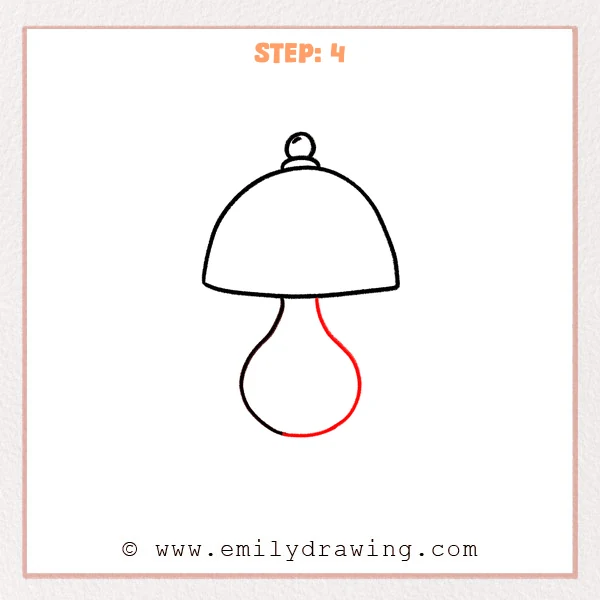
Draw a second curved side next to the first line and connect it at the bottom to form a bulb shape. Make the top narrow and the lower part rounder and wider. The shape should look a little like a hanging drop.
Pro Tip: Make the lower part of the bulb nice and round for a soft, natural look.
[Alt Text: A step by step drawing of a lamp completes the hanging bulb with a rounded teardrop outline.]
Step 5: Add the Bulb Highlight
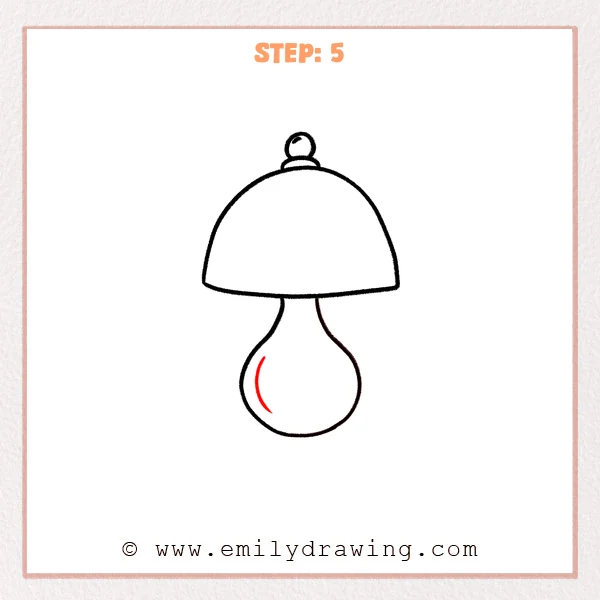
Inside the left side of the bulb, draw a short curved line. This small line shows a reflection on the glass surface. It helps the bulb look shiny and more three-dimensional.
Pro Tip: Keep the highlight short and curve it to match the bulb’s shape.
[Alt Text: An easy lamp drawing adds a small curved highlight inside the bulb to show glass reflection.]
Step 6: Draw the Base
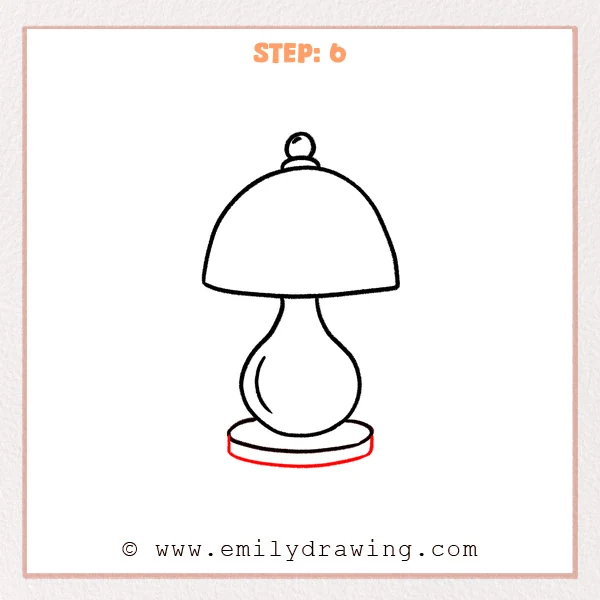
Under the bulb, draw a flat oval base so the lamp can stand firmly. Add a second curved line below the oval to show the thickness of the base. This finishes the lamp drawing in a simple and clear way.
Pro Tip: Make the base a little wider than the bulb so the lamp looks stable.
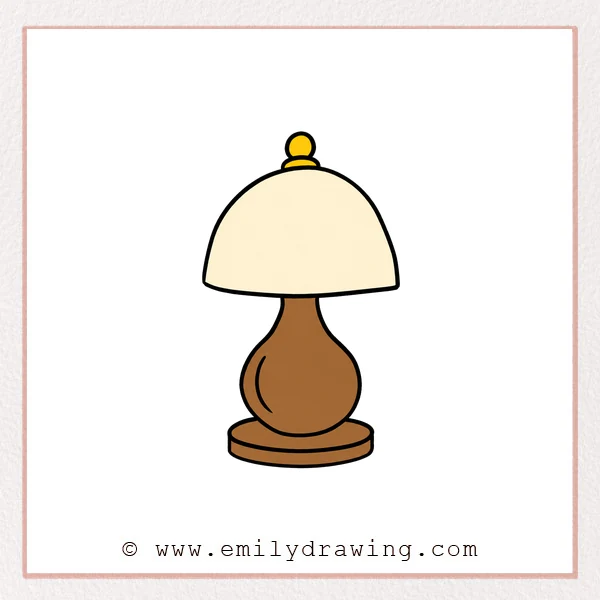
[Alt Text: A completed beginner lamp drawing shows a rounded lampshade, bulb, highlight, and flat oval base.]
Step 7: Color in your drawing!
Fun Facts
- Lamps help us see better when natural light is low.
- Table lamps come in many shapes, sizes, and styles.
- Artists often draw lamps to practice simple shapes and smooth curves.
Pin it now, Draw later!
You have now completed an easy drawing tutorial on how to draw a lamp. You can trace your final lines, erase extra sketch marks, and add color if you like. Keep practicing this step by step drawing lesson, and try drawing more household objects to build your skills.
Get the FREE Printable Drawing Guide
FREE Download Printable Lamp Drawing Tutorial
Frequently Asked Questions
Can beginners learn how to draw a lamp easily?
Yes, this drawing for beginners uses simple curves and basic shapes. It is a great subject for early practice.
What colors can I use for my lamp drawing?
You can use any colors you like. Try a bright lampshade, a soft gray base, or a glowing yellow bulb.
How can I make my lamp drawing look better?
Focus on smooth lines, balanced shapes, and small details like the highlight. Taking your time will make your drawing look cleaner and more polished.