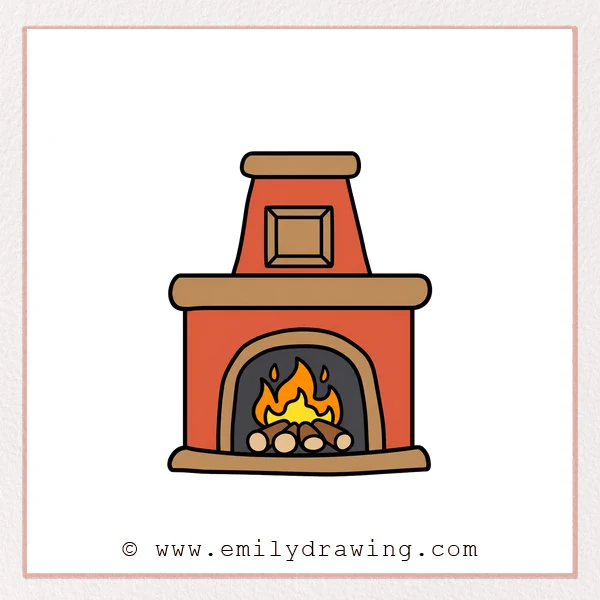
Learn how to draw fireplace shapes with a tall chimney and arched opening. This easy drawing tutorial balances straight edges, rounded trim, and flowing flames.
What You Will Need
- A pencil
- Plain drawing paper
- An eraser
- Colored pencils or crayons, if desired
Here are my RECOMMENDED Art Supplies!
- Crayola Coloring Set (140 Pieces – Mega Value!)
- 24 Colored Crayon Set
- A4 Printer Paper
- Crayola Coloring Pencils
- HP Home Printer with Instant Ink!
Time needed:
19 minutes.
Step-by-Step Drawing Guide
Step 1: Start the Chimney
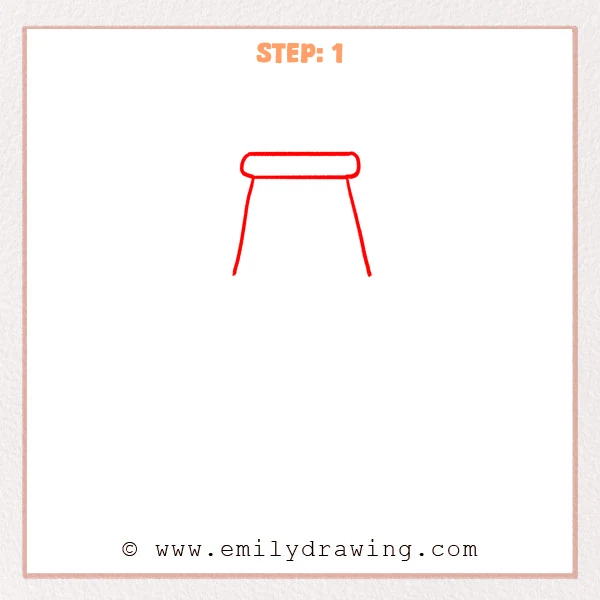
Draw a short, wide rectangle with softly rounded ends. From underneath, draw two sides slanting outward as they descend.
Pro Tip: Keep the chimney cap centered over the widening sides.
Step 2: Add the Chimney Panel
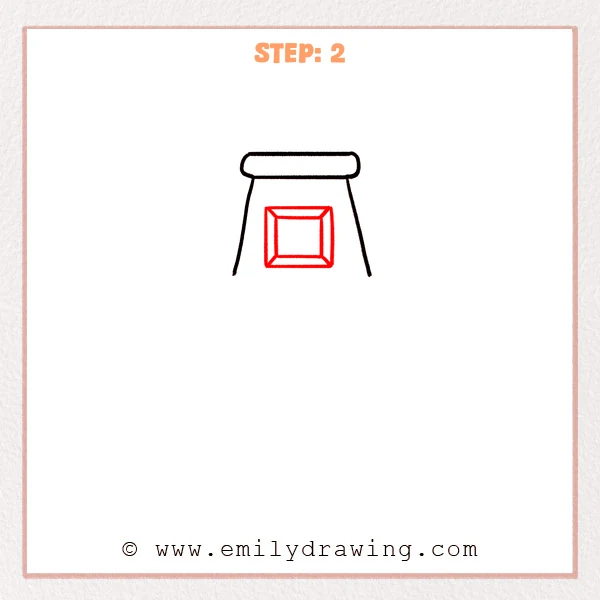
Draw a square panel inside the chimney’s lower area. Add a smaller square within it and connect their corners diagonally.
Pro Tip: Leave similar spaces between the inner and outer square edges.
Step 3: Draw the Mantel Shelf
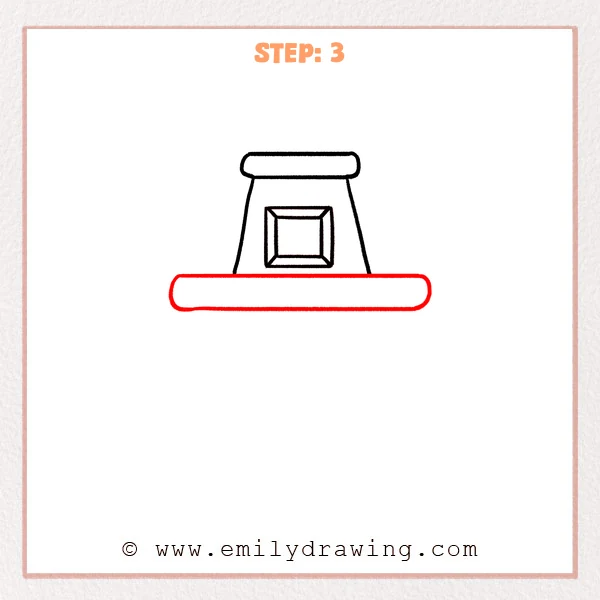
Draw a long, shallow rounded rectangle across the chimney’s bottom. Extend both ends well beyond the chimney’s sloping sides.
Pro Tip: Balance the shelf’s overhang on the left and right.
Step 4: Outline the Arched Opening
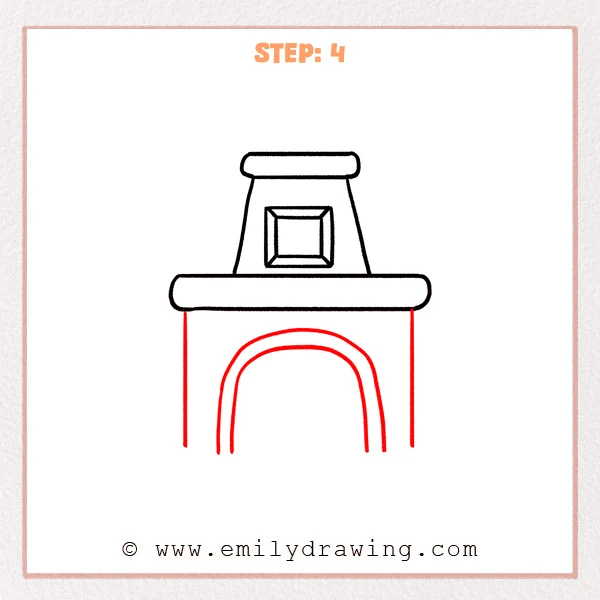
Extend two straight outer sides downward beneath the mantel. Between them, draw two nested arches with long upright lower sides.
Pro Tip: Keep the inner arch centered inside the outer arch.
Step 5: Add the Hearth Base
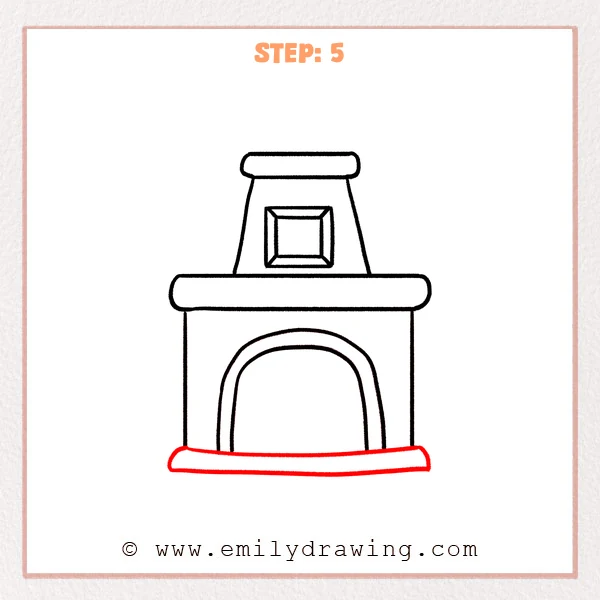
Draw a wide, shallow base beneath the fireplace’s lower edges. Use gently curved horizontal lines and short sloping ends to close it.
Pro Tip: Make the hearth slightly wider than the lower fireplace walls.
Step 6: Draw Logs and Flames
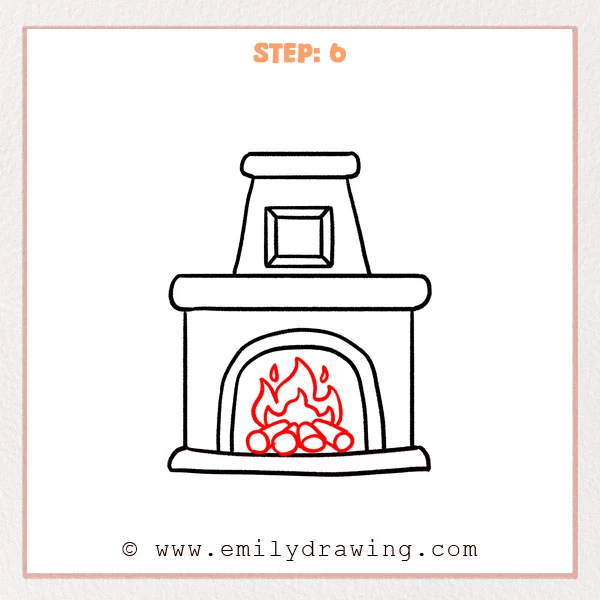
Inside the opening, arrange four overlapping logs with rounded front ends. Draw a large pointed flame and a smaller flame outline above them. Add two small teardrop sparks beside the highest flame tip.
Pro Tip: Keep the flames and logs inside the inner arch.
Step 7: Color in your drawing!
Fun Facts
- Nested arches give this fireplace drawing a thick-looking border around the opening.
- Rounded log ends contrast with the fireplace’s straight chimney edges.
Pin it now, Draw later!
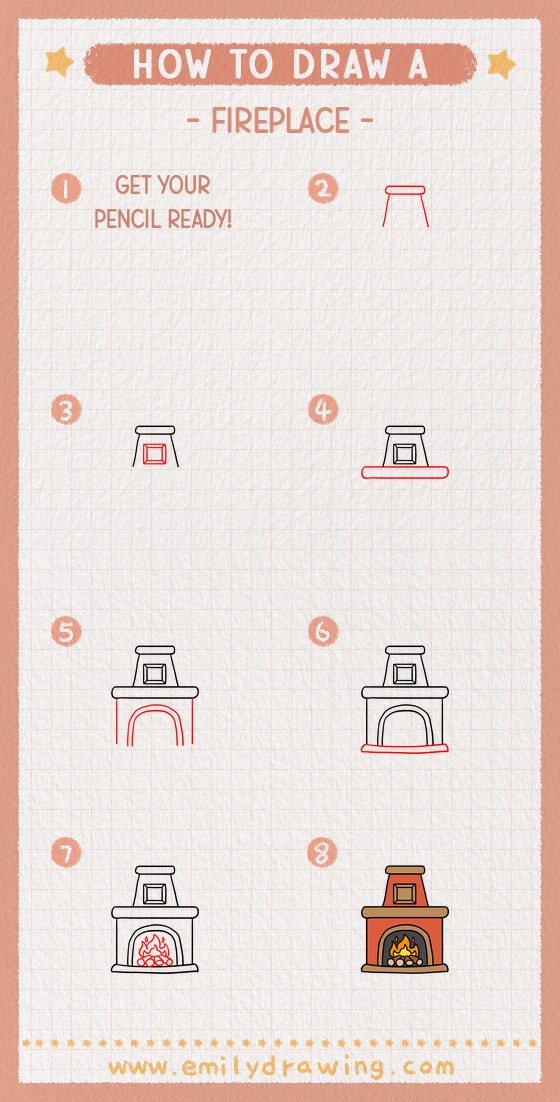
Your fireplace step by step drawing now has a chimney, mantel, hearth, and fire. Check the spacing around the arch and tidy the log overlaps. Add cozy colors if you like, and enjoy practicing another fireplace drawing for beginners.
Get the FREE Printable Drawing Guide
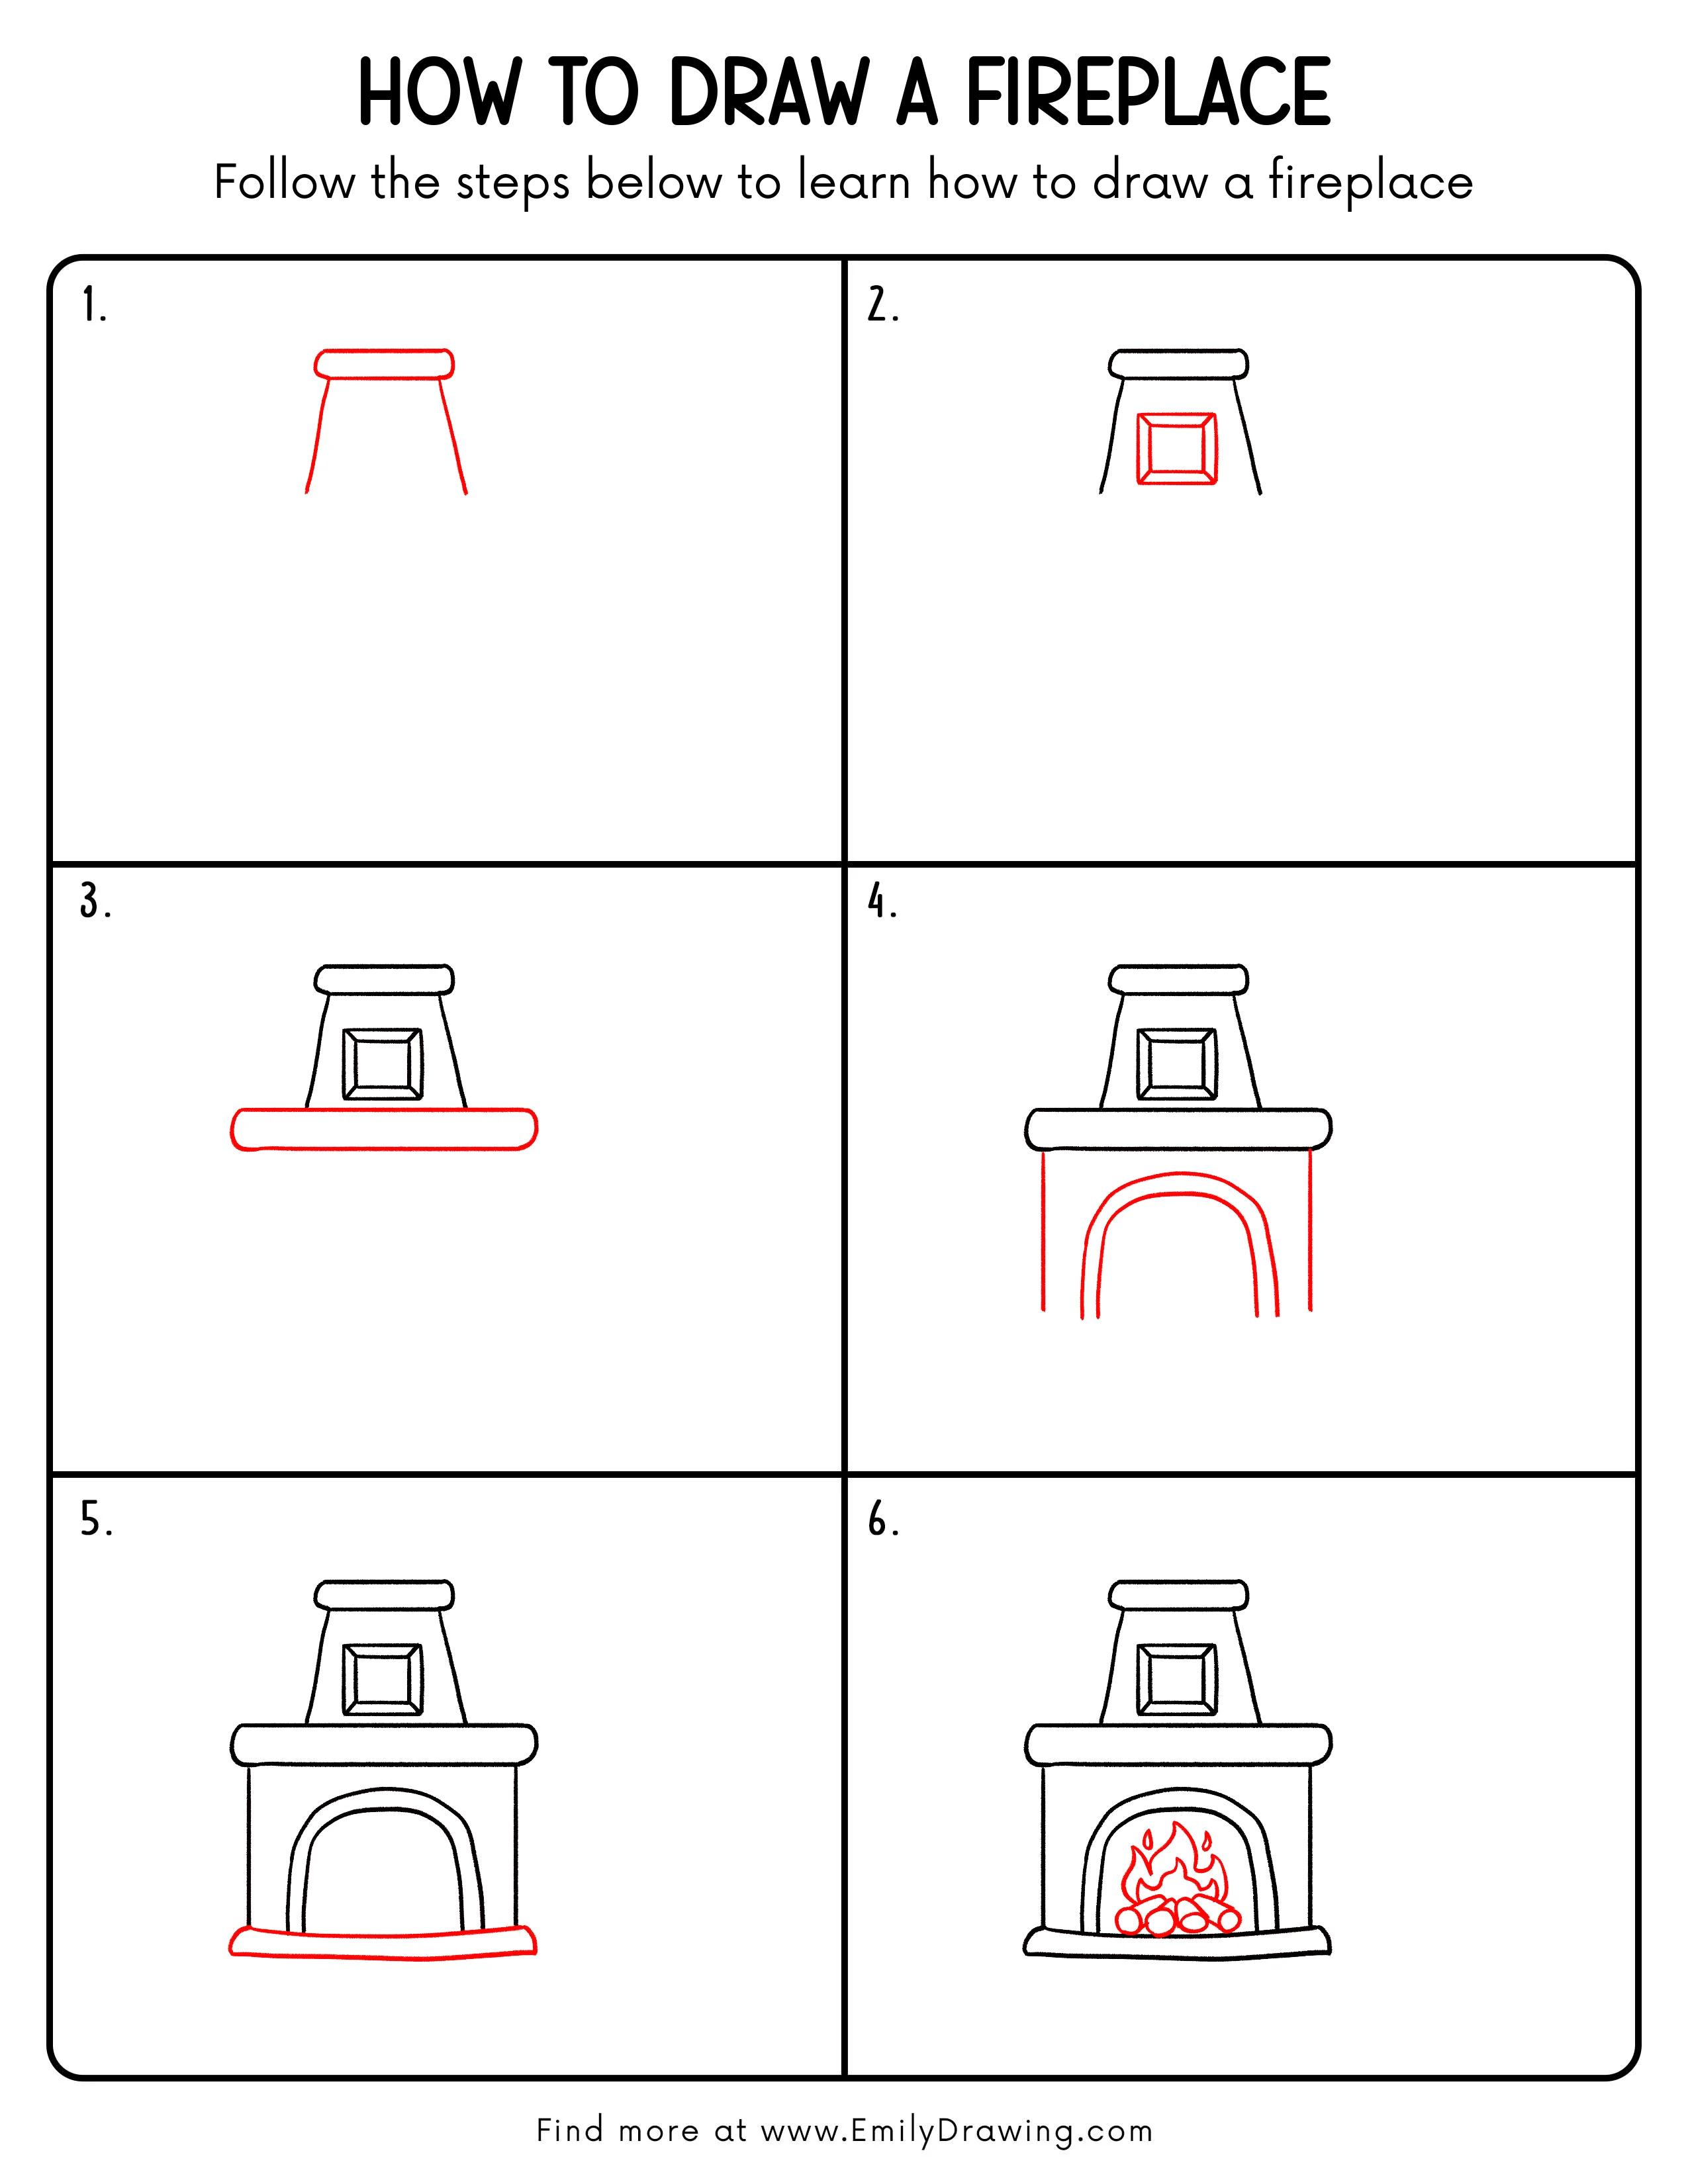
FREE Download Printable Fireplace Drawing Tutorial
Frequently Asked Questions
How can I center the fireplace opening?
Lightly mark the mantel’s midpoint and place the arch’s highest point beneath it.
How do I show overlapping fireplace logs?
Keep each front end visible and stop hidden log edges where another log crosses.