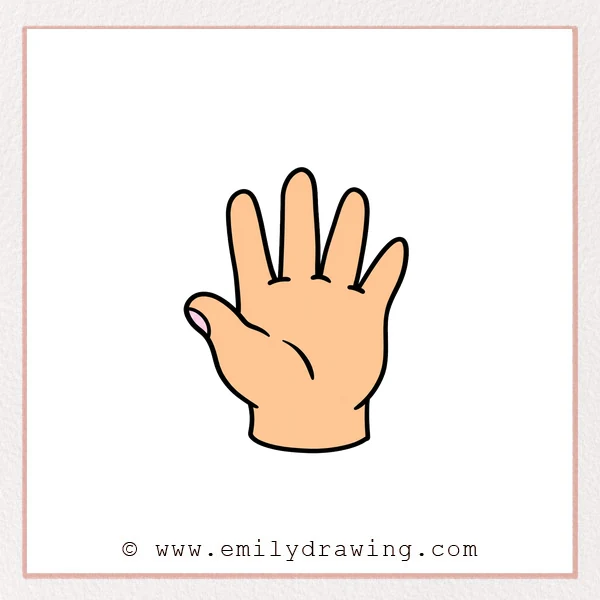
Learn how to draw fingers with rounded tips and gently spreading outlines. This easy drawing tutorial adds each finger separately around a simple palm.
What You Will Need
- A pencil
- Plain drawing paper
- An eraser
- Colored pencils or crayons, if desired
Here are my RECOMMENDED Art Supplies!
- Crayola Coloring Set (140 Pieces – Mega Value!)
- 24 Colored Crayon Set
- A4 Printer Paper
- Crayola Coloring Pencils
- HP Home Printer with Instant Ink!
Time needed:
11 minutes.
Step-by-Step Drawing Guide
Step 1: Start with the Thumb
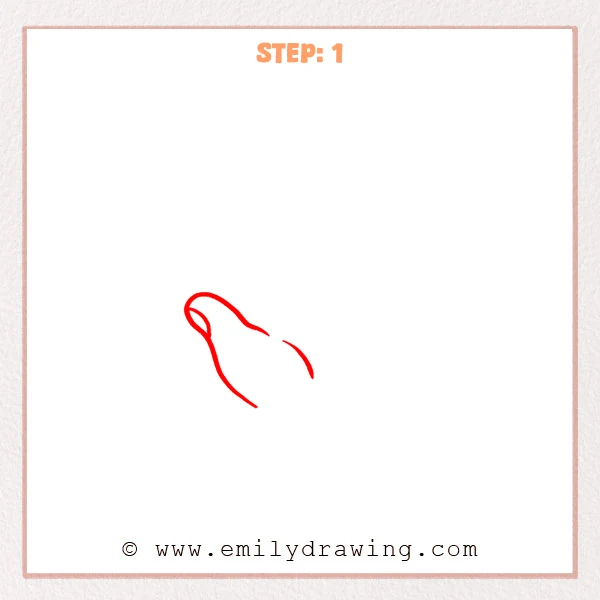
Draw a rounded thumb leaning toward the upper left. Continue its lower edge into the palm and add a curved thumbnail. Place a separate curved crease inside the palm, leaving a small gap.
Pro Tip: Keep the thumb broad and noticeably shorter than the fingers.
Step 2: Draw the Index Finger
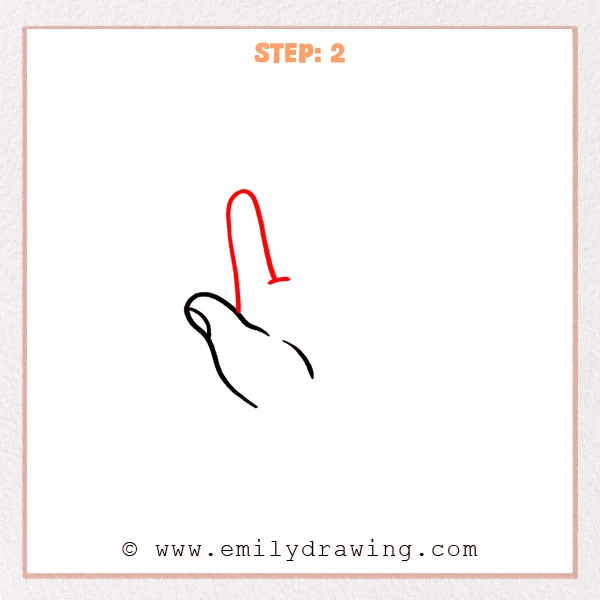
Draw a tall, narrow arch rising beside the thumb. Bring its right edge down and add a short curved base crease.
Pro Tip: Round the fingertip instead of making a sharp corner.
Step 3: Add the Middle Finger
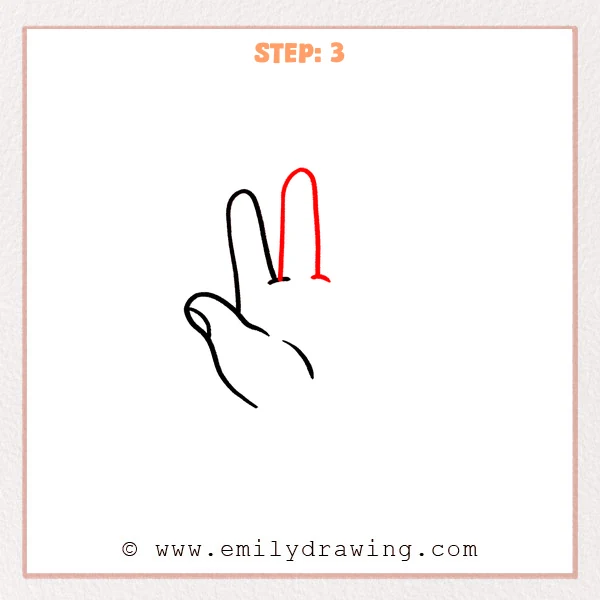
Draw another long, rounded finger beside the index finger. Make it slightly taller and finish with a small base crease.
Pro Tip: Leave a narrow valley between the two finger outlines.
Step 4: Shape the Ring Finger
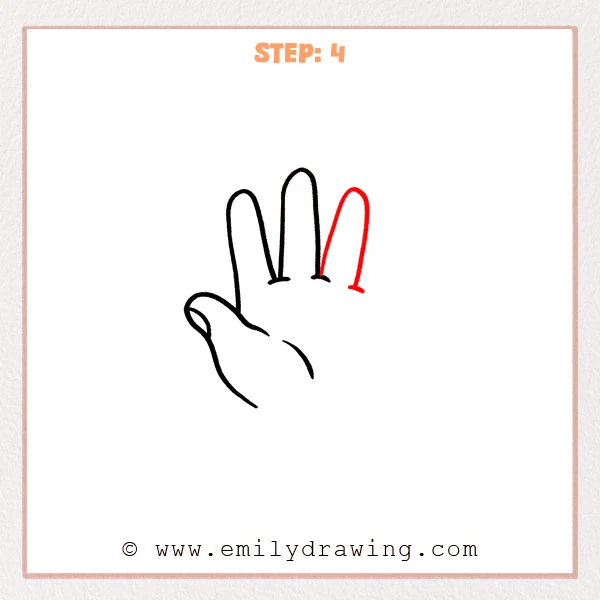
Add a rounded ring finger to the middle finger’s right. Tilt it slightly outward and mark its base with a short curve.
Pro Tip: Keep this fingertip a little lower than the middle fingertip.
Step 5: Complete the Little Finger and Palm
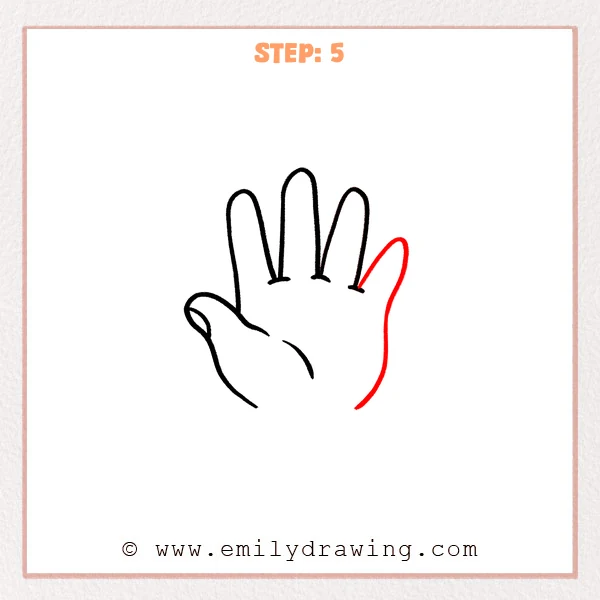
Draw a shorter little finger spreading outward on the right. Continue its outer edge downward to form the palm’s right side.
Pro Tip: Let the outer palm narrow gently as it approaches the wrist.
Step 6: Outline the Wrist
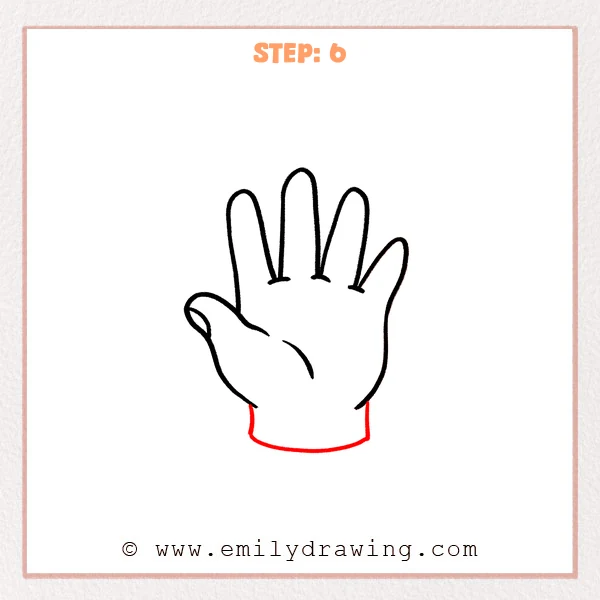
Extend a short line downward from each lower palm edge. Join these lines with a broad, gently curved wrist base.
Pro Tip: Keep the wrist narrower than the widest part of the palm.
Step 7: Color in your drawing!
Fun Facts
- Different fingertip heights help this fingers drawing look more natural.
- Small valleys between the fingers make each rounded shape easier to recognize.
Pin it now, Draw later!
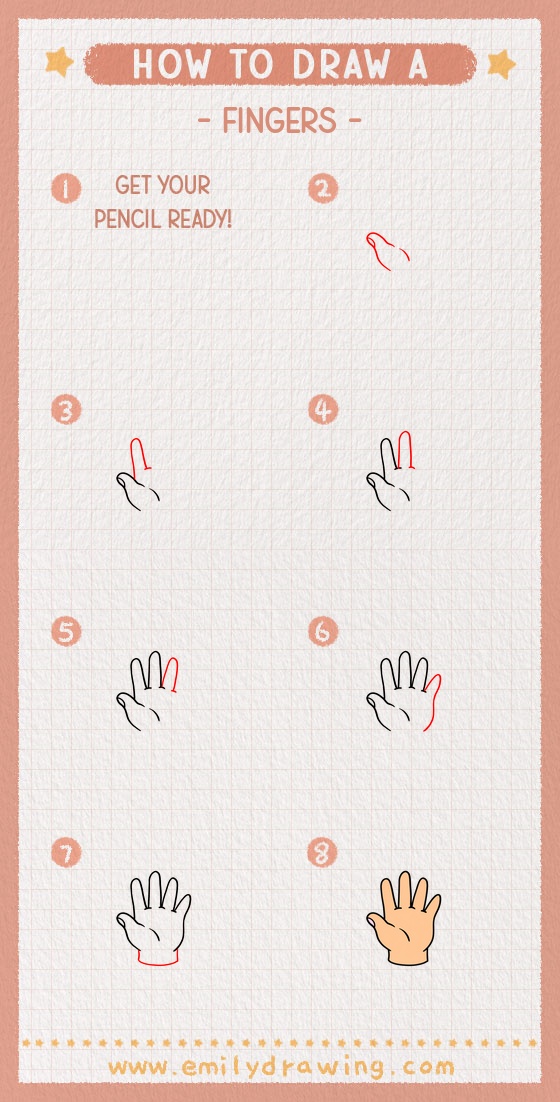
Your fingers step by step drawing now shows an open hand with a wrist. Review the spaces between the fingers and soften any uneven curves. Enjoy this drawing for beginners, and try sketching your own fingers next.
Get the FREE Printable Drawing Guide
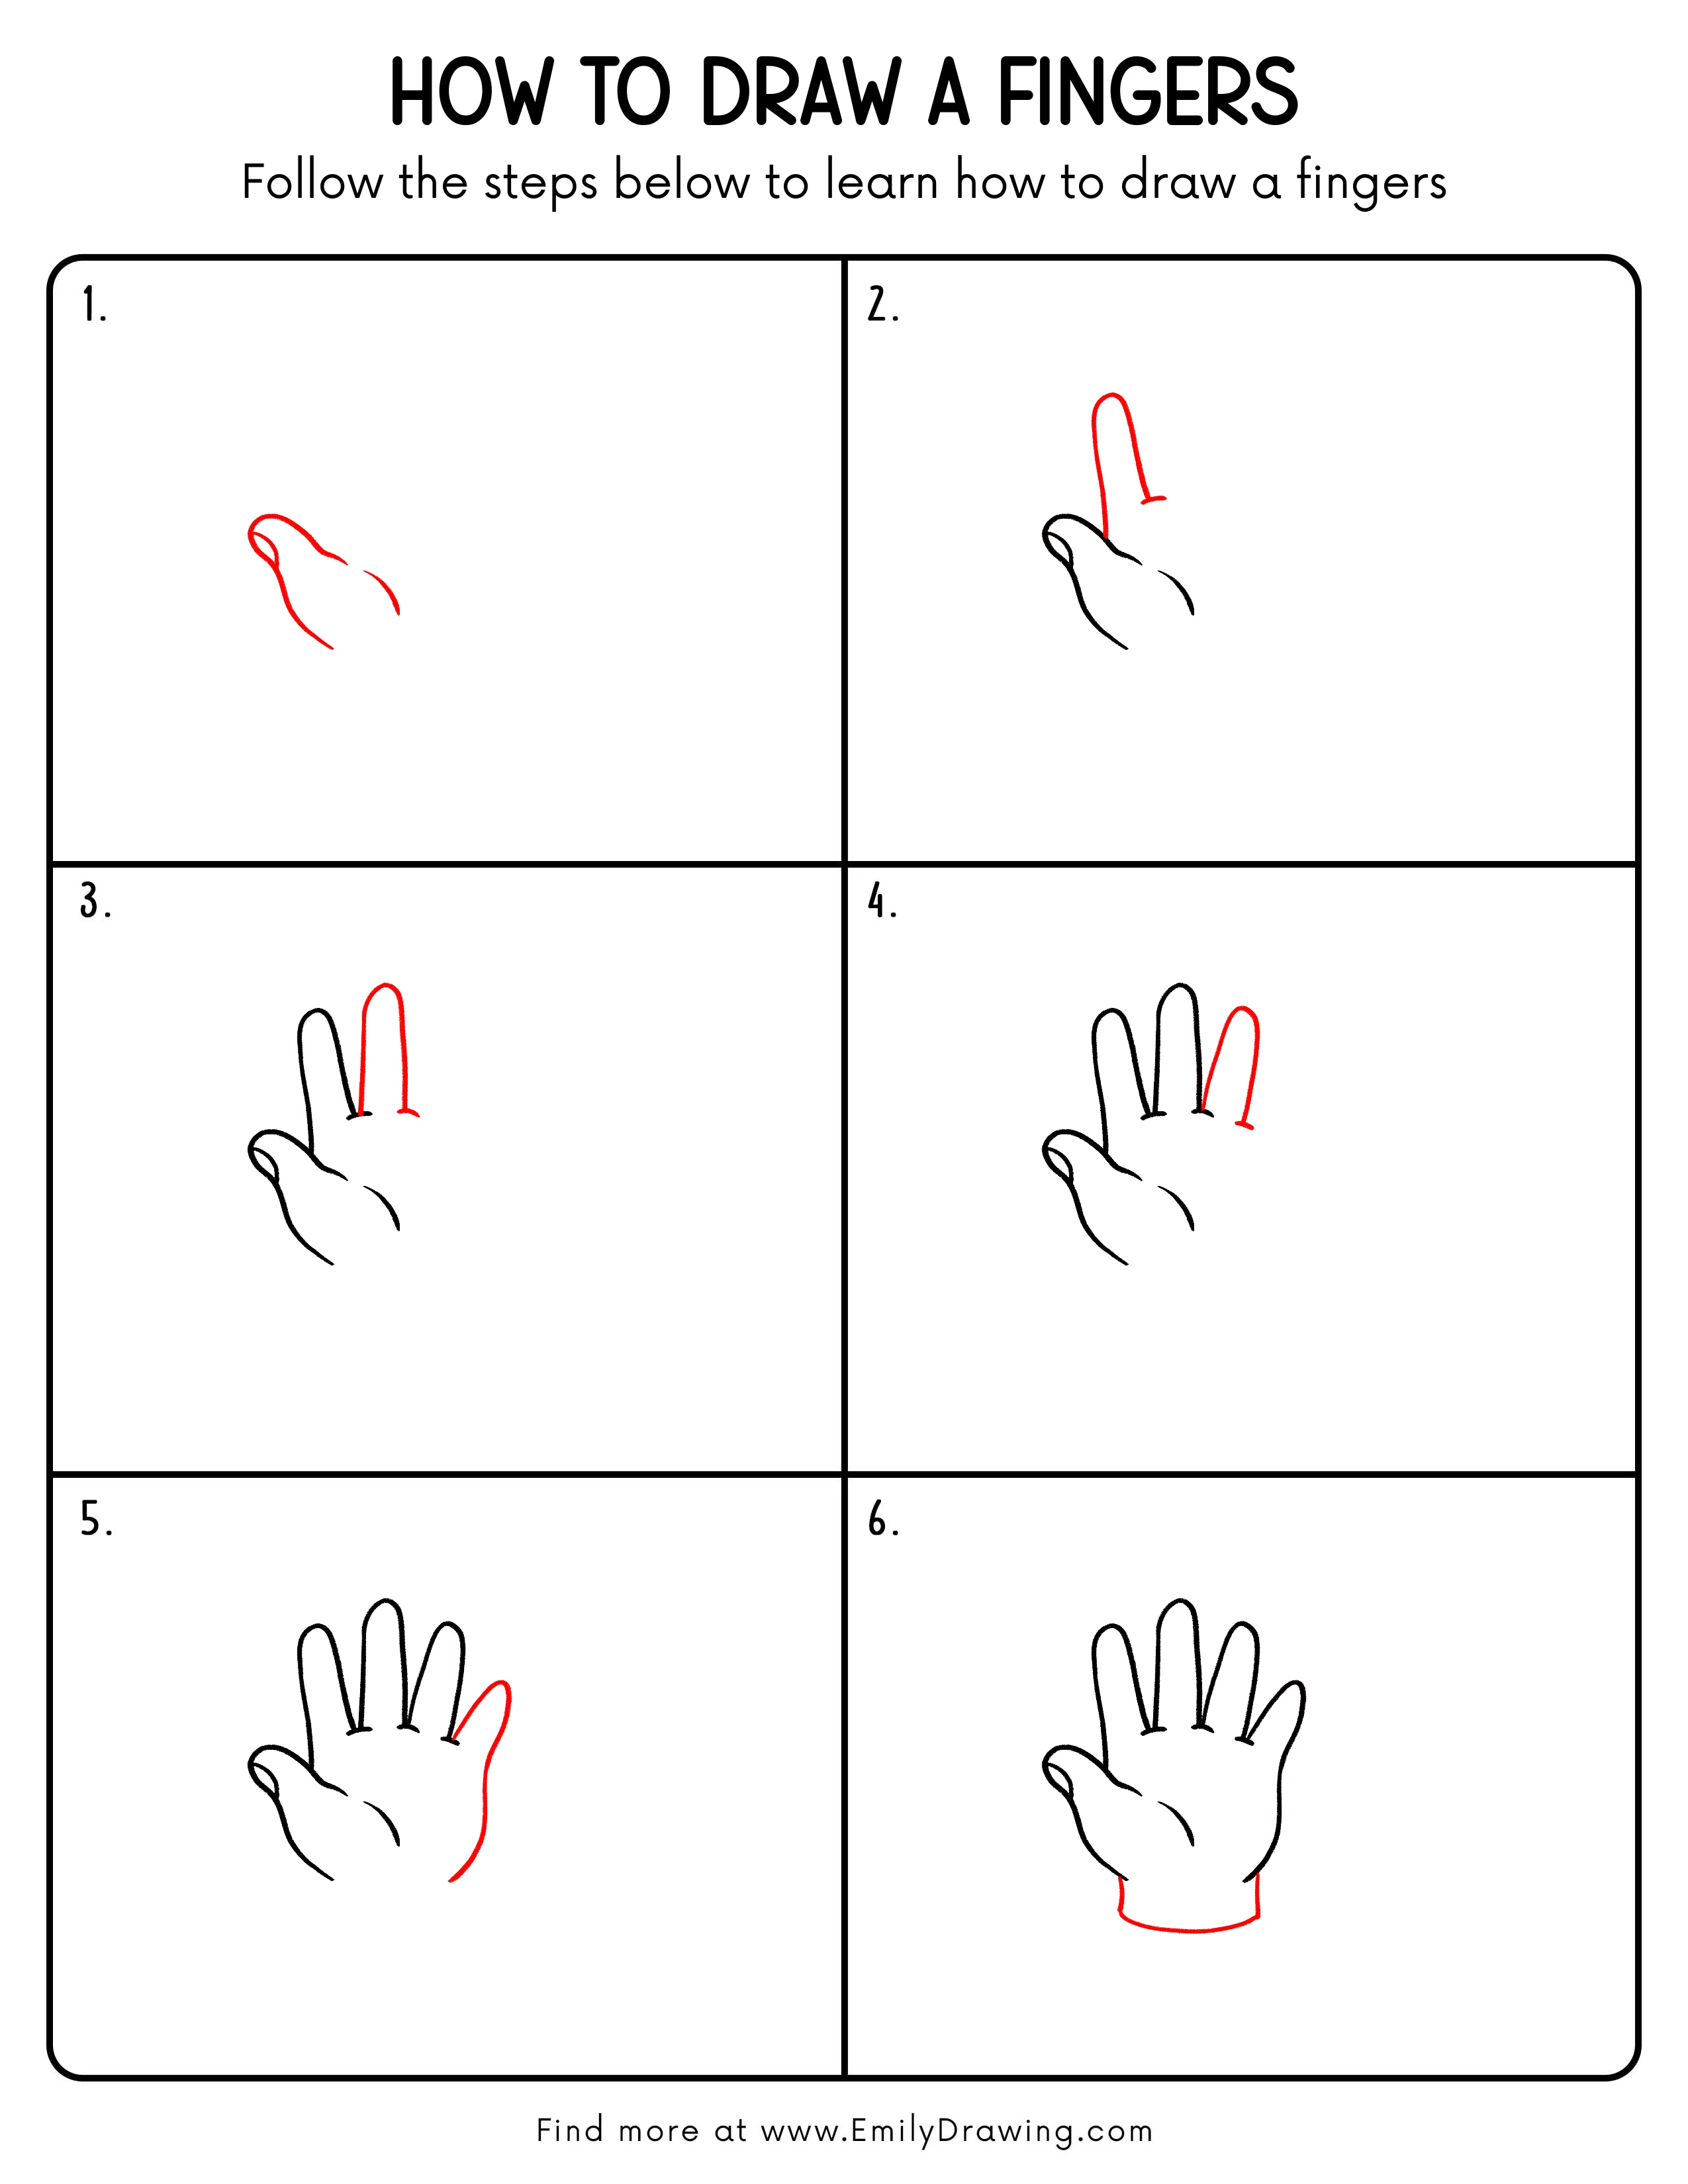
FREE Download Printable Fingers Drawing Tutorial
Frequently Asked Questions
How can I avoid making every finger the same length?
Use the middle finger as the tallest reference, then lower the surrounding fingertips.
How can I make fingers look less stiff?
Use gently curved sides and rounded tips, allowing the fingers to spread slightly.