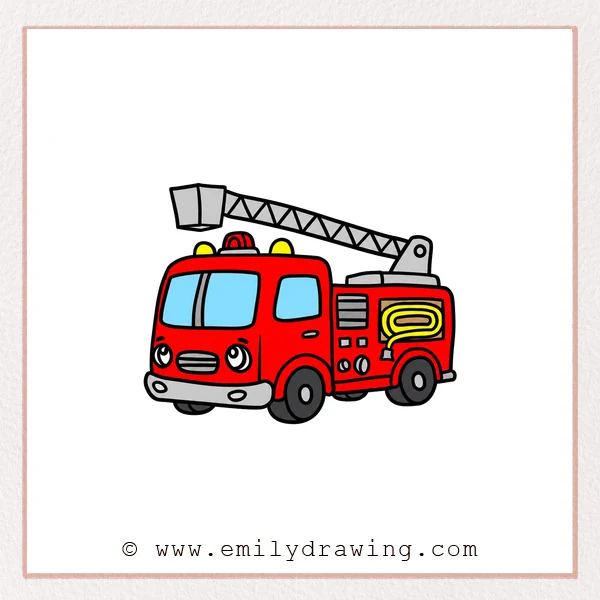
Learn how to draw fire truck shapes with a raised ladder and coiled hose. This easy drawing tutorial uses rounded rectangles, ovals, and repeating triangles.
What You Will Need
- A pencil
- Plain drawing paper
- An eraser
- Colored pencils or crayons, if desired
Here are my RECOMMENDED Art Supplies!
- Crayola Coloring Set (140 Pieces – Mega Value!)
- 24 Colored Crayon Set
- A4 Printer Paper
- Crayola Coloring Pencils
- HP Home Printer with Instant Ink!
Time needed:
21 minutes.
Step-by-Step Drawing Guide
Step 1: Draw the Raised Ladder
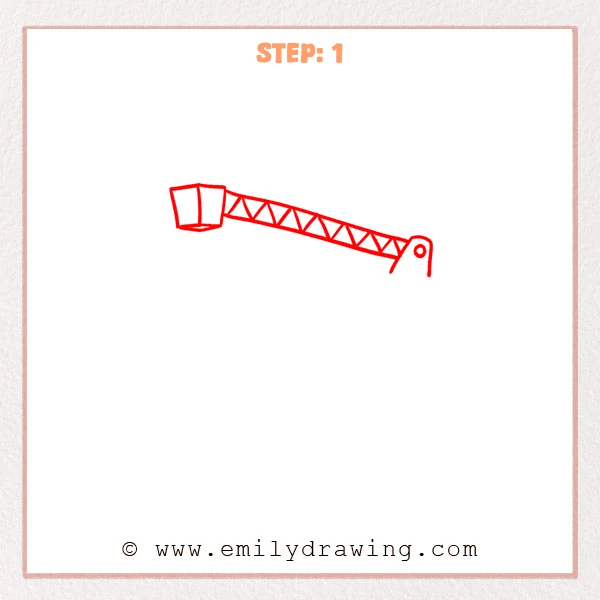
Draw a long, narrow ladder slanting upward toward the left. Fill it with zigzag braces and add a box-shaped basket at the tip. Finish the right end with a rounded support and circular pivot.
Pro Tip: Keep the ladder’s long edges nearly parallel.
Step 2: Outline the Upper Cab
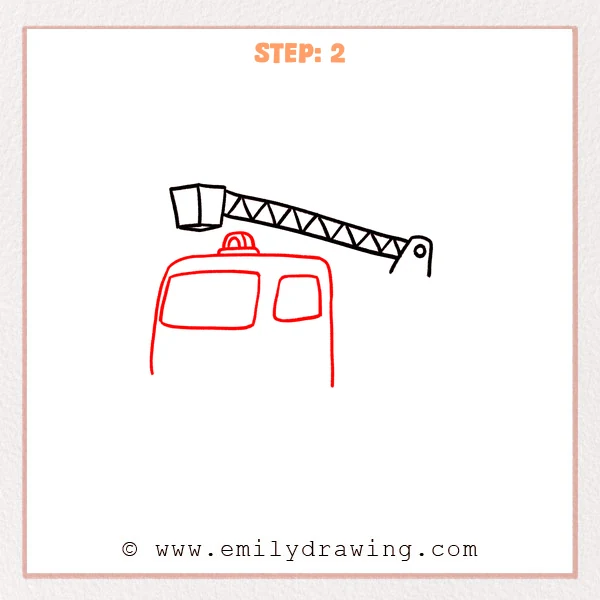
Below the basket, outline the cab’s rounded roof and long sides. Add a wide front windshield and a smaller side window. Draw a domed beacon with inner curved details on the roof.
Pro Tip: Leave the cab’s bottom open for its bumper and wheels.
Step 3: Add the Cab Base and Wheels
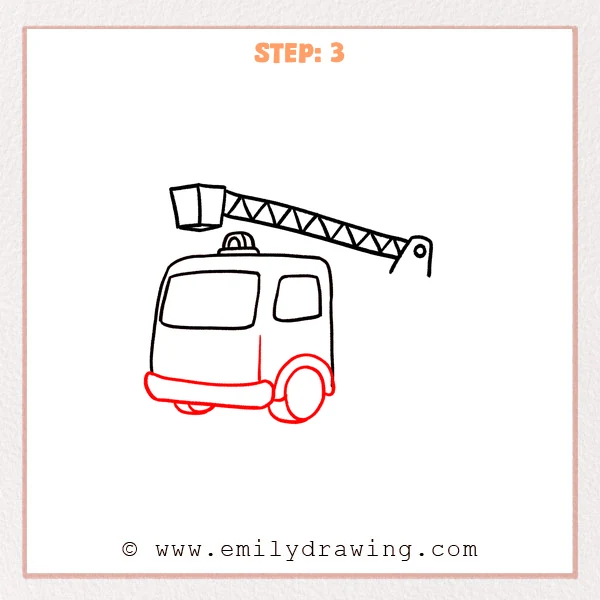
Draw a long, rounded bumper across the cab’s bottom. Add the door seam, near wheel arch, and large oval wheel. Show a small partial wheel beneath the bumper on the left.
Pro Tip: Use a second curved edge to suggest the near tire’s thickness.
Step 4: Build the Rear Body
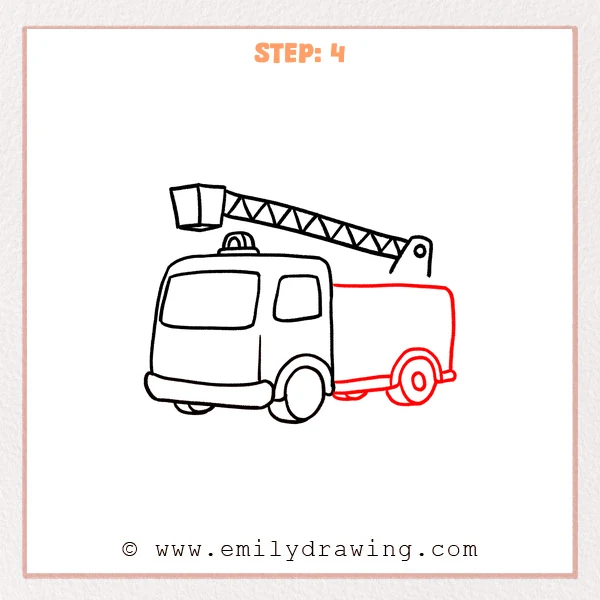
Extend a long rectangular body behind the cab with rounded rear corners. Add the lower rail, rear wheel arch, and oval wheel with a hub. Show a small partial far wheel underneath the body.
Pro Tip: Keep the rear body’s roof lower than the cab roof.
Step 5: Add the Coiled Hose
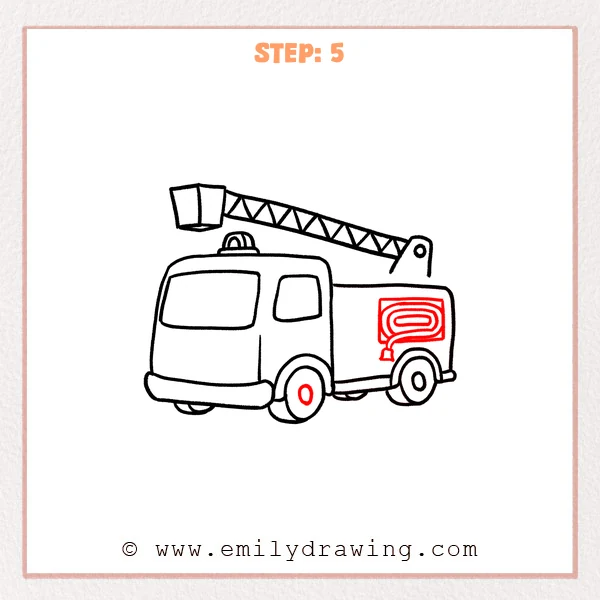
Draw a rectangular hose compartment above the rear wheel. Inside, make nested rounded loops, then extend the hose downward into a flared nozzle. Add a small oval hub inside the front wheel.
Pro Tip: Leave clear spaces between the hose loops.
Step 6: Detail the Equipment Panel
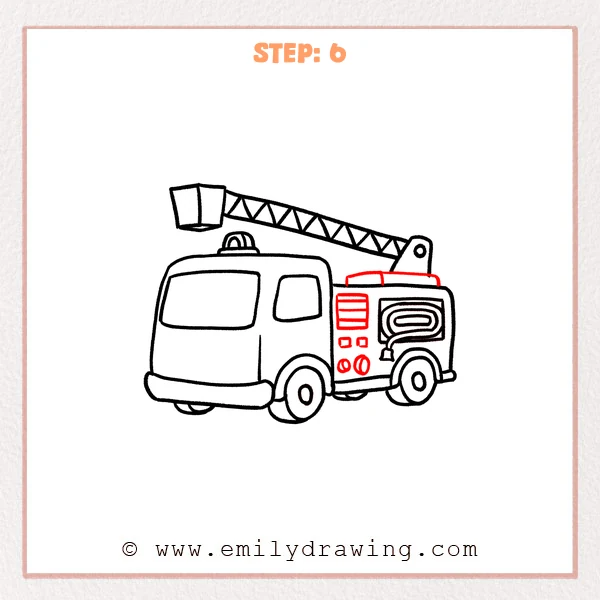
Add a low, divided platform beneath the ladder support. Beside the hose, draw a rectangular panel with horizontal stripes. Place two small squares and two round fittings underneath.
Pro Tip: Stack the equipment details in neat rows beside the hose.
Step 7: Divide the Windshield and Add Lights
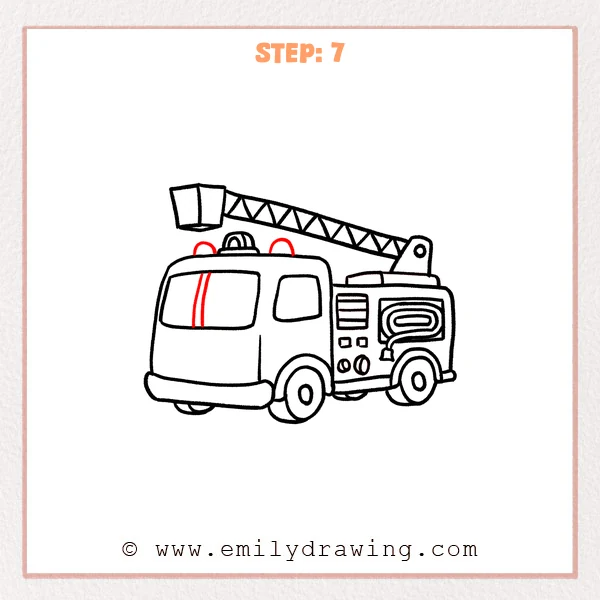
Draw two close vertical curves through the front windshield. Add a small domed roof light on each side of the central beacon.
Pro Tip: Curve the windshield divider slightly to follow the cab’s shape.
Step 8: Add the Friendly Front Details
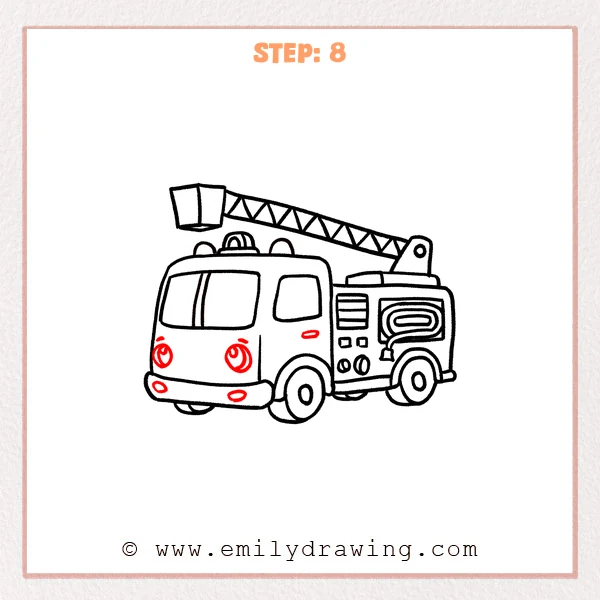
Draw two round eyes below the windshield, with inner curves and highlights. Add short eyebrows above them and two oval lights on the bumper. Place a small rounded door handle beneath the side window.
Pro Tip: Keep space between the eyes for the final grille.
Step 9: Finish the Grille
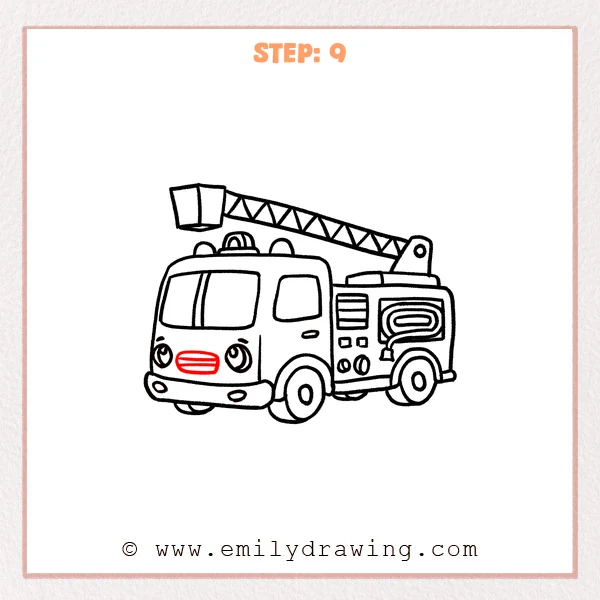
Draw a wide, rounded grille between the fire truck’s eyes. Add two horizontal bars inside to divide its opening.
Pro Tip: Center the grille below the windshield divider.
Step 10: Color in your drawing!
Fun Facts
- Repeating triangles give the raised fire truck ladder a clear structural pattern.
- The coiled hose uses nested curves that echo the truck’s rounded wheels.
Pin it now, Draw later!
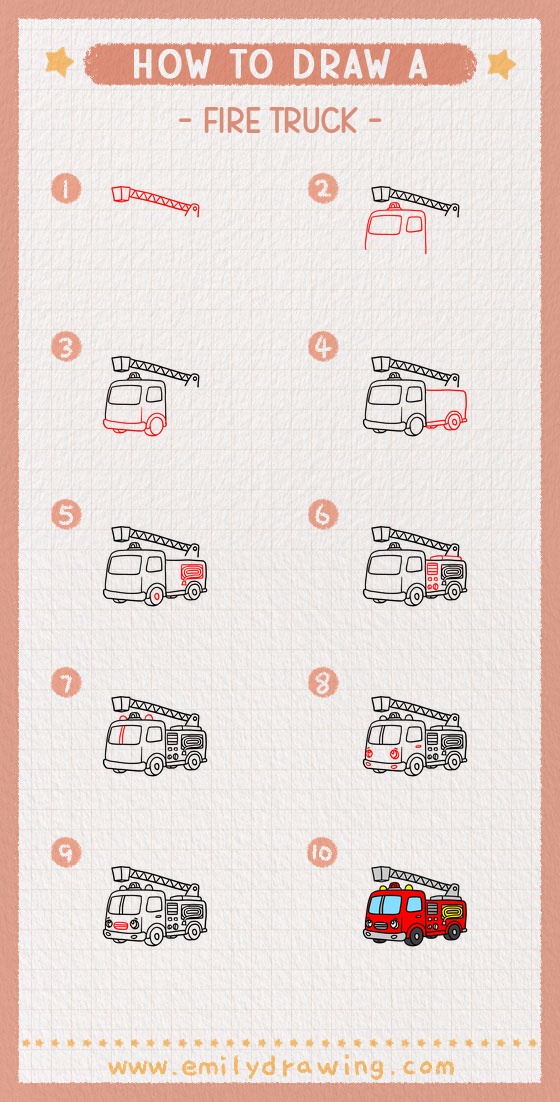
Your fire truck step by step drawing now includes a ladder, hose, and friendly front. Check the small equipment shapes and tidy any stray lines. Add color if you wish, and enjoy another fire truck drawing for beginners soon.
Get the FREE Printable Drawing Guide
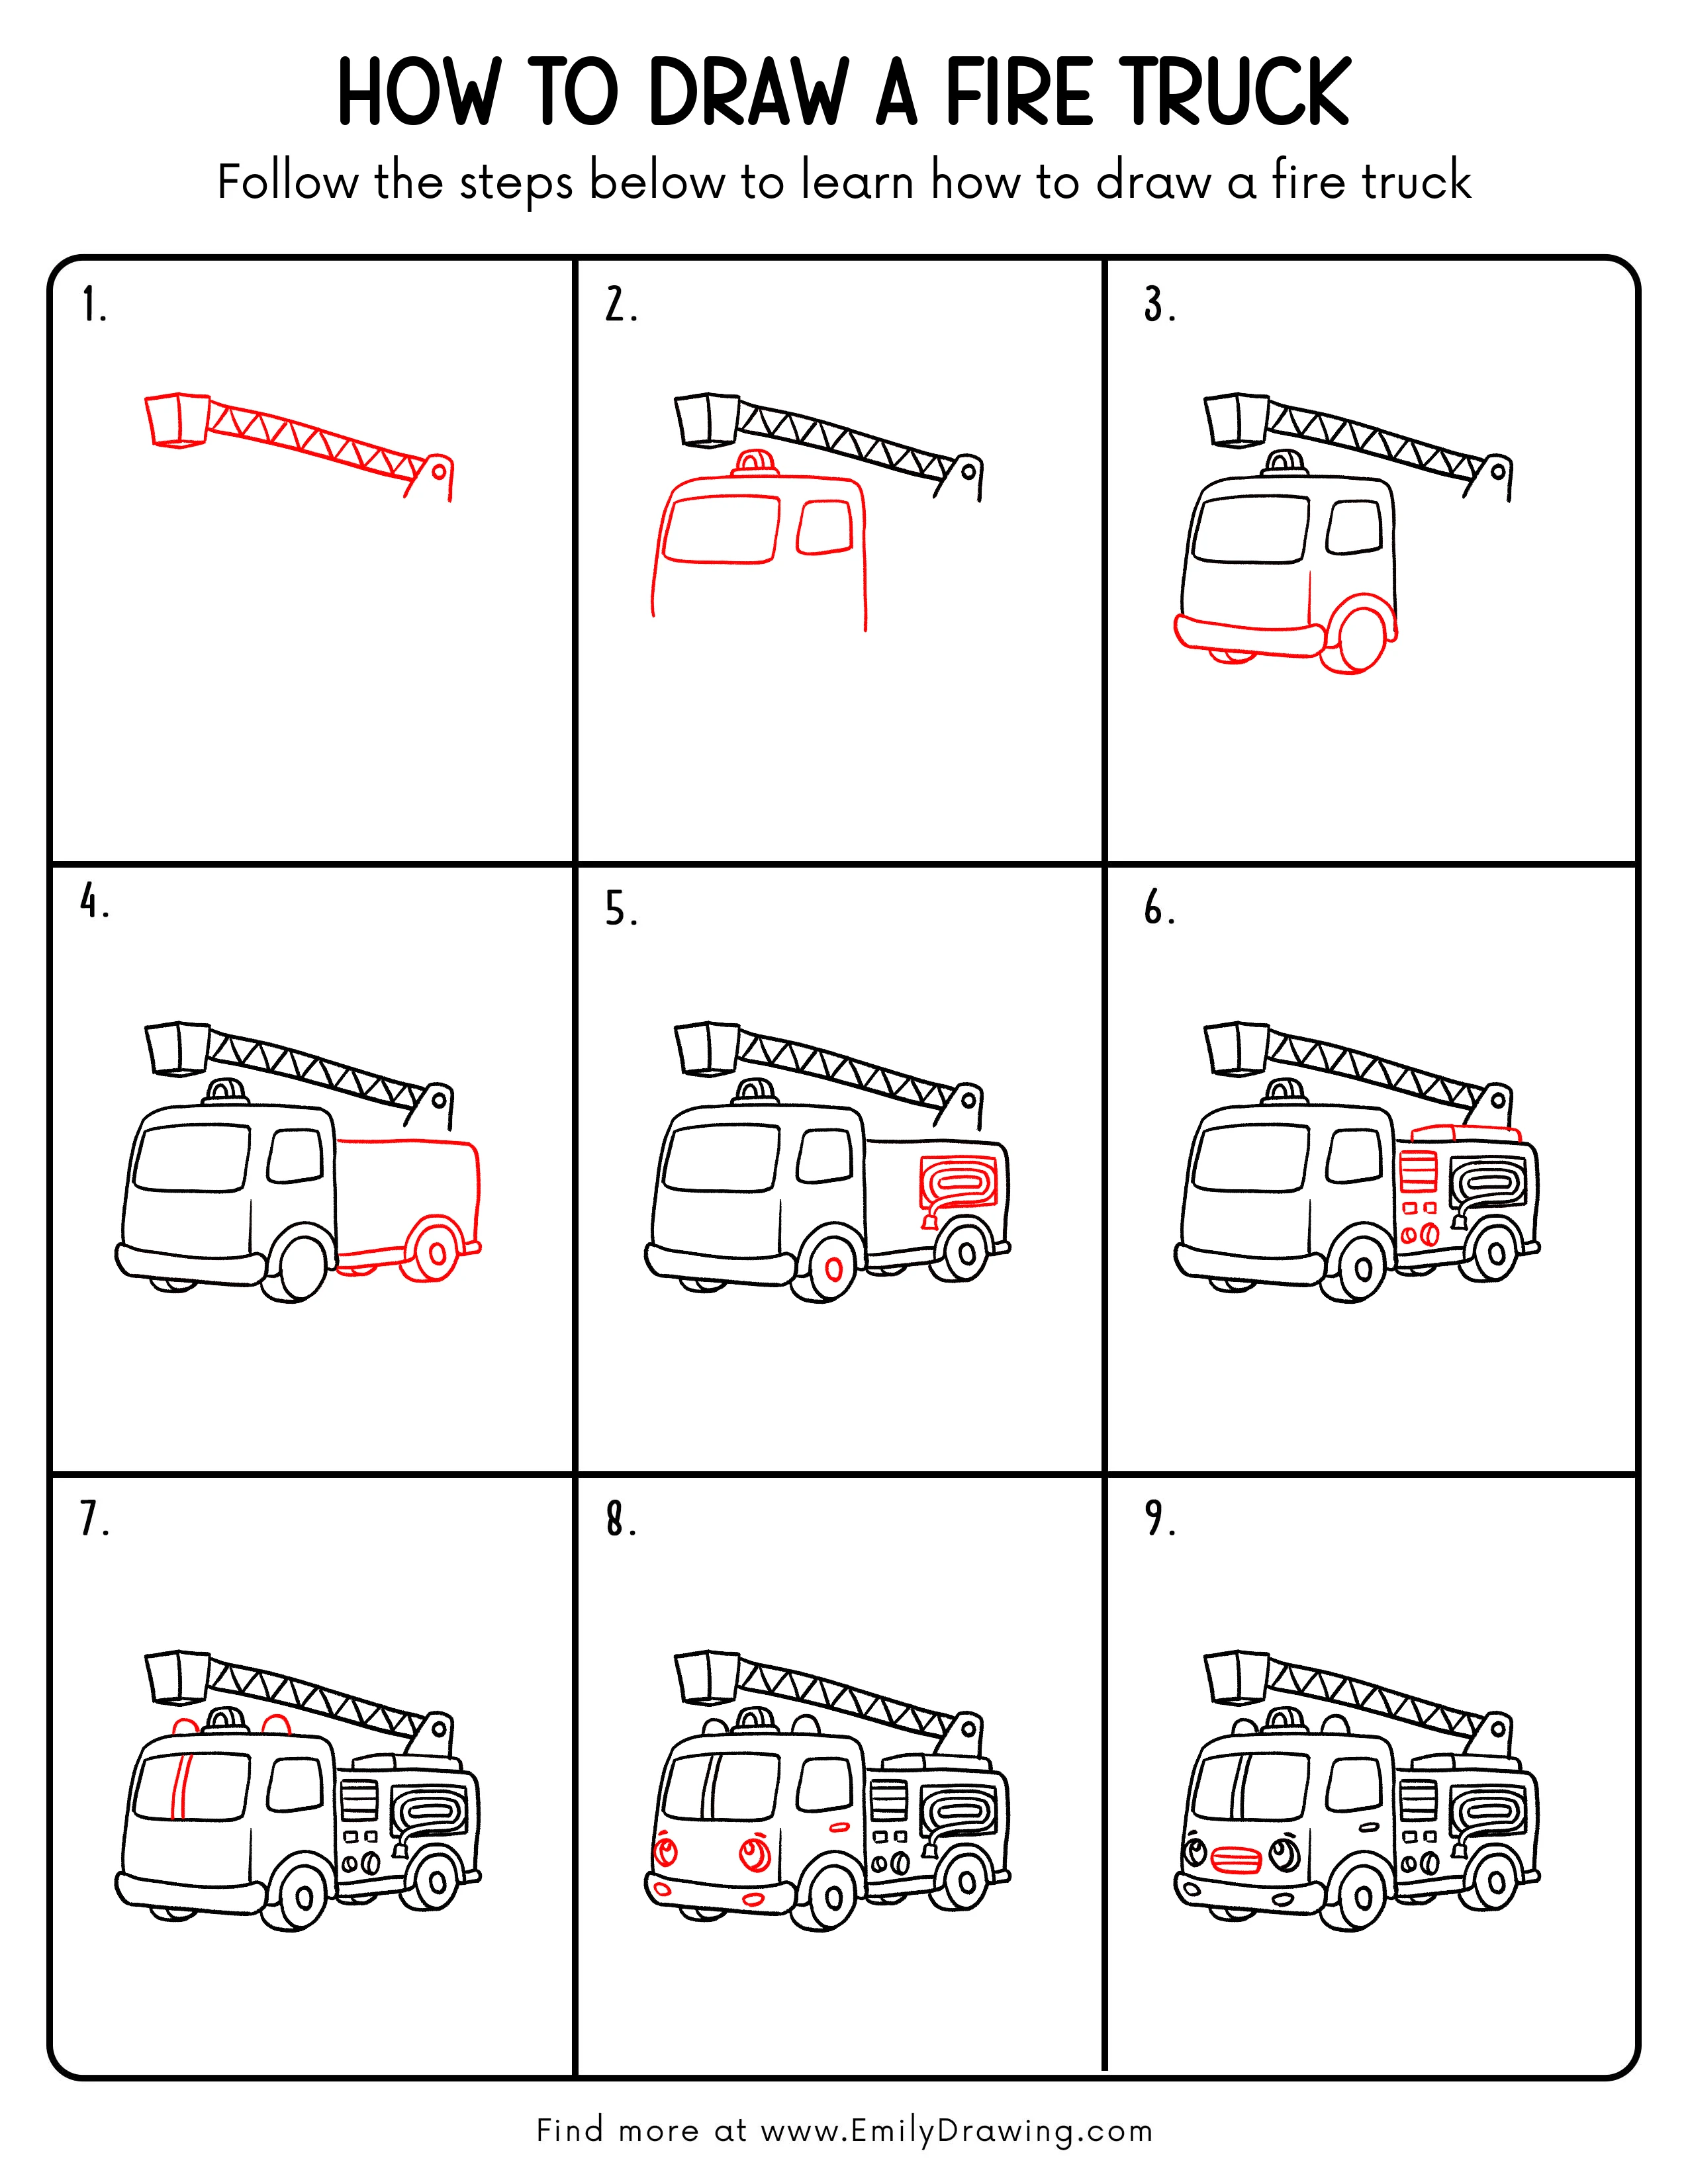
FREE Download Printable Fire Truck Drawing Tutorial
Frequently Asked Questions
How can I space the fire truck ladder braces?
Mark a few light intervals along the ladder, then connect alternating points diagonally.
How do I keep the fire truck hose readable?
Draw each loop with a visible gap and make the nozzle slightly wider than the hose.