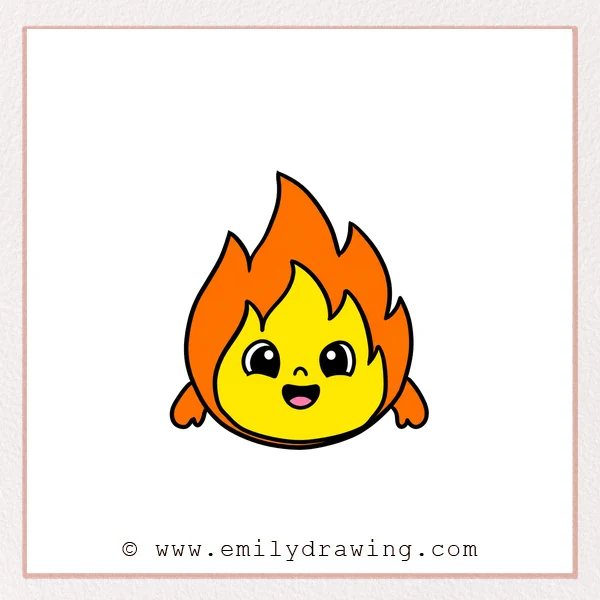
Learn how to draw fire as a cheerful character with layered flames. This easy drawing tutorial combines flowing curves, pointed tips, and a friendly face.
What You Will Need
- A pencil
- Plain drawing paper
- An eraser
- Colored pencils or crayons, if desired
Here are my RECOMMENDED Art Supplies!
- Crayola Coloring Set (140 Pieces – Mega Value!)
- 24 Colored Crayon Set
- A4 Printer Paper
- Crayola Coloring Pencils
- HP Home Printer with Instant Ink!
Time needed:
29 minutes.
Step-by-Step Drawing Guide
Step 1: Outline the Inner Flame
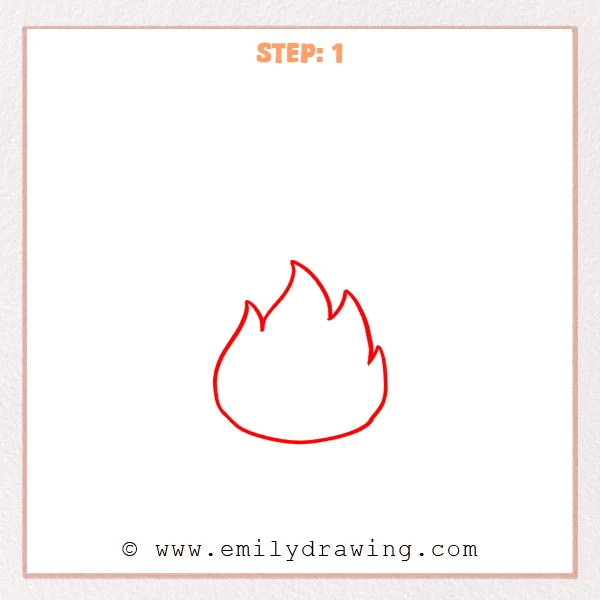
Draw a rounded base that curves upward on both sides. Shape four pointed flame tips above it, making the middle tip tallest.
Pro Tip: Alternate outward curves with inward dips to create flowing flame tips.
Step 2: Begin the Outer Flame
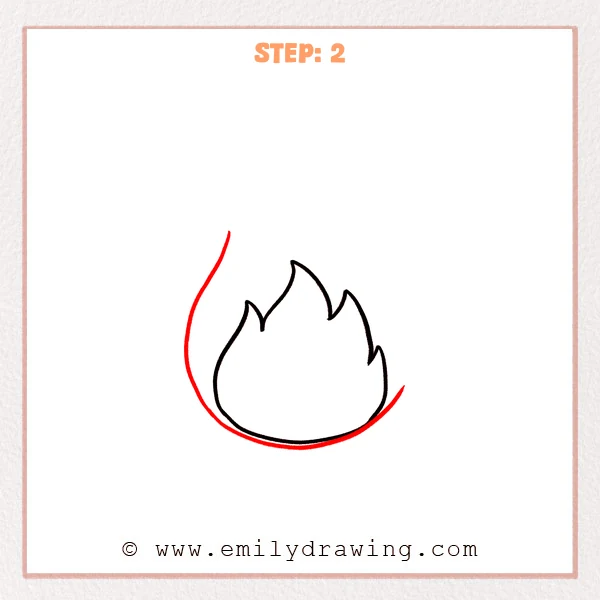
Draw a larger sweeping curve outside the inner flame’s left edge. Carry it around the base and curve upward on the right, leaving the top open.
Pro Tip: Keep a narrow gap between the two curves near the bottom.
Step 3: Complete the Outer Flame Tips
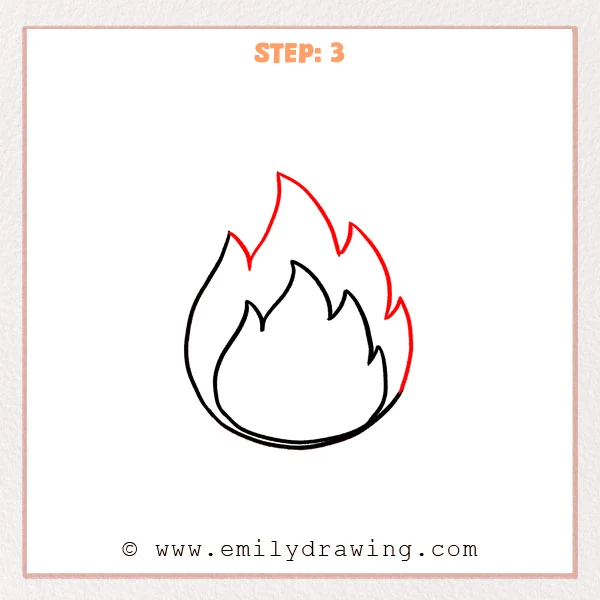
Connect the outer curve’s open ends with a series of pointed tips. Make the highest tip lean slightly left above the inner flame.
Pro Tip: Leave more space between the flame layers near the top.
Step 4: Add the Left Hand
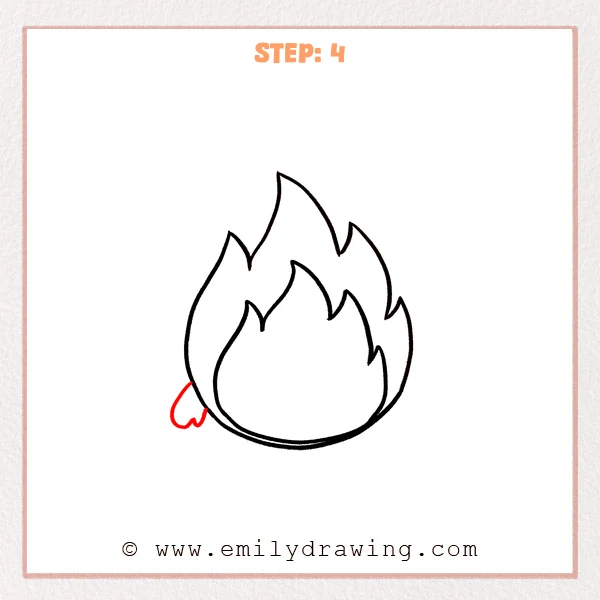
Curve a small arm outward from the fire’s lower left side. Form two rounded hand bumps and connect back to the body.
Pro Tip: Keep the hand below the flame tips so the silhouette stays clear.
Step 5: Add the Right Hand
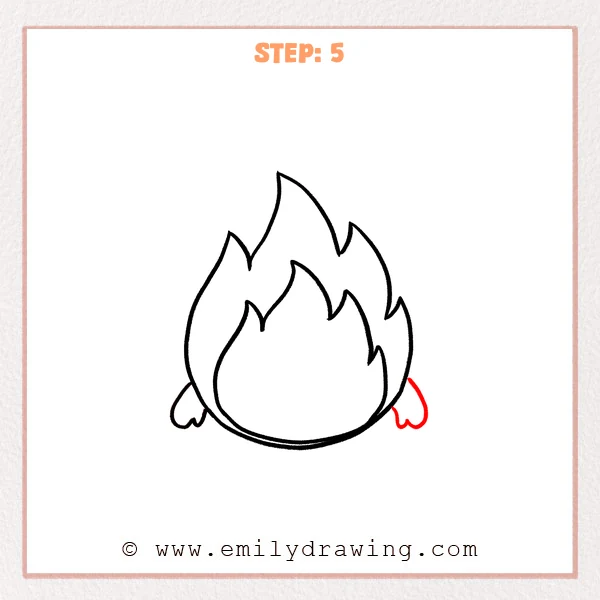
Draw another short arm outside the fire’s lower right side. Finish it with two rounded hand bumps joining the body.
Pro Tip: Place the hands at roughly the same height for balance.
Step 6: Draw the Happy Face
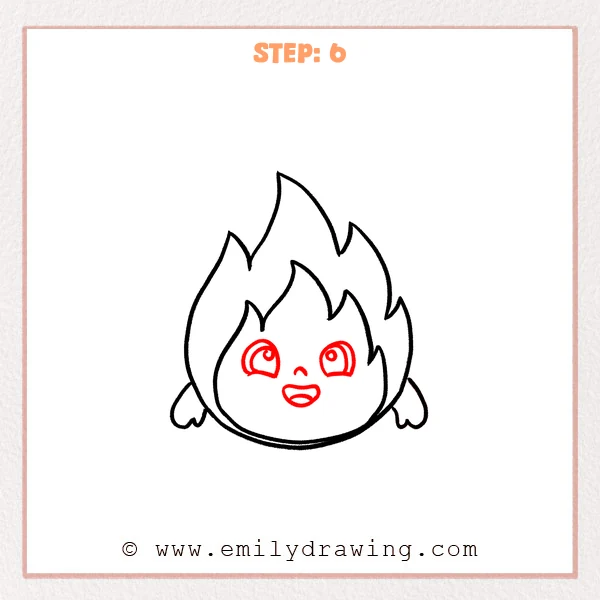
Add two tall eyes with inner curves and small circular highlights. Place a tiny arch between them for the nose. Draw an open smile below, with a curved tongue inside.
Pro Tip: Fit the face entirely within the inner flame outline.
Step 7: Color in your drawing!
Fun Facts
- Alternating curved edges and pointed tips give this fire drawing a flickering appearance.
- The two flame outlines create separate spaces for a layered color design.
Pin it now, Draw later!
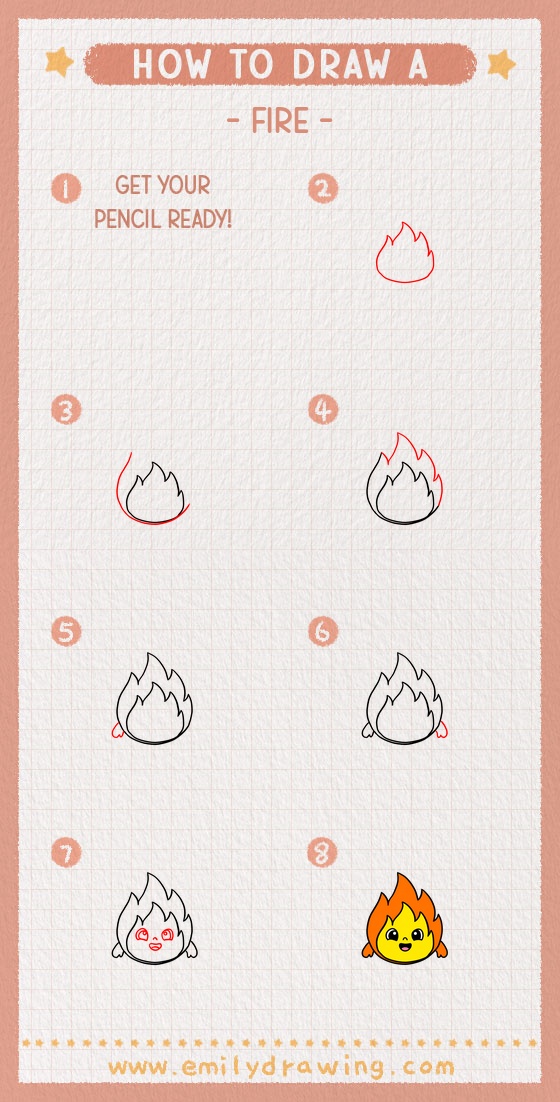
Your fire step by step drawing now has layered flames and a cheerful expression. Smooth any rough curves and choose colors for the flame layers. Enjoy this drawing for beginners, and try another fire character with a different smile.
Get the FREE Printable Drawing Guide
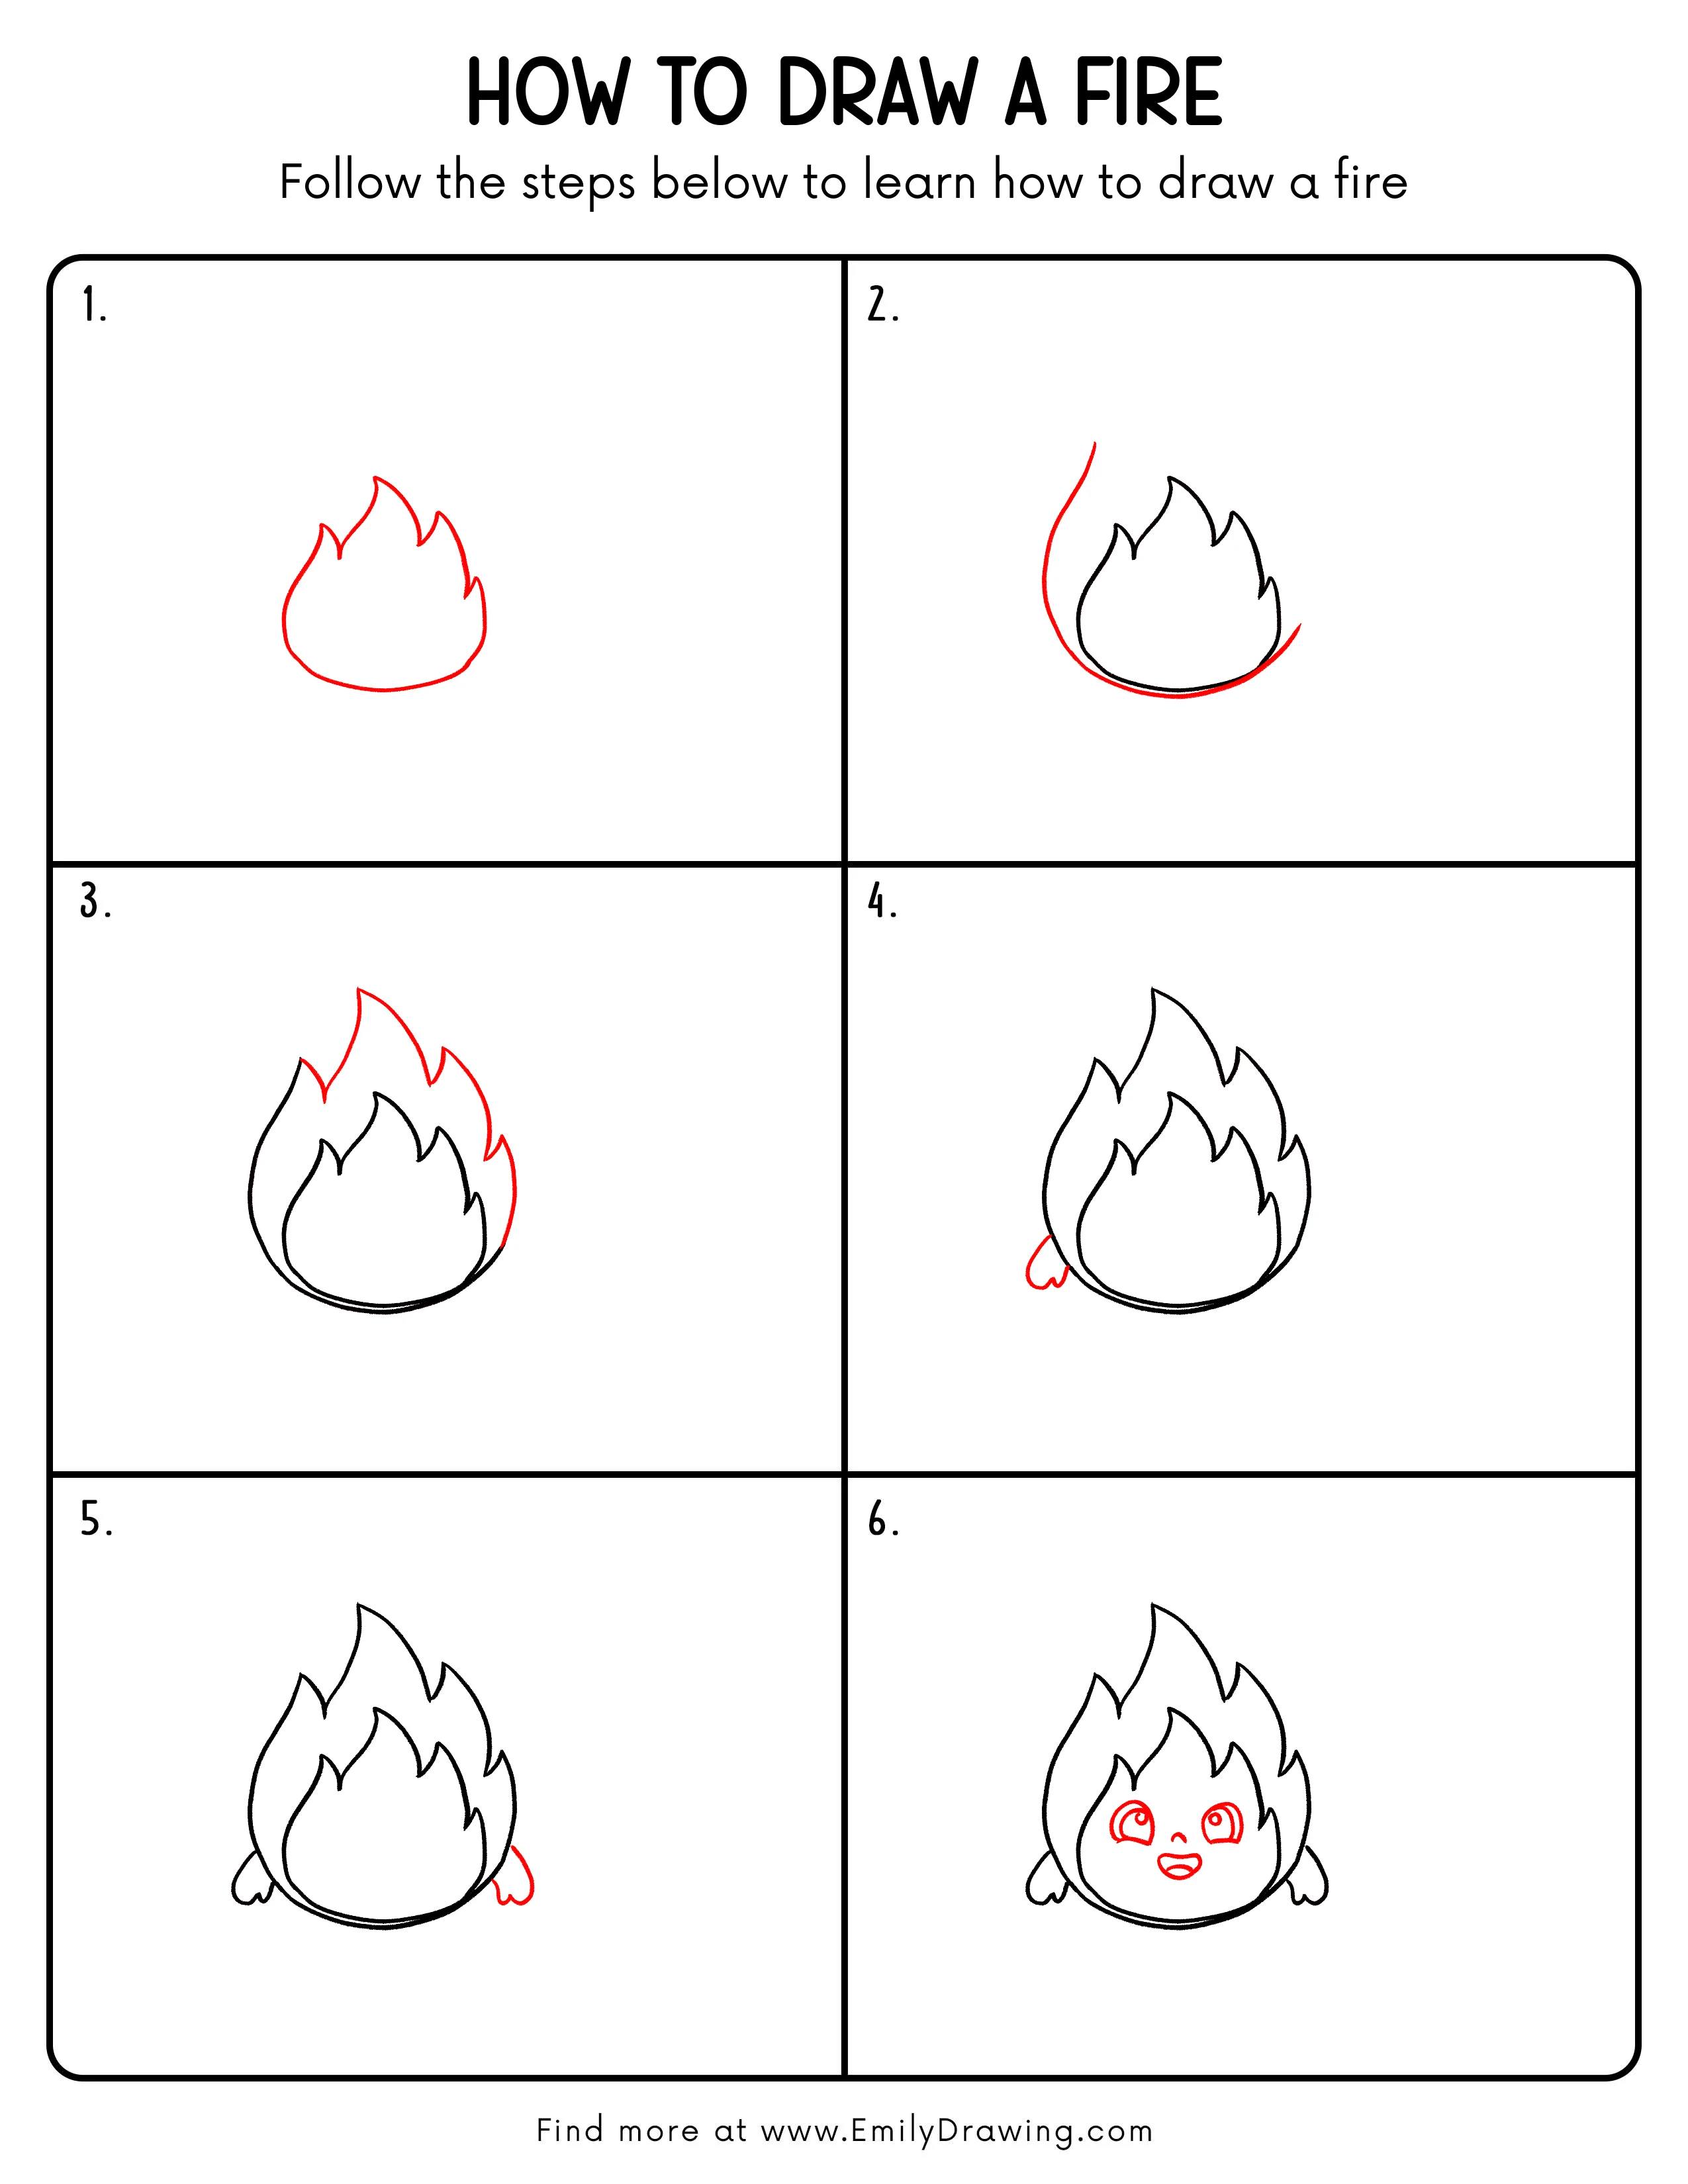
FREE Download Printable Fire Drawing Tutorial
Frequently Asked Questions
Do the fire tips need to match?
No. Varying their heights and curves gives the fire a lively shape.
How can I leave enough room for the fire’s face?
Make the inner flame wide near its base and keep the eyes below its points.