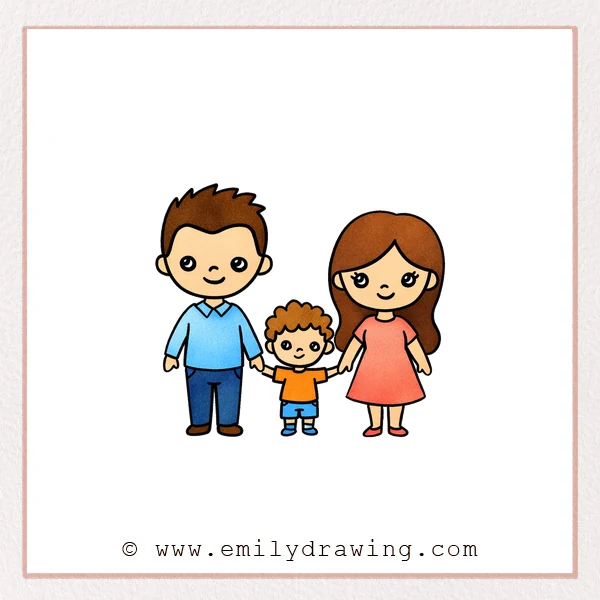
Learning how to draw a family can feel calm and enjoyable when you build the picture one small step at a time. This easy drawing tutorial is made for beginners and shows a simple step by step drawing of a parent, a child, and another parent standing together.
What You Will Need
- Paper
- Pencil
- Eraser
- Black pen or marker
- Colored pencils or crayons
Here are my RECOMMENDED Art Supplies!
- Crayola Coloring Set (140 Pieces – Mega Value!)
- 24 Colored Crayon Set
- A4 Printer Paper
- Crayola Coloring Pencils
- HP Home Printer with Instant Ink!
Time needed:
15 minutes.
Step-by-Step Drawing Guide
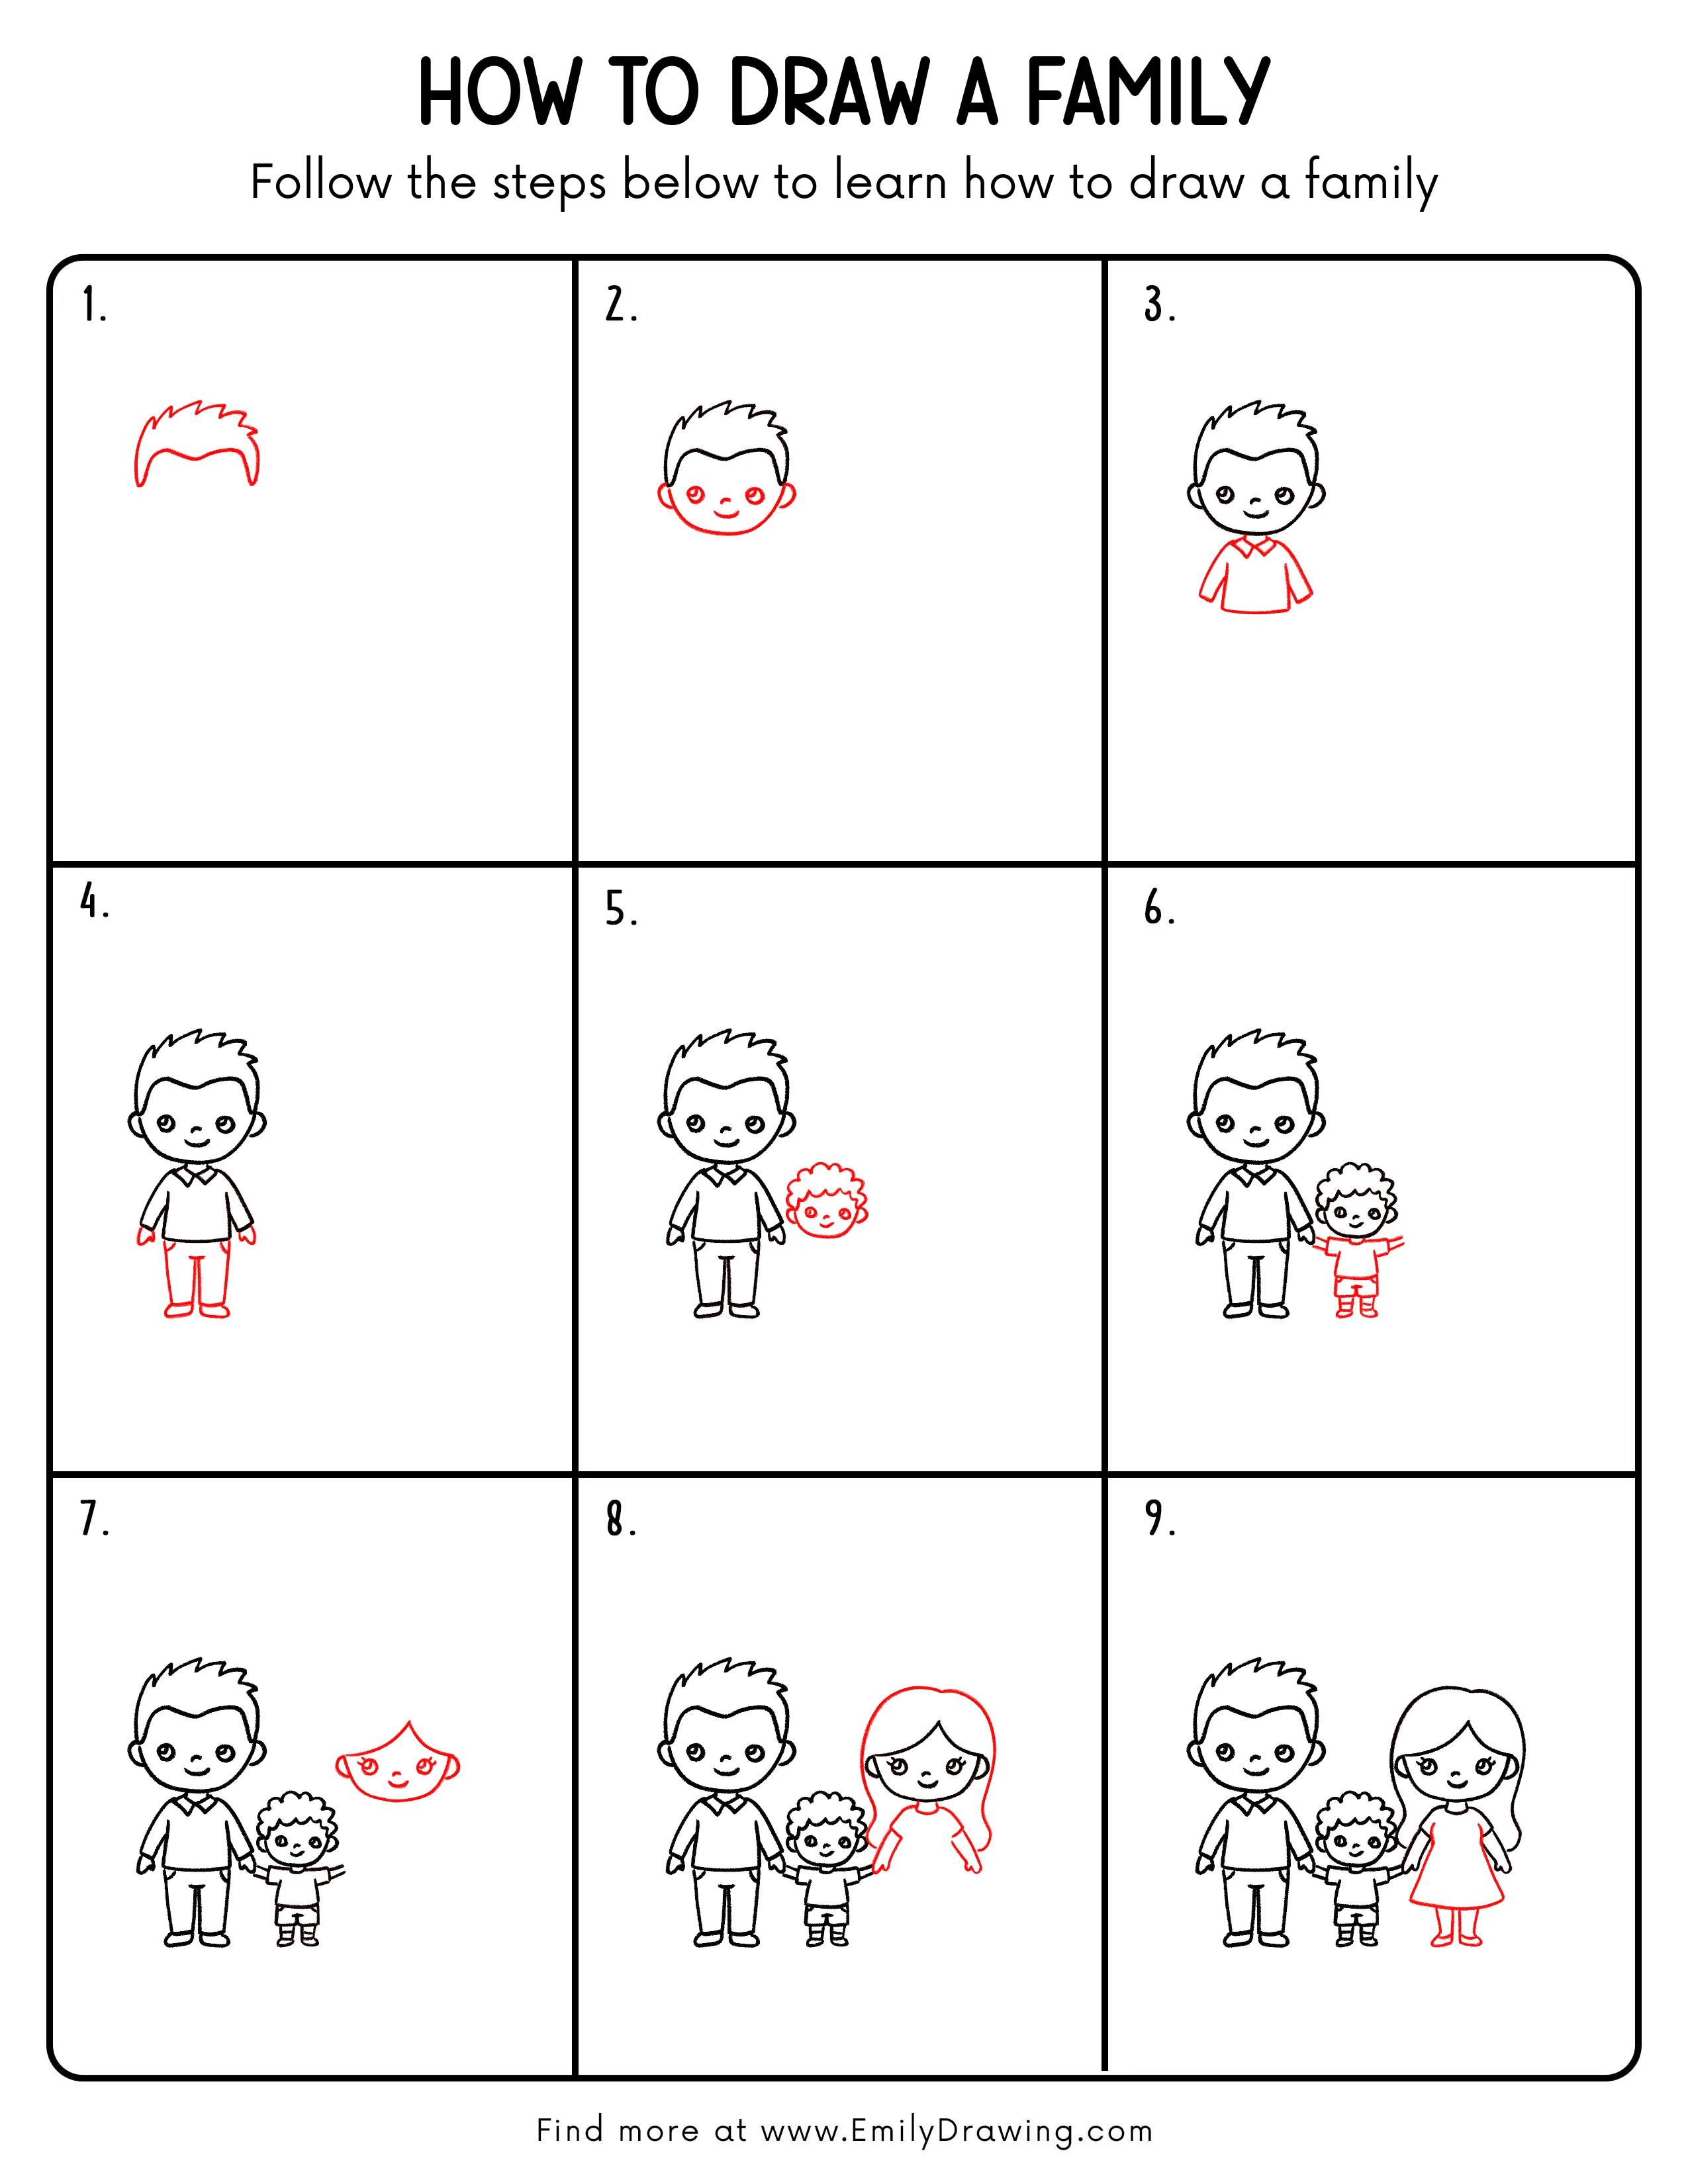
Step 1: Sketch the First Family Member’s Hair Outline
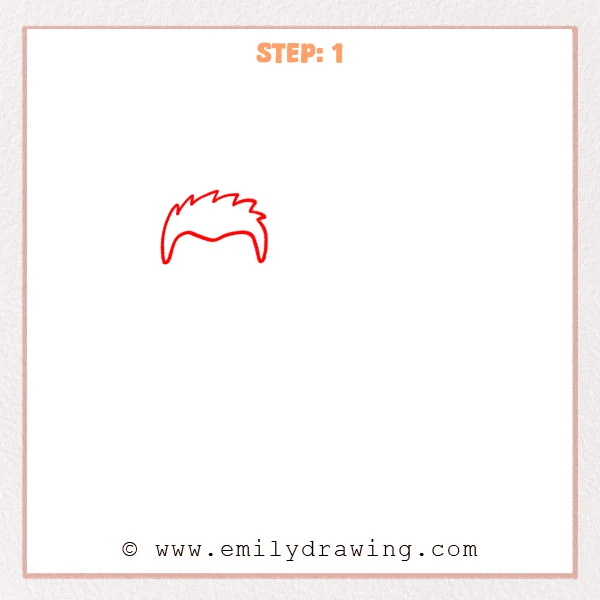
Start near the upper middle of the page and sketch a soft outer shape for the hair with a few gentle spikes. Let both sides curve slightly downward, and keep the lower middle line smooth so the hair looks natural and balanced.
Pro Tip: Keep the spikes light at first so the hair proportions are easier to adjust.
Step 2: Add the Face Shape and Features
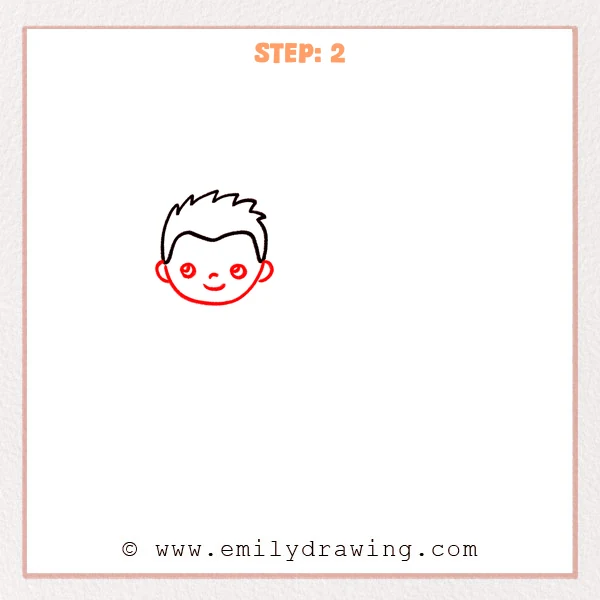
Under the hair, continue with a soft rounded face and add small ears on both sides to complete the head. Then place two round eyes, a tiny nose, and a smiling mouth near the center of the face so the character looks warm and friendly.
Pro Tip: Try to keep both eyes at the same height so the face looks balanced.
Step 3: Add the Shirt and Arms
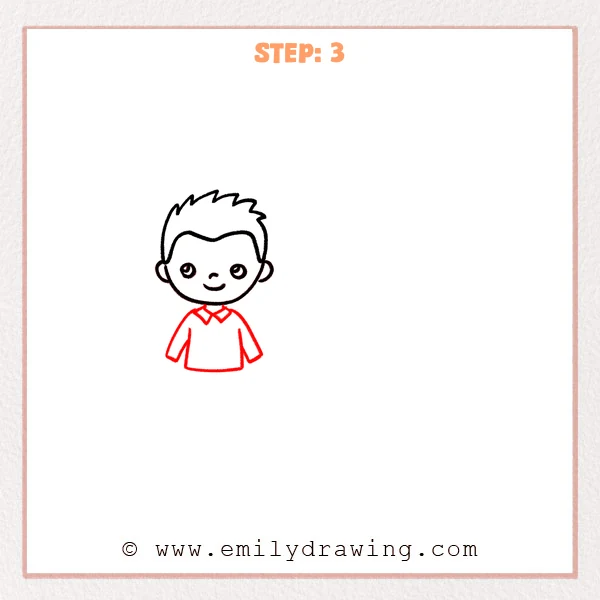
Under the head, start with a short neck and add a simple collared shirt to make the family character feel more complete. Then extend the body with two gently curved sleeves and a loose top shape, keeping the clothing easy and soft for the next steps.
Pro Tip: Try to keep both sides of the collar similar in size so the front view stays even.
Step 4: Add the Pants, Hands, and Shoes
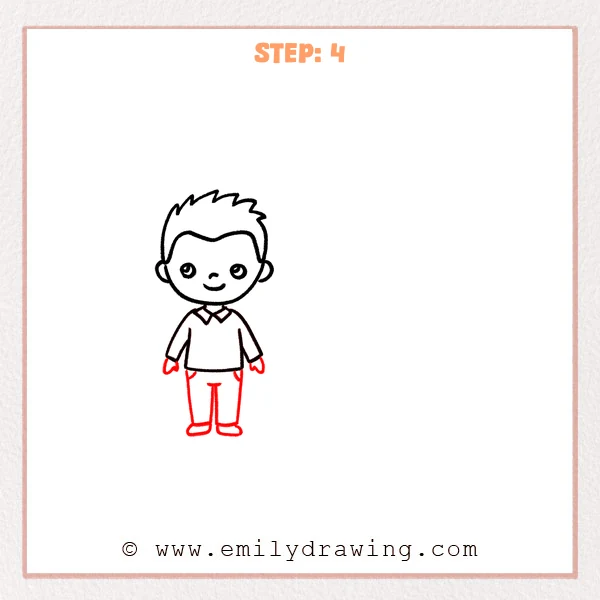
Under the shirt, continue with two straight pant legs so the body extends neatly downward. Then add small hands at the sleeve ends and rounded shoes at the bottom to turn the character into a full family figure.
Pro Tip: Try to keep both pant legs close in length so the standing pose looks steady.
Step 5: Add a Second Family Face Beside Him
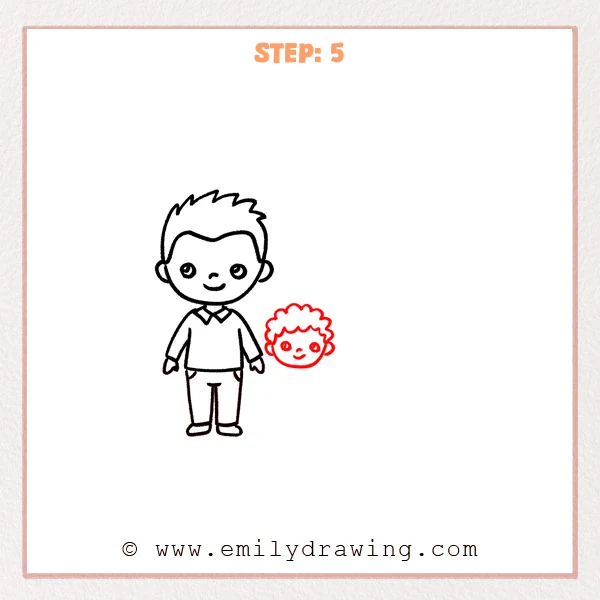
In the open space to the right, start a smaller round face and add a ring of curly hair so it looks like a child in the family. Then place small ears, round eyes, a tiny nose, and a smiling mouth to help the two family members feel connected.
Pro Tip: Keep the smaller face features closer together so the child looks younger.
Step 6: Add the Child’s Body and Open Arms
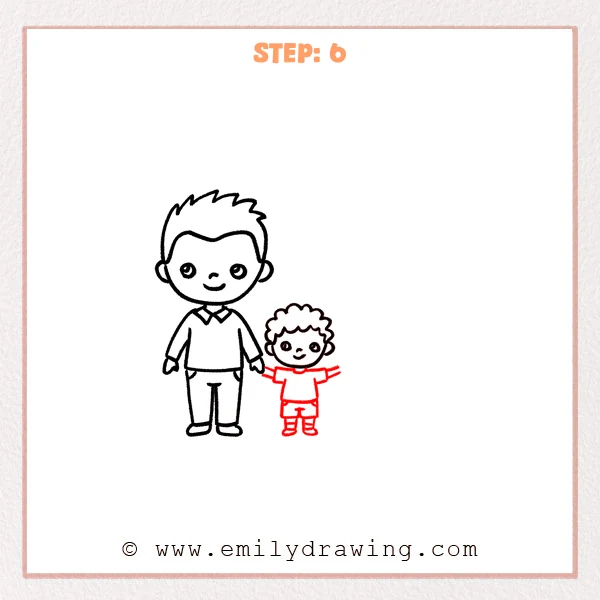
Under the smaller face, continue with a short shirt and little shorts so the child’s body feels playful and young. Then open both arms gently to the sides, placing one near the adult’s hand, and finish with small shoes below to make the family scene feel warm and complete.
Pro Tip: Keep the child’s body a little shorter so the proportions look more youthful.
Step 7: Add the Third Family Member’s Face and Hairstyle
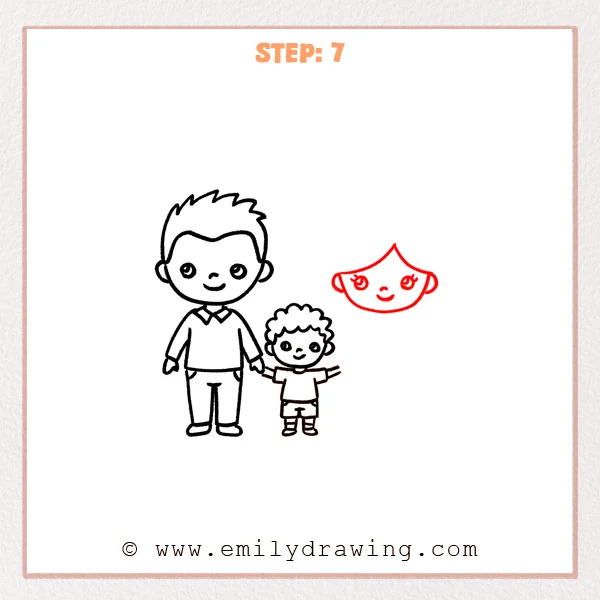
In the open space at the upper right, add a new face shape and let the top come to a soft point to suggest a neat, simple hairstyle. Then place small ears, round eyes, a tiny nose, and a smiling mouth so the family scene includes one more friendly member.
Pro Tip: Keep the new face slightly smaller so all three family members feel balanced together.
Step 8: Add the Mother’s Long Hair and Upper Body

Around the third family member’s face, continue with long hair falling down both sides, letting the ends curve softly for a gentle look. Then add a simple top and both arms under the head, with one hand reaching toward the child, so the family scene feels more complete.
Pro Tip: Keep both sides of the long hair close in length so the figure looks balanced.
Step 9: Add the Mother’s Dress and Legs
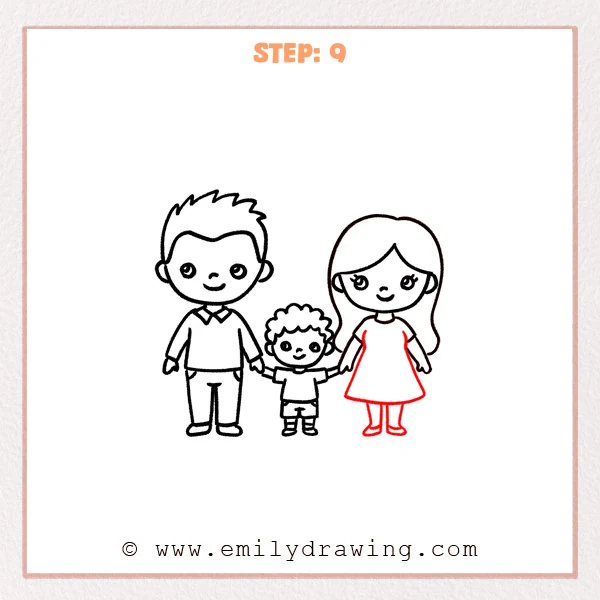
Under the top, continue downward with a gently flared skirt, letting both sides open out softly for a neat and gentle shape. Then add two slim legs and small shoes below the hem so the mother’s full standing figure is complete.
Pro Tip: Keep the skirt spread similar on both sides so the standing pose looks balanced.
Step 10: Color in your drawing!
Fun Facts
- Drawing family groups helps you practice size differences between adults and children.
- Simple cartoon faces often use wide eyes and small smiles to look friendly.
- Curved lines can make characters feel softer and more welcoming.
Pin it now, Draw later!

You now have a simple family drawing with three smiling characters standing together. Add soft colors, light shading under the hair, and a little shadow under the feet to give the picture more depth.
A common beginner mistake is making one side much longer than the other, so take your time and compare both sides as you draw. Keep practicing this step by step drawing, and try more easy drawing tutorials to grow your skills.
Get the FREE Printable Drawing Guide
FREE Download Printable Family Drawing Tutorial
Frequently Asked Questions
How can I make my family drawing look more balanced?
Compare the left and right sides as you draw, especially the hair, arms, and legs.
What if my characters look too stiff?
Use softer curves in the arms, clothing, and hair to give the figures a gentler look.
Can I change the family members after finishing the sketch?
Yes. You can add different hairstyles, clothes, or facial features to make the drawing your own.