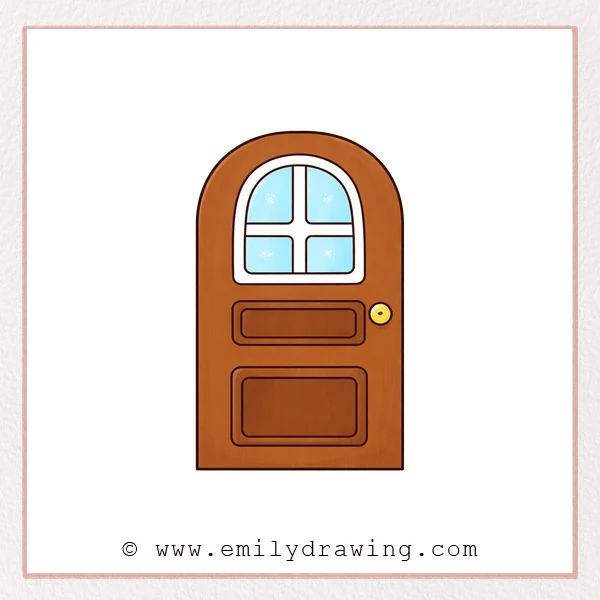
A door is a great subject for practicing clean shapes and simple details.
In this easy drawing tutorial, you will build the outline first, then add panels and a window.
Take your time with spacing so your drawing looks balanced and neat.
What You Will Need
- Pencil
- Eraser
- Black marker or pen (optional, for outlining)
- Paper
- Coloring tools (optional)
Here are my RECOMMENDED Art Supplies!
- Crayola Coloring Set (140 Pieces – Mega Value!)
- 24 Colored Crayon Set
- A4 Printer Paper
- Crayola Coloring Pencils
- HP Home Printer with Instant Ink!
Time needed:
22 minutes.
Step-by-Step Drawing Guide
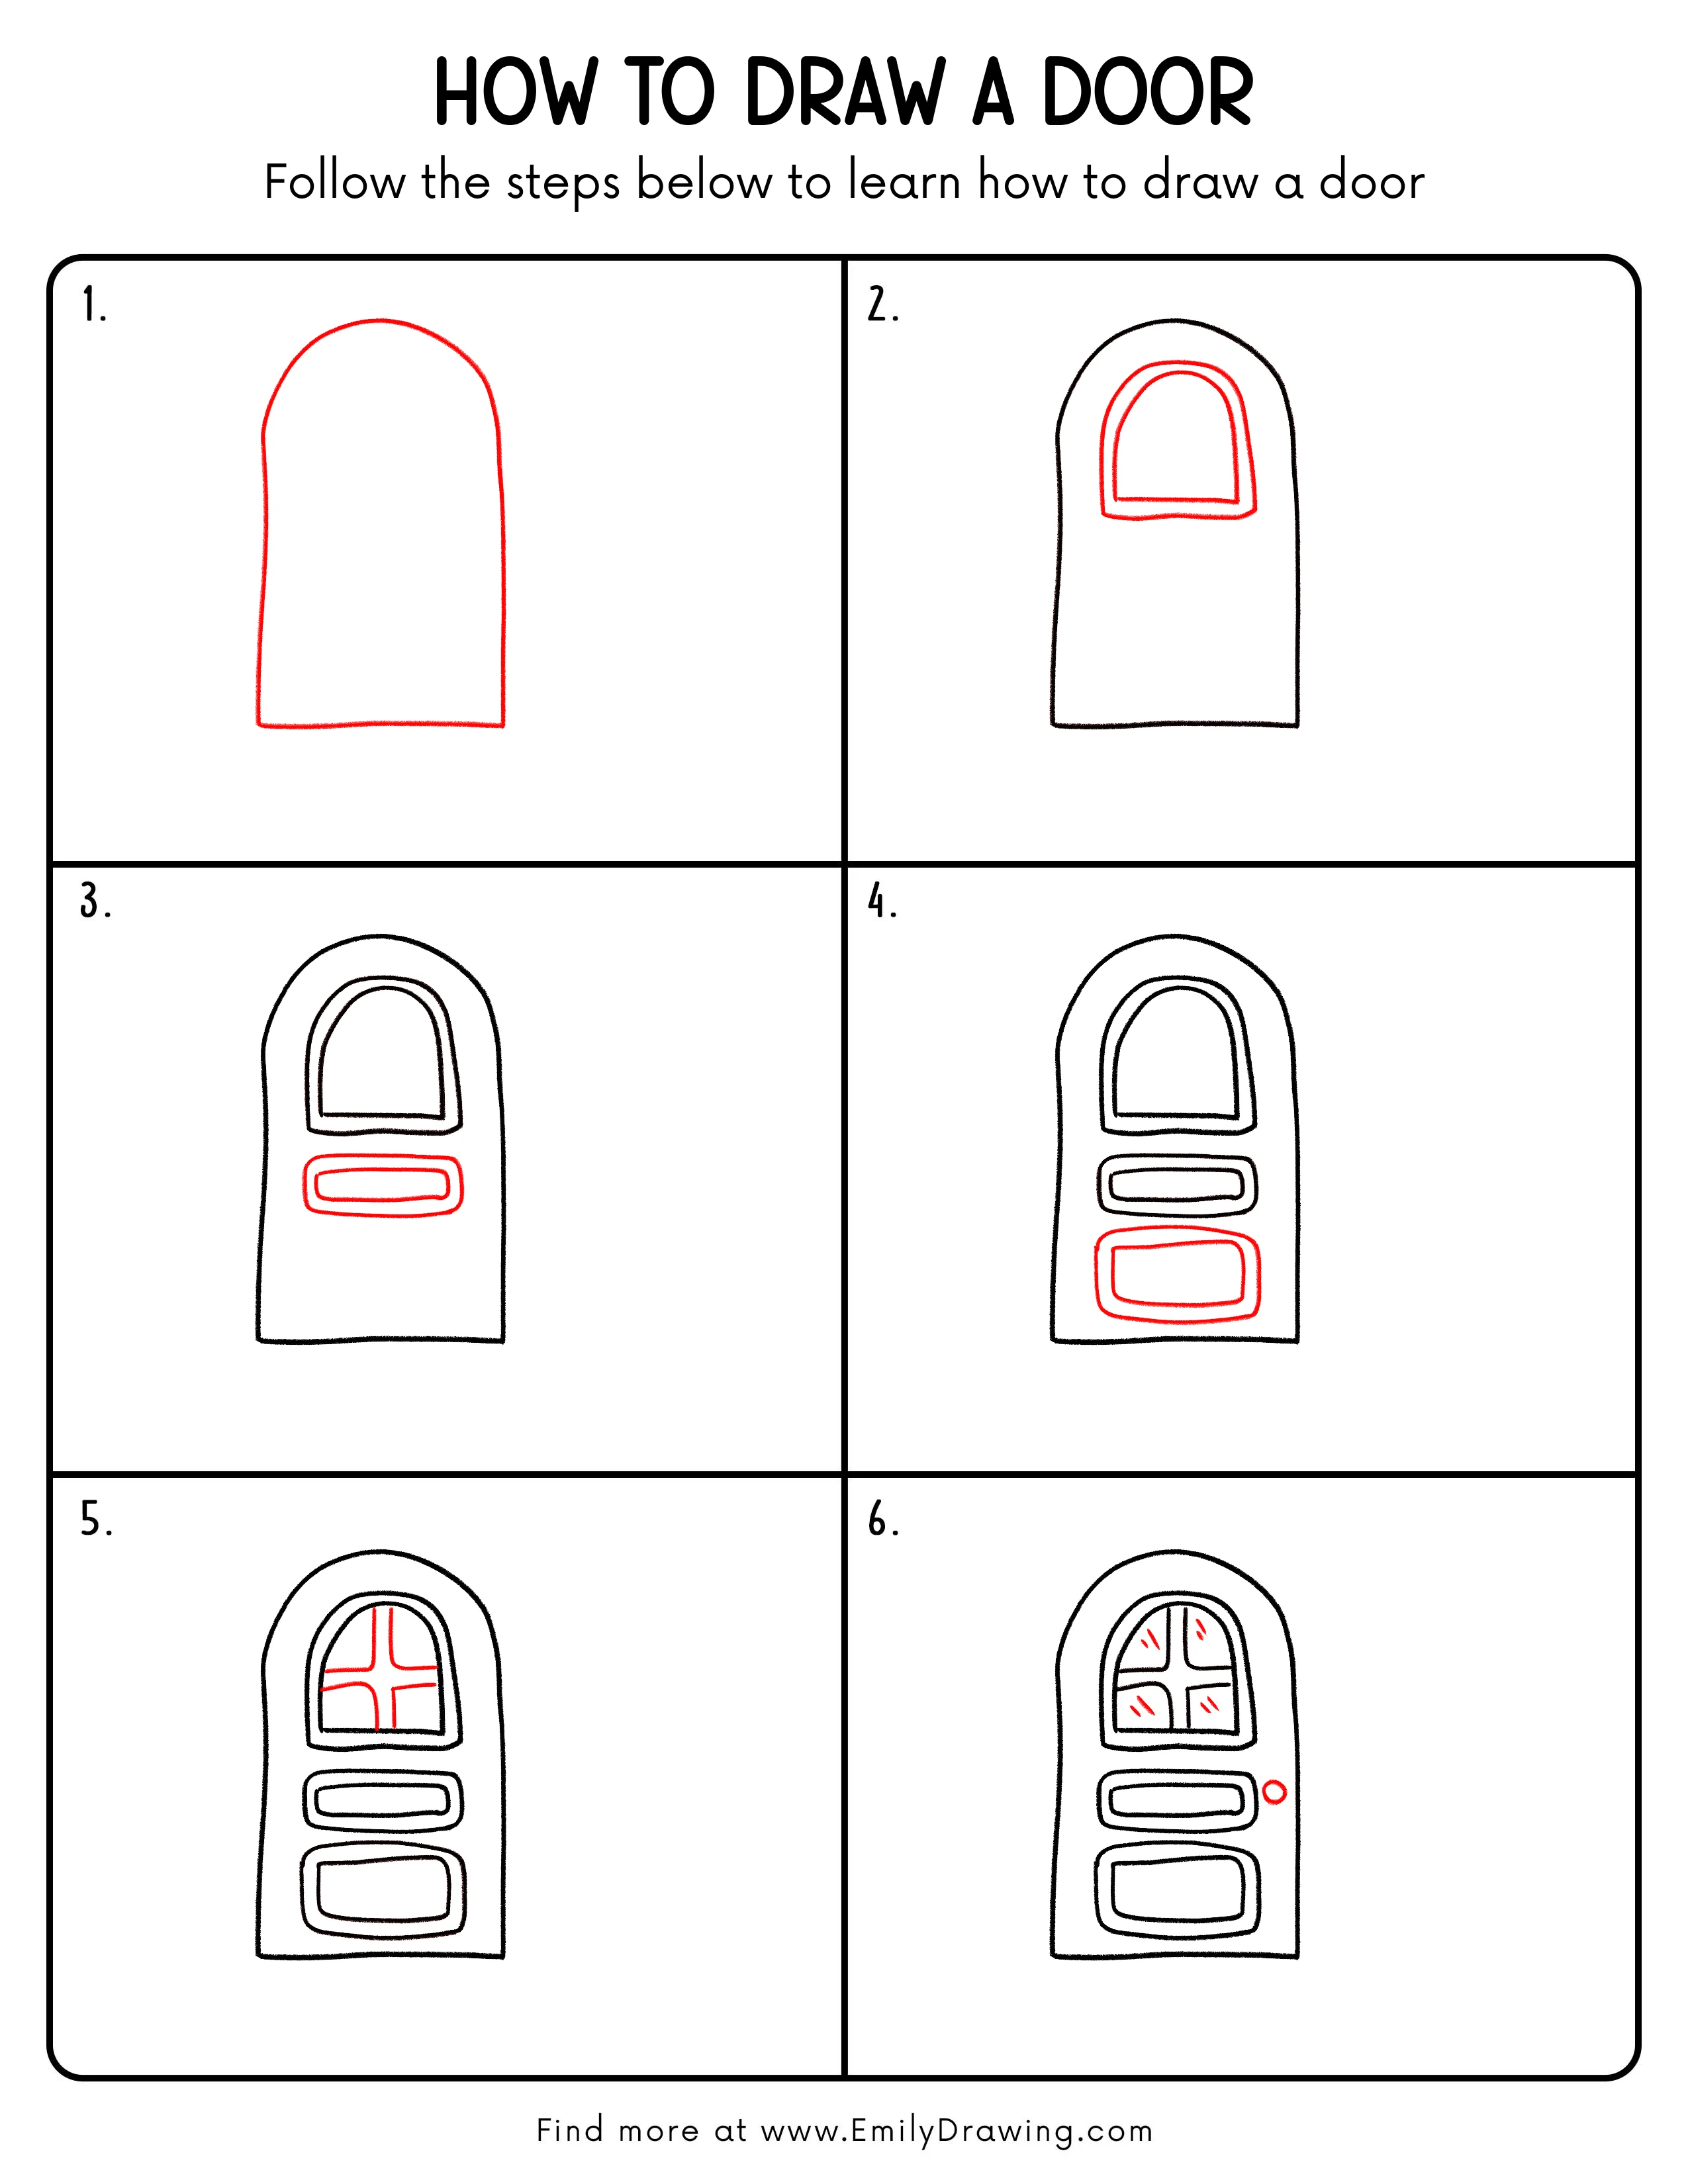
Step 1: Block In the Door Shape
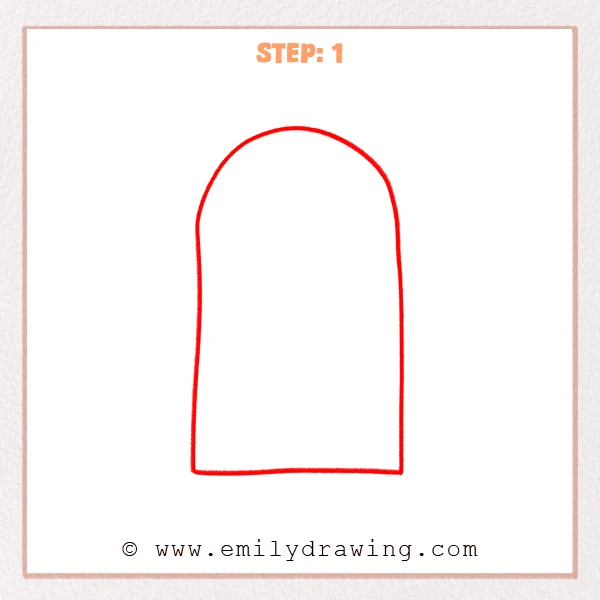
Start with a tall rectangle, keeping the two side lines parallel.
Add a rounded arch on top, then close it with a slightly curved bottom line.
Pro Tip: Keep both side edges the same distance apart so the door looks straight.
Step 2: Add an Inner Arch Panel
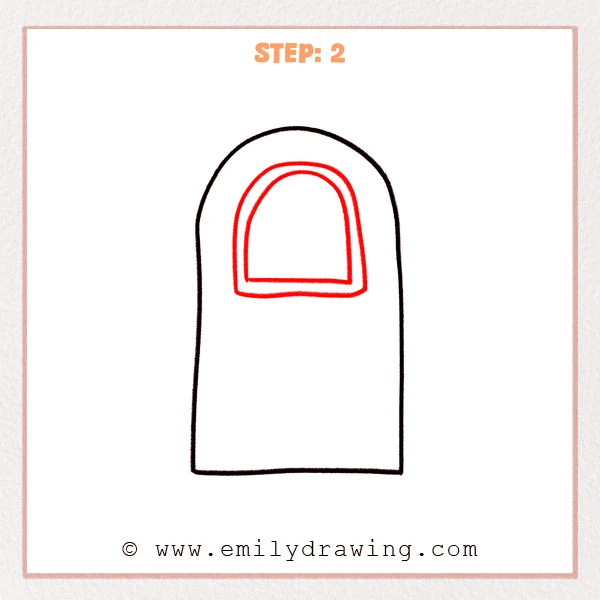
Draw a smaller arched shape in the upper half of the door, matching the outer curve.
Add a second line around it to create a neat double border like a window or panel.
Pro Tip: Keep the gap between the inner panel and its border evenly spaced.
Step 3: Add a Rounded Rectangle Panel
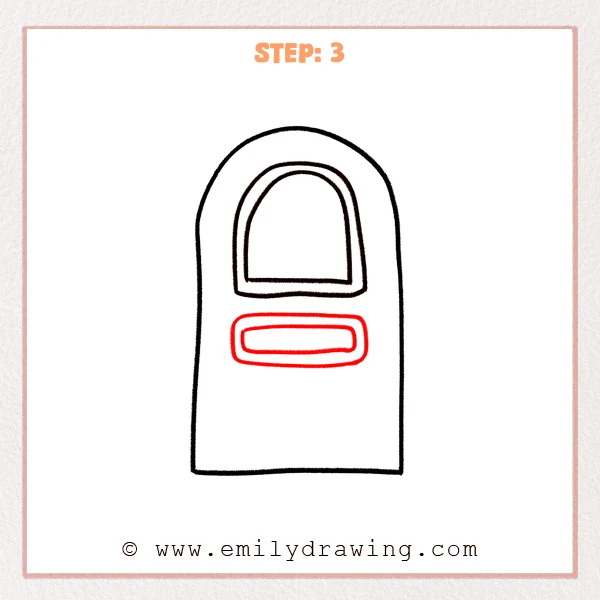
Draw a wide rounded rectangle in the middle of the door, keeping it centered.
Add a smaller rounded rectangle inside it to make a clean double border.
Pro Tip: Lightly mark the door’s center line first, then align the panel evenly on both sides.
Step 4: Add a Larger Bottom Panel
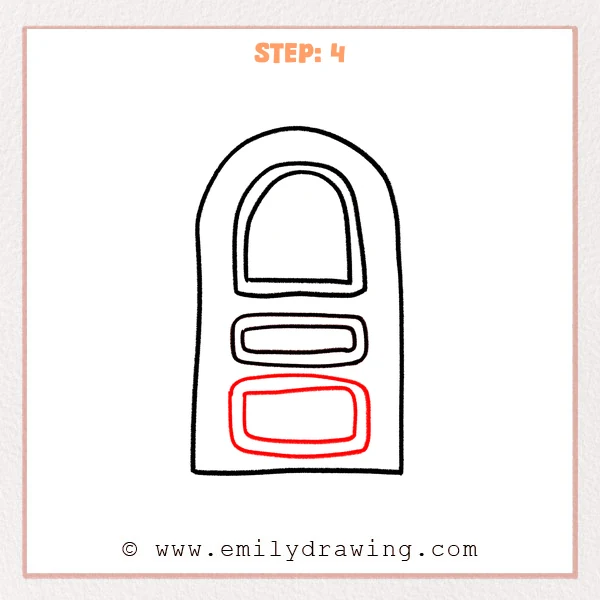
Draw a bigger rounded rectangle in the lower half of the door, below the middle panel.
Add a smaller matching rounded rectangle inside it to create a neat double border.
Pro Tip: Keep similar side margins between the bottom panel and the door edges for balance.
Step 5: Add Cross Window Panes
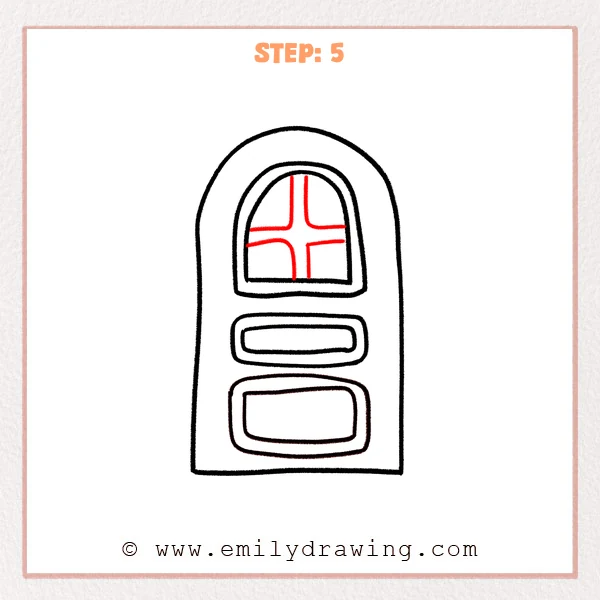
Draw a vertical line down the center inside the arched window.
Add a horizontal line across the middle, rounding the ends so they meet the frame smoothly.
Pro Tip: Lightly mark the window’s center point first so the cross stays symmetrical.
Step 6: Add the Doorknob and Glass Shine
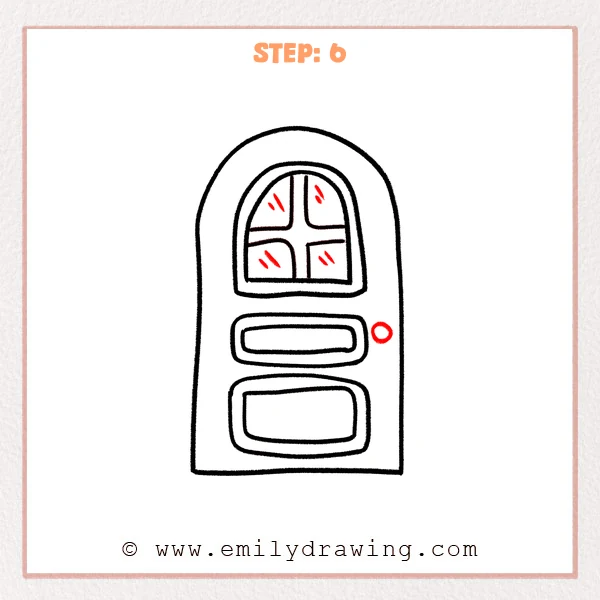
Draw a small circle on the right side near the middle panel to make the doorknob.
Add a few short diagonal strokes in the window panes to show shiny glass reflections.
Pro Tip: Don’t place the knob too close to the edge; leave a small margin.
Step 7: Color in your drawing!
Fun Facts
- Many doors have panels to make the surface stronger and less likely to warp.
- Arched windows are common in older buildings because the curve spreads weight evenly.
- A simple cross pane pattern can make a window look classic and cozy.
Pin it now, Draw later!

Trace your final lines with a darker pencil or a pen, then erase extra sketch marks.
You can color the door wood, paint it a bright color, or shade the panels lightly.
Now you know how to draw a door step by step—try adding a doorstep, bricks, or a welcome mat next!
Get the FREE Printable Drawing Guide
FREE Download Printable Door Drawing Tutorial
Frequently Asked Questions
How do I make the door look more realistic?
Add a thicker frame line, a keyhole under the knob, and light shading along one edge.
What if my panels look uneven?
Use light guide marks to find the center first, then match spacing on both sides.
Can I change the style of the door?
Yes—try a rectangular top, add more panels, or draw a different window pattern.