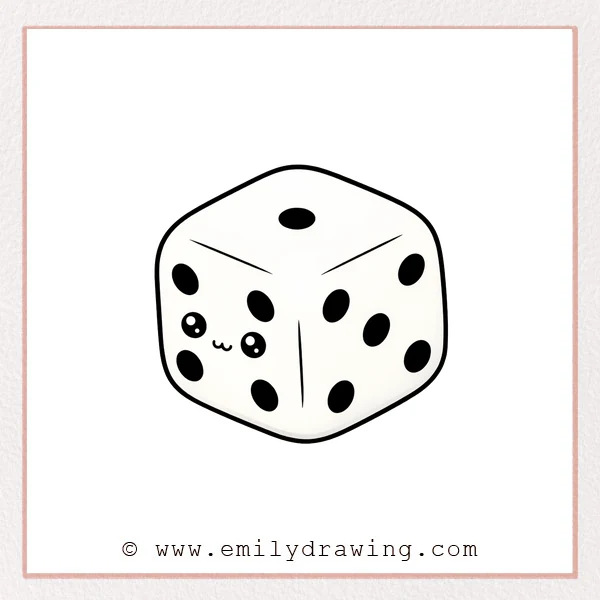
A dice is a fun, simple shape that teaches easy 3D drawing.
In this easy drawing tutorial, you will build a rounded cube and add pips.
Take your time, and keep your lines light until the end.
What You Will Need
- Pencil or black marker
- Eraser (optional)
- Blank paper
- Coloring tools (optional)
Here are my RECOMMENDED Art Supplies!
- Crayola Coloring Set (140 Pieces – Mega Value!)
- 24 Colored Crayon Set
- A4 Printer Paper
- Crayola Coloring Pencils
- HP Home Printer with Instant Ink!
Time needed:
25 minutes.
Step-by-Step Drawing Guide
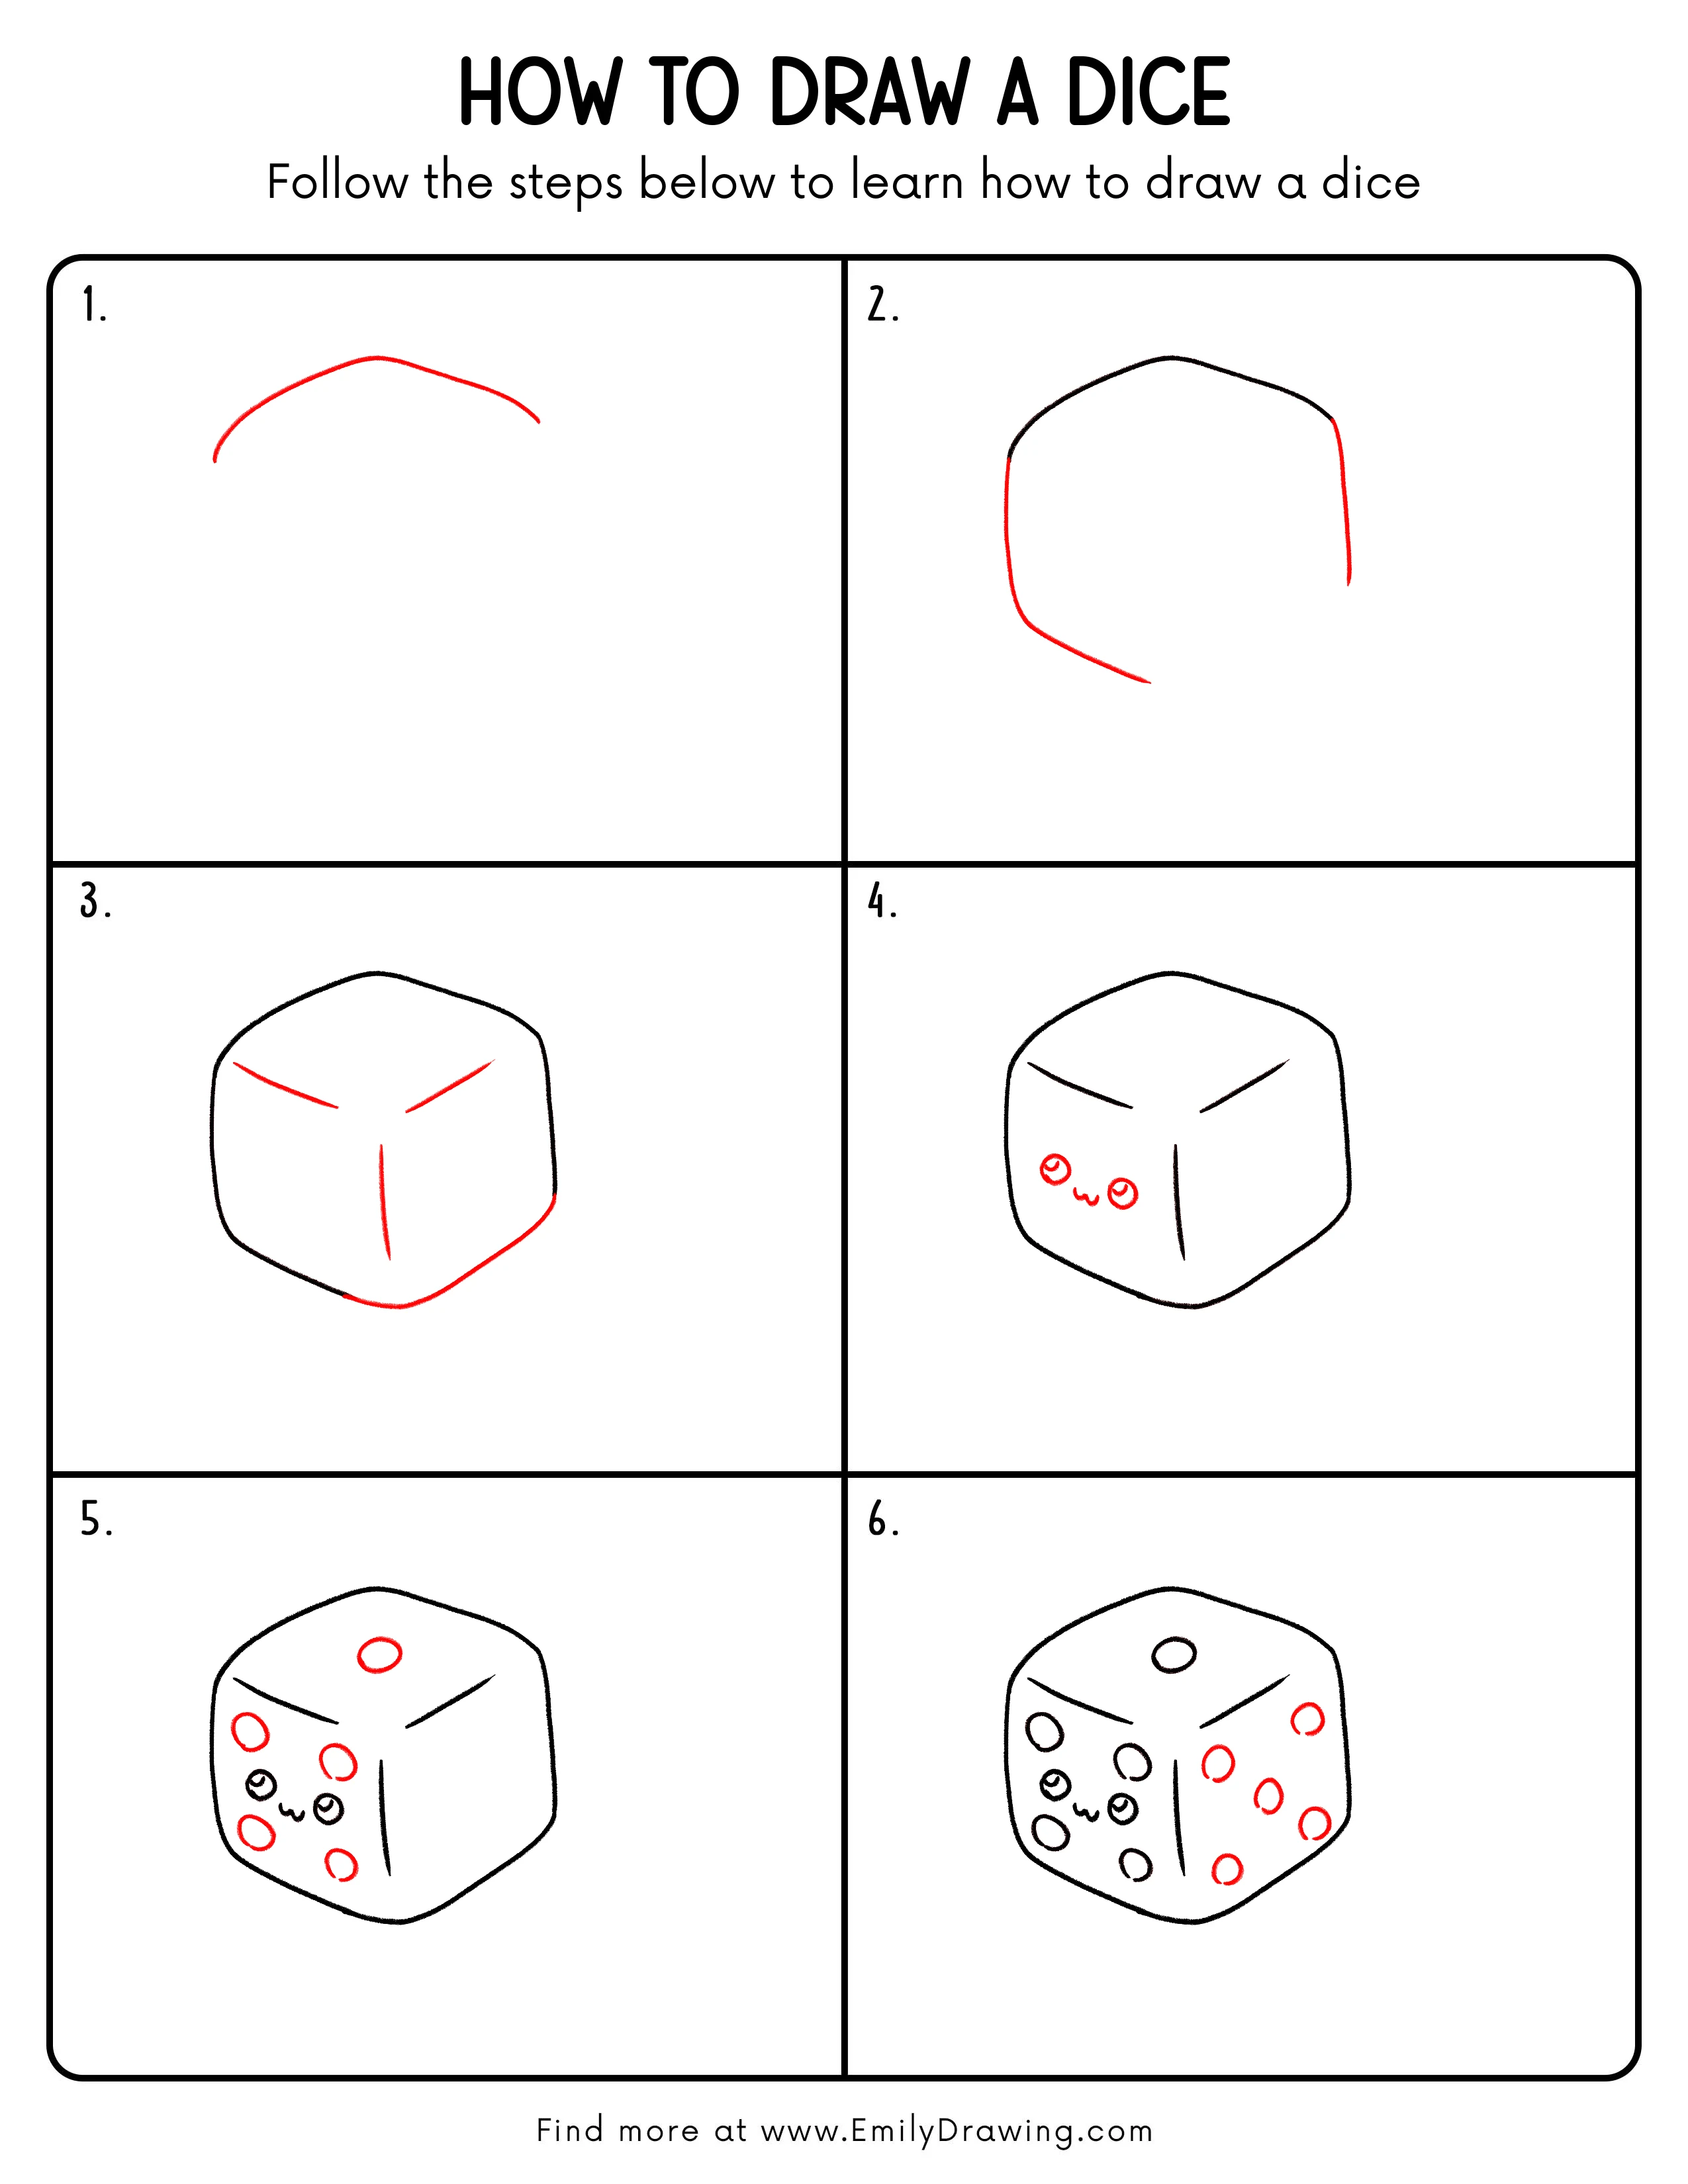
Step 1: Draw the Top Curve
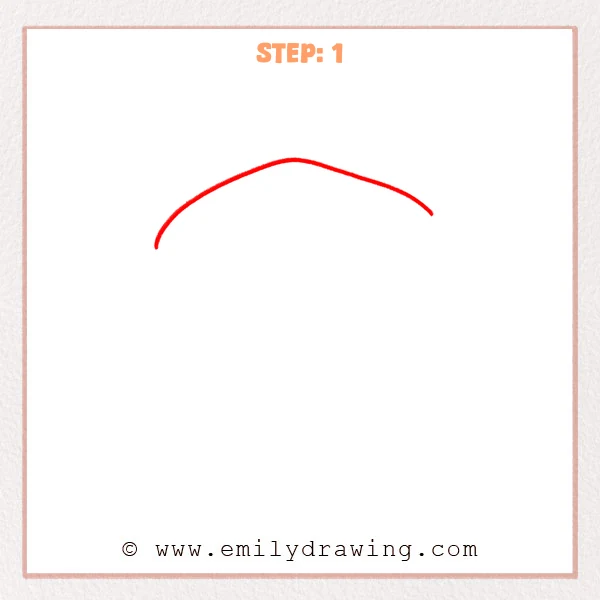
Start with one long, smooth curved line to guide the top edge of the dice.
Keep both ends gently tapered so the curve feels clean and controlled.
Pro Tip: The steadier this curve is, the easier your dice perspective will line up.
Step 2: Build the Side Outline
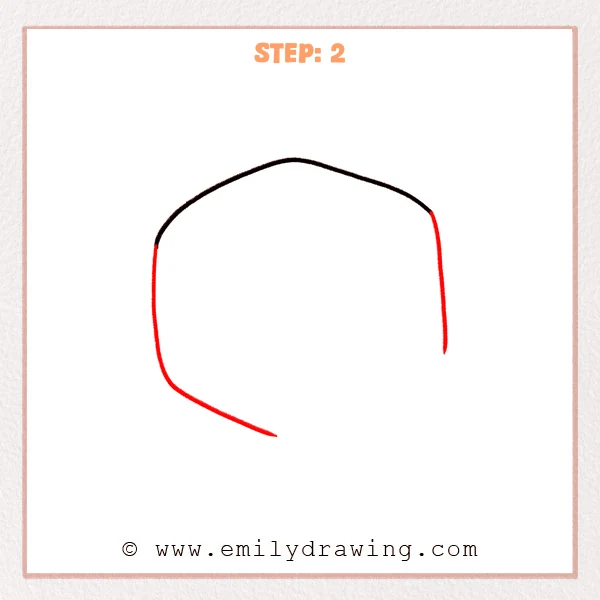
Extend both ends of the top curve downward to form the left and right outer edges.
From the lower left, sweep a short slanted line to suggest the bottom edge, leaving it open.
Pro Tip: Keep both sides similar in height so the dice feels solid and squared.
Step 3: Add the 3D Face Guides
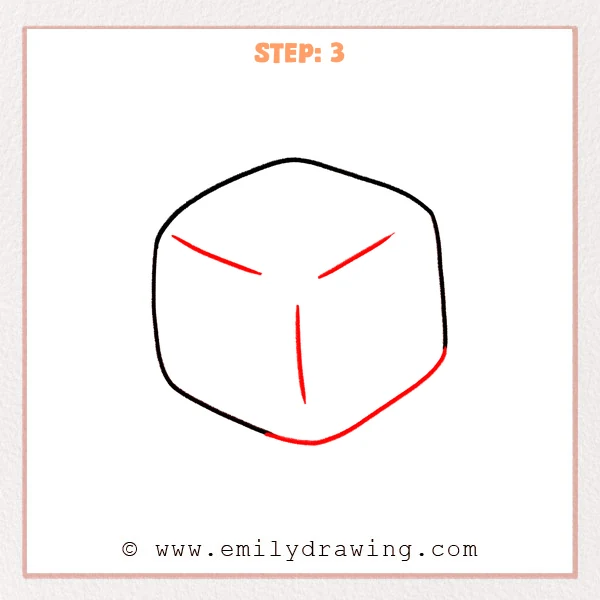
Draw two short slanted lines on the upper left and upper right, aiming inward to suggest top face edges.
Add one vertical line dropping from the center area to split the front into two faces.
Pro Tip: Keep both slanted lines at similar angles for a consistent 3D look.
Step 4: Add a Cute Face
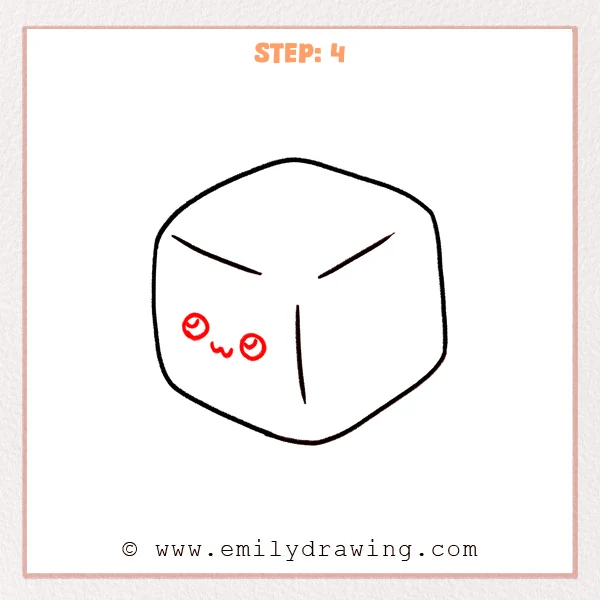
On the left face, draw two small circles for eyes and leave tiny highlights inside.
Between and slightly below them, add a short wavy curve for a little smile.
Pro Tip: Keep both eyes the same size, and place them slightly left for cuteness.
Step 5: Add the Dice Pips
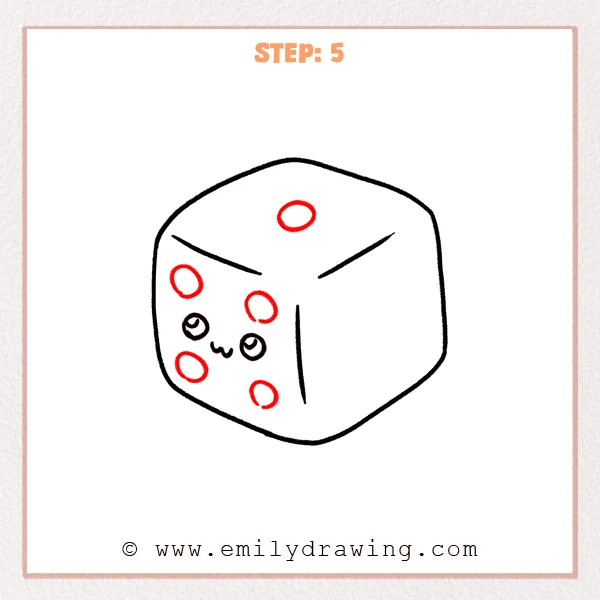
Draw one small circle in the center of the top face to show its pip.
Add several more small circles on the left face around the cute expression, spacing them near corners and edges.
Pro Tip: Keep all pip circles the same size, and space them evenly for a neat look.
Step 6: Add Pips on the Right Face
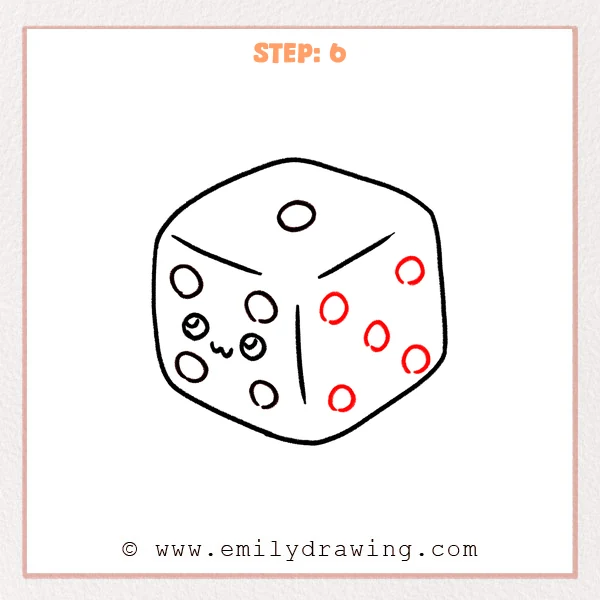
Add a set of small circular pips on the right face, spaced across the top, middle, and bottom.
Refine the earlier pips by tracing them more cleanly so each circle looks even.
Pro Tip: Let the right-face pips follow the face’s angle so the perspective feels natural.
Step 7: Color in your drawing!
Fun Facts
- Standard dice are carefully balanced so each side has equal weight.
- On many dice, opposite sides add up to seven (1–6, 2–5, 3–4).
- Rounded-corner dice roll more smoothly than sharp-edged cubes.
Pin it now, Draw later!

Thicken the outer edges a little more than the inner guide lines.
You can shade one face lightly to boost the 3D look, or keep it clean and simple.
Now you know how to draw a dice step by step—try drawing a whole set with different faces.
Get the FREE Printable Drawing Guide
FREE Download Printable Dice Drawing Tutorial
Frequently Asked Questions
How do I make the dice look more 3D?
Keep the top edges slightly angled, and make one face a little darker.
How do I place the pips evenly?
Use an invisible grid in your mind: top, middle, bottom rows with equal spacing.
Can I draw a dice without rounded corners?
Yes—use straighter lines and sharper corners, but keep the face angles consistent.