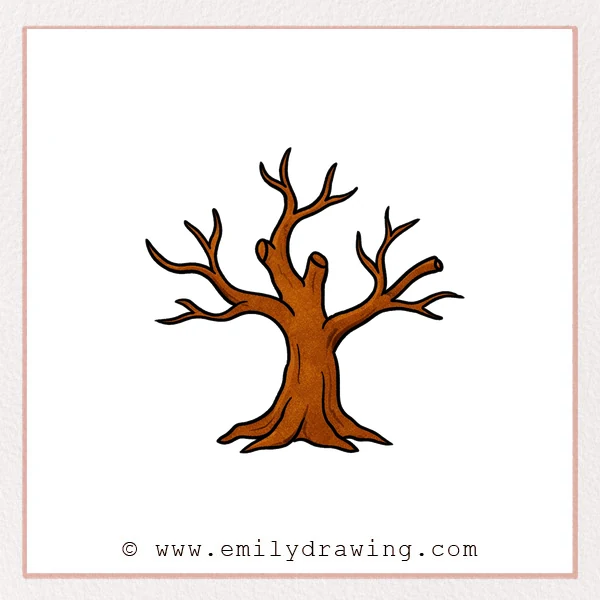
This easy drawing tutorial shows how to draw a dead tree step by step.
We will build sharp, broken branches first, then shape the trunk and roots.
Take your time, and let each line stay calm and simple.
What You Will Need
- Pencil
- Eraser
- Black pen or marker (optional for final lines)
- Paper
- Colored pencils or crayons (optional)
Here are my RECOMMENDED Art Supplies!
- Crayola Coloring Set (140 Pieces – Mega Value!)
- 24 Colored Crayon Set
- A4 Printer Paper
- Crayola Coloring Pencils
- HP Home Printer with Instant Ink!
Time needed:
14 minutes.
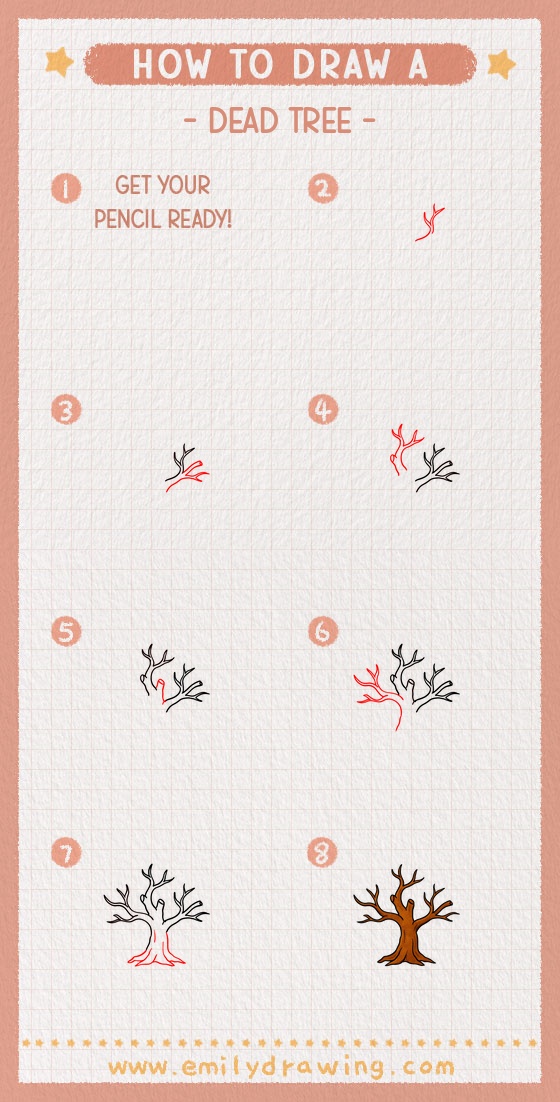
Step-by-Step Drawing Guide
Step 1: Build the Forked Branch Framework
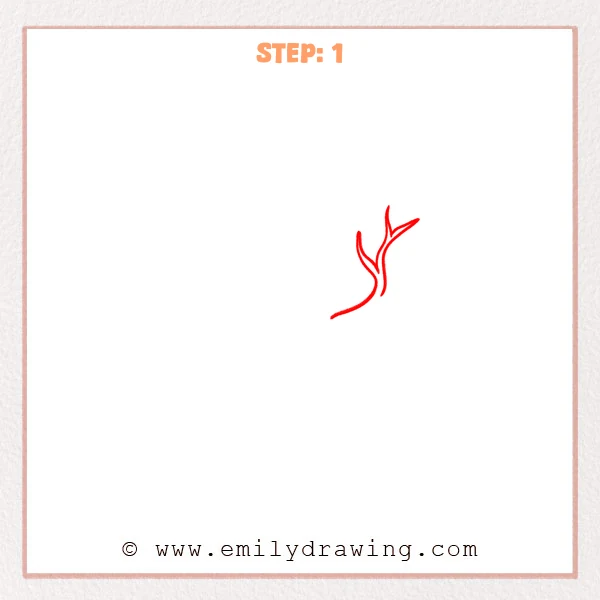
Start near the upper area with a long, slim curved main branch reaching up-right.
Add a clear Y-shaped fork at the tip, then place one or two close short lines to hint at branch thickness.
Pro Tip: Leave a small gap at the fork so the branches don’t look crowded.
Step 2: Add a Broken Stub and a Side Branch
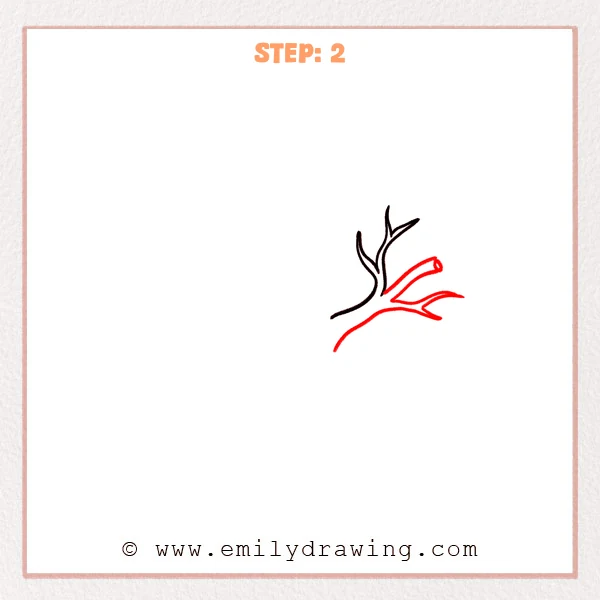
Extend a thicker branch to the right from the trunk area, and close its end with a small round opening to show a snapped-off cut.
From the same area, pull a thinner branch down-right, letting it taper into a sharp, dead-tree point.
Pro Tip: Make the cut end slightly oval so it feels like real wood.
Step 3: Extend the Upper Trunk and Add More Dead Branches
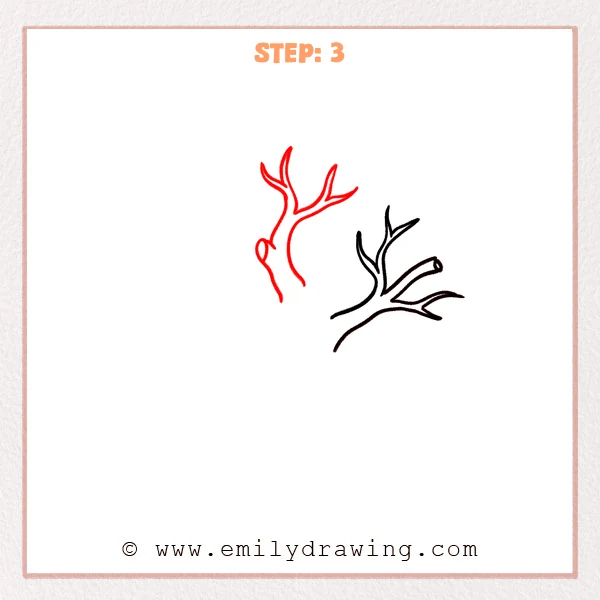
Lengthen the trunk upward from the fork so one main branch direction feels clear.
Split the top into two or three thinner branches, tapering each one to a sharp point for a dry, brittle look.
Pro Tip: Vary the branch lengths so the tree feels more natural.
Step 4: Add the Middle Broken Stump Connection
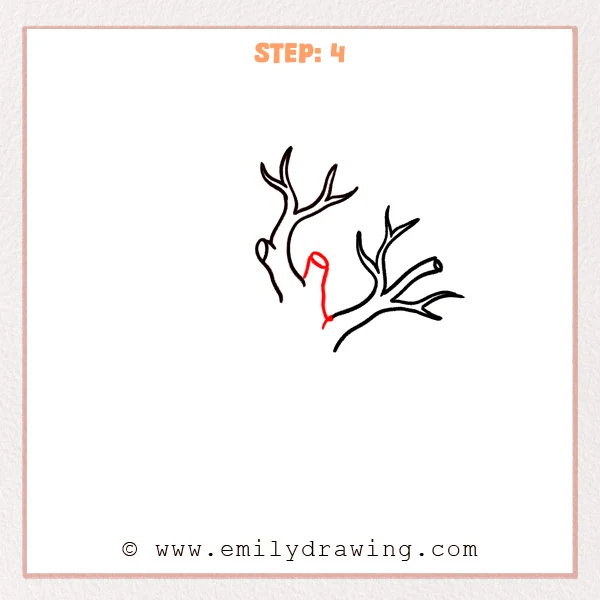
Fill in a short downward trunk piece between the two parts, so it reads like a broken stump in the middle.
Cap the top with a small oval cut surface, then gently attach the bottom into the base of the right branch so the join feels smooth.
Pro Tip: Use short curved transitions at the join so the stump looks grown into the branch.
Step 5: Add the Big Left Branch and Extend the Trunk
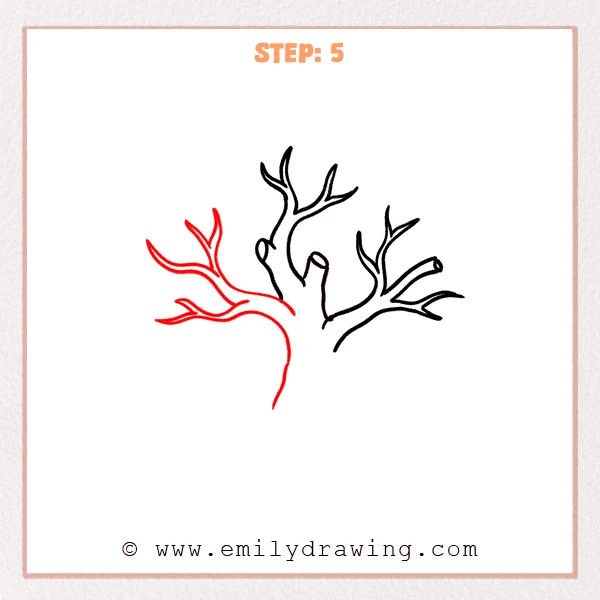
Pull a thicker, longer curved branch out to the left, like an arm reaching outward.
Split it into two smaller forks, then extend the trunk downward with a smooth long curve to complete the tree’s main shape.
Pro Tip: Start the left branch thicker, then taper slowly for a strong look.
Step 6: Finish the Root Base and Add Bark Texture Lines
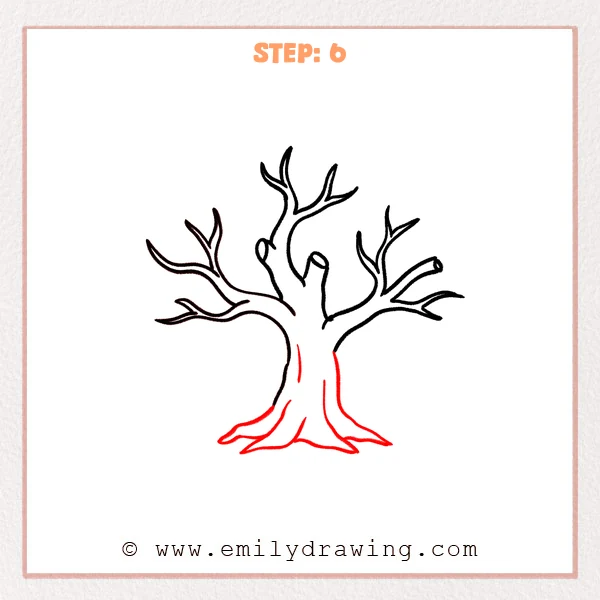
Widen the bottom into flat, spreading roots, with a few pointed bumps to show the tree gripping the ground.
Add two or three vertical curved lines down the front of the trunk to suggest bark folds and depth.
Pro Tip: Keep texture lines slightly curved, not perfectly straight, for a wood-like feel.
Step 7: Color in your drawing!
Fun Facts
- Dead trees that are left standing are often called “snags.”
- Snags can become homes for birds, insects, and small animals.
- Old bark often cracks in long lines, which is why curved texture marks work well.
Pin it now, Draw later!
You now have a complete dead tree drawing, from sharp branches to grounded roots.
For shading, darken the undersides of branches and the inner curves of the trunk.
Try a light gray or brown base layer, then add darker strokes for depth.
A common beginner mistake is making every branch the same thickness and length.
Practice a few versions, and try different branch angles for new shapes.
Get the FREE Printable Drawing Guide

FREE Download Printable Dead Tree Drawing Tutorial
Frequently Asked Questions
How do I make the dead tree look more “broken”?
Add more cut ends and keep tips sharp, not rounded.
What if my branches look too crowded?
Erase a small space at each fork, and separate the branch tips a little.
Can I color a dead tree without making it look boring?
Yes. Use warm browns, cool grays, and small highlights to show dry bark texture.