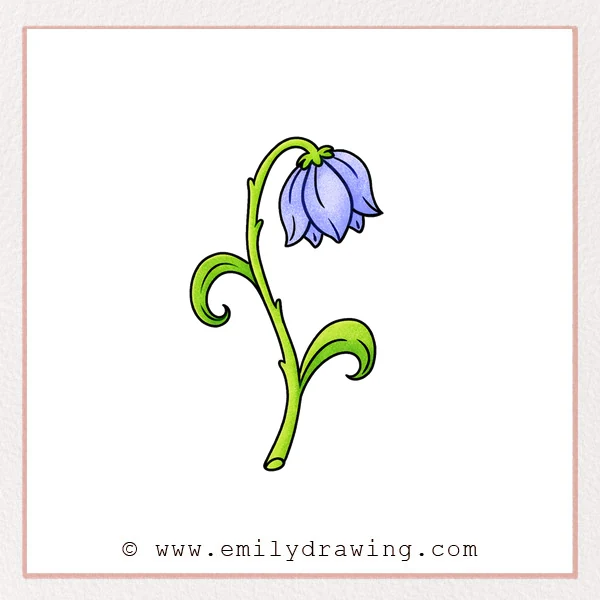
This easy drawing tutorial shows how to draw a dead flower step by step. We will focus on drooping petals, a bent stem, and curled dry leaves. Take your time, and let each line stay simple and calm.
What You Will Need
- Pencil
- Eraser
- Black pen or fineliner (optional)
- Paper
- Colored pencils or markers (optional)
Here are my RECOMMENDED Art Supplies!
- Crayola Coloring Set (140 Pieces – Mega Value!)
- 24 Colored Crayon Set
- A4 Printer Paper
- Crayola Coloring Pencils
- HP Home Printer with Instant Ink!
Time needed:
14 minutes.
Step-by-Step Drawing Guide
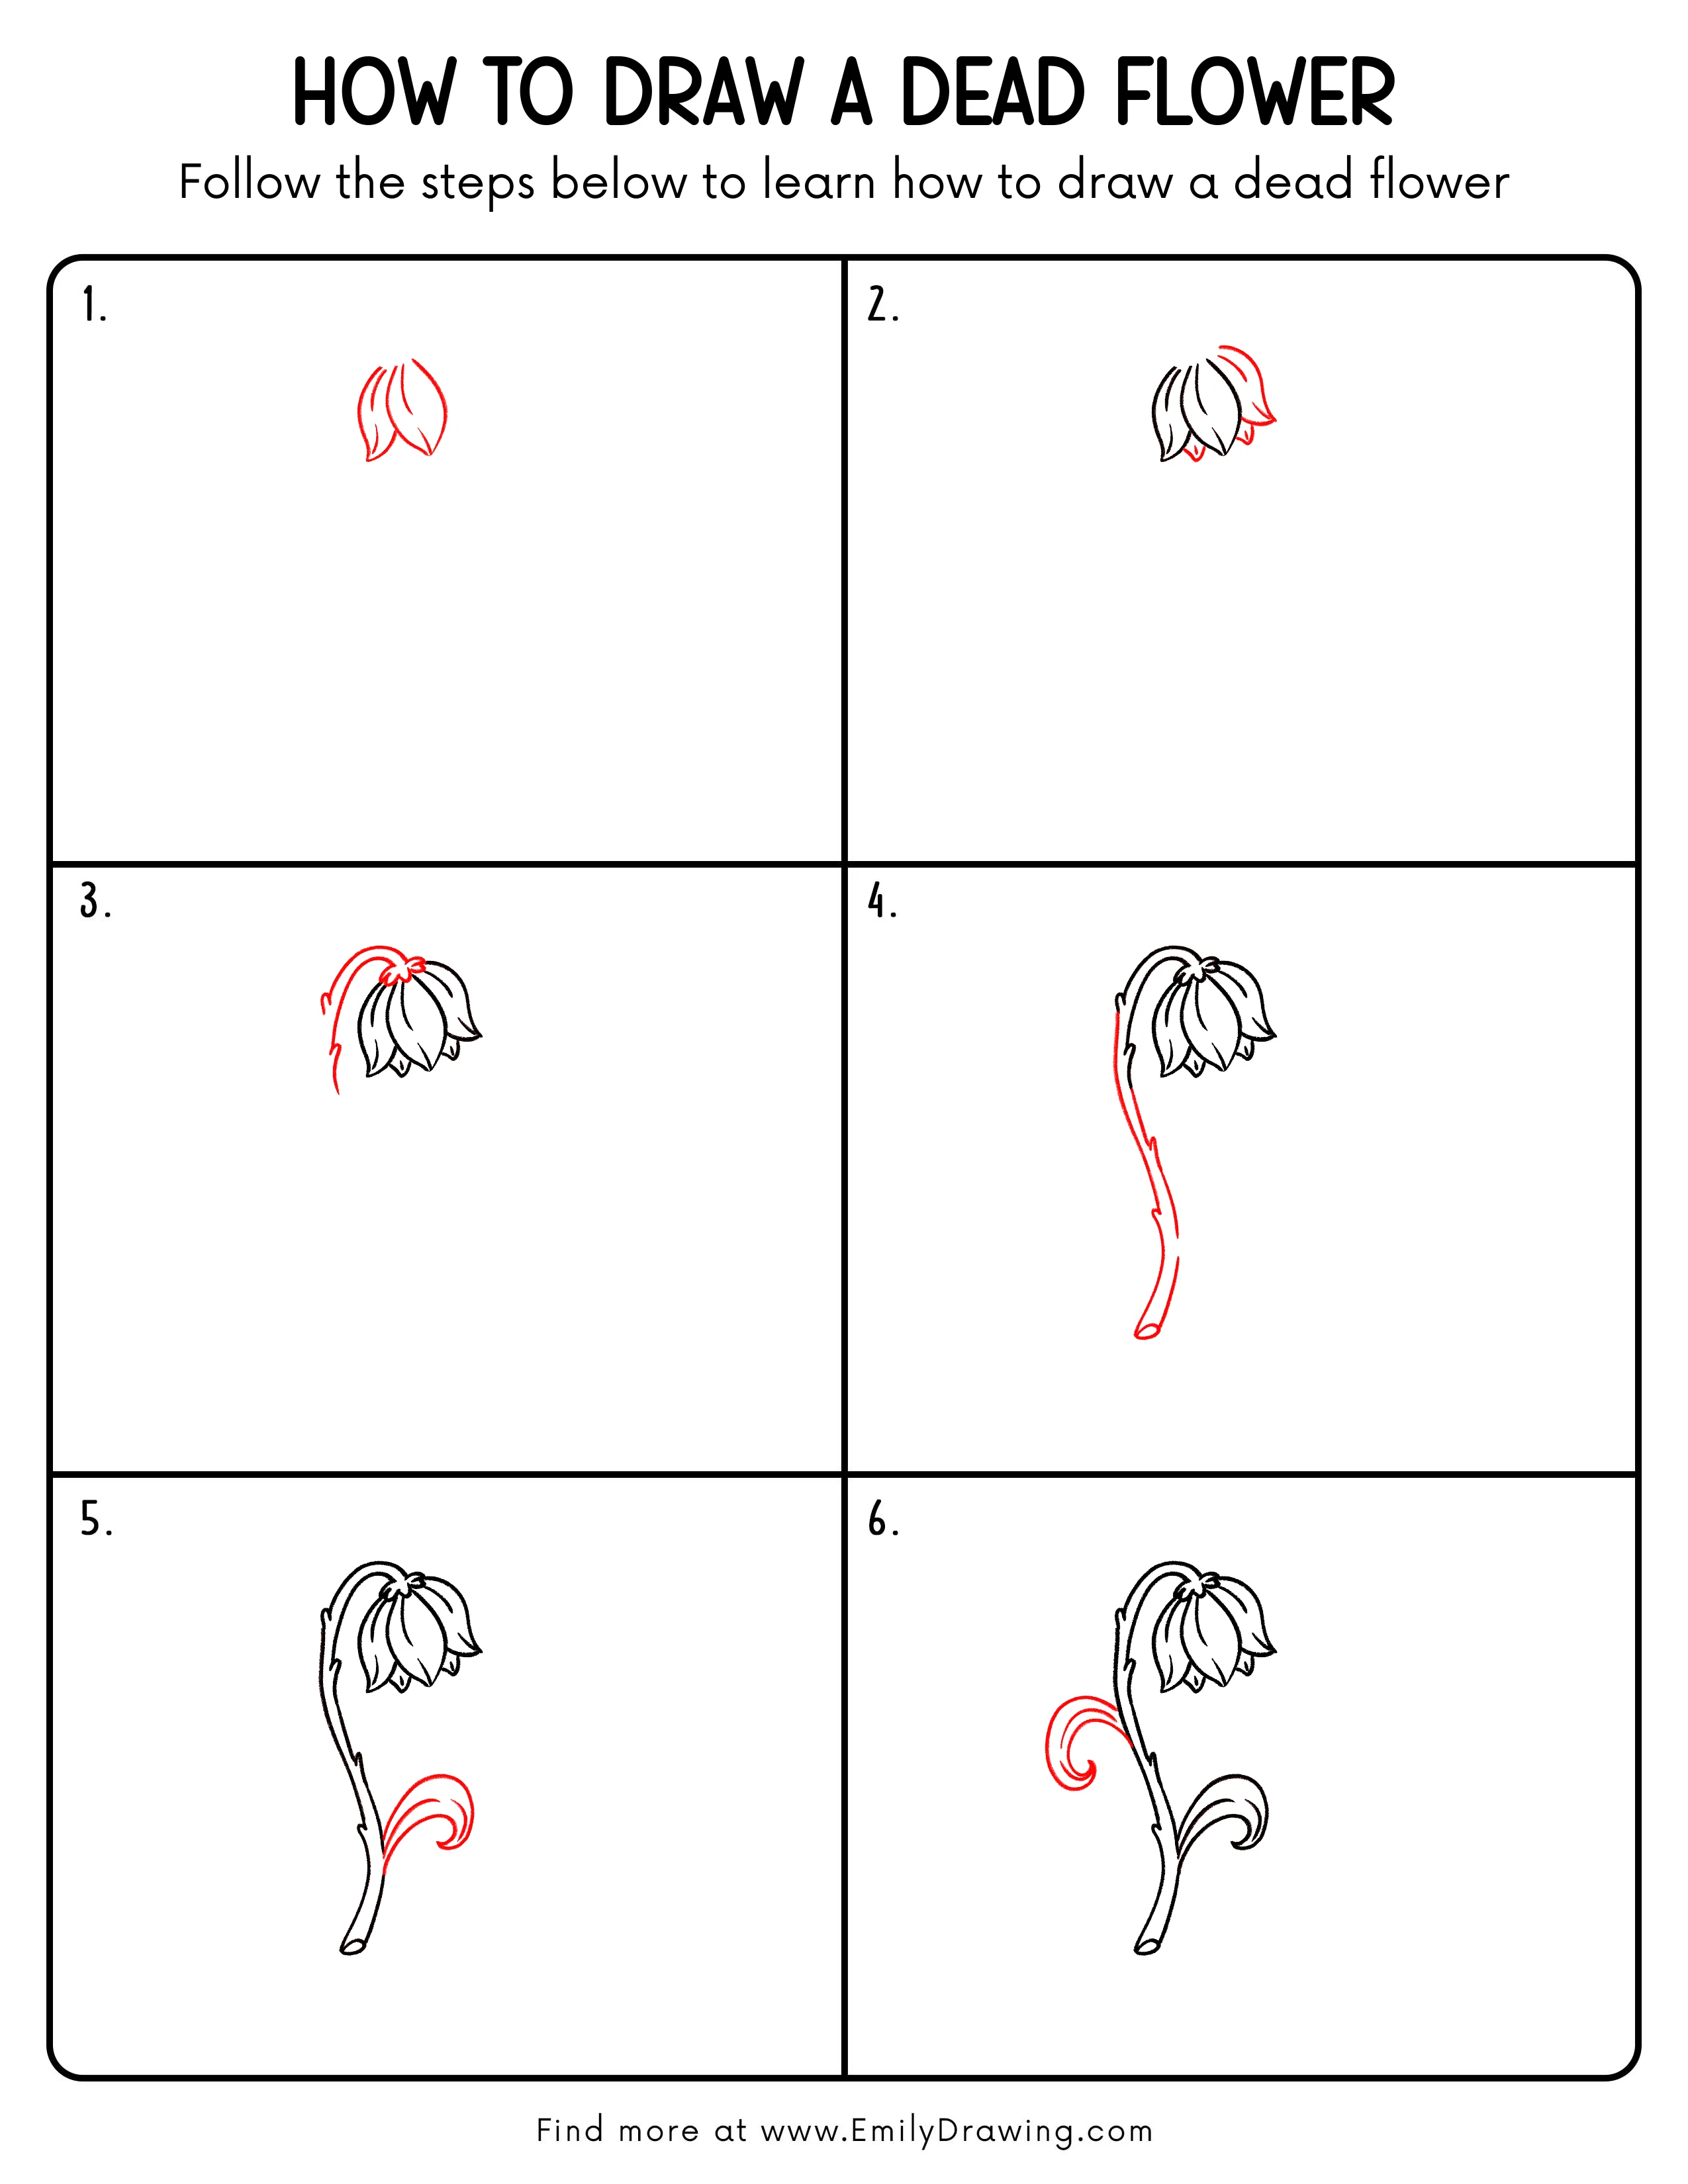
Step 1: Sketch the Drooping Petal Shapes
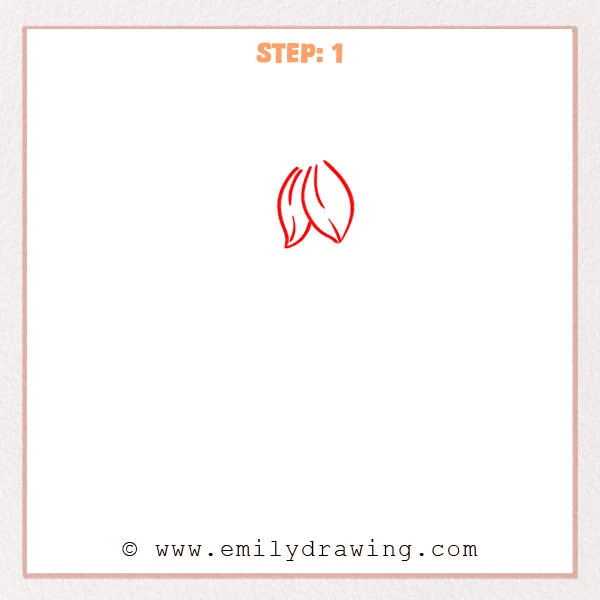
Start near the top of your page and draw three long teardrop-shaped petals that hang downward. Make the middle petal a bit shorter and the side petals longer, with small pointed tips at the bottom for a wilted feel.
Pro Tip: Keep the tops closer together and the bottoms farther apart to feel more wilted.
Alt Text: Early sketch of a dead flower showing three drooping petals with simple inner vein lines.
Step 2: Add a Side Drooping Petal
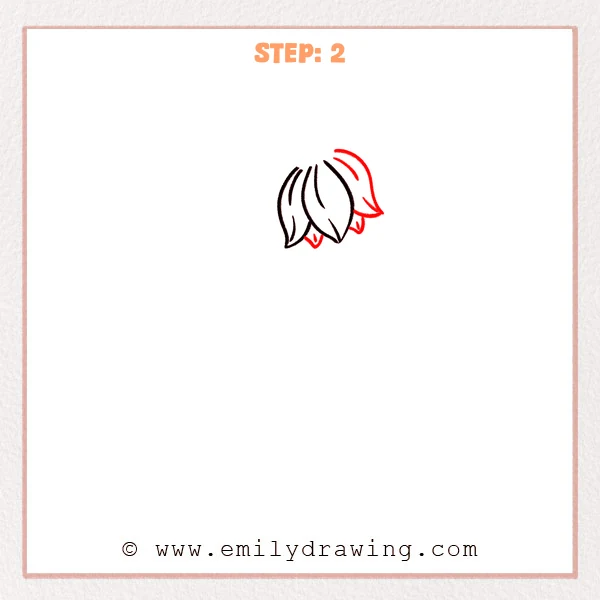
Add one larger petal on the right, starting behind the top and curving outward as it droops. Then sketch two tiny pointed “torn petal” tips underneath to make the wilted edge feel more real.
Pro Tip: Make the right petal slightly wider and curl the tip more to show weight.
Alt Text: Dead flower sketch with a new larger right-side drooping petal and small pointed torn tips added beneath the petals.
Step 3: Add the Curved Stem and Wilted Calyx
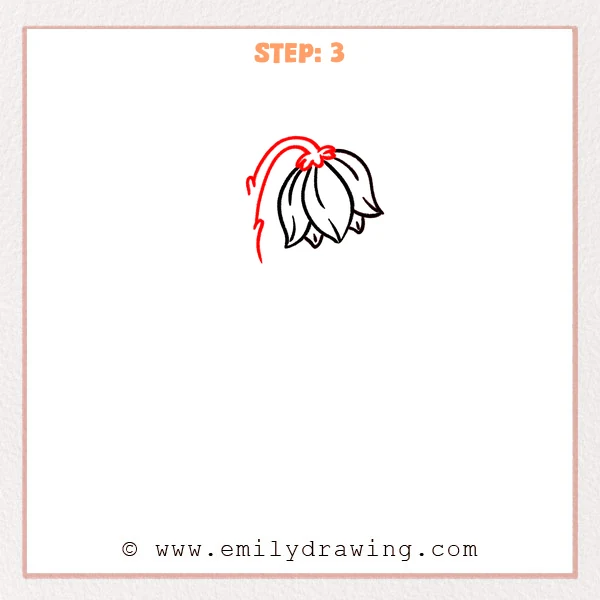
From the top of the flower, sketch a long curved stem that arches up and left, then add a second line beside it for thickness. At the very top of the petals, draw a small calyx shape, like a few short leaf points hugging the base.
Pro Tip: A slightly uneven curve makes the droop feel more natural.
Alt Text: Dead flower drawing with a new arched stem added above and a small calyx at the top of the drooping petals.
Step 4: Extend the Stem and Add a Cut End
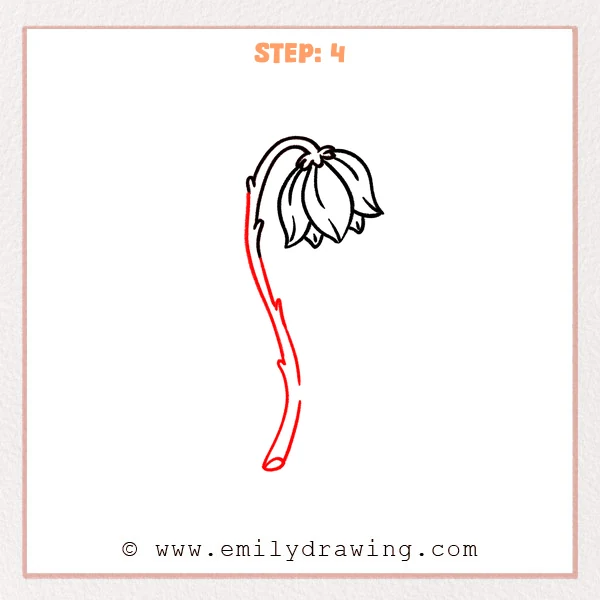
Continue the curved stem downward into a long, thin tube shape, with a gentle twist through the middle. At the very bottom, add a small oval to show the cut end, keeping the edge slightly uneven for a dried look.
Pro Tip: Let the stem edges vary a little in width so it feels dry and natural.
Alt Text: Dead flower drawing with a long, curved stem extended downward and a small oval cut end at the bottom.
Step 5: Add a Curled, Dried Leaf
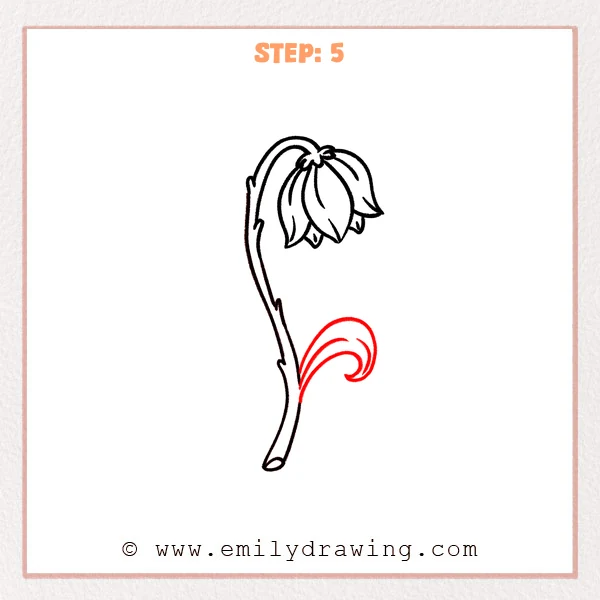
On the lower right side of the stem, sketch a leaf that sticks out and curls into a swirl shape. Add two or three curved vein lines inside to make it look dry and brittle.
Pro Tip: Let the vein lines follow the curl so the leaf feels more 3D.
Alt Text: Dead flower drawing with a new curled leaf sprouting from the stem, showing curved inner vein lines.
Step 6: Add a Second Curled, Dried Leaf

On the left side of the stem, add another leaf that reaches out and curls into a tighter spiral. Draw one or two inner curved lines that follow the swirl to match the dry, wrinkled look of the other leaf.
Pro Tip: Let the two leaves curl in different directions to keep it natural.
Alt Text: Dead flower drawing with a new curled leaf added on the left side of the stem, including simple inner vein lines.
Step 7: Color in your drawing!
Fun Facts
- A flower often droops when it loses water pressure inside its stem.
- Dried petals can curl as they shrink, which is why dead flowers look wrinkled.
- A bent stem can show age, damage, or simply dryness over time.
Pin it now, Draw later!

Now you have a simple dead flower drawing with drooping petals, a heavy stem, and curled leaves. To finish, trace your favorite lines with a pen and erase leftover pencil marks. Add light shading under the petals and along one side of the stem to show form, then use soft browns, dusty reds, or muted greens for a dried look. A common beginner mistake is making every petal the same size, so keep small changes for a more natural feel. Practice this step by step drawing a few times, and try drawing a different wilted flower next.
Get the FREE Printable Drawing Guide
FREE Download Printable Dead Flower Drawing Tutorial
Frequently Asked Questions
How do I make the flower look more “dead” or dry?
Add sharper tips, a little wrinkling, and gentle shading where petals fold.
What if my stem looks too straight?
Redraw it with a longer curve and a slight twist in the middle.
Can I use this drawing for beginners with markers?
Yes, just outline first and use light colors before adding darker shading.