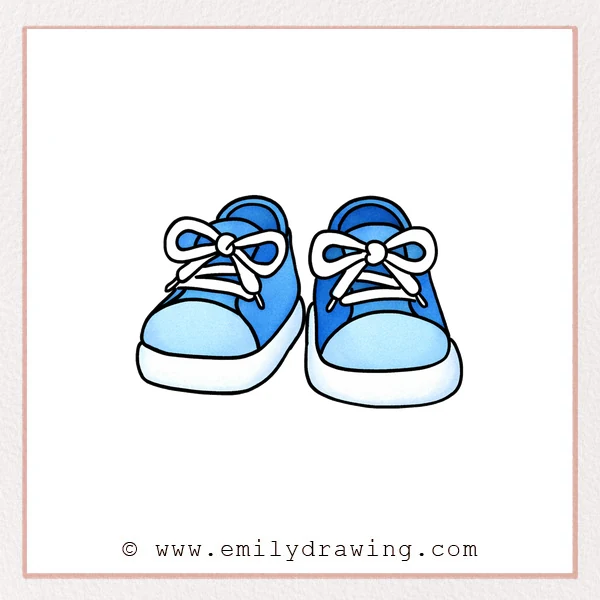
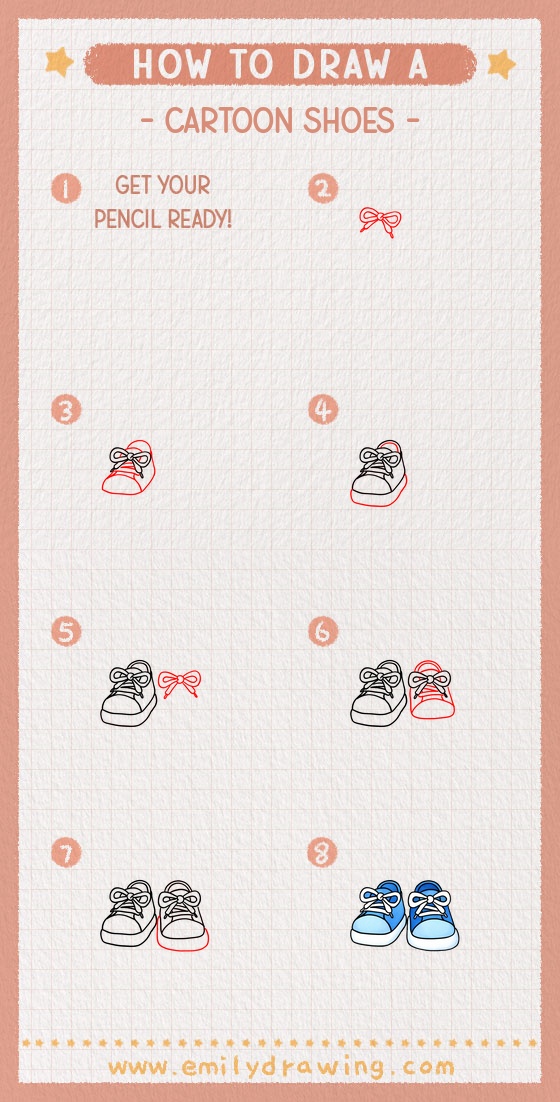
This easy drawing tutorial shows how to draw cartoon shoes step by step. You will build two cute sneakers with big bows, using simple shapes and calm, steady lines. It is a friendly drawing for beginners and a fun way to practice curves.
What You Will Need
- Pencil
- Eraser
- Black pen or marker (optional for outlining)
- Coloring tools (colored pencils, markers, or crayons)
- Paper
Here are my RECOMMENDED Art Supplies!
- Crayola Coloring Set (140 Pieces – Mega Value!)
- 24 Colored Crayon Set
- A4 Printer Paper
- Crayola Coloring Pencils
- HP Home Printer with Instant Ink!
Time needed:
15 minutes.
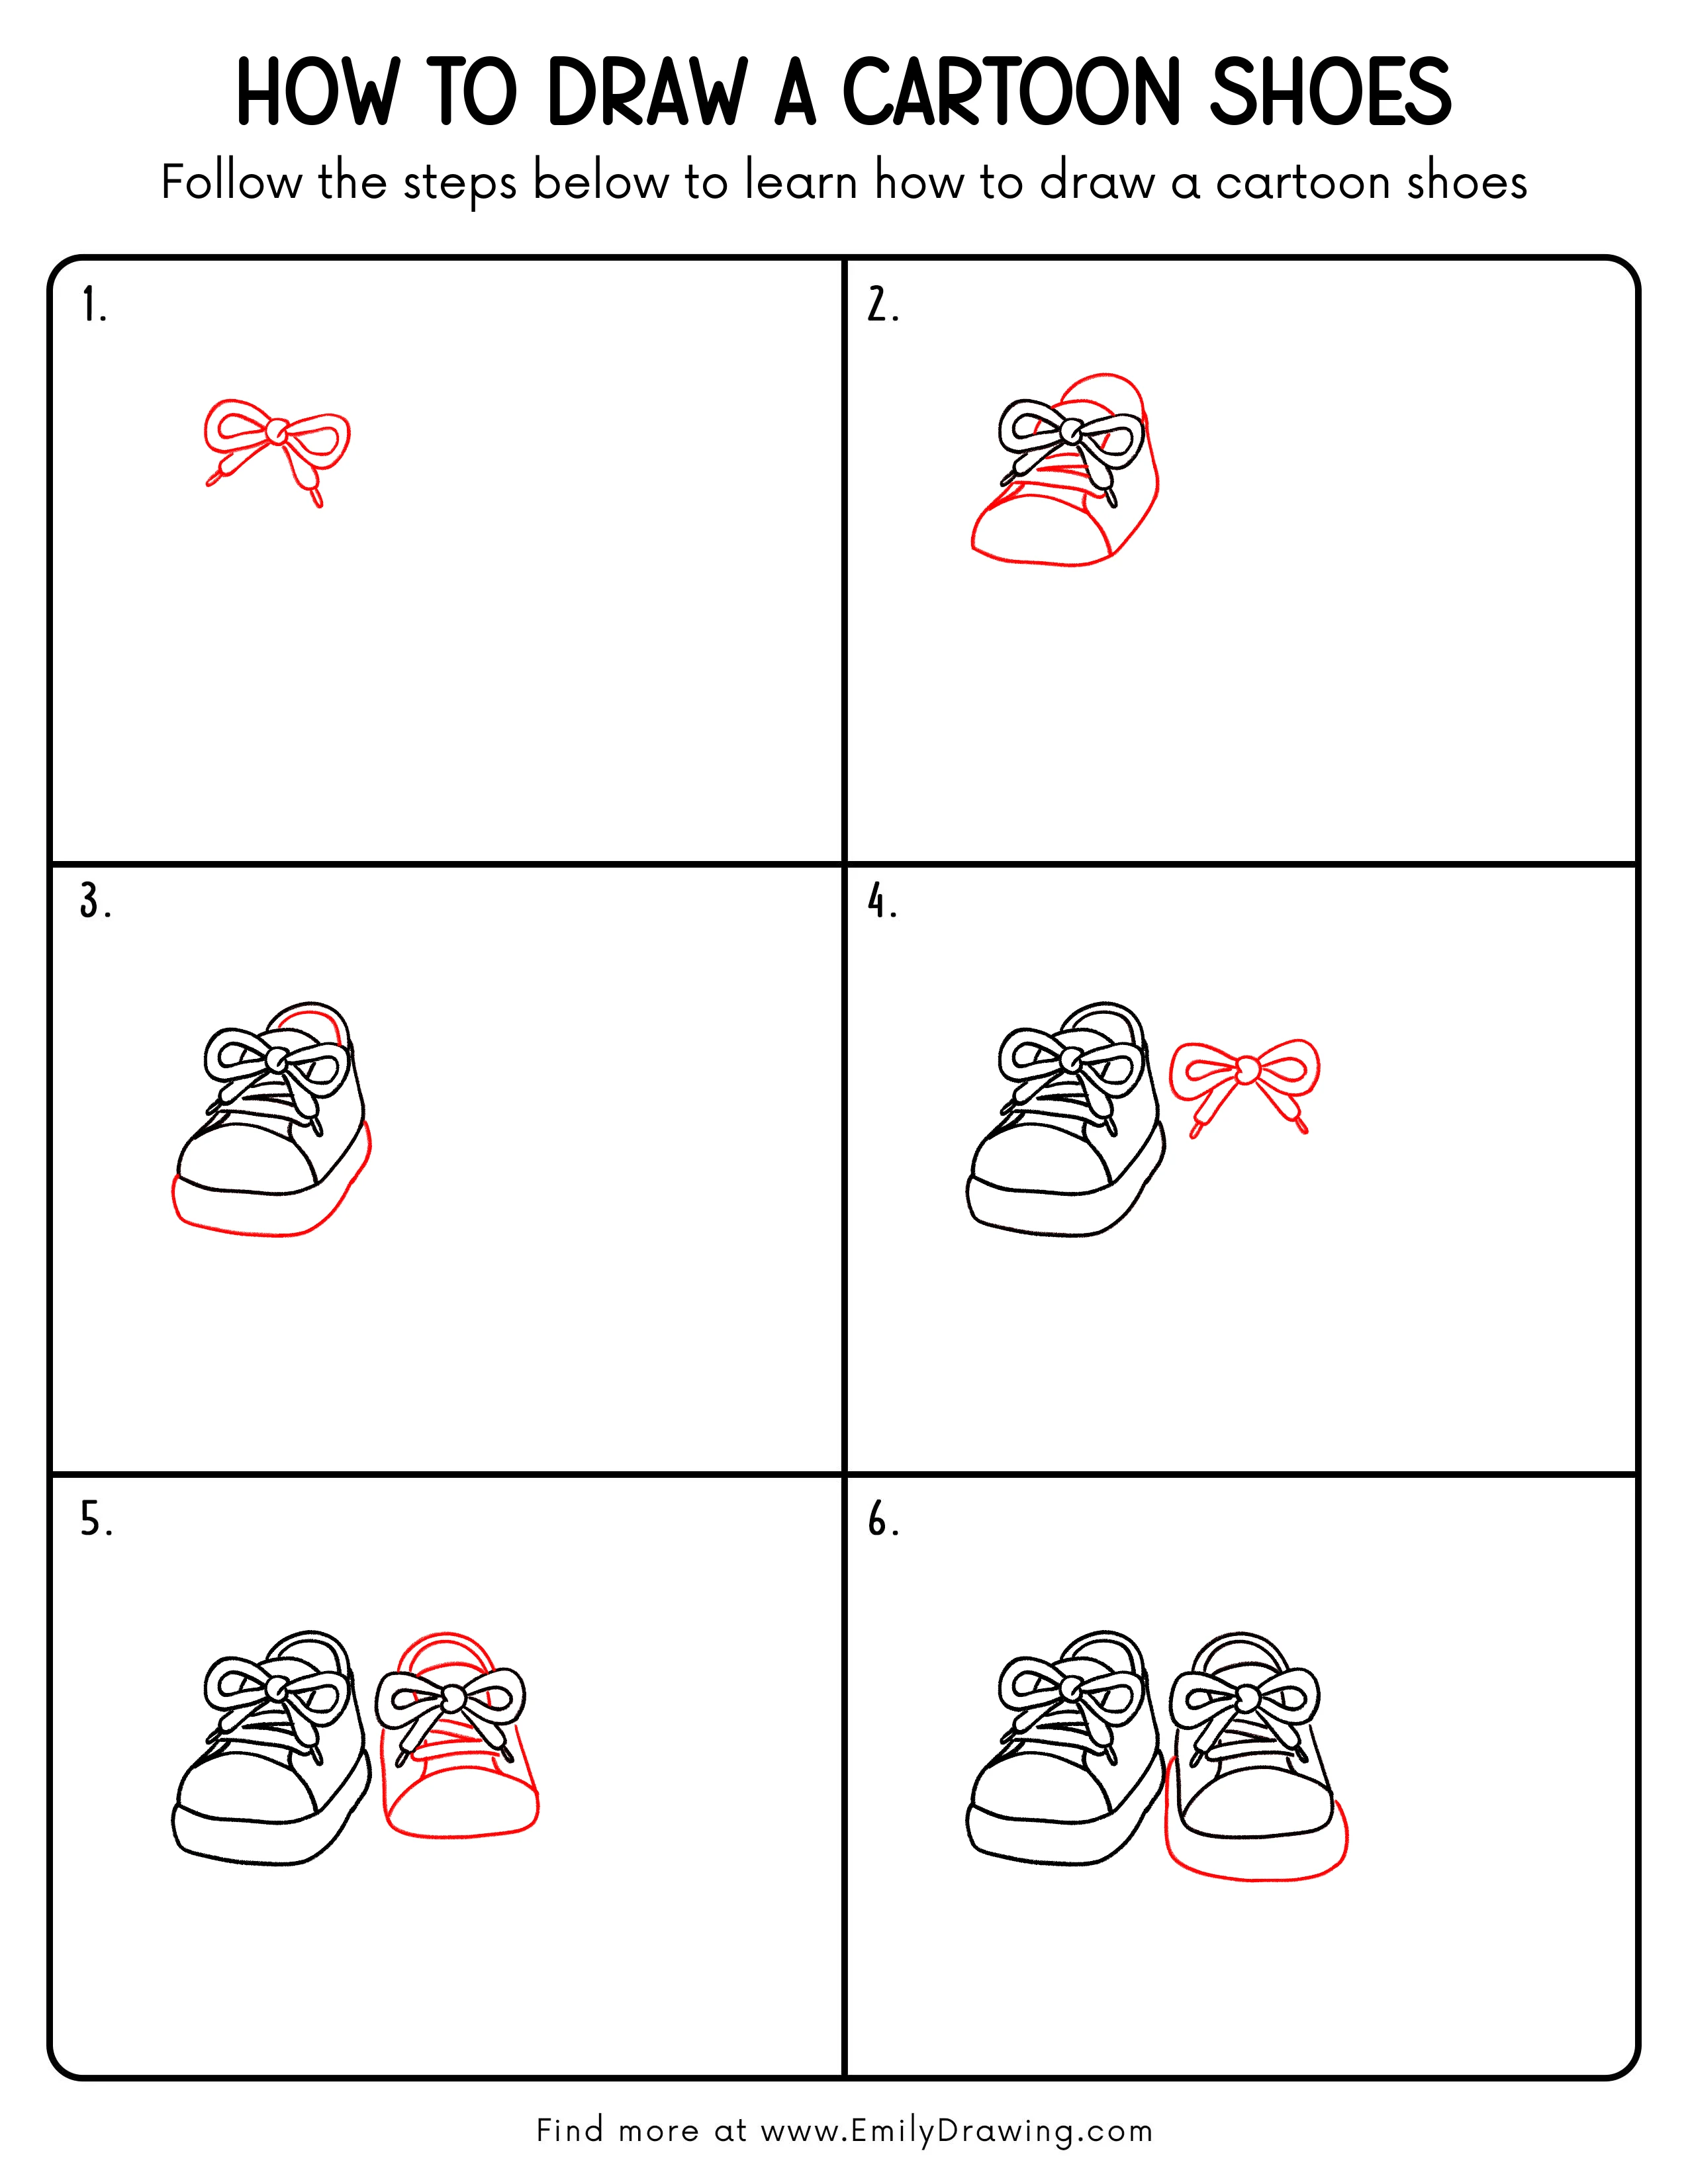
Step-by-Step Drawing Guide
Step 1: Draw the Shoelace Bow
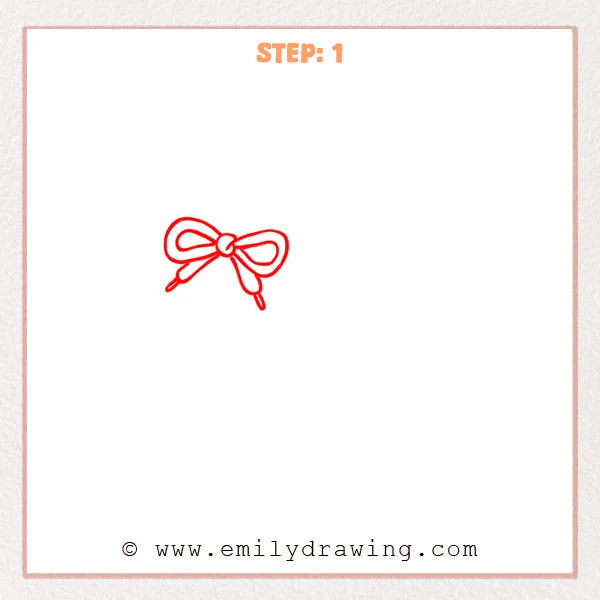
Start with a small circle near the upper center for the shoelace knot. Add one large loop on each side using rounded oval shapes, then draw a thin inner line inside each loop for depth. Finish with two short lace ends hanging below the knot, with softly rounded tips.
Pro Tip: Keep both loops similar in size so the bow looks neat.
Alt Text: Early sketch of cartoon shoes showing a shoelace bow with a round knot, two rounded loops, and two short lace ends.
Step 2: Add the Shoe Shape and Laces
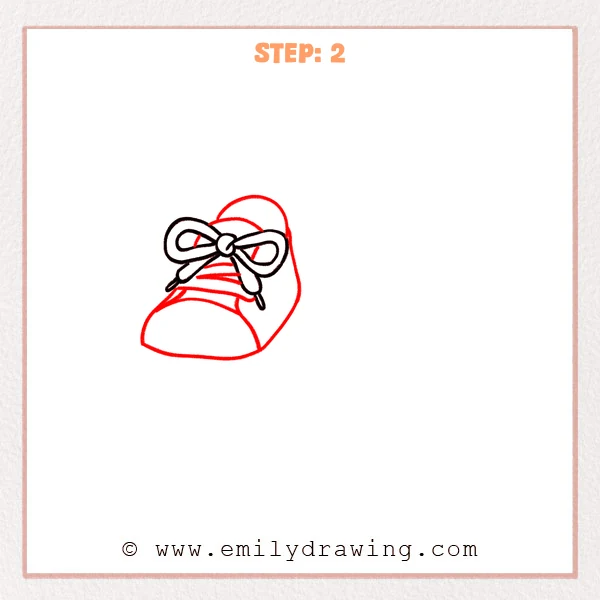
Behind the bow, sketch a large curved outline to form the upper and heel, like a tilted bean shape. Add a rounded toe cap at the front, then separate it from the upper with a soft curved seam line. Under the bow, draw a few short curved stripes to suggest the shoelaces across the tongue.
Pro Tip: Make the toe cap wide and round for a cute cartoon look.
Alt Text: Cartoon shoe sketch with a large rounded sneaker outline, a toe cap seam, and several curved lace lines beneath the shoelace bow.
Step 3: Add the Thick Sole and Heel Edge
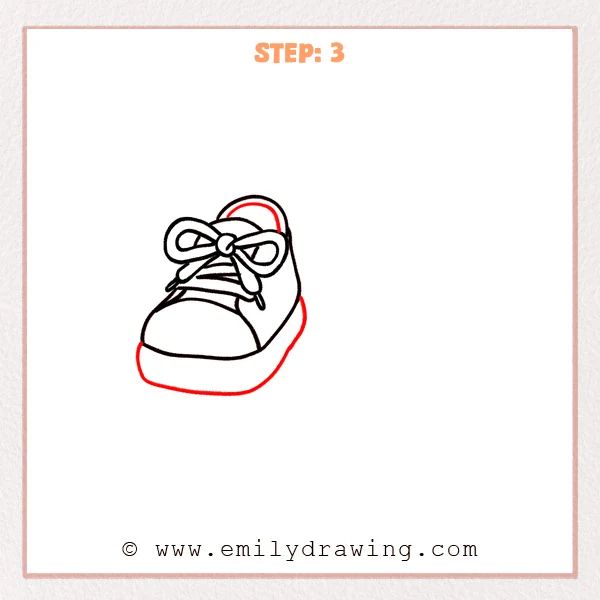
Trace a wider curved band under the shoe to create a chunky sole, keeping the front nice and rounded. Lift the sole slightly at the back to show a higher heel edge, so the shoe feels more three-dimensional. Finish by adding a simple inner curve at the opening to suggest the soft collar.
Pro Tip: Make the sole band thicker than the upper for a stronger cartoon style.
Alt Text: Cartoon shoe drawing with a newly added thick, rounded sole band and a small inner collar line near the opening.
Step 4: Draw the Second Bow Accessory
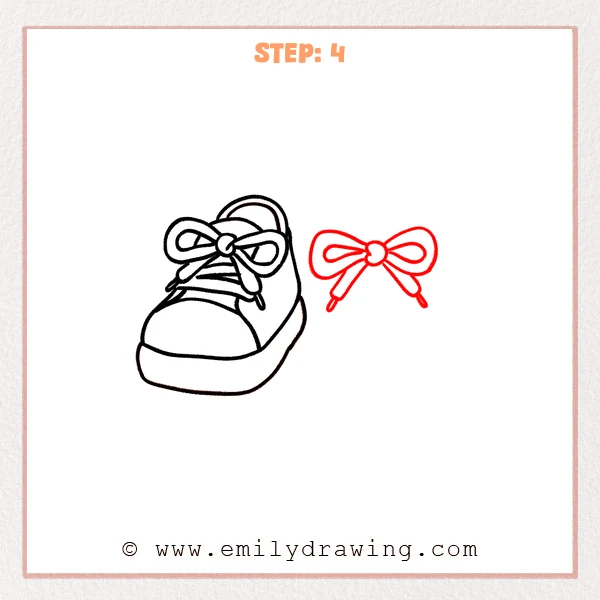
Leave some space to the right of the shoe and sketch a matching bow, starting with a small round knot. Make the two loops a little flatter, then let the two lace ends drop down and split apart gently. Clean up the curves so it looks like the bow for the other cartoon shoe.
Pro Tip: Keep this bow close in size to the first one.
Alt Text: Cartoon shoe with a finished outline and a separate matching shoelace bow drawn to the right, ready to pair with the other shoe.
Step 5: Build the Second Shoe
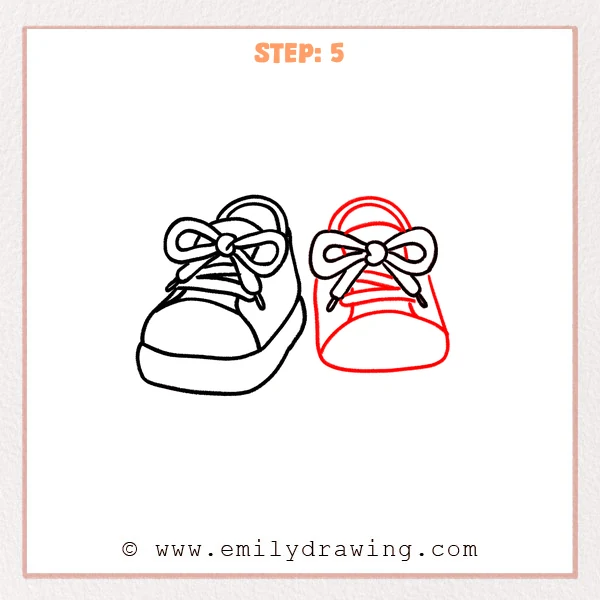
Turn the bow on the right into a full shoe by drawing the upper outline behind it, with the toe facing forward. Add a rounded toe cap and a gentle curved seam to separate it from the upper. Under the bow, sketch a few curved lace stripes across the tongue, then add an inner curve at the opening.
Pro Tip: Since this shoe faces front, keep the toe curve more symmetrical.
Alt Text: Two cartoon shoes side by side, with the second shoe newly drawn in a front-facing view, including a bow, lace stripes, toe cap seam, and collar line.
Step 6: Add the Thick Sole to the Second Shoe
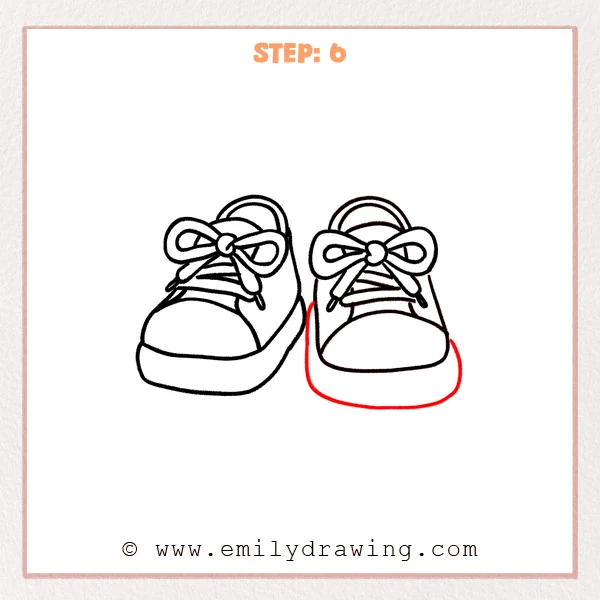
Draw a wider curved band around the bottom of the right shoe to form a chunky sole. Keep the front extra rounded and let the back wrap up slightly, matching the thickness of the left shoe. Slow down on the curves so the sole looks smooth and even.
Pro Tip: Keep the outer and inner sole lines parallel for steady thickness.
Alt Text: Two cartoon shoes side by side, with the second shoe now gaining a thick rounded sole band to match the first shoe.
Step 7: Color in your drawing!
Fun Facts
- Sneakers often have a rubber outsole, which helps with grip and comfort.
- Cartoon shoes look cuter when the toe is wider than real shoes.
- A thicker sole is an easy trick to make a drawing feel more playful.
Pin it now, Draw later!
Now you have a pair of cartoon shoes with big bows and chunky soles. Try outlining your favorite lines with a darker pen, then erase any leftover sketch marks. For coloring, keep the shoe body a lighter color and the bows a brighter color so they stand out. Add a soft shadow under each shoe with light gray to help them sit on the page.
A common beginner mistake is making the second shoe’s sole much thinner than the first one. If that happens, gently redraw the sole band so both shoes feel like a matching pair.
Keep practicing this step by step drawing, and try making new versions with different patterns or colors. When you are ready, draw another pair in a new style and build your own easy drawing tutorial collection.
Get the FREE Printable Drawing Guide
FREE Download Printable Cartoon Shoes Drawing Tutorial
Frequently Asked Questions
How do I keep both cartoon shoes the same size?
Start the second shoe with a bow that matches the first bow, then keep the toe and sole widths similar.
My bow looks uneven. What should I do?
Lightly sketch the two loops first, then adjust the bigger side before you darken the lines.
How can I make this drawing for beginners look more 3D?
Add a small shadow under the shoes and a gentle highlight curve on the toe cap.