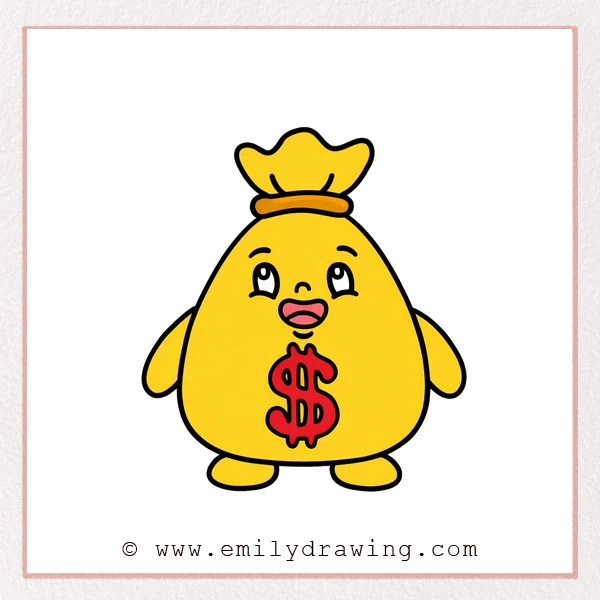
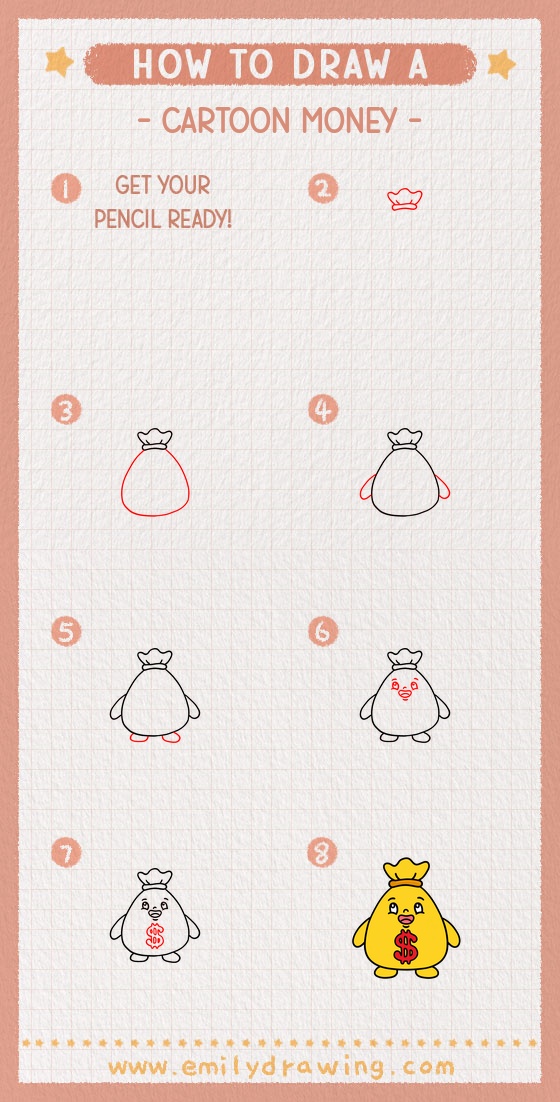
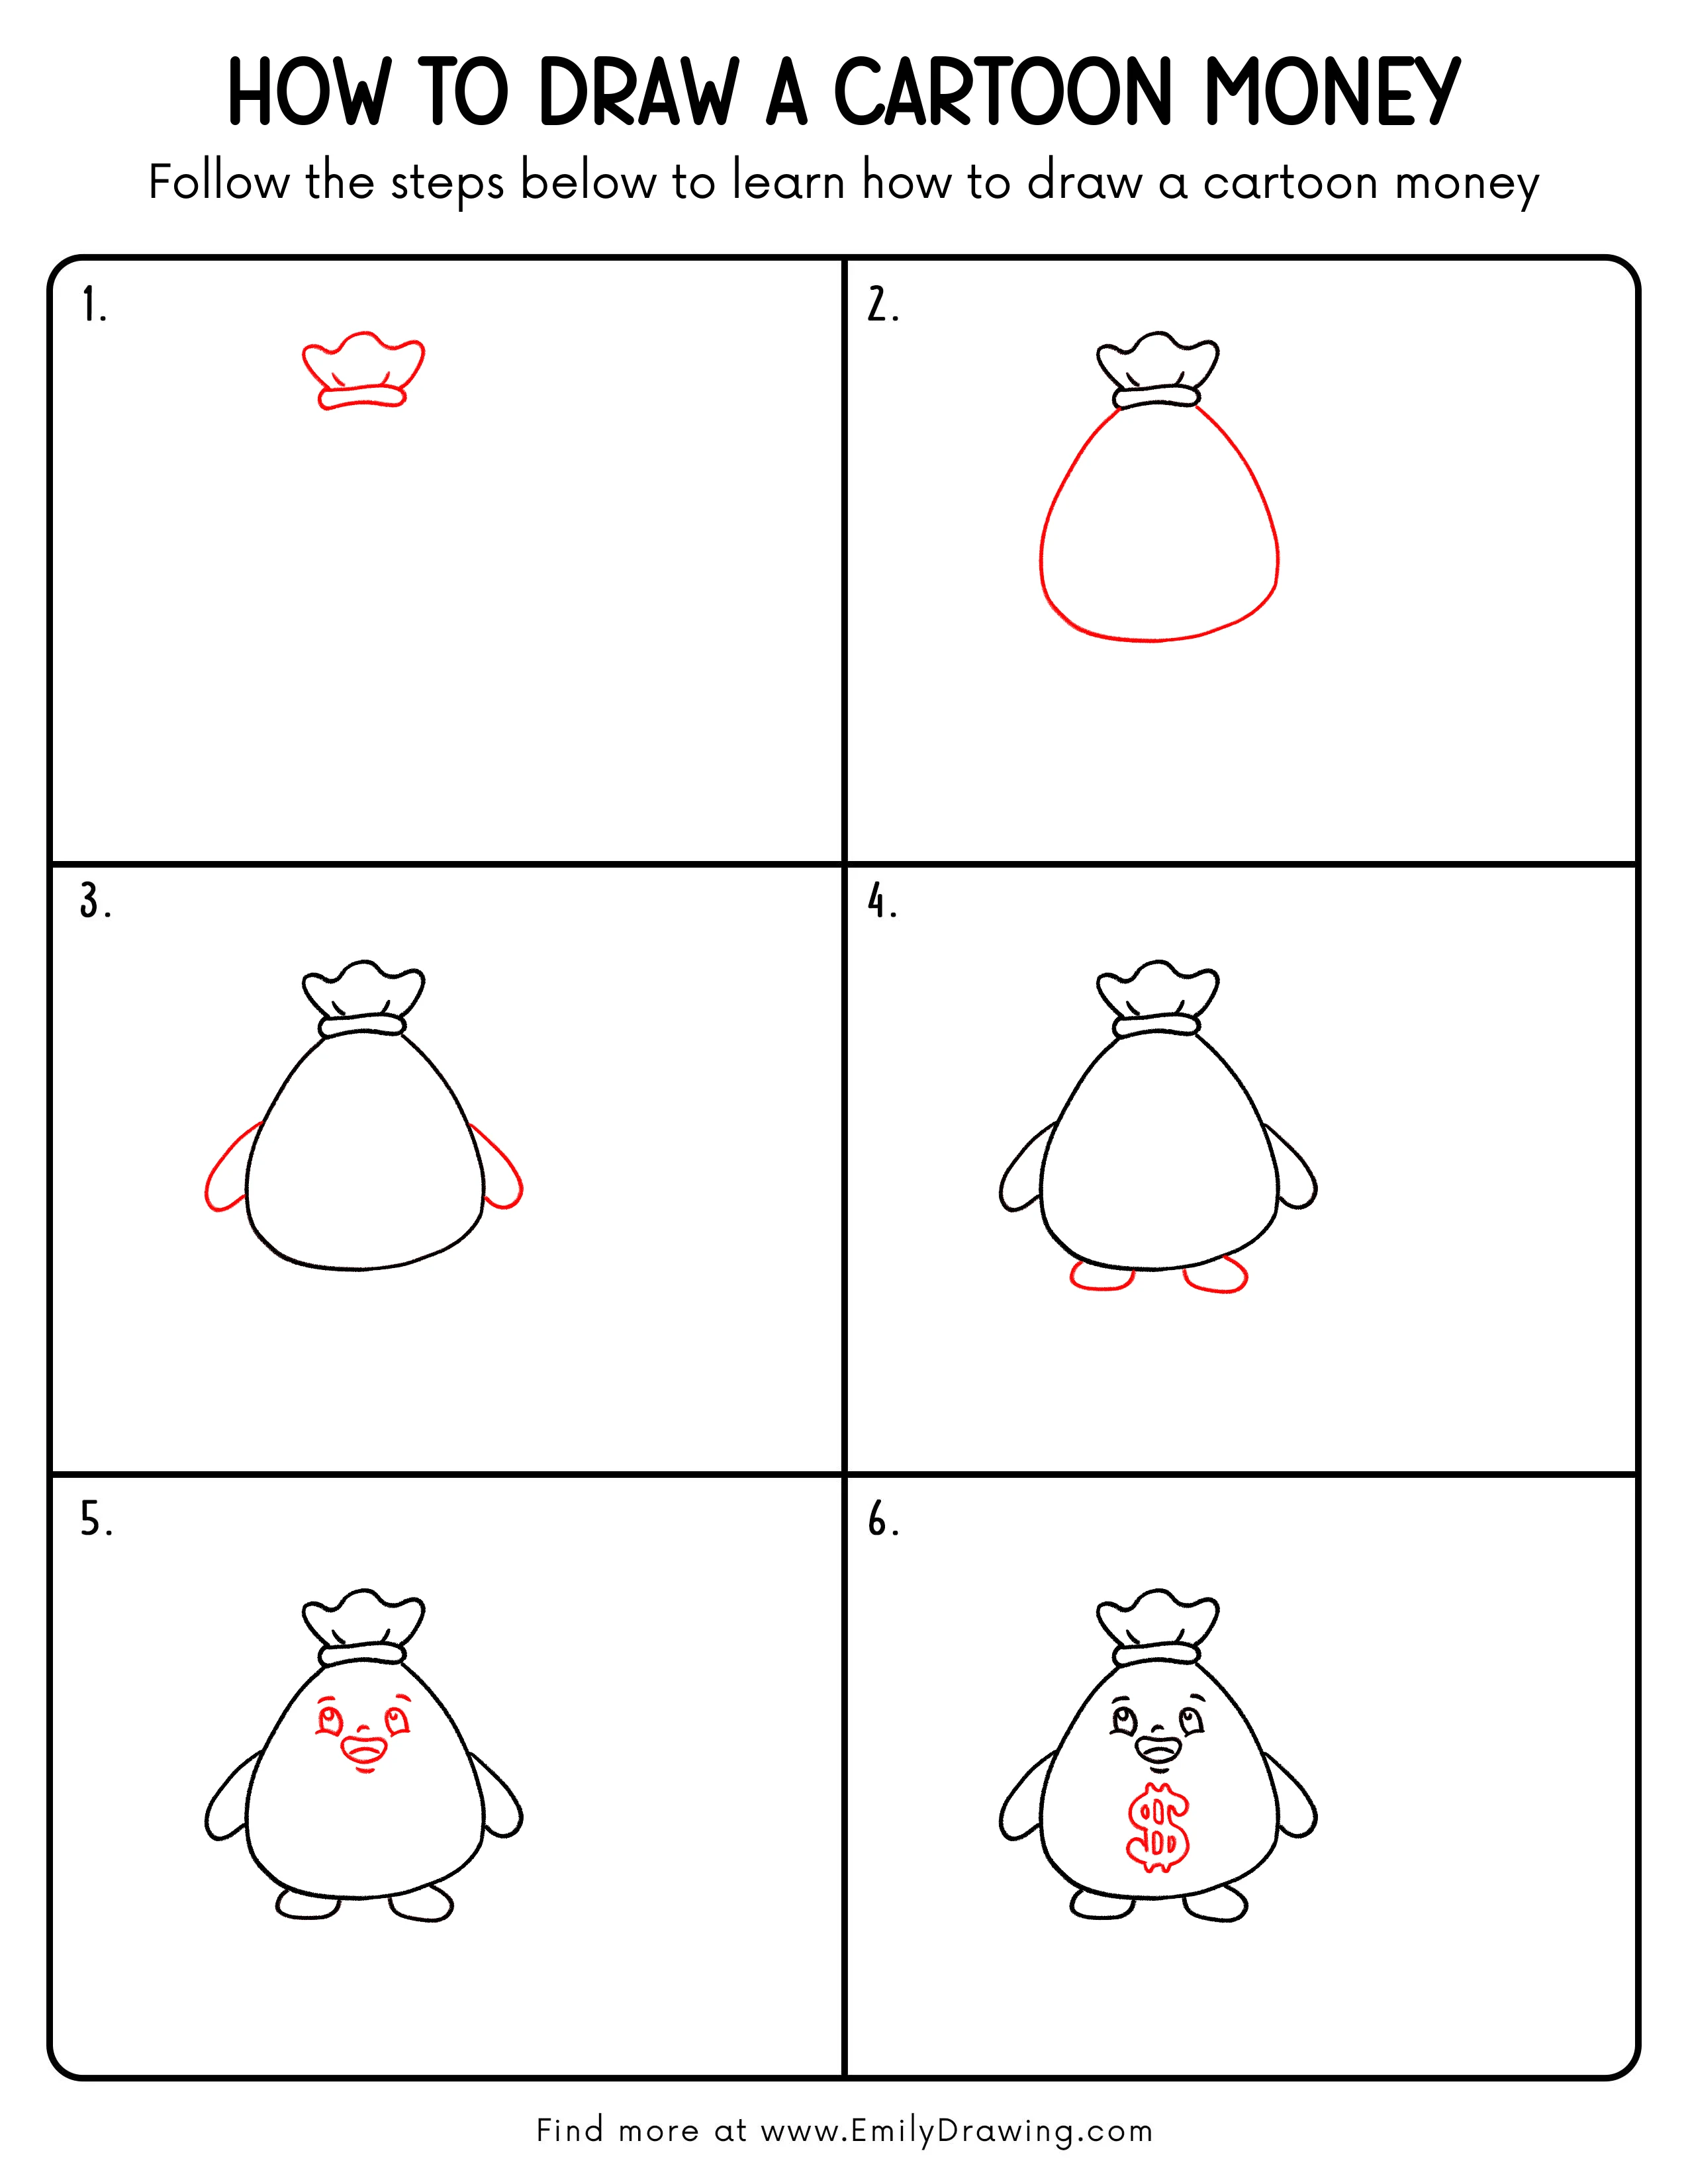
This easy drawing tutorial shows you how to draw a cartoon money bag step by step. We will build a friendly character using simple shapes and gentle curves. Take your time, and enjoy this drawing for beginners.
What You Will Need
- Pencil
- Eraser
- Black marker or pen (optional for outlining)
- Colored pencils or markers (optional)
Here are my RECOMMENDED Art Supplies!
- Crayola Coloring Set (140 Pieces – Mega Value!)
- 24 Colored Crayon Set
- A4 Printer Paper
- Crayola Coloring Pencils
- HP Home Printer with Instant Ink!
Time needed:
30 minutes.
Step-by-Step Drawing Guide
Step 1: Sketch the Money Bag Opening
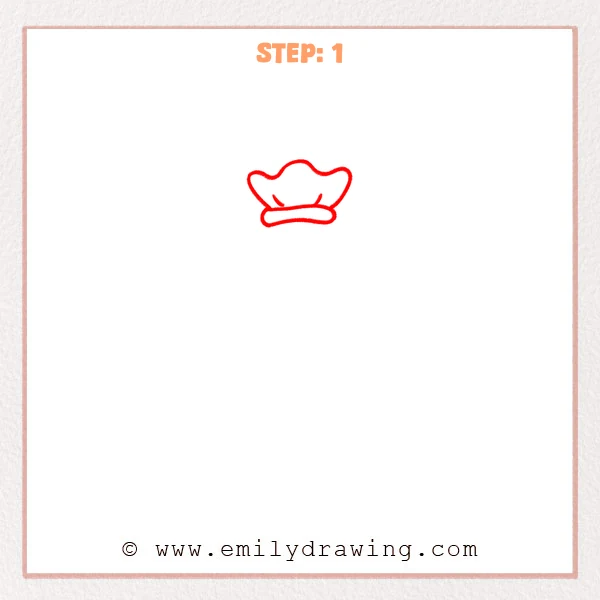
Start near the top of your page with a soft wavy shape, like puffed fabric. Add a flat curved band underneath it to form the tied opening. Then place two short curved lines inside to suggest gentle folds.
Pro Tip: Keep the bumps rounded, not pointy, so it feels like fabric.
Step 2: Add the Round Bag Body
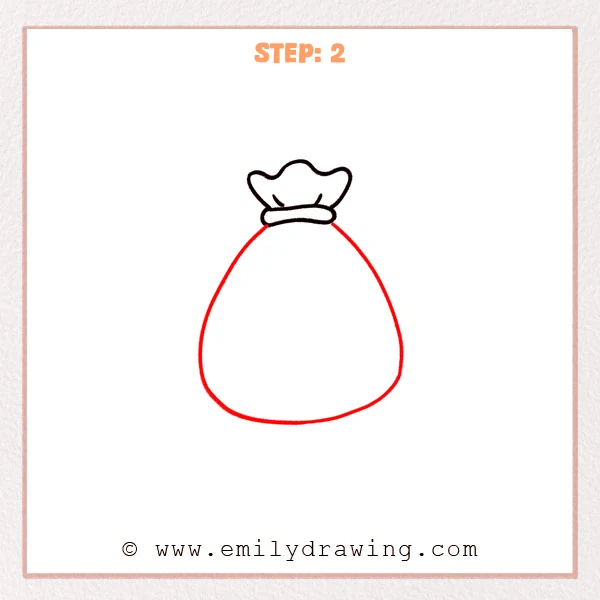
From both sides of the tie, draw two long curves that bow outward as they go down. Connect them with a wide, rounded curve at the bottom to make a teardrop-shaped belly. Keep the bottom curve gently flat so the money bag feels stable.
Pro Tip: Aim for symmetry on both sides, but small differences can look natural.
Step 3: Add Two Simple Arms
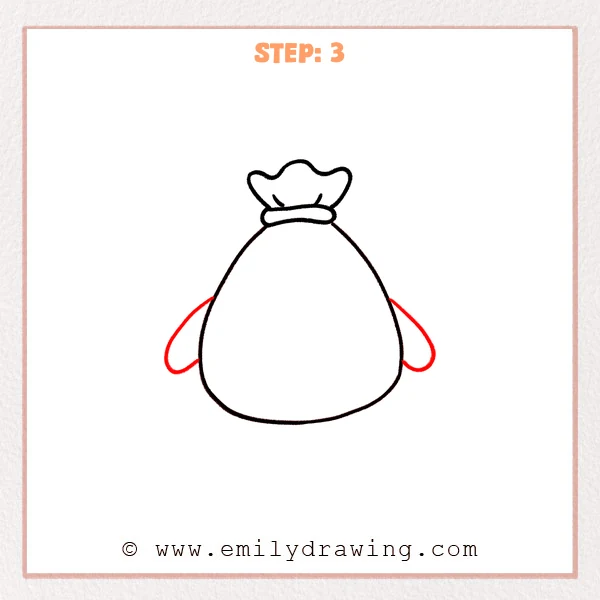
On each side of the money bag body, add a small oval shape like a soft mitten. Place them around the middle-lower area and let a short join touch the bag’s outline. Keep both arms close in size so the character feels balanced.
Pro Tip: Keep the arms short and round for a cute cartoon look.
Step 4: Add Two Simple Feet
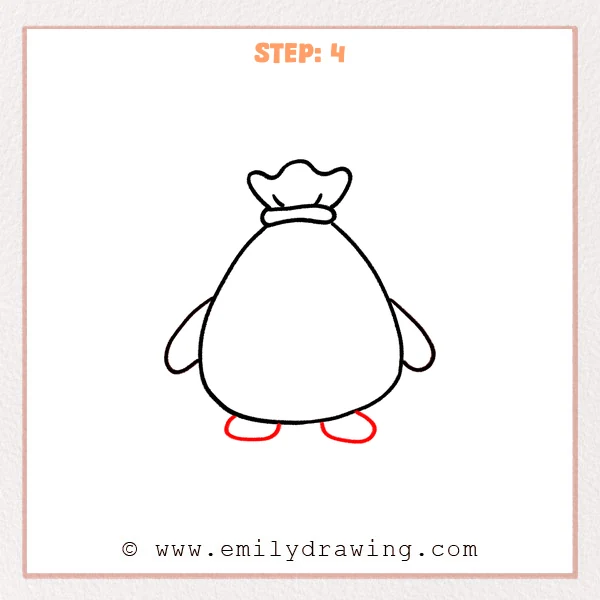
Under the bottom of the money bag, add two flat oval feet, one on each side, like little slippers. Let the top of each oval tuck slightly behind the bag so it looks like it is standing. Leave a small gap between the feet to keep the pose balanced.
Pro Tip: Make the feet a bit wider than tall so the character feels grounded.
Step 5: Add a Cute Face

In the upper half of the bag, add two eyes using a simple outline with a small pupil inside, angled slightly toward the center. Draw an open smiling mouth in the middle, then add a small curved line inside for the tongue or inner mouth. Finish with two short eyebrow curves above, and a tiny curve under the mouth for a little chin fold.
Pro Tip: Keep the features centered in the upper half for a sweeter look.
Step 6: Add the Dollar Sign on the Bag
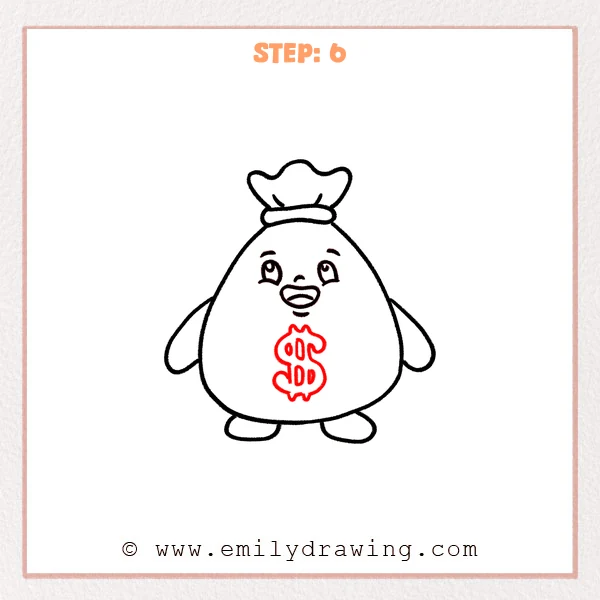
In the center of the money bag belly, draw a large S-shaped outline with soft bumps at the top and bottom. Inside the S, add two short vertical bars near the middle, like cut-out stamp details. Keep the symbol centered and upright, sized to fill about one-third to one-half of the belly area.
Pro Tip: Lightly mark the center first, then thicken the symbol for better alignment.
Step 7: Color in your drawing!
Fun Facts
- Money bags are often drawn with a “$” sign, even though real money sacks usually have labels instead.
- Cartoon money bags are shaped like soft cloth, which is why rounded lines look best.
- Adding a face turns a simple object into a character, making it more fun to draw.
Pin it now, Draw later!
You now have a complete cartoon money bag with a tie, arms, feet, a happy face, and a bold dollar sign. Try outlining your final lines with a pen, then erase extra pencil marks for a clean look. For color, a warm tan or light brown works well, and you can shade one side a little darker to make the bag look round.
A common beginner mistake is placing the face too low, which can make the character feel unbalanced. Keep the features in the upper half of the bag so it stays cute and clear. Practice this step by step drawing again, then try new expressions or different symbols to make your own version.
Get the FREE Printable Drawing Guide
FREE Download Printable Cartoon Money Drawing Tutorial
Frequently Asked Questions
How can I make the money bag look more “full”?
Widen the belly slightly and make the side curves rounder. You can also add a few gentle fold lines near the bottom.
What if my dollar sign looks crooked?
Lightly draw a center guide line first. Then build the S shape around it before darkening your final lines.
Can I change the expression?
Yes. Try smaller eyes for a calm look, or a wider mouth for extra excitement. Keeping the features close together still helps it look cute.