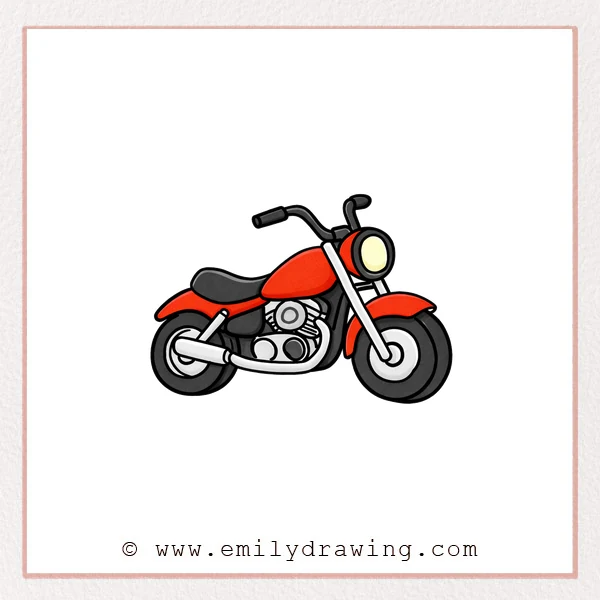
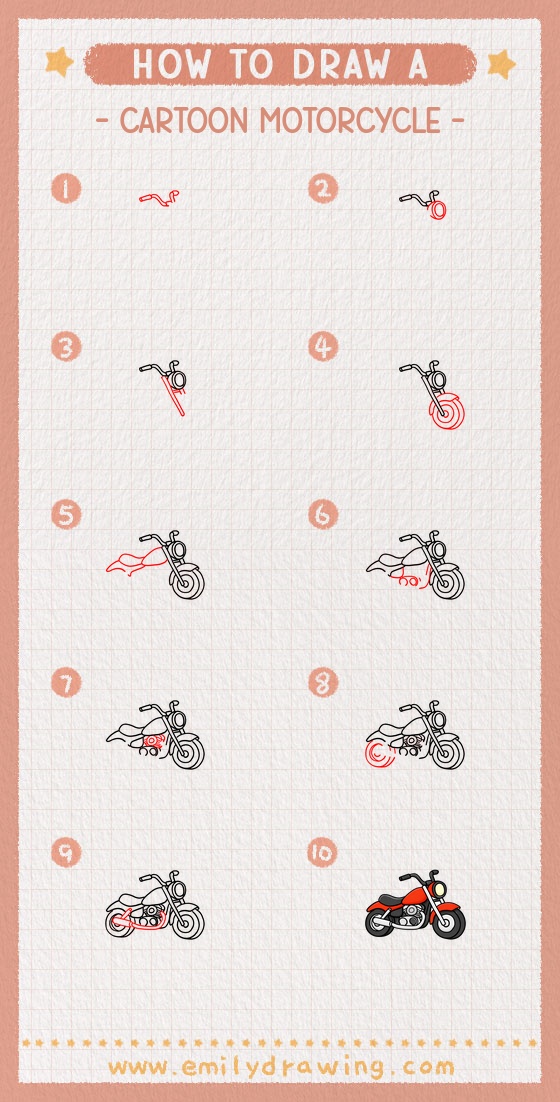
This easy drawing tutorial shows how to draw a cartoon motorcycle step by step. You will build the bike from simple shapes, then refine it into a clean, bold cartoon look. Take your time with each line, and enjoy watching the motorcycle come together.
What You Will Need
- Pencil
- Eraser
- Black marker or pen (for final lines)
- Coloring tools (colored pencils, markers, or crayons)
- Paper
Here are my RECOMMENDED Art Supplies!
- Crayola Coloring Set (140 Pieces – Mega Value!)
- 24 Colored Crayon Set
- A4 Printer Paper
- Crayola Coloring Pencils
- HP Home Printer with Instant Ink!
Time needed:
30 minutes.
Step-by-Step Drawing Guide
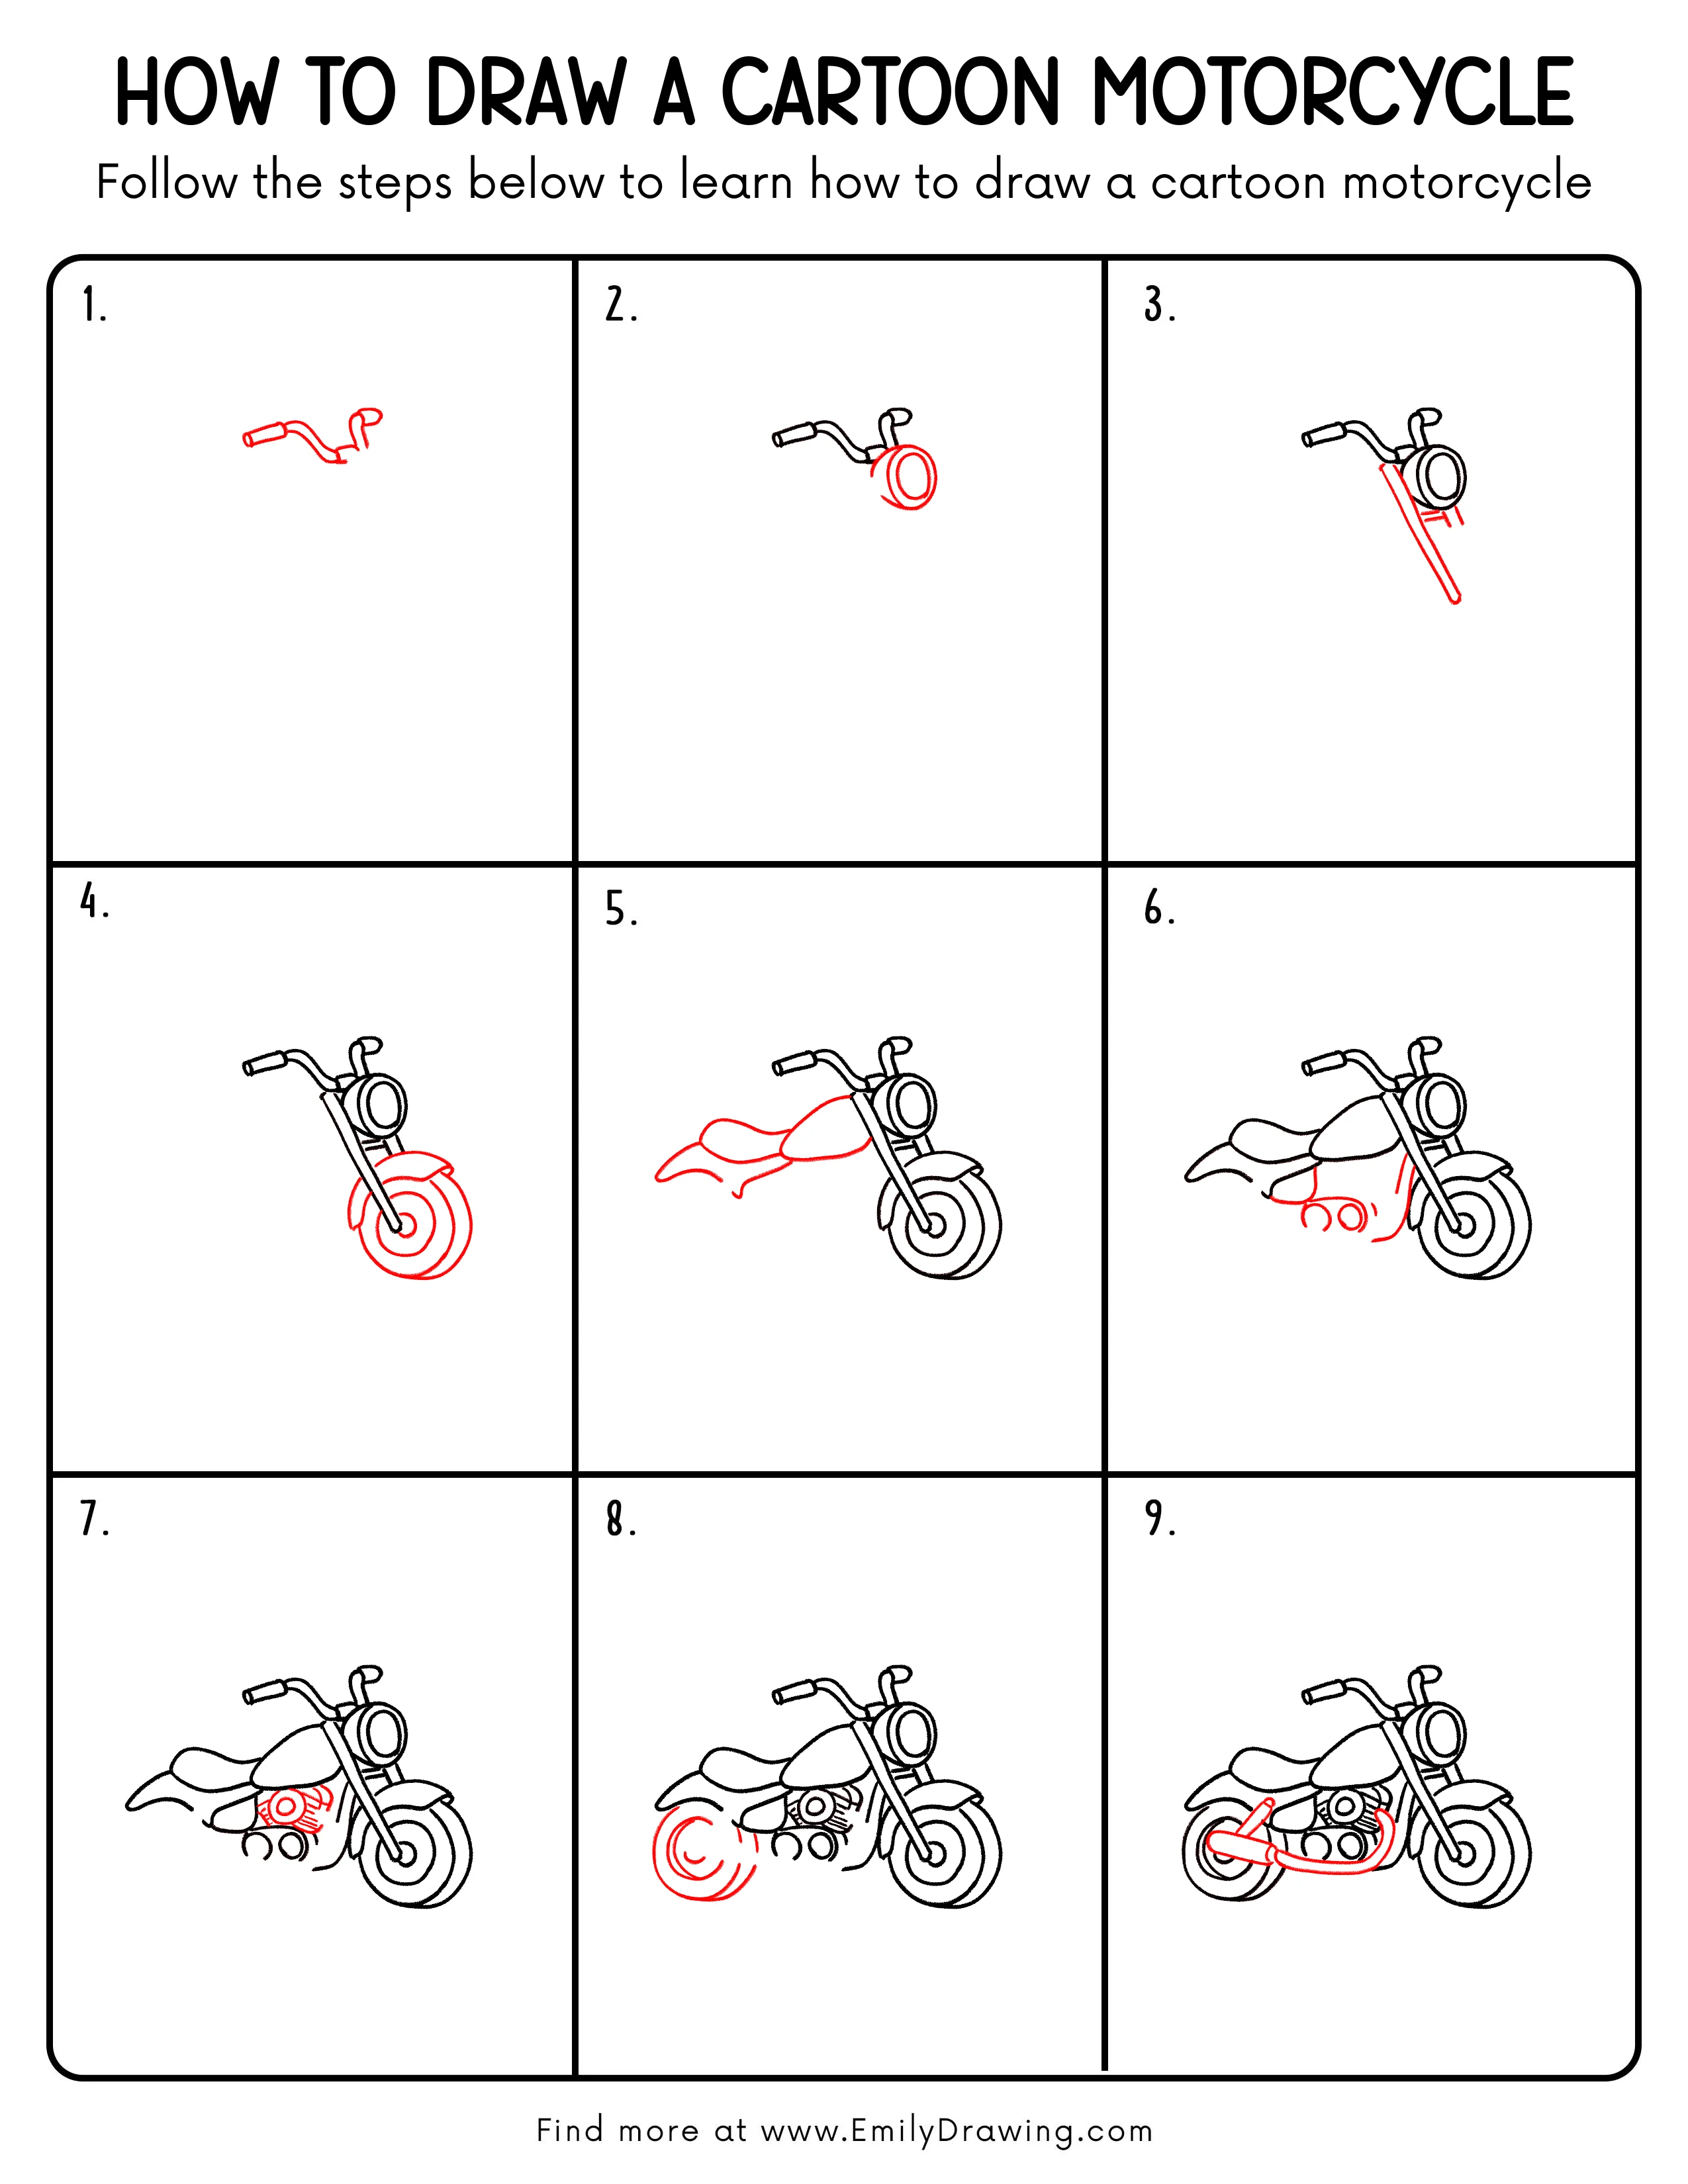
Step 1: Sketch the Handlebar and Small Mirror
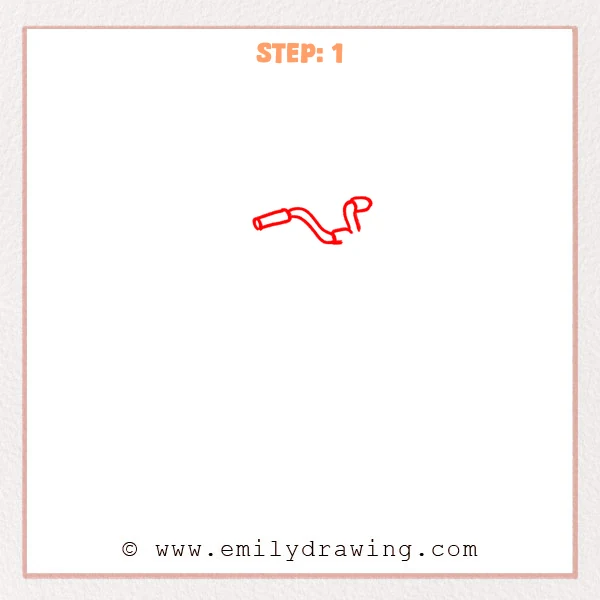
Start near the upper middle of the page with a short rounded rectangle for the grip. From its right side, add a smooth curved bar that bends slightly, then finish with a small loop on the far right to suggest the mirror shape.
Pro Tip: Keep the grip a little thicker so the curved bar feels sturdy like metal.
Step 2: Add the Round Headlight Shape
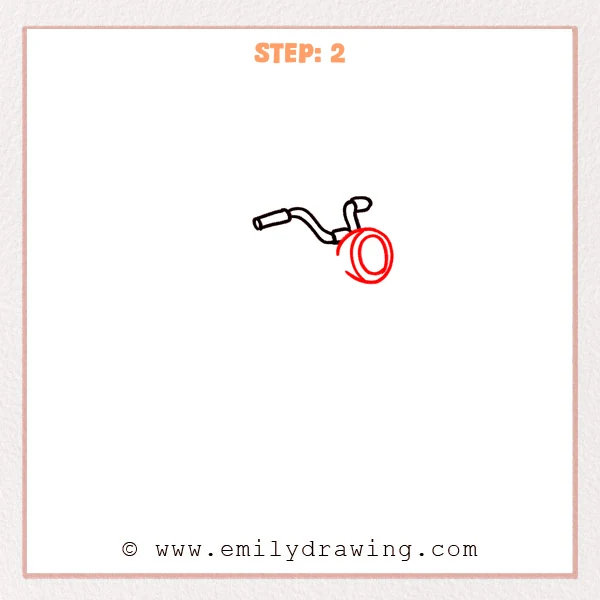
Just below the handlebar and slightly to the right, sketch a large oval for the motorcycle’s headlight housing. Add a smaller oval inside it for the lens, then wrap one or two curved lines around the outside to show a thick rim.
Pro Tip: Keep the inner oval centered so the headlight looks neat and solid.
Step 3: Draw the Front Fork and Support Brackets
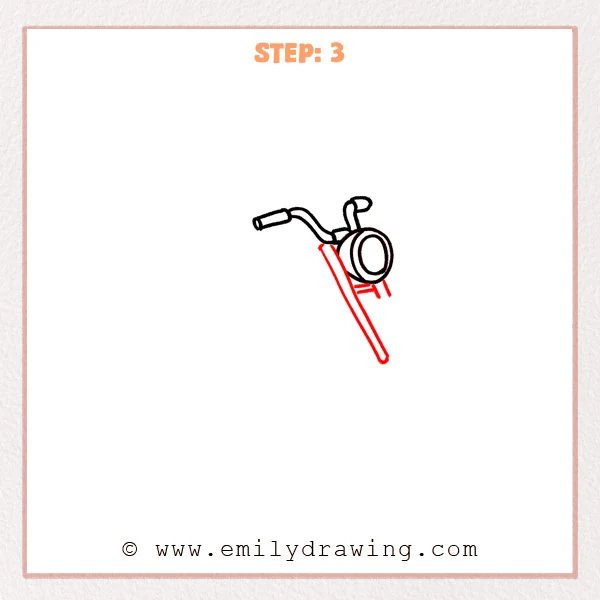
Starting just under the left side of the headlight, add a long rounded tube that slopes down for the front fork. Draw a second line alongside it to show thickness, then place a few short strokes under the headlight to suggest the small mounting brackets.
Pro Tip: Keep the gap between the fork lines even so it looks sturdy.
Step 4: Add the Front Wheel and Fender
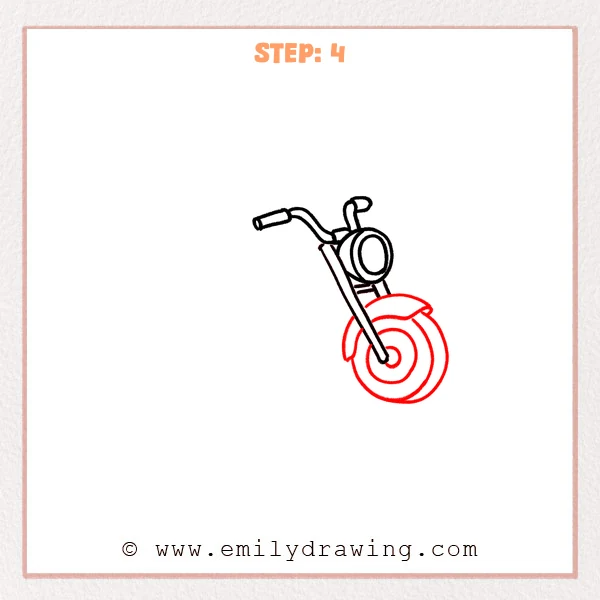
Below the fork, draw a large circle for the front tire, then add a smaller circle inside for the hub. On top of the wheel, sketch a curved cap shape that hugs the upper tire to form the fender.
Pro Tip: Align the small hub circle with the fork tip so the wheel feels attached.
Step 5: Shape the Fuel Tank and Seat
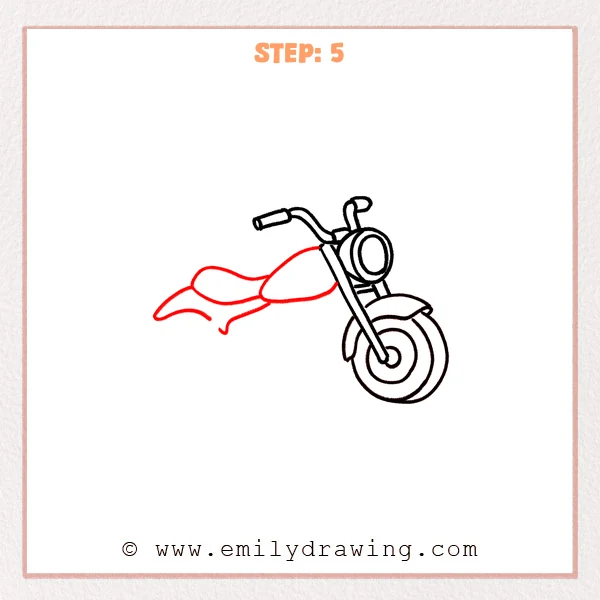
From behind the headlight, sweep a smooth curved line left to form a rounded teardrop for the fuel tank. Attach a flatter curved shape behind it for the seat, then add a small downward curl at the far left to hint at the rear end.
Pro Tip: Keep the tank’s top curve full and round for a strong cartoon look.
Step 6: Add the Engine and Lower Frame Shapes
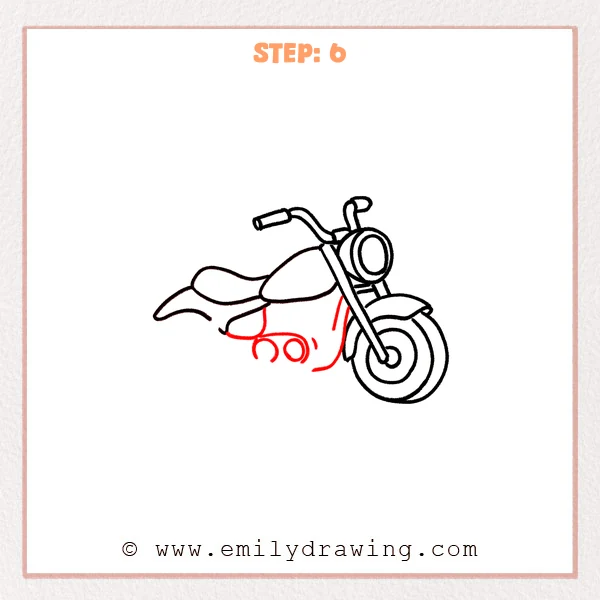
Under the tank and seat, sketch a rounded hanging shape to suggest the top of the engine area. Add two small circles and a short curve beneath it for simple mechanical details, then pull a curved line down behind the fork to hint at the frame dropping toward the wheel.
Pro Tip: Connect the engine shapes with smooth curves to keep it clean and cartoony.
Step 7: Add an Engine Cover and Cooling Lines
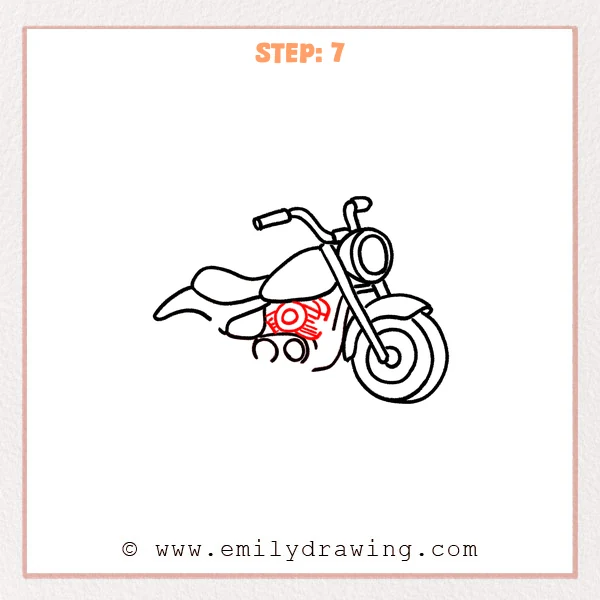
In the middle of the engine area, draw a larger round cover and place a smaller circle inside it for the center. Then add a few short, parallel curved lines to the right and below the cover to suggest cooling fins and extra detail.
Pro Tip: Keep the fin lines parallel and similar in length for a tidy look.
Step 8: Draw the Rear Wheel Rings
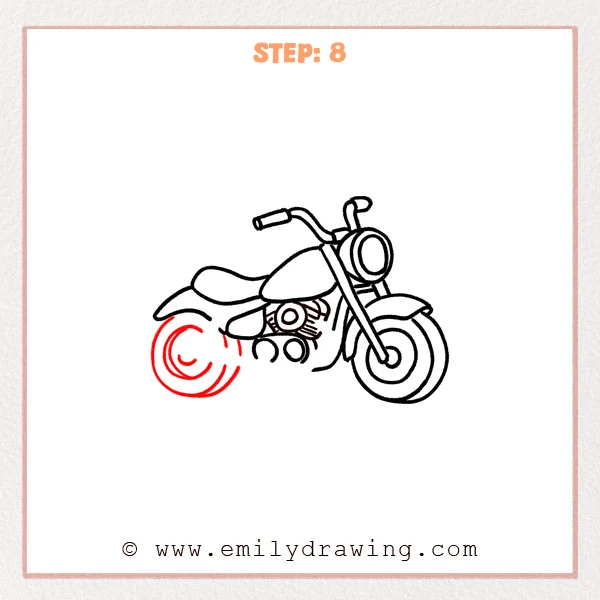
Under the back of the bike on the left, sketch a large circle for the rear tire. Inside it, add one or two curved inner rings to show tire thickness and a simple hub layer.
Pro Tip: Make the rear wheel slightly larger than the front for a strong stance.
Step 9: Add the Curved Exhaust Pipe and Muffler
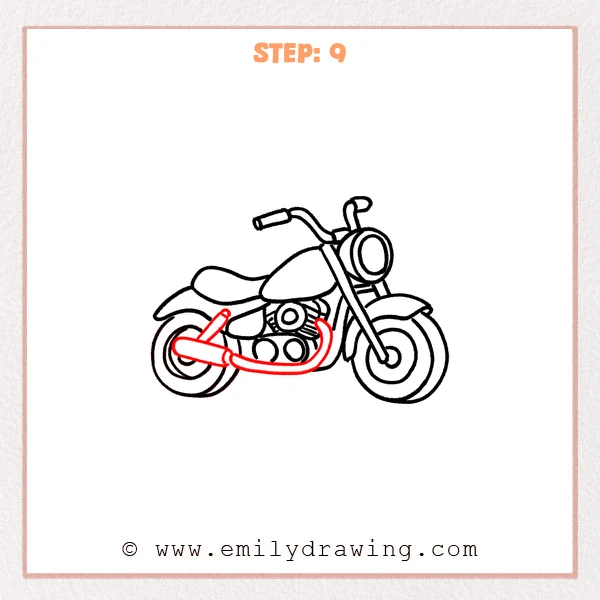
Starting under the engine, draw a thick curved pipe that swoops forward, then bends back in a wide arc. Near the front of the rear wheel, add a rounded horizontal rectangle for the muffler, and connect it to the bike with a short slanted support bar.
Pro Tip: Keep the exhaust curve smooth and unbroken so it feels like metal.
Step 10: Color in your drawing!
Fun Facts
- Motorcycles are often lighter than cars, so they can feel very quick.
- The round headlight on many classic bikes is designed to shine far down the road.
- Exhaust pipes and mufflers help guide noise and heat away from the engine.
Pin it now, Draw later!
You now have a complete cartoon motorcycle built from simple shapes and smooth curves. Trace your final lines with a black pen, then erase extra sketch marks for a clean look. Try shading under the fuel tank, beneath the engine, and inside the wheel rings to add depth.
A common beginner mistake is placing the wheels at different angles, which can make the bike look wobbly. If that happens, gently adjust the circles so both wheels feel like they sit on the same ground line. Keep practicing this step by step drawing, and try drawing the same motorcycle in a new pose or with different colors next time.
Get the FREE Printable Drawing Guide
FREE Download Printable Cartoon Motorcycle Drawing Tutorial
Frequently Asked Questions
How can I make the motorcycle look more 3D?
Add a second outline to thick parts like the fork and exhaust, then shade one side lightly.
What if my circles for the wheels look uneven?
Draw lightly at first, go around the circle several times, and choose the smoothest line.
How do I color a cartoon motorcycle nicely?
Pick one main color for the body, a darker shade for shadows, and leave small white highlights.