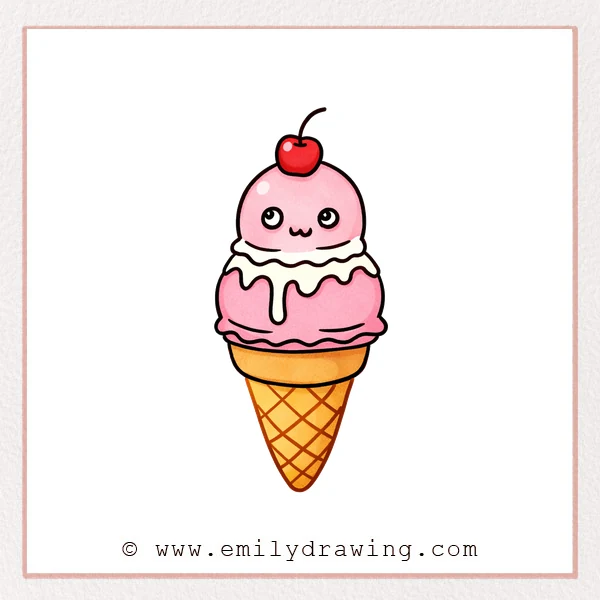
This easy drawing tutorial shows how to draw cartoon ice cream step by step in a calm, simple way. You will build a sweet sundae-style ice cream with a cherry, drippy sauce, and a waffle cone. It is a friendly drawing for beginners, with shapes that stay soft and rounded.
What You Will Need
- Pencil
- Eraser
- Black marker or pen
- Coloring tools (crayons, colored pencils, or markers)
- Paper
Here are my RECOMMENDED Art Supplies!
- Crayola Coloring Set (140 Pieces – Mega Value!)
- 24 Colored Crayon Set
- A4 Printer Paper
- Crayola Coloring Pencils
- HP Home Printer with Instant Ink!
Time needed:
18 minutes.
Step-by-Step Drawing Guide
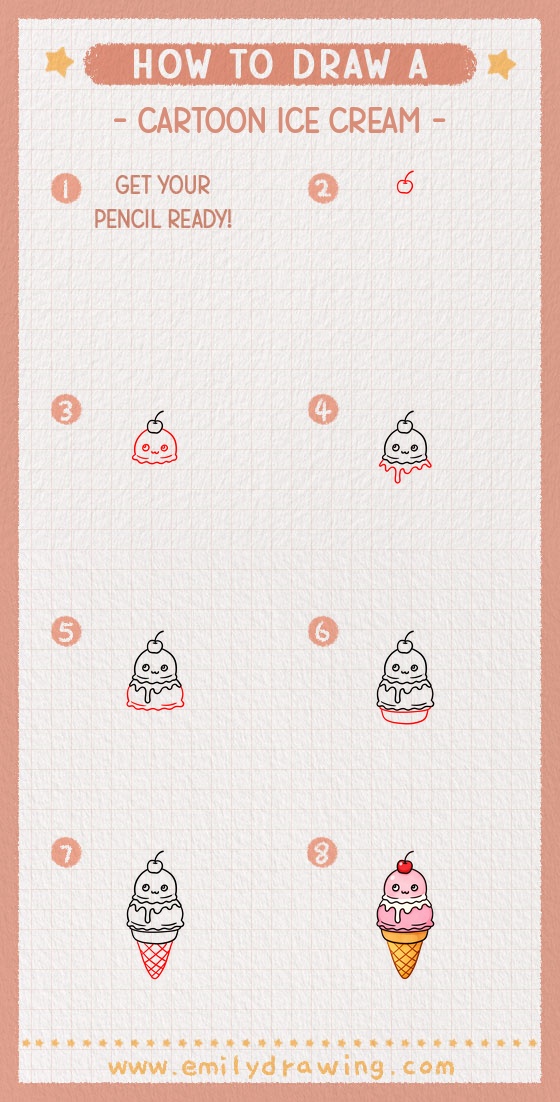
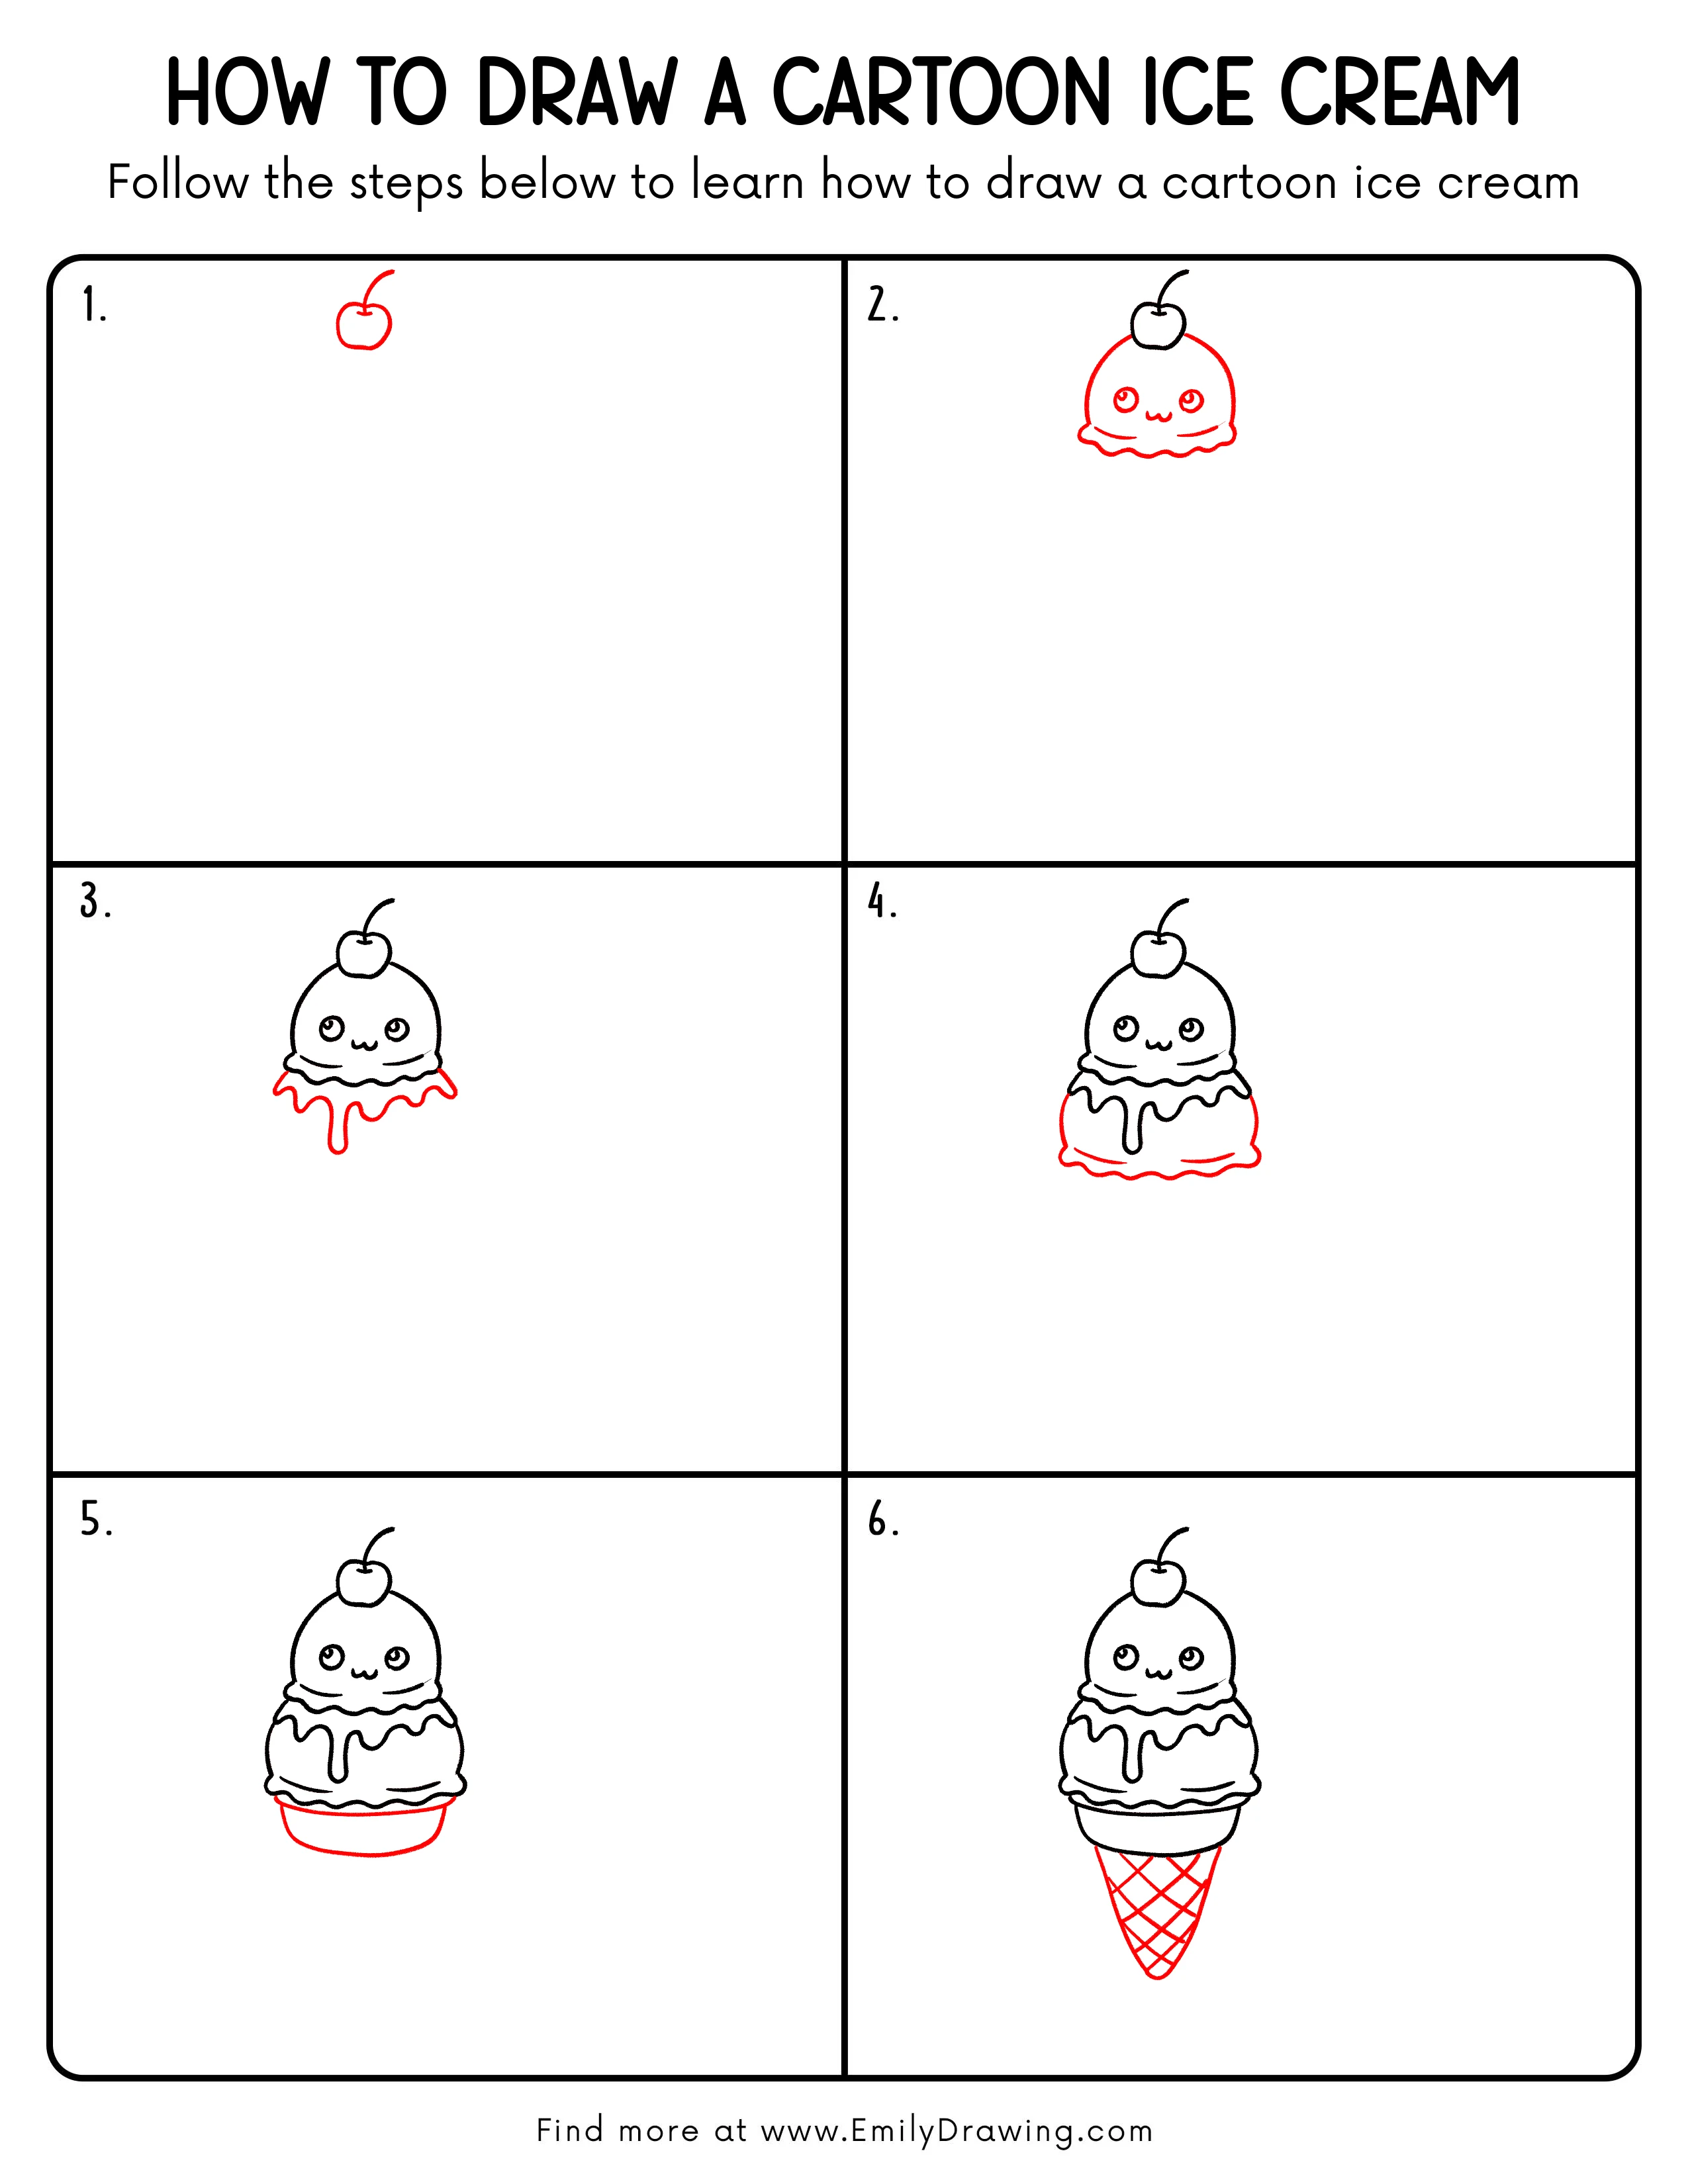
Step 1: Add the Cherry Topping
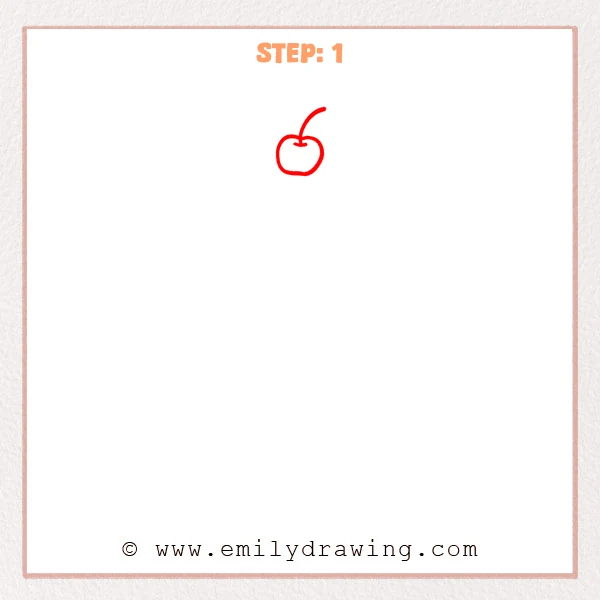
Start near the top of the page with a small, rounded heart-like shape for the cherry. Then add a thin, curved stem that rises and leans gently to one side. Keep the curves smooth so it feels cartoon-like.
Pro Tip: Keep the cherry small so there’s plenty of room for the ice cream below.
Step 2: Add the Scoop and Cute Face
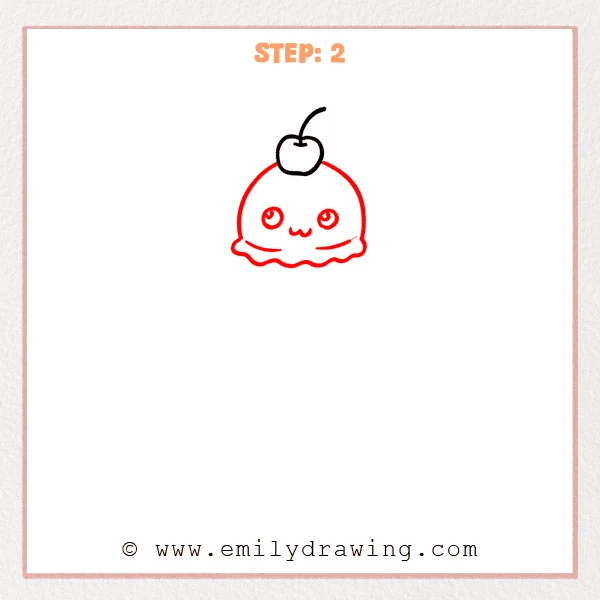
Under the cherry, sketch a big dome shape for the ice cream scoop, keeping the cherry centered on top. Turn the bottom edge into a soft wavy “melting” line with small bumps on both sides. Then add two round eyes and a tiny “w” mouth in the middle for a sweet expression.
Pro Tip: Keep the wavy edge evenly spaced so the scoop looks balanced.
Step 3: Add the Dripping Sauce
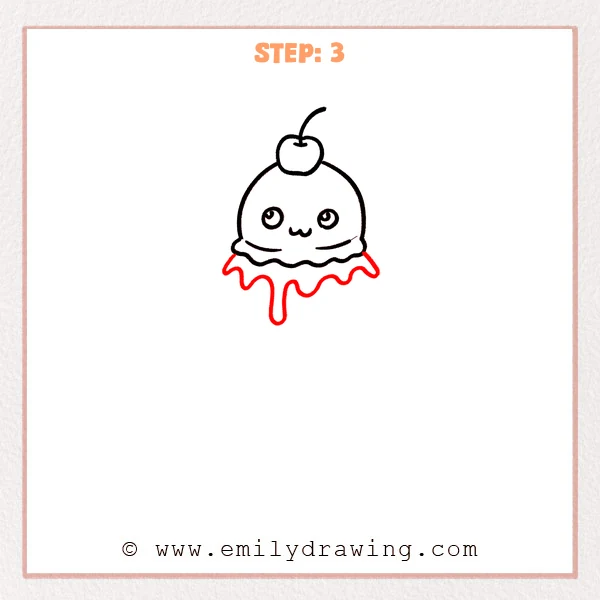
Draw a second, larger wavy layer underneath the scoop’s edge, like syrup spreading out. Then pull one or two long drips downward, ending each with a rounded drop shape. Vary the lengths a little so the drips feel lively.
Pro Tip: Round the drip tips so the sauce looks thick and sticky.
Step 4: Add the Bottom Base
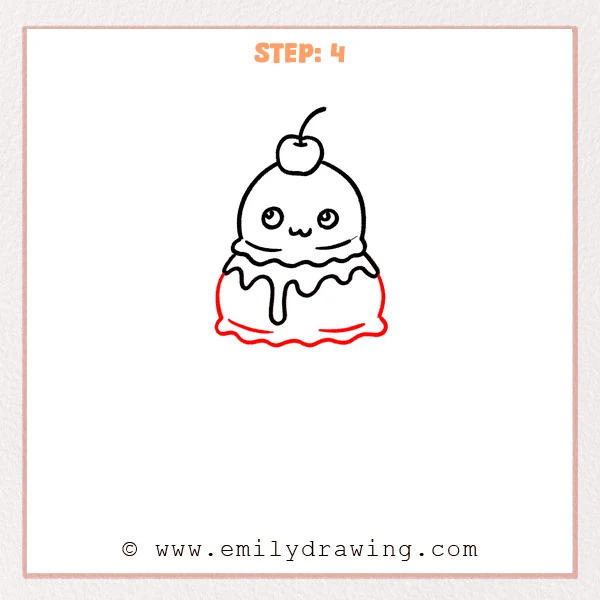
Extend the sides downward and sketch a larger rounded shape under the drips, like a soft cookie or bun holding the ice cream. Finish the bottom with a gentle wavy line and small side bumps to show thickness. Add two short curved lines near the bottom to suggest soft folds.
Pro Tip: Make the base slightly wider than the scoop so it feels stable.
Step 5: Add a Small Bowl Underneath
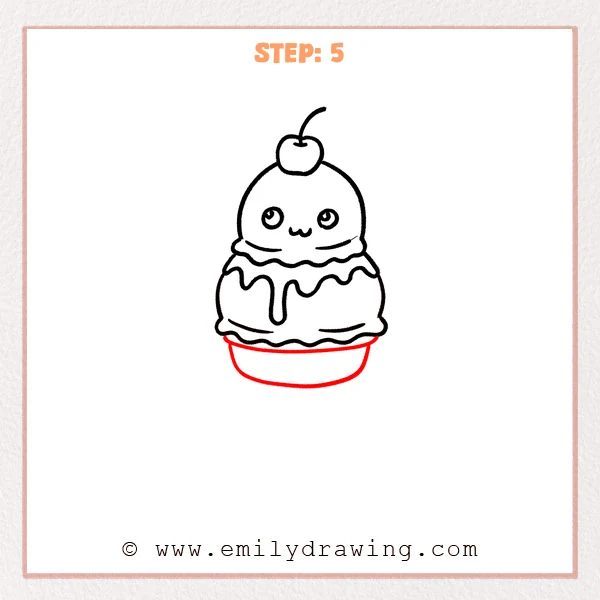
Draw a shallow oval curve under the base to form the bowl’s rim, touching the dessert gently. Then sketch a wider curved shape below it and connect the sides to make a rounded bowl wall. Finish with a soft curved bottom so the bowl looks stable.
Pro Tip: Keep the rim flatter than the bottom curve to show depth.
Step 6: Add the Cone and Waffle Pattern
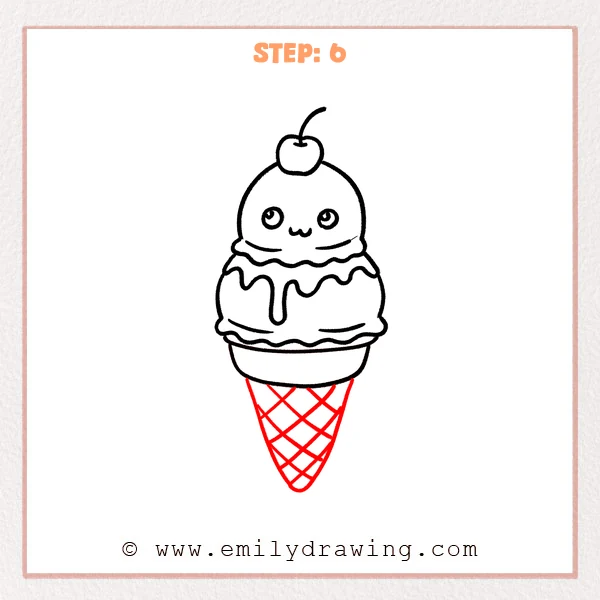
Under the bowl, sketch a long triangle that narrows to a rounded point, like an upside-down cone. Inside the cone, draw a few diagonal lines, then cross them with diagonals the other way to make a waffle grid. Let the lines stop neatly at the cone outline.
Pro Tip: Keep the grid spacing similar so the cone looks tidy.
Step 7: Color in your drawing!
Fun Facts
- The waffle cone became popular after ice cream vendors wanted an easy, edible holder.
- A cherry on top is a classic symbol that something is “extra special.”
- Cartoon ice cream drawings often use drips and waves to show softness.
Pin it now, Draw later!
You have built your cartoon ice cream from a tiny cherry to a full cone dessert. Try adding gentle shading under the scoop and along one side of the bowl to make it feel round. For color, keep the lightest area on one side and the darker area on the other for simple depth. A common beginner mistake is making the cone too skinny, so leave it wide enough to support the treat. Keep practicing this step by step drawing, and try changing flavors, toppings, or facial expressions in your next easy drawing tutorial.
Get the FREE Printable Drawing Guide
FREE Download Printable Cartoon Ice Cream Drawing Tutorial
Frequently Asked Questions
How do I make my cartoon ice cream look more cute?
Make the eyes a little larger and keep the mouth small and centered.
What if my dripping sauce looks messy?
Use fewer drips, and keep each drip end rounded and smooth.
How can I color this drawing for beginners without streaks?
Color lightly in layers, then build darker areas slowly for a clean finish.