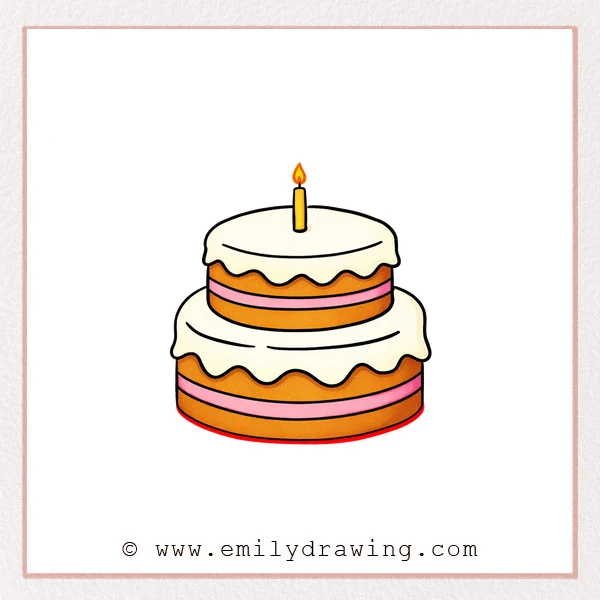
This easy drawing tutorial shows how to draw a cartoon cake step by step. You will build the cake in small, simple shapes, so it feels calm and doable. Take your time, and let each line be a gentle guide.
What You Will Need
- Pencil
- Eraser
- Black pen or marker (optional, for outlining)
- Coloring tools (crayons, markers, or colored pencils)
- Plain drawing paper
Here are my RECOMMENDED Art Supplies!
- Crayola Coloring Set (140 Pieces – Mega Value!)
- 24 Colored Crayon Set
- A4 Printer Paper
- Crayola Coloring Pencils
- HP Home Printer with Instant Ink!
Time needed:
20 minutes.
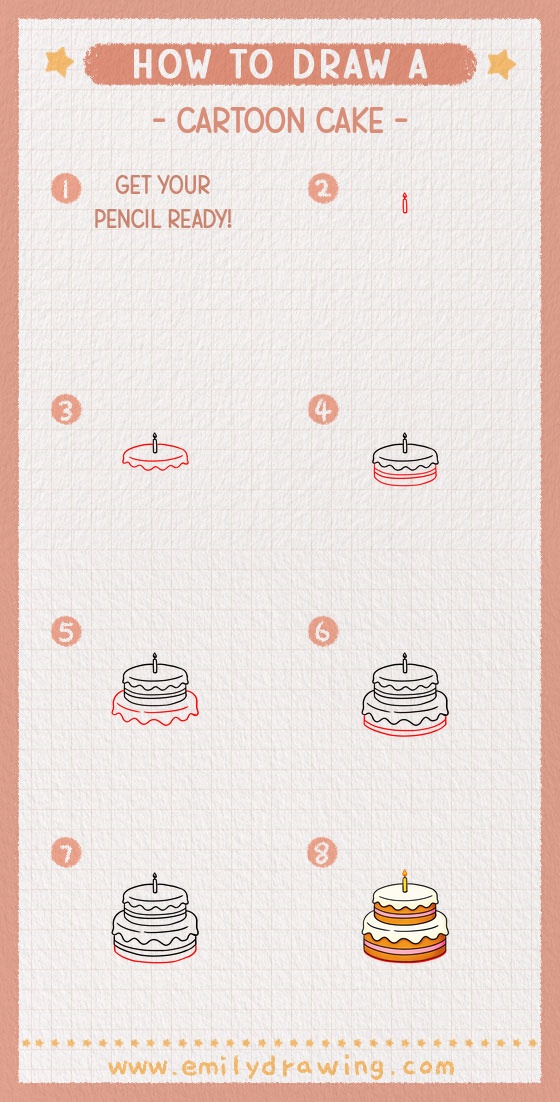
Step-by-Step Drawing Guide
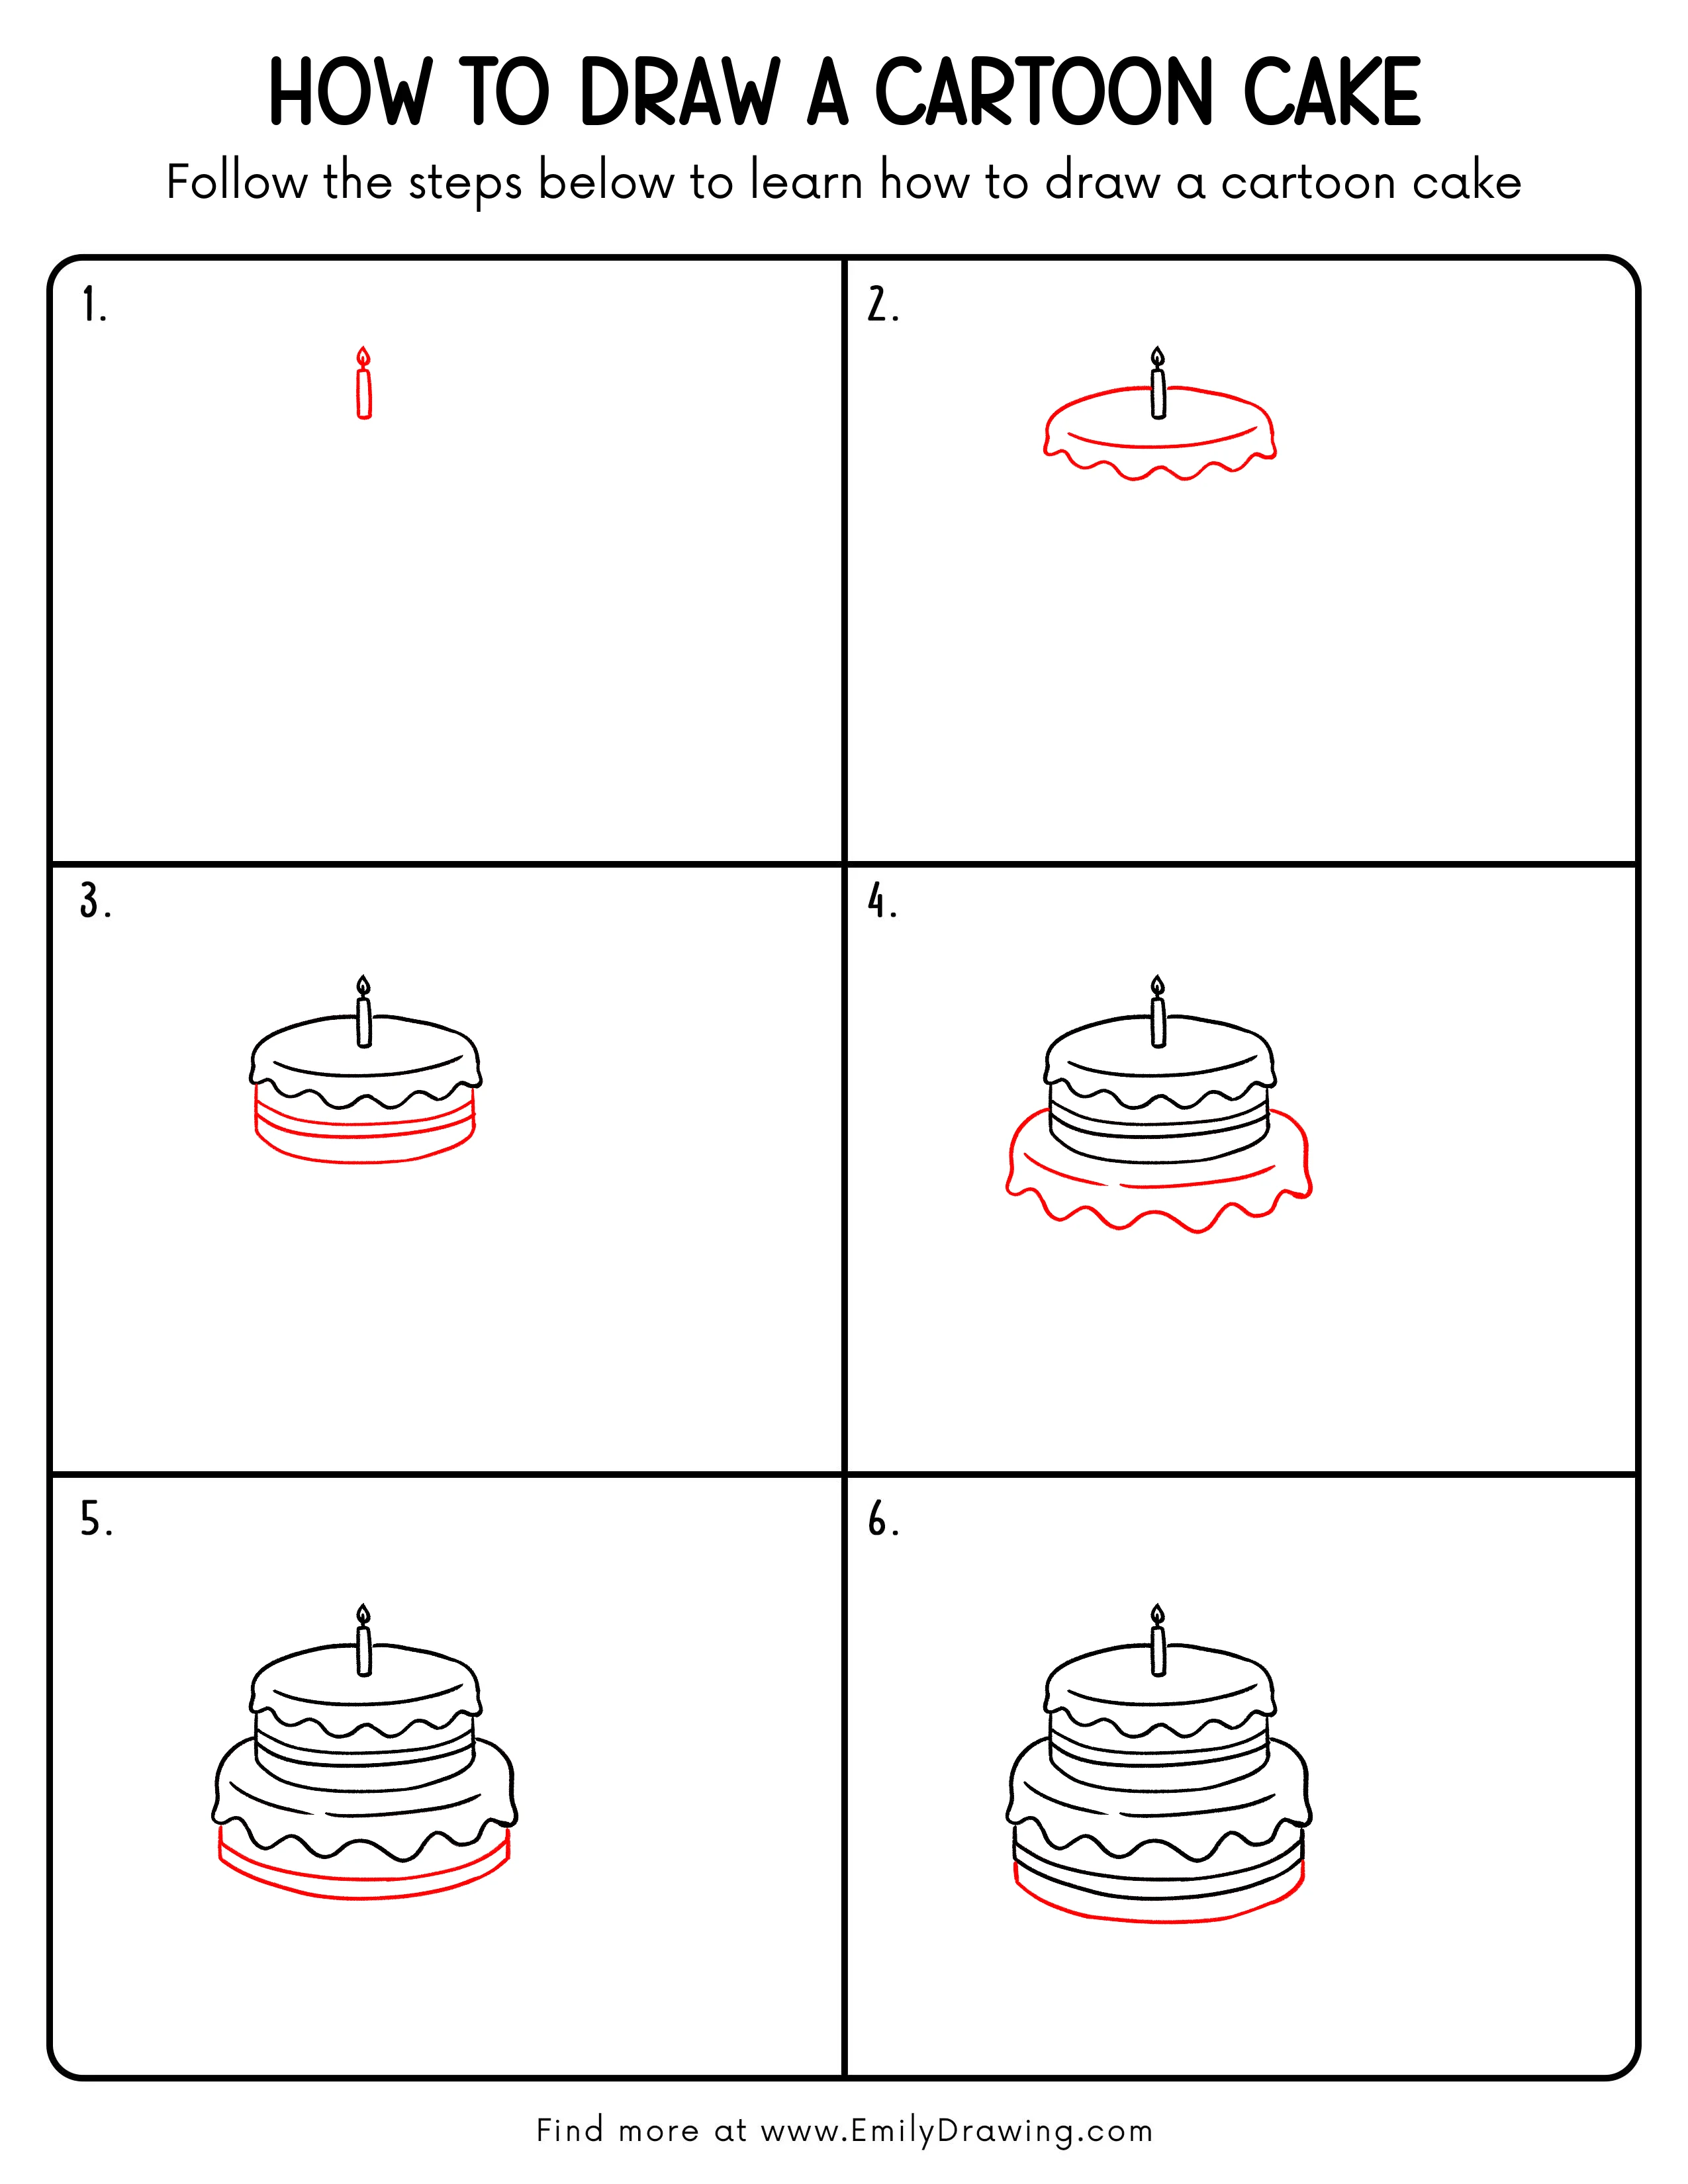
Step 1: Start with the Candle
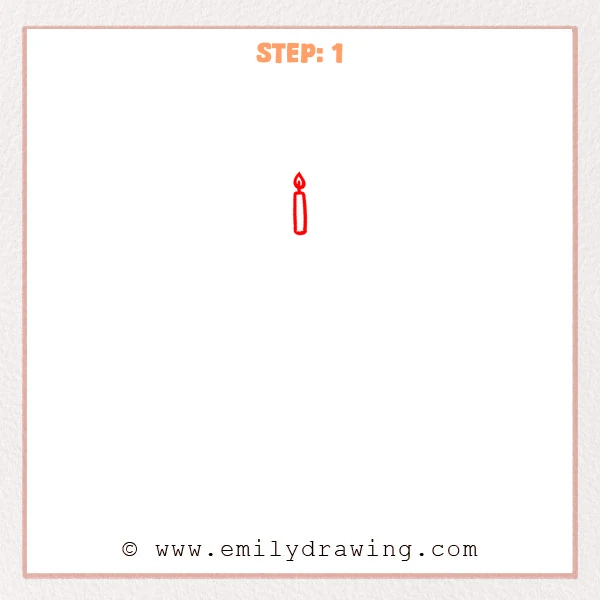
Near the upper center of your page, sketch a slim rounded rectangle for the candle. Add a small curved base on top, then draw a teardrop-shaped flame with a pointed tip. Keep the shapes simple and clean.
Pro Tip: Keep both sides of the candle symmetrical for a neat look.
Step 2: Add the Frosting Top Edge
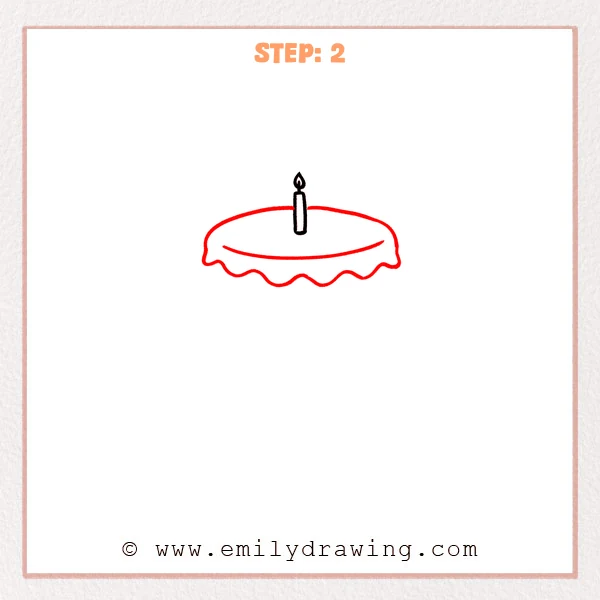
Under the candle, draw a wide oval curve to form the cake’s top surface. Around the outside, add a wavy dripping line to create frosting that hangs down softly. Let the drips feel evenly spaced, not sharp.
Pro Tip: Keep the drip waves similar in size so the frosting looks tidy.
Step 3: Draw the Cake Side and Filling Stripes
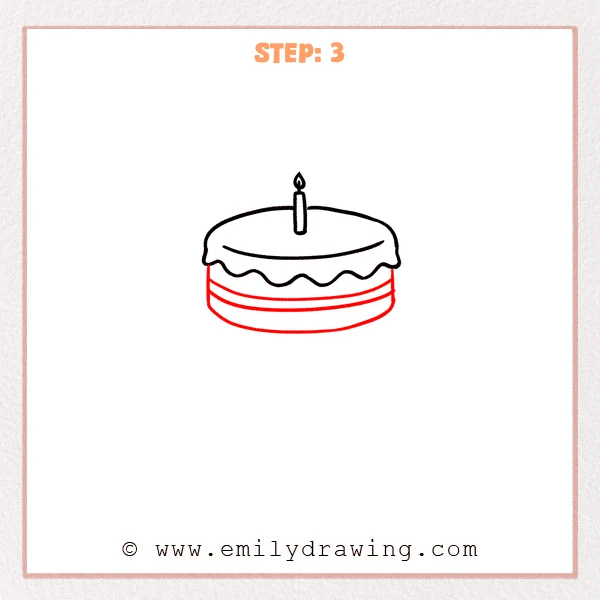
Below the dripping frosting, add a larger curved line to form the cake’s bottom edge and give it height. Then draw two parallel curved stripes across the side, following the same rounded curve like filling layers. Let the lines end smoothly at the sides.
Pro Tip: Match the stripes’ curve to the bottom edge for an even, rounded look.
Step 4: Add the Plate Under the Cake
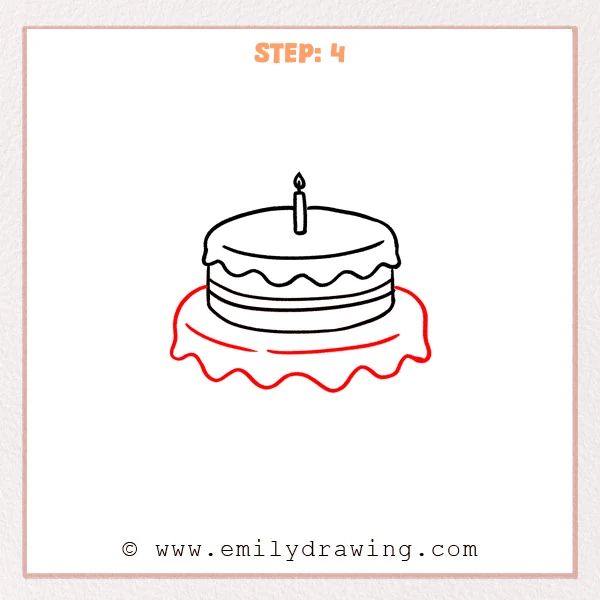
Draw a larger oval shape under the cake to form the plate. Give the outer edge a soft wavy outline, then add one curved line inside to show the plate’s inner rim and depth. Keep the plate centered under the cake.
Pro Tip: Make the inner rim curve follow the same direction as the outer oval for depth.
Step 5: Add a Bigger Bottom Cake Layer
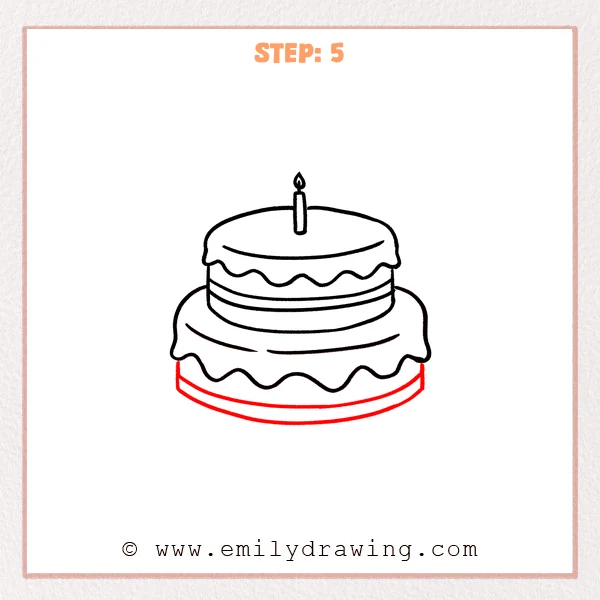
Under the plate, sketch a wider oval base so it looks like a second, larger cake tier. Add a wavy dripping frosting edge along the top of this tier, then draw two parallel curved lines near the bottom to show the side thickness. Try to keep the top tier centered above the wider tier.
Pro Tip: Make the bottom tier wider, and keep the overhang even on both sides.
Step 6: Draw the Outer Rim of the Bottom Plate
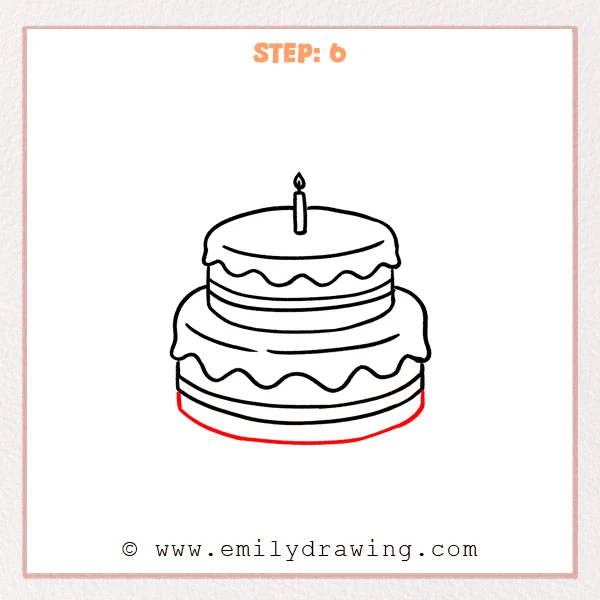
Add a larger oval curve at the very bottom, just wide enough to support the lower cake tier like a plate or stand. Let both ends lift slightly so the base feels stable. This final line helps the whole cake look grounded.
Pro Tip: Make the bottom oval slightly wider than the cake for a natural support look.
Step 7: Color in your drawing!
Fun Facts
- Birthday cakes are often stacked in tiers to look extra special at parties.
- Frosting drips are a popular cake style because they look soft and sweet.
- Candles on cakes are a tradition in many places for making a birthday wish.
- Cakes can be decorated with fruit, sprinkles, or little candy shapes.
Pin it now, Draw later!
You have built a cartoon cake by adding one simple layer at a time. Try coloring the frosting a light shade and the cake layers a warmer color to help them stand apart. Add gentle shading under the frosting drips and along the bottom edge to give the cake more depth.
A common beginner mistake is making the ovals too flat or too pointy, so the cake looks tilted. If that happens, lightly erase and round the curves until they feel smooth again. Keep practicing this step by step drawing, and try making a new cake with more candles or extra layers next time.
Get the FREE Printable Drawing Guide
FREE Download Printable Cartoon Cake Drawing Tutorial
Frequently Asked Questions
How do I make the cake look more 3D?
Add a light shadow under each frosting edge and keep your oval curves consistent.
What if my frosting drips look uneven?
That is okay—drips can be different sizes, but try to keep the spacing steady.
How can I decorate the cartoon cake after I finish?
Add sprinkles as small dots, fruit as simple circles, or a message on the top layer.