This easy drawing tutorial shows how to draw a cartoon brain step by step. We will build a cute brain character with simple curves and a friendly face. Take your time, and enjoy a calm drawing for beginners.
What You Will Need
- Pencil and eraser
- Black marker or fineliner
- Colored pencils or markers (optional)
- Plain paper
Here are my RECOMMENDED Art Supplies!
- Crayola Coloring Set (140 Pieces – Mega Value!)
- 24 Colored Crayon Set
- A4 Printer Paper
- Crayola Coloring Pencils
- HP Home Printer with Instant Ink!
Time needed:
17 minutes.
Step-by-Step Drawing Guide
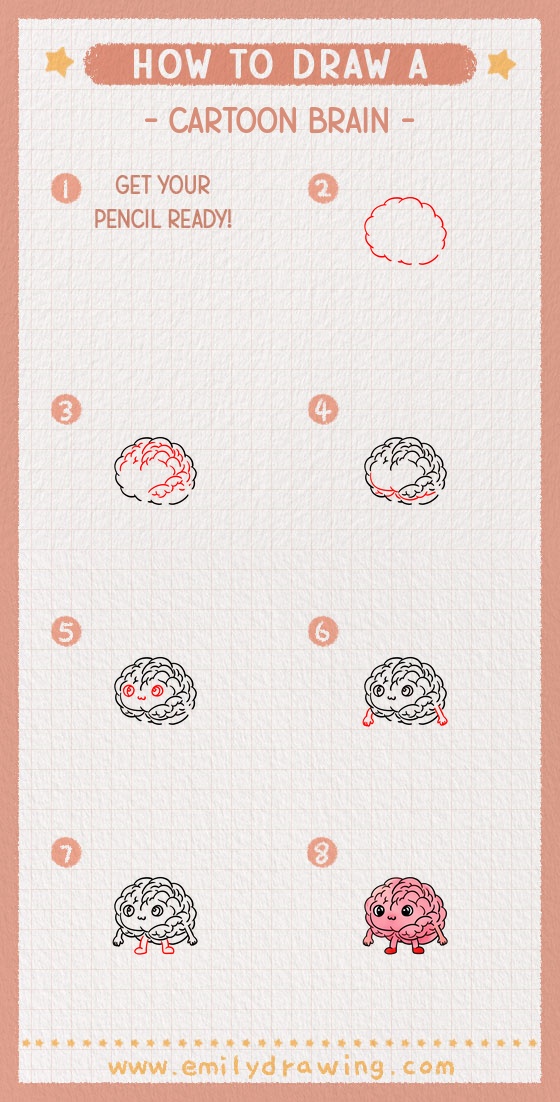
Step 1: Sketch the Brain’s Puffy Outline
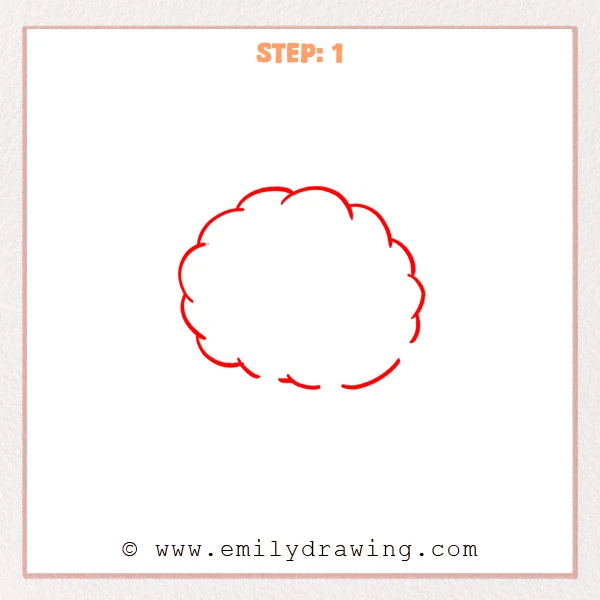
Start in the center of the page and draw a big rounded shape using connected curved bumps, like a soft cloud. Leave tiny gaps between some bumps so the edge feels light and bouncy.
Pro Tip: Keep the bumps similar in size so the outline reads as a cartoon brain.
Step 2: Add the Brain’s Curvy Folds
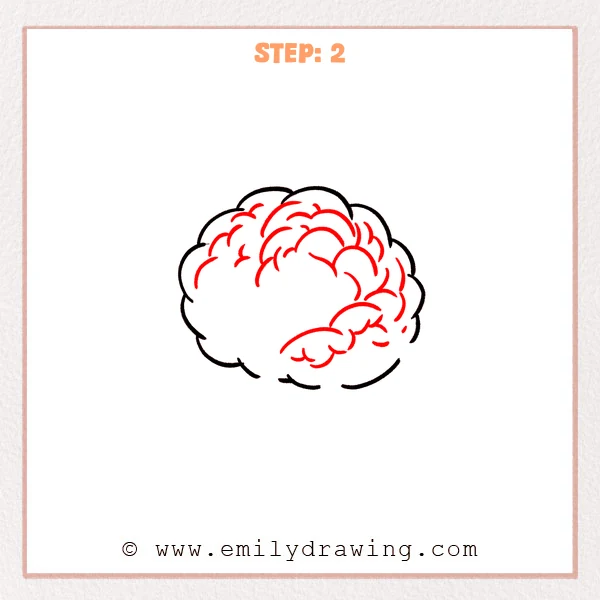
Inside the outline, start near the top and add several short curved strokes, like stacked little waves. Add a few longer curves on the right side so the folds flow downward, then tuck a small curled fold near the bottom.
Pro Tip: Avoid closing the curves into full loops; leaving space keeps the folds soft.
Step 3: Deepen the Bottom Crease and Thickness
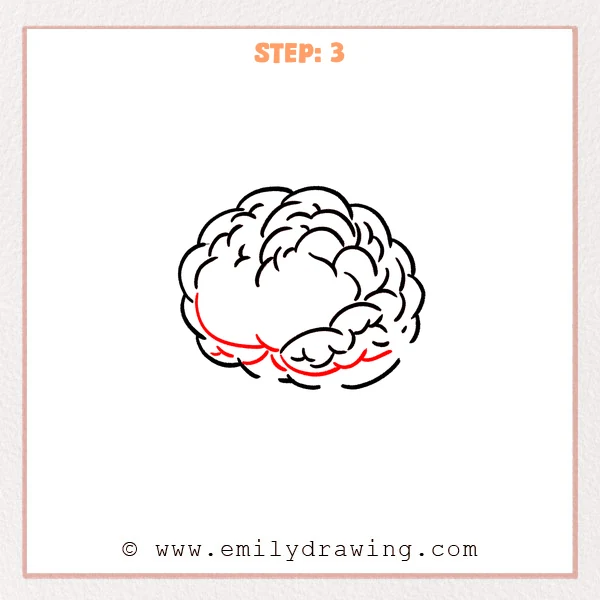
Add a longer curved line along the lower part of the brain, starting on the left and sweeping toward the middle to suggest the bottom edge. Then add one more curved stroke near the lower-right curl, following the outline to give that area extra depth.
Pro Tip: Keep the bottom curves slightly inside the outline for a cleaner look.
Step 4: Add a Cute Facial Expression
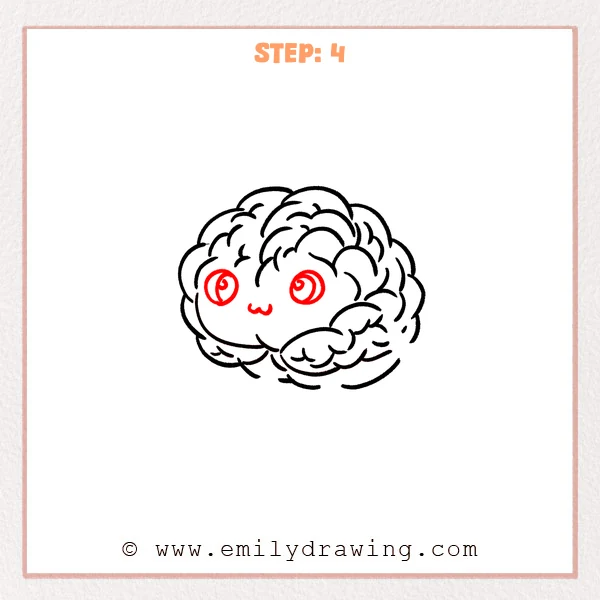
In the open space on the left side, add two large eyes using two round shapes, then draw a smaller circle inside each for the pupil and leave a tiny highlight. Between and slightly below the eyes, draw a small “w”-shaped mouth for a sweet, simple smile.
Pro Tip: Keep both eyes level so the face feels cute and balanced.
Step 5: Add Two Little Arms
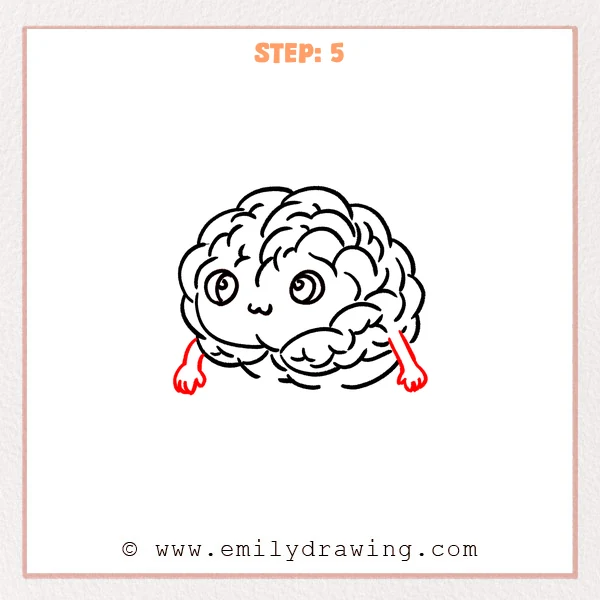
On the lower left and lower right sides, add short arm shapes that hang down like soft tubes. Finish each arm with a small hand using three or four rounded finger bumps.
Pro Tip: Keep the arms short so the brain stays the main focus.
Step 6: Add Two Short Legs and Shoes
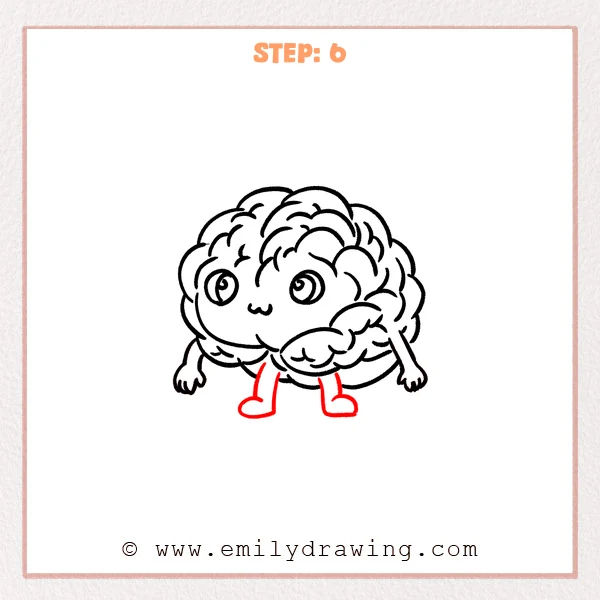
Under the center bottom, add two short legs using slightly curved vertical lines, keeping the spacing even. Attach a rounded shoe under each leg, with the toes pointing slightly outward for a steady stance.
Pro Tip: Make both shoes the same size so the character feels tidy and cute.
Step 7: Color in your drawing!
Fun Facts
- Your brain has two halves, called hemispheres, that work together.
- The wrinkly folds help the brain fit more surface area into a small space.
- Even simple cartoon folds can suggest a real brain texture.
Pin it now, Draw later!
You now have a full cartoon brain character with folds, a face, arms, and legs. If you want color, try a soft pink base and add light shading under the folds and along the bottom edge. A common beginner mistake is making the fold lines too long and crowded, so leave some quiet spaces inside. Practice this step by step drawing again, and try giving your brain a different expression next time.
Get the FREE Printable Drawing Guide
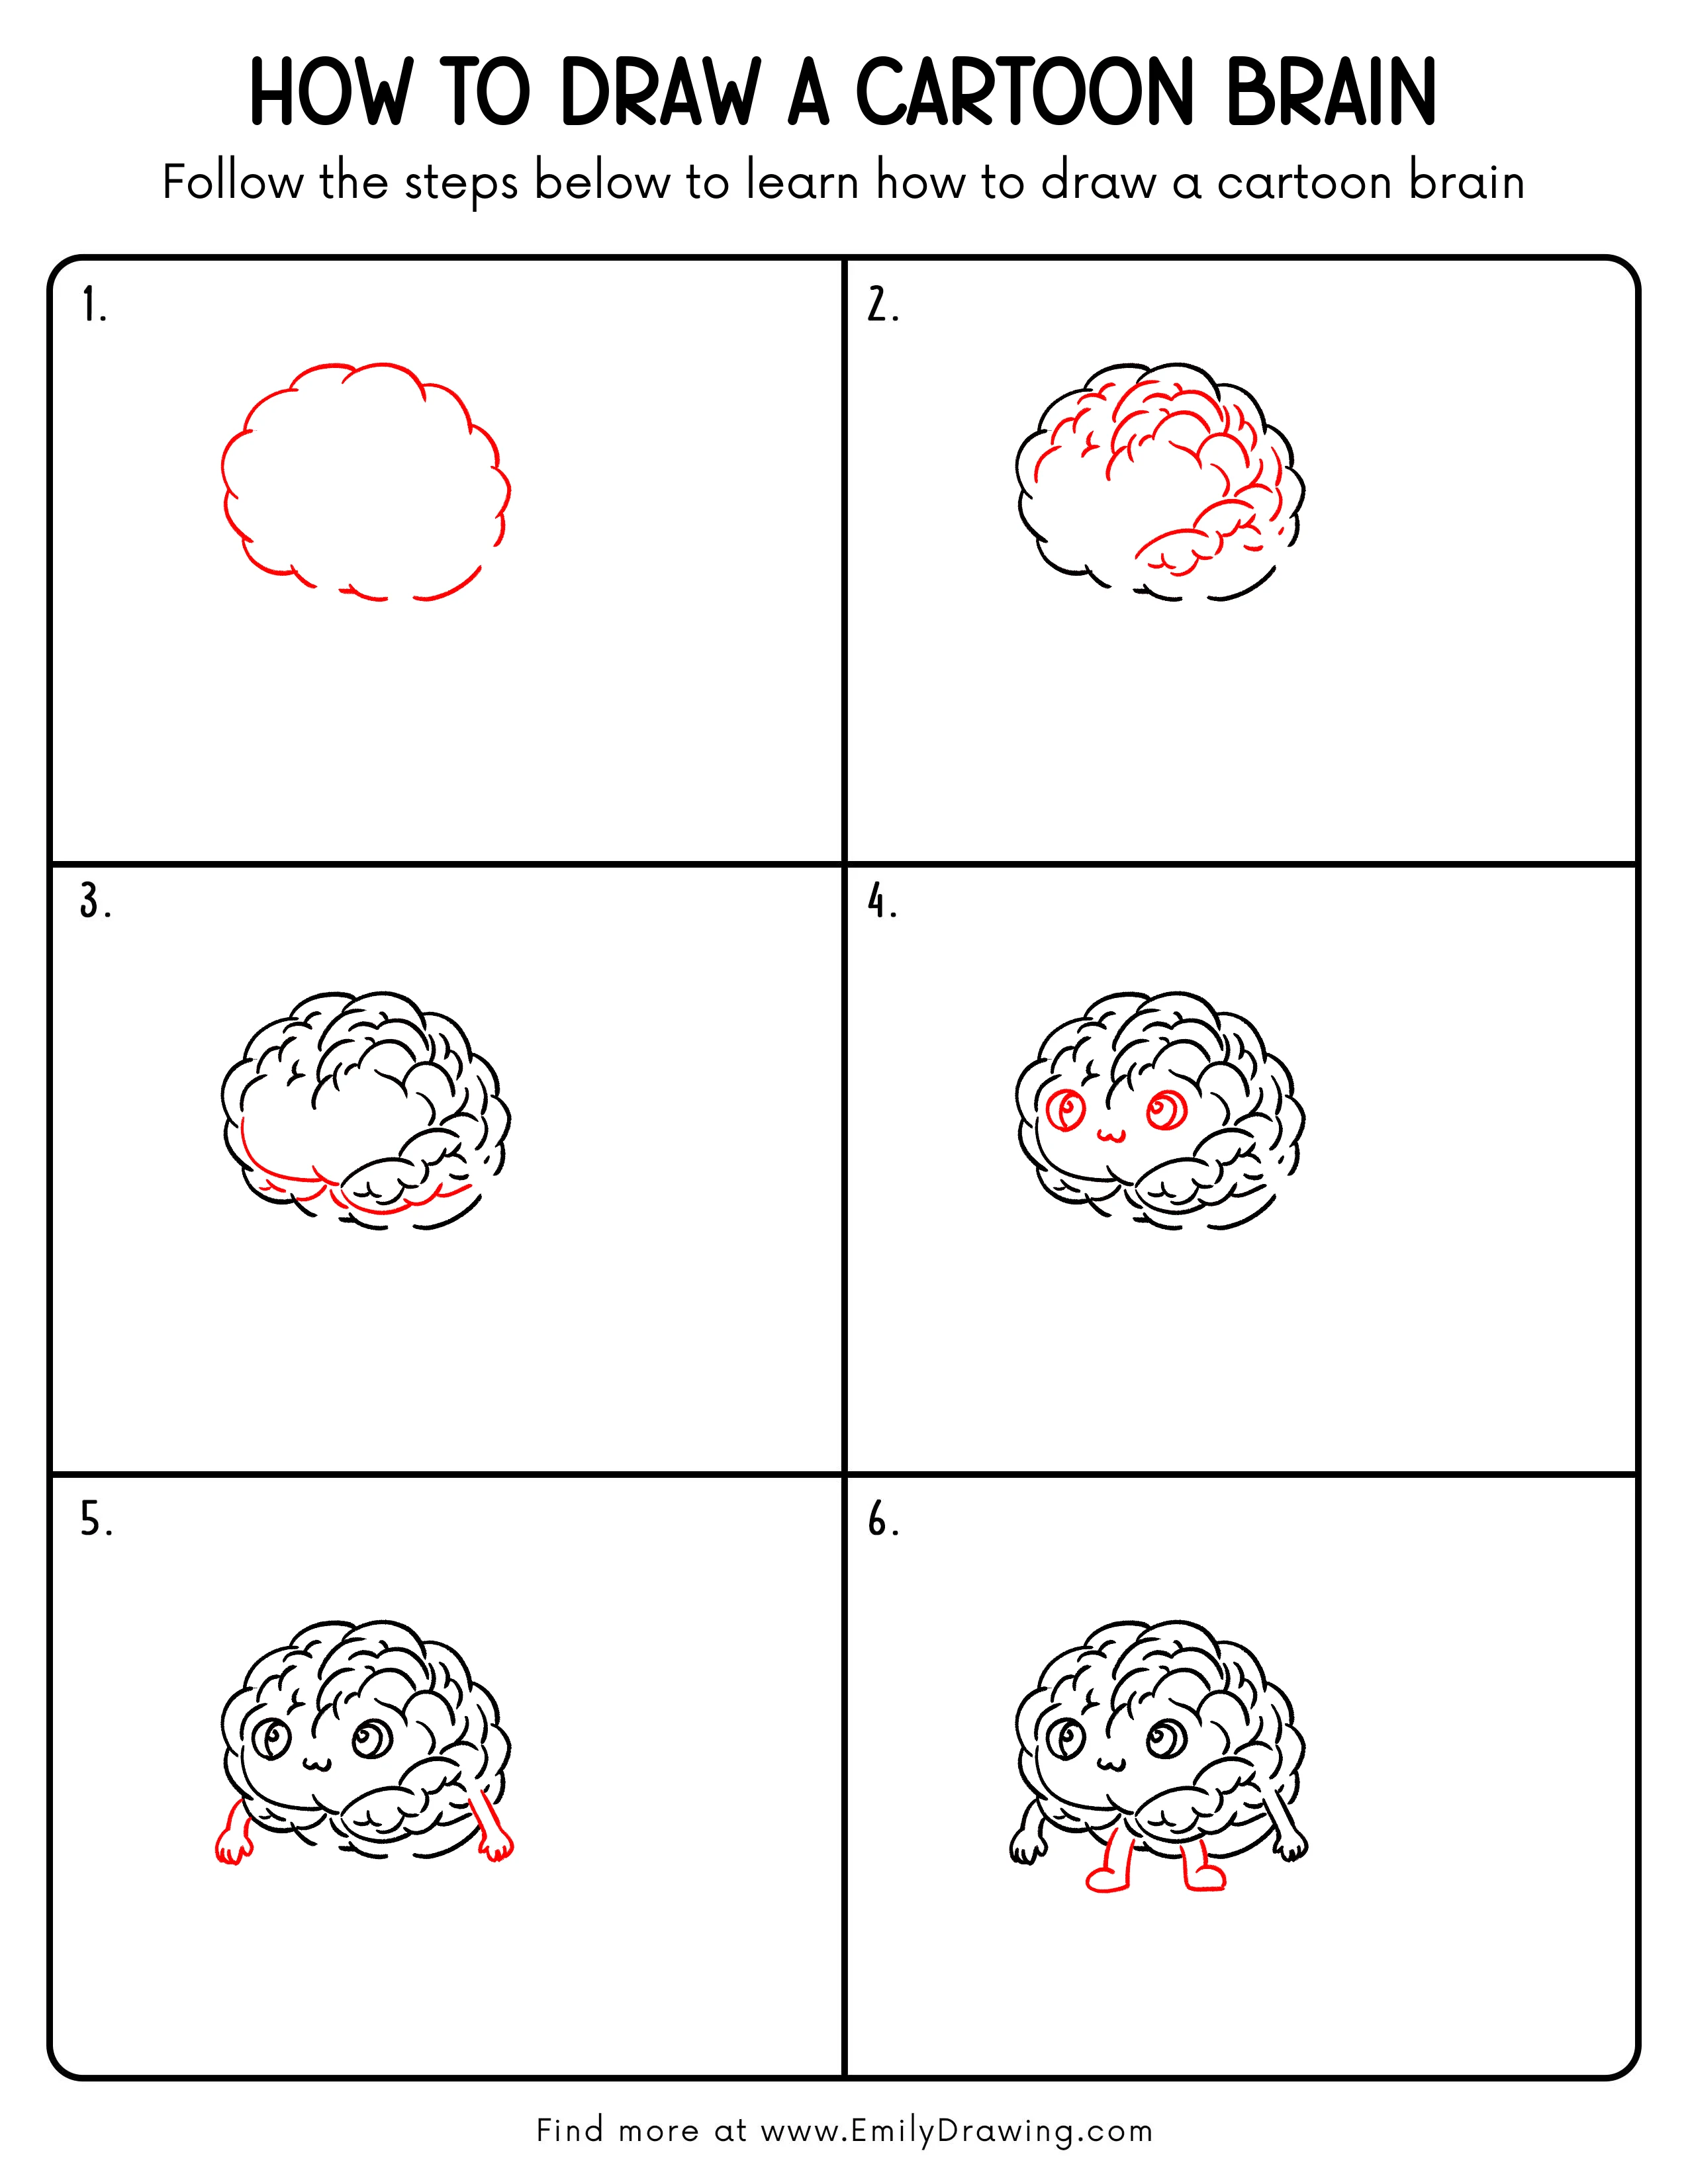
FREE Download Printable Cartoon Brain Drawing Tutorial
Frequently Asked Questions
How do I make the cartoon brain look cuter?
Make the eyes slightly bigger and keep the mouth small and centered. Adding a tiny highlight in each eye also helps.
What if my fold lines look messy?
Use fewer lines and keep them short and curved. Leaving gaps makes the folds look softer and cleaner.
Can I turn this into a full character drawing?
Yes, you can add simple eyebrows, blush cheeks, or a small hat. Keep the new details rounded so they match the cute style.