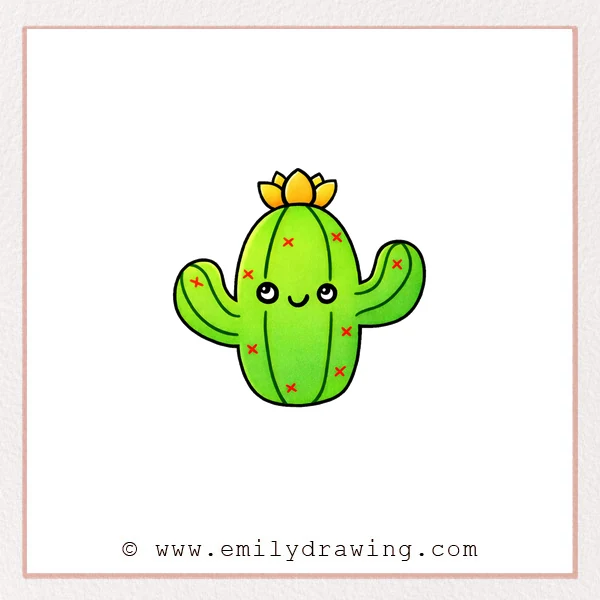
This easy drawing tutorial shows how to draw a cartoon cactus step by step. We will build simple shapes slowly, so drawing for beginners feels calm and manageable. Take your time, and let each line stay soft at first.
What You Will Need
- Pencil
- Eraser
- Black marker or pen (optional, for outlining)
- Coloring tools (colored pencils, markers, or crayons)
- Paper
Here are my RECOMMENDED Art Supplies!
- Crayola Coloring Set (140 Pieces – Mega Value!)
- 24 Colored Crayon Set
- A4 Printer Paper
- Crayola Coloring Pencils
- HP Home Printer with Instant Ink!
Time needed:
16 minutes.
Step-by-Step Drawing Guide
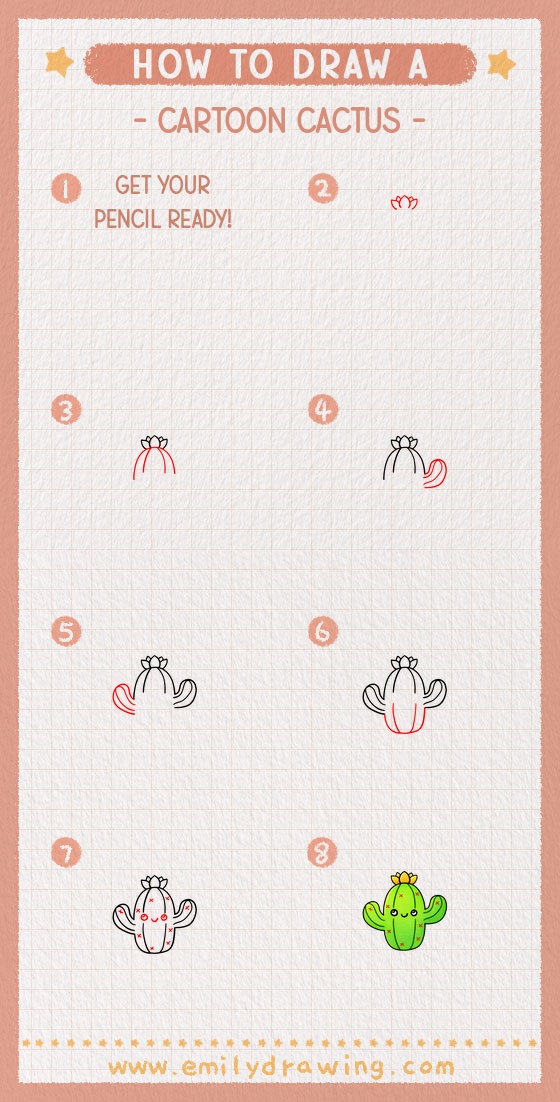
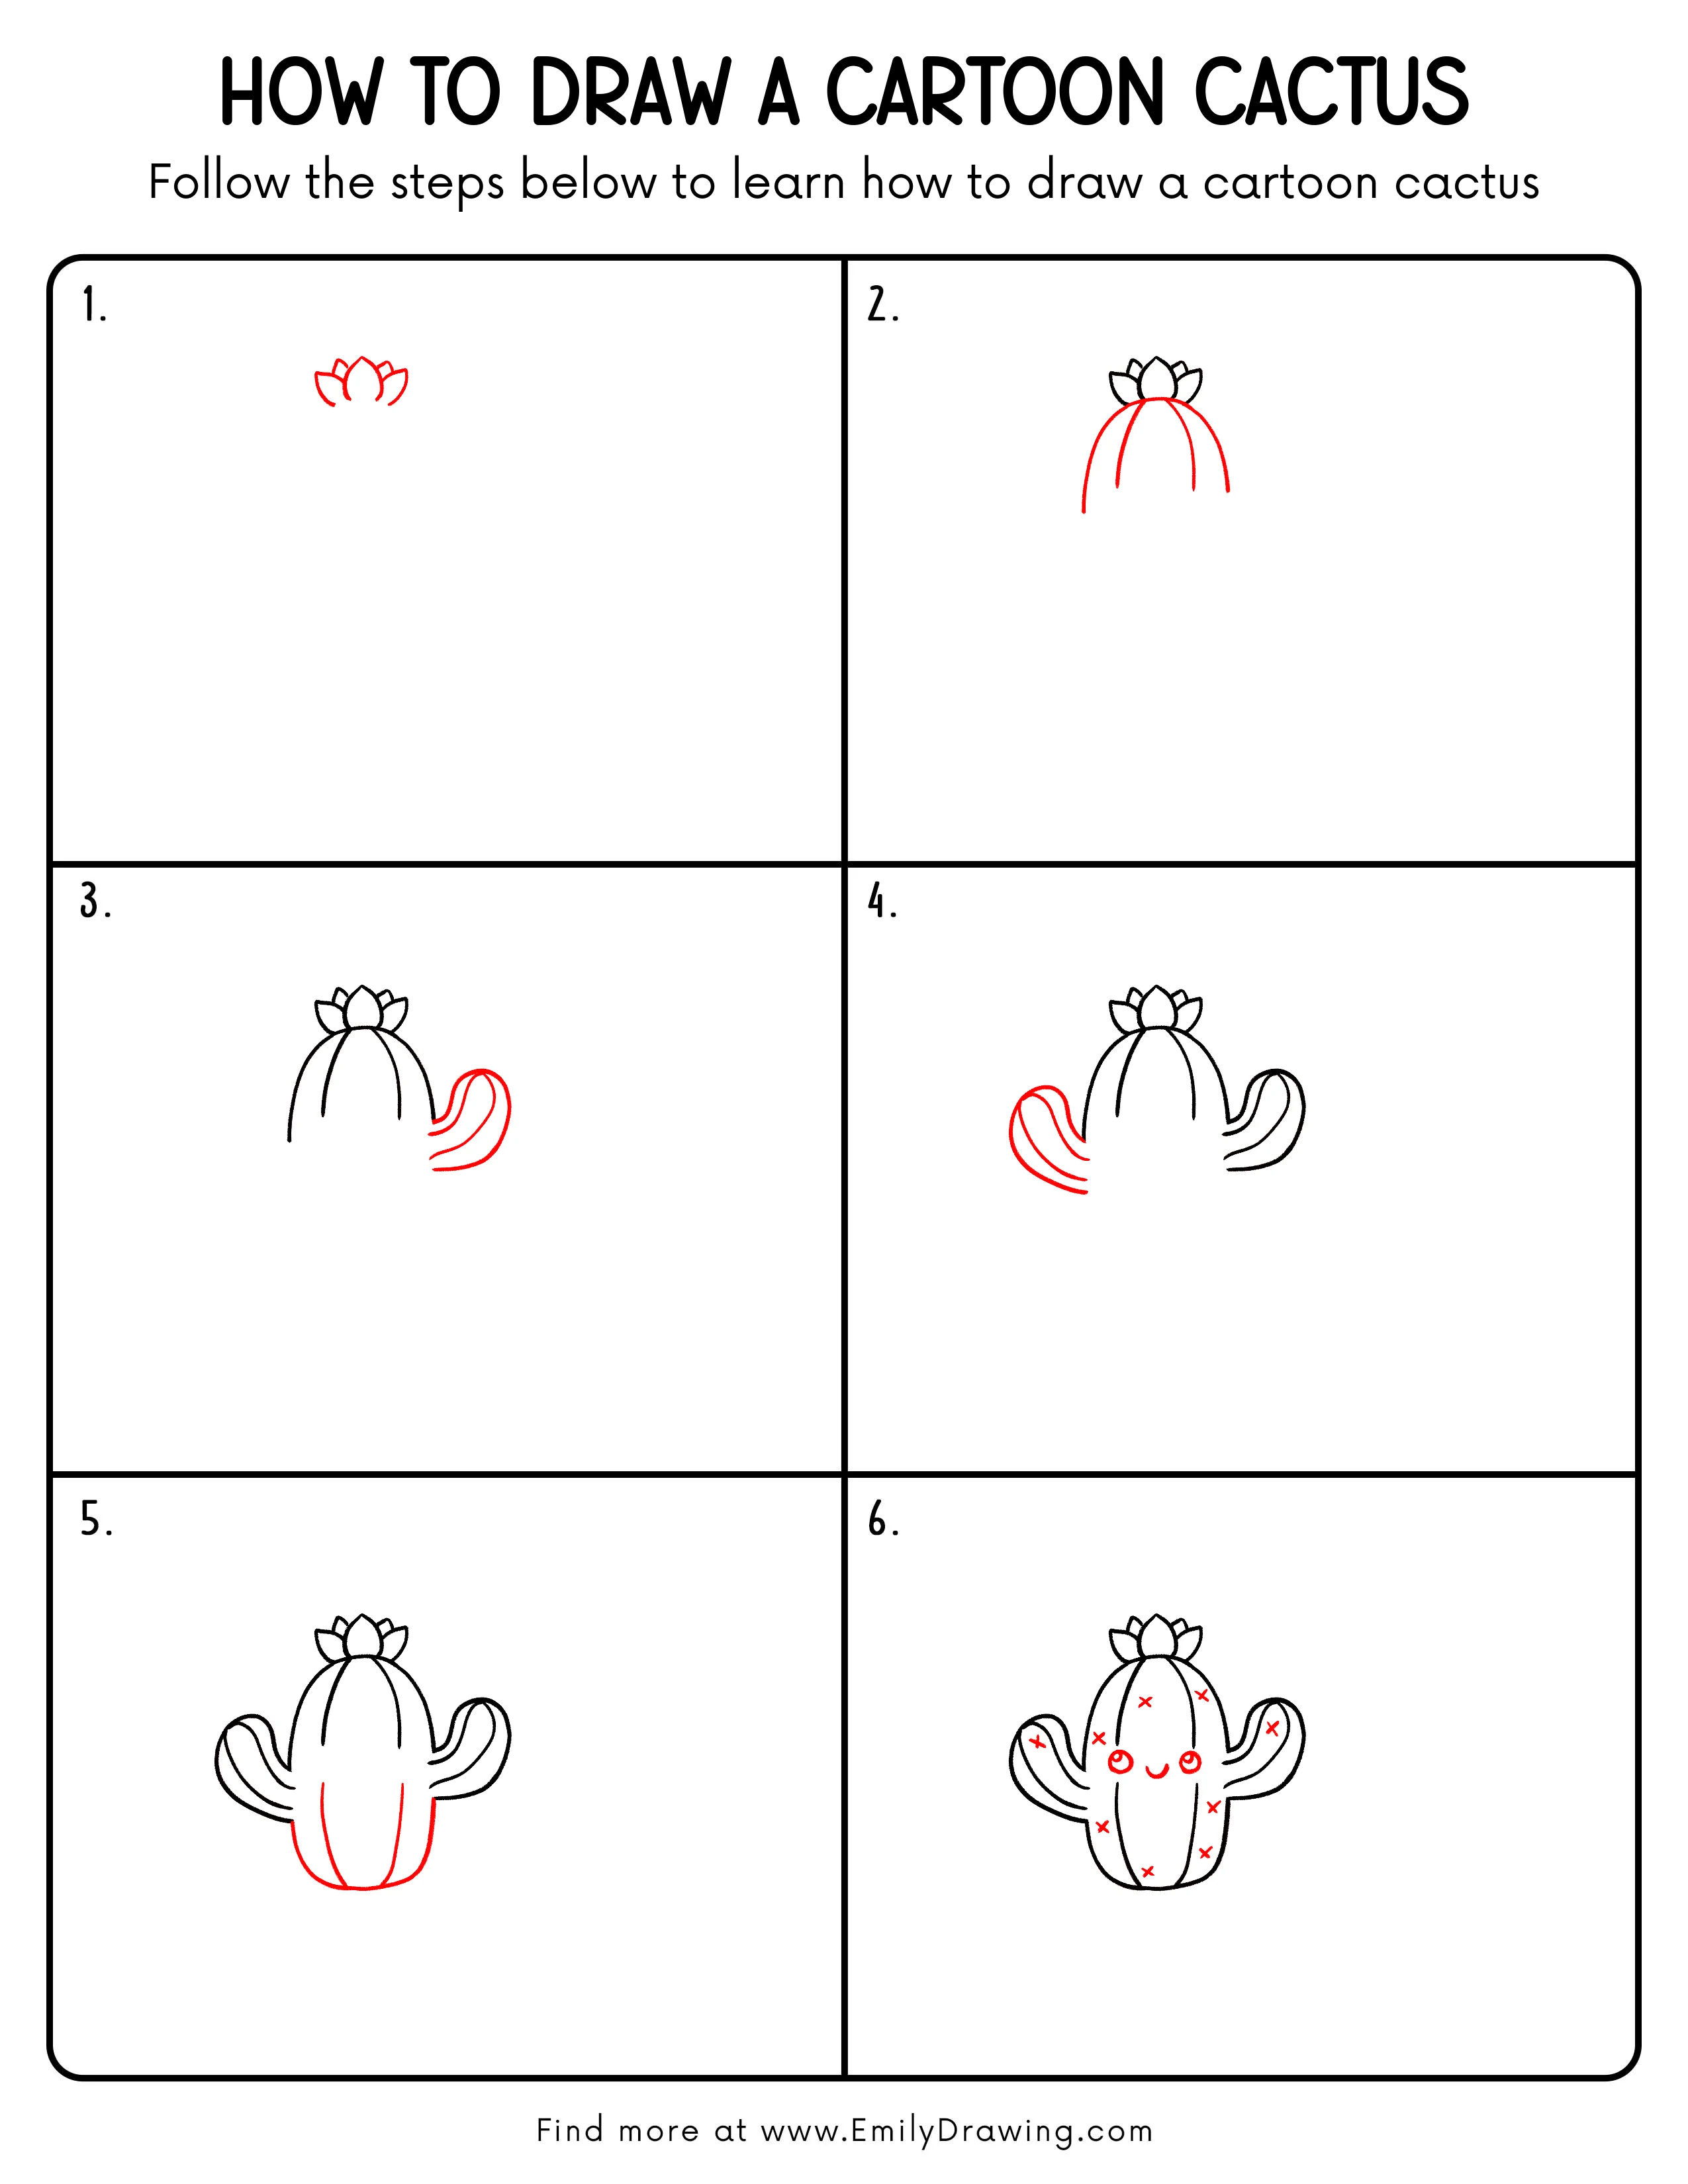
Step 1: Sketch the Top Shape of the Cactus
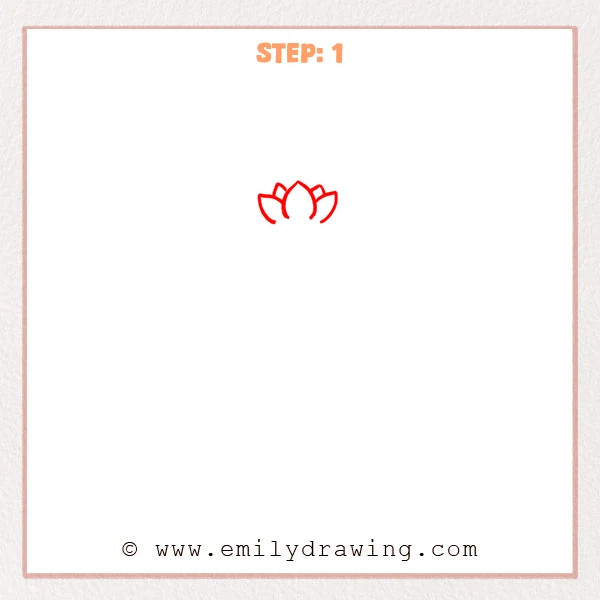
Start near the upper center and draw a rounded teardrop shape for the cactus top. Add one curved petal-like shape on each side so it opens like a small crown. Then tuck two smaller curved shapes behind to show layered bumps.
Pro Tip: Keep the left and right sides balanced for a cute, steady look.
Step 2: Add the Rounded Cactus Body and Ribs
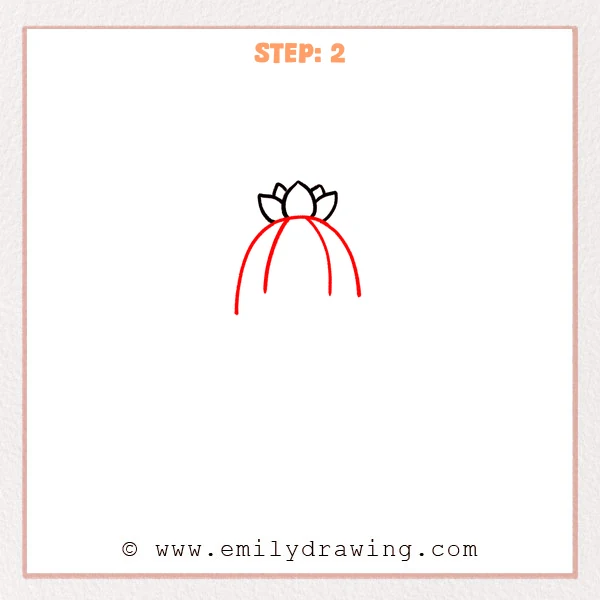
Under the top crown, sketch a big dome-like curve to form the cactus body. Then pull down a few long, gentle curved lines from near the top, spacing them apart to create the cactus ribs.
Pro Tip: Curve the outer ribs more so the body looks nicely round.
Step 3: Add the Curved Right Arm
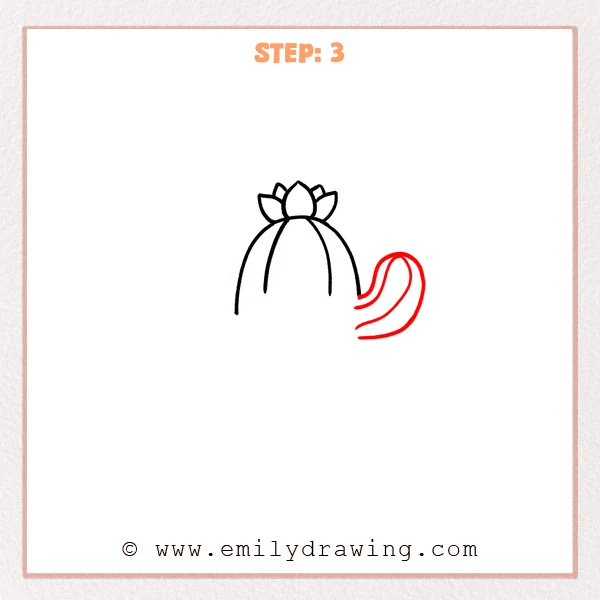
From the right side of the body, extend a curved line outward and curl it upward into a rounded hook shape. Add a second, parallel curve to give the arm thickness, then close the tip with a soft rounded end.
Pro Tip: Keep the join smooth so the arm blends into the body.
Step 4: Add the Curved Left Arm
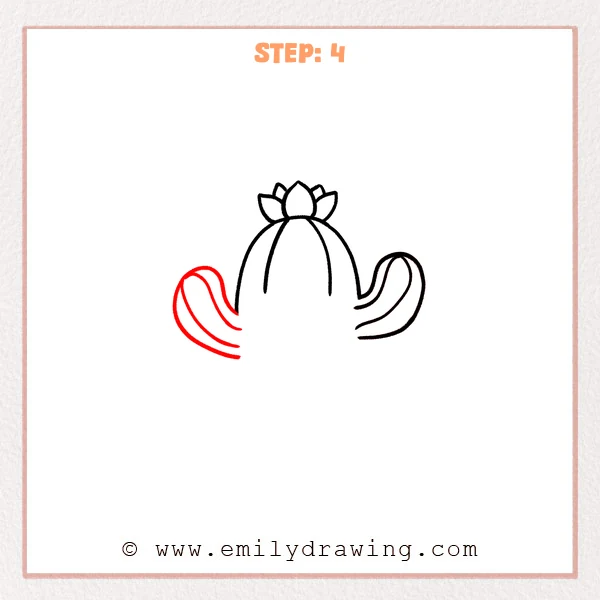
Attach a new curved arm on the left side, letting it sweep outward and bend up like a plump bean shape. Add a second inner curve to give it thickness, then place one or two short inner curves to suggest rounded ribs.
Pro Tip: Let the two arms differ slightly so it feels more lively.
Step 5: Close the Bottom and Strengthen the Body Ribs
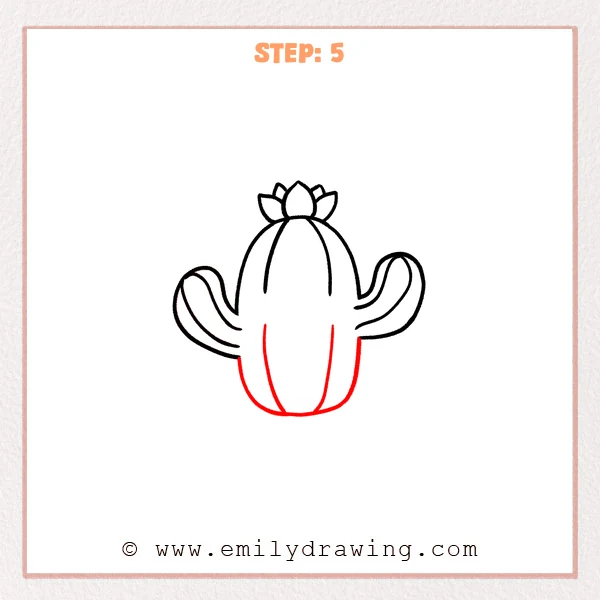
Add a shallow curved line at the bottom to gently close the cactus body so it feels grounded. Then draw two long curved rib lines down the front, letting them stop neatly near the base curve.
Pro Tip: Keep the base curve rounded, not pointy, for a cute look.
Step 6: Add a Cute Face and Little Spines
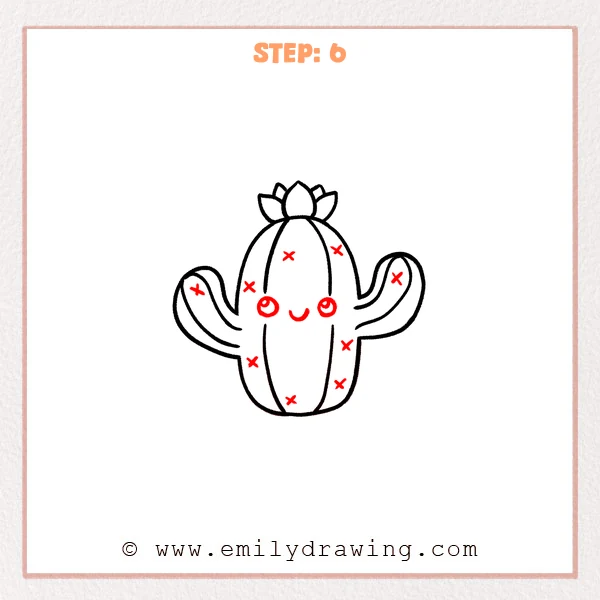
Place two round eyes on the lower middle area, and add tiny highlight circles inside. Draw a small curved smile between them for a friendly expression. Then sprinkle a few X-shaped spines across the body and arms, spacing them out evenly.
Pro Tip: Keep both eyes at the same height for a clean, calm expression.
Step 7: Color in your drawing!
Fun Facts
- Many cacti have ribs so they can expand after rain and shrink during dry times.
- Cactus spines help protect the plant and can also shade it from strong sun.
- Some cacti bloom bright flowers, even in very dry deserts.
Pin it now, Draw later!
You now have a happy cartoon cactus with a crown top, two arms, and simple ribs. If you want color, try a light green base and add darker green along the rib edges for gentle shading. A small pink blush on the cheeks can make the face feel extra friendly.
One beginner mistake is making the ribs perfectly straight, which can flatten the shape. Let the rib lines curve a little so the cactus stays round. Keep practicing this step by step drawing, and try drawing for beginners with different arm shapes or a tiny pot next time.
Get the FREE Printable Drawing Guide
FREE Download Printable Cartoon Cactus Drawing Tutorial
Frequently Asked Questions
How do I make my cartoon cactus look more round?
Curve the outer rib lines more than the middle ones, and keep the bottom softly rounded.
What if my arms look uneven?
That is okay. Adjust one arm by widening it slightly, or change the bend so both sides feel balanced.
How can I add more detail without making it messy?
Add only a few extra spines and keep them spaced out, then use simple shading on one side.